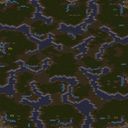
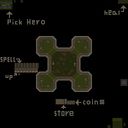
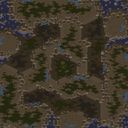
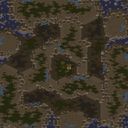
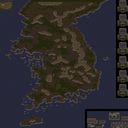
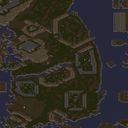
《건너 디펜스》는 스타크래프트: 브루드워의 유즈맵 중에서도 디펜스 장르에 속하는 맵으로, 플레이어는 끊임없이 몰려드는 적 웨이브를 방어하며 살아남아야 하는 게임입니다. 맵 중앙에 위치한 건물이 공격받기 전에 적을 섬멸하는 것이 핵심 목표이며, 다양한 유닛과 구조물을 활용해 전략적으로 방어선을 구축할 수 있습니다. 이미지를 보면 화산 타일셋을 사용한 맵으로, 어두운 배경과 붉은 색조가 긴장감을 더합니다. 맵의 규모는 4096x4096으로 넓은 편이지만, 실질적인 전투는 비교적 좁은 구역에서 이루어지므로 플레이어는 빠르게 적의 공격 패턴을 파악하고 효율적인 방어 전략을 세워야 합니다. 건널목 형태의 좁은 통로가 여러 곳 있어, 이곳을 어떻게 활용하느냐가 승패를 좌우할 수 있습니다. 특히 적의 공격 루트가 제한적이므로, 포지션 선점과 빠른 반응이 무엇보다 중요합니다. 초보 플레이어의 경우 적의 공격 타이밍을 익히는 데 시간이 걸릴 수 있으며, 방어 건물이 파괴되기 전에 적을 처리하는 연습이 필요합니다. 반면에 숙련된 플레이어라면 다수의 적을 한꺼번에 상대해야 하는 ситуа에서 순간적인 판단과 유닛 컨트롤이 요구됩니다. 맵의 구조상 특정 위치에 방어 타워를 배치하면 일방적으로 적을 제압할 수 있지만, 반대로 잘못된 위치에 타워를 설치하면 효율이 떨어지므로 신중한 설계가 필요합니다. 건널목 디자인 덕분에 적의 공격을 일정 부분 예측할 수 있지만, 반대로 지나치게 좁은 길목은 플레이어의 움직임을 제한할 수 있어, 유닛 배치와 이동 경로를 신중히 계획해야 합니다. 이 맵은 주로 혼자 또는 소규모 팀으로 플레이하는 경우가 많으며, 다수의 플레이어가 협력해 방어선을 구축하는 방식이 일반적입니다. 6명의 플레이어가 각각의 포지션을 맡아 방어 임무를 수행한다면 보다 안정적인 플레이가 가능할 것입니다. 추천하는 난이도는 초심자에게는 '어려움' 정도로, 적의 웨이브 패턴과 공격 타이밍을 익히는 데 시간이 필요할 수 있습니다. 반면에 경험이 많은 플레이어라면 '보통' 수준에서도 충분히 재미를 느낄 수 있을 것입니다. 플레이 전에는 맵의 주요 길목과 적의 공격 루트를 미리 숙지하고, 방어 건물의 배치와 유닛의 생산 타이밍을 계획하는 것이 중요합니다. 또한, 적의 공격을 방어하는 것뿐만 아니라 자원의 확보와 유닛의 효율적인 관리가 게임의 승패를 가를 수 있으므로, 자원 관리에도 신경을 써야 합니다. 건널목 형태의 맵 디자인은 타 디펜스 맵과는 차별화된 재미를 제공하며, 좁은 공간에서의 긴장감과 전략적 깊이가 이 게임의 핵심 포인트입니다. 만약 디펜스 장르를 좋아하거나, 좁은 공간에서의 전투를 즐기는 플레이어라면 반드시 한번 시도해 볼 만한 맵입니다. Gunner Defense is a user-made defense map in StarCraft: Brood War where players must defend against endless waves of enemies to survive. The core objective is to protect the central building from destruction by eliminating incoming threats, utilizing various units and structures strategically. The map uses a volcanic tileset, creating a dark and intense atmosphere with reddish hues. While the map size is large at 4096x4096, combat primarily occurs in confined areas, requiring players to quickly recognize enemy attack patterns and deploy effective defense strategies. The narrow chokepoints scattered throughout the map play a crucial role, as controlling these areas can determine victory or defeat. For beginners, mastering the timing of enemy attacks may take practice, and it's essential to eliminate threats before defensive structures are overwhelmed. Experienced players will need sharp decision-making and precise unit control to handle multiple enemies simultaneously. While placing defensive towers in strategic locations can dominate the enemy, poor placement may lead to inefficiency. The map’s design allows for some prediction of enemy movements, but the confined pathways can also restrict player mobility, making careful planning of unit placement and movement paths vital. This map is typically played solo or in small teams, with players collaborating to fortify defense lines. A team of six players, each assigned specific roles, can create a more stable defense. The recommended difficulty for beginners is 'Hard,' as understanding enemy wave patterns and timing takes practice. However, seasoned players may find 'Medium' difficulty enjoyable. Before playing, it's important to familiarize yourself with the map’s key pathways and enemy attack routes, plan defensive structure placements, and manage unit production timing. Effective resource management is also critical, as both defense and resource gathering influence the game’s outcome. The chokepoint design of this map offers a unique and thrilling experience compared to other defense maps, with its focus on tense, strategic combat in confined spaces. If you enjoy the defense genre or prefer close-quarters battles, Gunner Defense is a must-try map worth experiencing.

로그인 하시고 댓글을 남겨 볼까요?