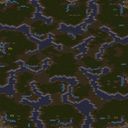
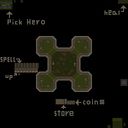
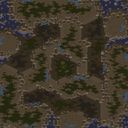
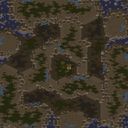
이 맵은 우주 정거장을 배경으로 한 5인 협동 유즈맵이다. 다섯 명의 플레이어는 각자 프로토스 일꾼 하나만 주어진 채 넓은 우주 공간에 흩어져 시작한다. 초반에는 주위의 미네랄을 채취하며 자원을 모으고, 제한된 공간에 건물을 짓는 전형적인 빠른 무한 자원 체제로 진행된다. 하지만 이 맵의 핵심은 단순한 자원 모으기가 아니라, 중앙에 자리 잡은 거대한 오버마인드와 그 주변을 지키는 강력한 저그 방어선에 있다. 오버마인드는 가만히 있는 것이 아니라 주기적으로 공격 유닛을 생산해 플레이어들을 압박하며, 시간이 지날수록 그 강도가 거세진다. 따라서 플레이어들은 제한된 공간에서 효율적으로 병력을 생산하고, 서로의 진영을 연결하는 좁은 통로를 통해 방어선을 공고히 해야 한다. 아군 기지가 지나치게 떨어져 있어 초반에 한 명이라도 무너지면 연쇄적으로 무너질 위험이 크기 때문에, 빠른 의사소통과 역할 분담이 필수적이다. 맵의 구조는 중앙의 원형 공간을 중심으로 다섯 개의 기지가 방사형으로 뻗어 있는 형태다. 각 기지는 좁은 입구를 통해 중앙과 연결되어 있어 방어하기 쉬운 듯 보이지만, 중앙에서 쏟아져 나오는 저그 유닛들이 동시에 여러 방향으로 퍼지기 때문에 방심할 수 없다. 자원은 초반에 주어진 미네랄 덩어리 외에는 추가적인 확장 기지가 전혀 없어, 자원 관리가 매우 까다롭다. 따라서 방어 타워를 도배하거나 병력을 무작정 소모하는 전략은 통하지 않는다. 각 플레이어는 제한된 자원으로 최대한 효율적인 병력을 생산하고, 아군과 조합을 맞춰야 한다. 예컨대 한 명은 방어에 특화된 질럿과 드라군을, 다른 한 명은 고위 기사나 리버 같은 특수 유닛을 담당하는 식이다. 플레이 경험은 초반의 긴장감 넘치는 자원 경쟁과 중반 이후의 숨 막히는 방어전으로 요약된다. 초반에는 일꾼을 어떻게 배치하느냐에 따라 자원 수급 속도가 크게 갈리고, 이 차이가 후반까지 이어지기 때문에 작은 실수도 치명적이다. 중반으로 접어들면서 오버마인드의 공세가 거세지면, 정신없이 쏟아지는 저그 유닛을 막아내는 손맛이 상당하다. 다만, 오랜 시간 반복적인 방어에 지칠 수 있으므로, 인내심이 없는 플레이어라면 중반부에서 흥미를 잃을 가능성도 있다. 이 맵은 전형적인 ‘버티기’ 형식의 협동 방어 맵을 좋아하는 사람들에게 추천한다. 특히 친구들과 함께 음성 채팅을 통해 실시간으로 전략을 조율하며 플레이할 때 재미가 배가된다. 플레이 전에는 반드시 다섯 명 모두가 같은 목표를 공유하고 있는지 확인해야 하며, 한 명이라도 소극적으로 플레이하거나 중간에 이탈하면 게임이 빠르게 파탄 나므로 주의가 필요하다. This map is a five-player cooperative UMS set against a space platform backdrop. Five players are scattered across a vast void, each starting with nothing but a single Protoss probe. The early game revolves around mining the scattered minerals and constructing buildings in cramped quarters, establishing a typical infinite survival economy. The true objective, however, is not merely to collect resources but to withstand the relentless pressure emanating from the massive Overmind located at the center, guarded by formidable Zerg defenses. The Overmind is not a passive objective; it periodically spawns attacking units that escalate in intensity over time, forcing players to build efficient armies and share defensive responsibilities through narrow connecting corridors. Because the bases are so far apart, the collapse of a single ally can trigger a domino effect, making rapid communication and clear role assignment absolutely essential. The map’s layout features a central circular arena from which five bases radiate outward. Each base connects to the center through a single narrow choke point, which appears defensible but quickly becomes a liability as Zerg forces pour out in multiple directions simultaneously. Beyond the initial mineral clusters, there are no additional expansions whatsoever, making resource management brutally tight. A strategy of spamming defensive cannons or recklessly sacrificing units is a recipe for failure. Players must combine their limited forces with surgical efficiency, coordinating unit compositions with allies. One player might specialize in durable Zealots and Dragoons to form a frontline, while another focuses on High Templars or Reavers to deliver critical area damage. The gameplay experience is defined by a tense early-game resource race followed by a suffocating mid-to-late-game defense. The placement of initial probes dramatically affects mineral income, and even a small mistake can create a critical snowball effect that lasts the entire match. Once the Overmind’s assault intensifies, the sheer satisfaction of mowing down endless waves of Zerg units is a highlight for fans of the genre. However, the repetitive nature of the long defensive hold can wear down players with less patience, potentially causing them to lose interest halfway through. This map is highly recommended for those who enjoy classic "holdout" style cooperative defense maps. The fun multiplies when played with friends over voice chat, allowing for real-time strategic coordination. Before starting, it is crucial to ensure that all five players are fully committed to the objective; even a single passive or disconnected player will cause the entire defense to fail rapidly.

로그인 하시고 댓글을 남겨 볼까요?