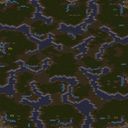
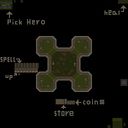
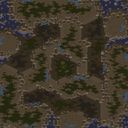
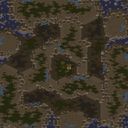
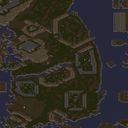
스타크래프트 브루드워 유즈맵 'DBZ 프리저와의 전투 iD5'는 원작 드래곤볼Z의 나메크성 결전을 모티브로 한 협동 서바이벌 맵이다. 정글 타일셋 위에 구현된 128x64 크기의 전장은 나메크성의 황량한 지형을 연상시키며, 최대 8명의 플레이어가 하나의 팀이 되어 밀려오는 적 병력과 보스 프리저를 상대하는 구조로 추정된다. 내부 설명에 '손오공이 도착해 프리저와 싸우도록 도우라'는 문구가 있는 것으로 보아, 일정 시간 동안 기지를 방어하며 버티면 트리거에 의해 손오공 유닛이 소환되고 이를 중심으로 프리저를 공략하는 전형적인 '버티기 → 역전' 흐름을 따를 것으로 보인다. 익스퍼트 버전 표기로 미루어 난이도는 높게 설정되어 있을 가능성이 크며, 초반 자원 관리와 입구 막기, 병력 조합이 생존의 열쇠가 될 전망이다. 맵 크기가 4096x2048로 넓은 편이라 다수의 플레이어가 분산되어 방어선을 구축하거나, 중앙 지역을 두고 치열한 공방이 벌어질 여지가 충분하다. 트리거 기반의 이벤트 연출과 원작 캐릭터 구현이 핵심 재미 요소로 보이며, 드래곤볼 팬이라면 원작 명장면을 스타크래프트 엔진 위에서 체험하는 즐거움을 느낄 수 있다. 협동 플레이 경험이 풍부한 유저나 고난도 디펜스·서바이벌을 선호하는 유저에게 추천되며, 플레이 전에는 동맹 설정과 공유 자원 활용법, 손오공 소환 조건 등을 숙지하고 시작하는 것이 좋다. StarCraft Brood War use map 'DBZ Battle With Frieza iD5' is a cooperative survival map inspired by the Namek saga climax from Dragon Ball Z. The 128x64 jungle tileset battlefield evokes the desolate terrain of Planet Namek, where up to eight players form a single team to withstand enemy waves and confront the boss Frieza. The internal description mentioning 'Wait for Goku to come help fight Frieza' suggests a classic 'hold out → turn the tide' structure: survive for a set time while defending the base, then a trigger spawns a Goku hero unit to lead the assault against Frieza. Marked as an Expert version, the difficulty is likely high, demanding careful early resource management, chokepoint defense, and unit composition. The spacious 4096x2048 map size allows players to spread across multiple defensive lines or engage in intense battles around the central area. Trigger-driven event sequences and faithful character representations appear to be the core appeal, offering Dragon Ball fans the thrill of reenacting an iconic scene on the StarCraft engine. Recommended for players experienced in co-op play or those who enjoy high-difficulty defense and survival maps; before starting, it is advisable to review allied settings, shared resource usage, and the conditions for Goku's arrival.

로그인 하시고 댓글을 남겨 볼까요?