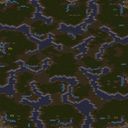
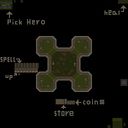
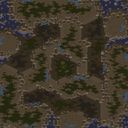
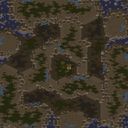
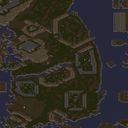
스타크래프트 브루드워의 유즈맵 <아스트룸 공방전 1.0.0>은 우주 배경의 군사기지 점령전을 주제로 한 디펜스 장르의 전략 맵입니다. 맵 내부에는 중앙의 주요 군사기지 주변으로 대칭형 구조의 방어 시설이 배치되어 있으며, 플레이어는 이 기지를 지키면서 상대 연합의 공격을 방어하거나 직접 공격하여 상대 본부를 함락시키는 목표를 달성해야 합니다. 맵 상단과 하단에는 각각의 플레이어 기지가 위치하고 있으며, 중앙 지대는 넓은 개활지로 구성되어 있어 기동전이 활발히 벌어질 수 있는 공간으로 보입니다. 맵의 전체적인 분위기는 우주 군단의 전투를 연상시키며, 방어 시설과 통로를 적절히 활용해야만 승리를 쟁취할 수 있을 것으로 추정됩니다. 이 맵은 8명의 플레이어가 동시에 참여할 수 있도록 설계되어 있으며, 각 플레이어는 독자적인 기지를 보유하고 있습니다. 방어 시설 외에도 다수의 mineral field와 vespene gas가 배치되어 있어 자원 관리와 병력 생산의 밸런스가 중요할 것으로 보입니다. 맵의 중심부에는 중앙 기지가 위치하고 있는데, 이곳을 차지하기 위한 공방전이 맵의 핵심 전략이 될 가능성이 큽니다. 또한, 맵 곳곳에 배치된 방어 타워와 좁은 길목은 적의 진격을 늦추는 데 유용할 수 있으나, 반대로 아군의 기동력을 제한할 수도 있어 신중한 플레이가 요구될 것입니다. 플레이어는 이 맵에서 단순히 방어만 하는 것이 아니라, 공격과 방어의 균형을 맞추어 상대의 기지를 함락시키는 것이 목표로 보입니다. 맵의 대칭 구조는 양측의 공방전을 더욱 치열하게 만들 것이며, 특히 중앙 기지의 점령 여부가 승패를 좌우할 가능성이 높습니다. 초보 플레이어의 경우 방어 시설의 배치와 자원 수급을 우선적으로 숙지한 뒤, 점차 공격과 방어 전략을 연마하는 것이 좋습니다. 반면, 숙련된 플레이어는 중앙 기지의 선점과 빠른 자원 확보를 통해 우위를 점할 수 있을 것입니다. 맵의 난이도는 맵의 구조상 '보통' 정도로 예상되며, 팀워크와 전략적 판단이 중요한 요소로 작용할 것입니다. 이 맵을 플레이하기 전에 맵의 주요 길목과 방어 시설의 위치를 미리 확인하고, 자원 수급과 병력 배치 계획을 세우는 것이 중요합니다. 또한, 중앙 기지의 점령 여부에 따라 전황이 급변할 수 있으므로, 상대의 움직임을 항상 주시해야 합니다. 맵의 전체적인 밸런스는 제작자의 의도대로 디자인되어 있지만, 플레이어의 실력과 전략에 따라 결과가 달라질 수 있습니다. 즐겁고 긴장감 넘치는 전투를 기대할 수 있는 맵으로, 디펜스와 공격의 균형을 맞추는 재미가 있는 유즈맵입니다. StarCraft: Brood War's custom map *Astrum Siege 1.0.0* is a defense-style strategy map set in a space-themed military base conquest scenario. The map features symmetrical defensive structures surrounding a central military base, and players must either defend their base from enemy attacks or launch their own assault to destroy the opposing team's headquarters. Each player's base is located at the top and bottom of the map, with a wide open central area that seems designed for dynamic mobile combat. The overall atmosphere evokes the battles of a space-faring faction, and victory likely depends on effectively utilizing defensive structures and pathways. Designed for up to eight players, each participant starts with their own base. In addition to defensive buildings, the map includes multiple mineral fields and vespene gas geysers, making resource management and balanced unit production crucial. At the heart of the map lies a central base, and controlling it will likely be a key strategic focus. Scattered defensive towers and narrow passages can slow enemy advances but may also restrict friendly movement, requiring careful positioning. While defense is important, the goal appears to be balancing offense and defense to capture the enemy's base. The symmetrical layout intensifies the back-and-forth struggle between teams, with control of the central base potentially deciding the match. Beginners should first familiarize themselves with defensive layouts and resource gathering before gradually developing offensive and defensive strategies. Experienced players, meanwhile, can gain an advantage by securing the central base early and fast-tracking resource collection. The map's difficulty is expected to be moderate due to its structure, with teamwork and strategic decision-making playing major roles. Before playing, it's important to scout key pathways and defensive structures, plan resource gathering, and coordinate unit placements. Since control of the central base can quickly shift the tide of battle, players should always monitor enemy movements. While the map is designed with balance in mind, outcomes will vary based on player skill and strategy. It offers an exciting and tense experience, with the fun of balancing defense and offense in a custom map setting.

로그인 하시고 댓글을 남겨 볼까요?