
4인 スタークラフト マップコレクション
「4인」タグが登録されたマップを集めました。ジャンルだけでは見つけにくいプレイ方式、難易度、特徴を中心に、人気のマップと最新マップを比較してみてください。
- 登録マップ
- 39個
- 累計ダウンロード
- 0
- 累計閲覧
- 1,709
人気マップ
ダウンロードと閲覧の反応が高いマップです。
도로 교차 (Roadcrossing)
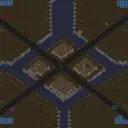
황무지 테마의 4인용 밀리 맵으로, 적 건물 파괴를 목표로 하는 간결한 구성이 돋보인다. 중앙을 가로지르는 넓은 도로가 맵 전체를 가르고 있어 양측 база가 직접 대치하기보다는 우회로를 활용한 기습이나 시야 싸움으로 전개될 가능성이 크다. 도로 양옆으로 펼쳐진 황량한 평야는 초기 자원 확보에 유리한 반면, 좁은 길목이 주요 교전 지점으로 작용해 치열한 전투가 벌어질 소지가 많다. 테란과 프로토스가 유리한 고지대를 선점하는 동시에, 저그의 경우 도로 주변의 평야를 활용한 기동전으로 균형을 맞출 수 있는 설계다. 시야 확보와 진형 싸움의 중요성이 부각되는 맵으로, 초반 러시 거리와 mineral line의 배치에 따라 게임의 흐름이 크게 좌우될 수 있다. 도로가 양쪽 база를 잇는 주요 통로 역할을 하면서도, 중앙의 넓은 공간은 대규모 병력 집결을 유도해 대규모 전투가 벌어질 가능성이 높다. 또한 도로 양옆의 평야는 시야 확보와 정찰에 유리한 지점들이 scattered되어 있어, 맵 리딩 능력이 승패를 가르는 중요한 요소가 될 것이다. 초보자와 숙련자 모두 즐길 수 있는 밸런스형 맵으로, 간단한 목표와는 달리 전략적 깊이가 필요한 구조다. 특히 도로 주변의 지형지물이 전투 시 후퇴 경로나 방어선 구축에 영향을 미치므로, 맵의 특징을 빠르게 파악하고 활용하는 플레이어가 유리할 것이다. 또한 mineral line의 안정성과 확장 가능성도 고려해야 하므로, 초반 자원 관리에 신경을 써야 한다. 이 맵은 4인용 밀리 매치에서 긴장감 넘치는 전투와 다양한 전략적 선택을 제공할 것으로 예상된다. 도로와 평야의 조화가 인상적인 가운데, 각 종족의 특성과 플레이 스타일에 따라 전혀 다른 양상으로 전개될 수 있는 점이 흥미로운 포인트다. --- The 4-player melee map set on the Badlands tileset offers a straightforward objective of destroying all enemy structures, but its layout introduces strategic depth through a central road that bisects the terrain. The wide road cutting across the map forces players to either engage directly or maneuver around it, favoring flanking maneuvers and vision control over frontal assaults. The surrounding barren plains provide ample space for early resource gathering, yet the narrow passages created by the road act as natural choke points where intense battles are likely to erupt. Vision and positioning become critical factors in this map, as the road serves as the primary route between bases while the open plains allow for rapid troop movements. The scattered high-ground spots along the roadside offer strategic advantages, turning vision control and reconnaissance into key skills that can dictate the flow of the game. Large-scale engagements are probable due to the spacious central area, which can accommodate massive troop clusters, making map awareness and timing crucial for success. This balanced map caters to both beginners and experienced players, offering a simple objective with complex strategic layers. The terrain around the road influences retreat paths and defensive setups, rewarding players who quickly adapt and utilize the map’s features. Early resource management and expansion opportunities also play a pivotal role, as securing mineral lines early can provide a significant advantage. With its blend of straightforward objectives and intricate tactical possibilities, this map promises tense and dynamic matches in 4-player melee scenarios. The harmony between the road and plains creates a layout where each race’s strengths and playstyles can lead to vastly different game outcomes, making every match a unique challenge.
다크 크리스탈 (Dark Crystal)
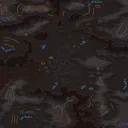
스타크래프트 브루드워의 정글 테마를 배경으로 한 맵 'Dark Crystal'은 4인용 밀리 맵으로, 어두운 분위기의 맵에서 보석을 둘러싼 치열한 전투를 펼치게 된다. 맵 중앙에는 거대한 크리스탈이 자리 잡고 있으며, 각 플레이어는Starting Location(시작 위치)에서 시작해 맵 곳곳에 흩어져 있는 보석을 확보하거나 상대방을 제압하는 방식으로 승리를 노리게 된다. 보석은 맵 중앙뿐만 아니라 각 진영 near(근처) 지점에 배치되어 있어 초반Resource Collection(자원 채집)과정에서 전략적 선택이 요구된다. 맵의 정글 타일셋은 시각적으로 독특한 분위기를 연출하며, 좁은 길목과 넓은 평지, 언덕 지형이 혼합되어 있어 다양한 전술적 플레이가 가능하다. 특히, 크리스탈 주변은 밀집된 언덕과 협곡으로 구성되어 있어 전투 시 진형 유지와 기동력이 중요해진다. 맵의 난이도는 맵 구조 자체는 복잡하지 않지만, 보석을 둘러싼 경쟁이 치열해질수록 전략적 판단과 빠른 판단력이 요구된다. 초보자들은 초반 자원 확보와 크리스탈 주변의 방어에 집중하는 것이 좋으며, 숙련자들은 보석 확보와 동시에 상대방의 움직임을 차단하는 플레이를 시도해 볼 만하다. 맵의 플레이 시간은 대략 20~30분 정도로 예상되며, 2인 또는 4인 플레이 모두 가능하도록 설계되어 있지만 4인의 경쟁이 더욱 흥미로운 전투를 연출할 수 있다. 크리스탈 주변의 좁은 길목에서 벌어지는 전면전은 이 맵의 백미로, 적절한 유닛 조합과 타이밍이 승패를 좌우할 것이다. 플레이 전에는 크리스탈 주변의 지형과 보석의 배치 위치를 숙지하는 것이 중요하다. 또한, 언덕과 협곡을 활용한 기습이나 방어 전략을 미리 계획해 두면 전투에서 큰 이점을 얻을 수 있다.Dark Crystal은 단순히Resource Collection(자원 채집)과 전투를 반복하는 맵이 아니라, 크리스탈 주변의 전략적 지형과 보석 확보를 통한Resource Management(자원 관리)가 핵심인 맵이다. 맵의 어두운 분위기와 조화로운 정글 타일셋은 플레이어들에게 색다른 스타크래프트 경험을 제공하며, 특히 밀리 경험이 있는 플레이어들에게는Classic(클래식)한 밀리 게임의 재미를 느낄 수 있도록 구성되어 있다. 맵의 난이도는 맵 구조 자체는 복잡하지 않지만, 보석을 둘러싼 경쟁이 치열해질수록 전략적 판단과 빠른 판단력이 요구된다. 초보자들은 초반 자원 확보와 크리스탈 주변의 방어에 집중하는 것이 좋으며, 숙련자들은 보석 확보와 동시에 상대방의 움직임을 차단하는 플레이를 시도해 볼 만하다. 맵의 플레이 시간은 대략 20~30분 정도로 예상되며, 2인 또는 4인 플레이 모두 가능하도록 설계되어 있지만 4인의 경쟁이 더욱 흥미로운 전투를 연출할 수 있다. 크리스탈 주변의 좁은 길목에서 벌어지는 전면전은 이 맵의 백미로, 적절한 유닛 조합과 타이밍이 승패를 좌우할 것이다. 플레이 전에는 크리스탈 주변의 지형과 보석의 배치 위치를 숙지하는 것이 중요하다. 또한, 언덕과 협곡을 활용한 기습이나 방어 전략을 미리 계획해 두면 전투에서 큰 이점을 얻을 수 있다. Set in the jungle-themed backdrop of *StarCraft: Brood War*, the 4-player melee map *Dark Crystal* plunges players into fierce battles over rare gems amid a dark, atmospheric setting. At the heart of the map lies a massive crystal, and victory is achieved by securing gems scattered across the battlefield or eliminating opponents. Gems appear not only near the central crystal but also in designated locations near each player’s starting point, forcing strategic decisions during the early stages of resource collection. The jungle-themed tileset lends a visually distinct mood, blending narrow pathways, open plains, and elevated terrain to create a dynamic battleground. Around the crystal, dense hills and ravines dominate, making formation control and mobility crucial during engagements. While the map’s layout isn’t overly complex, the intense competition over gems demands sharp strategic thinking and quick decision-making. Beginners should focus on early resource gathering and defending the crystal’s surroundings, while experienced players can attempt to block opponents while securing gems. Designed for both 2- and 4-player matches, the map shines brightest in four-player games, offering thrilling combat that unfolds in roughly 20 to 30 minutes. The standout moments come from large-scale confrontations in the crystal’s cramped corridors, where victory hinges on well-timed unit compositions and tactical execution. Before diving in, study the terrain around the crystal and the placement of gems to gain an edge. Leveraging hills and ravines for ambushes or defensive setups can turn the tide of battle. *Dark Crystal* isn’t just about mindless resource hoarding and combat—it’s a map where mastering crystal-adjacent terrain and gem management defines success. The dark, jungle-inspired aesthetic delivers a fresh *StarCraft* experience, appealing especially to veterans seeking a classic melee thrill.
| iCCup | Sword in the Moon2.1
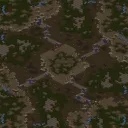
스타크래프트 브루드워의 인기 유즈맵 시리즈인 'Sword in the Moon'의 최신 버전, 'Sword in the Moon 2.1'은 사막 타일셋을 배경으로 한 디펜스 장르의 유즈맵으로 추정된다. 맵 화면에서 확인되는 요소들을 종합해 볼 때, 플레이어는 중앙의 기지나 주요 건물을 지키며 끊임없이 몰려드는 적 유닛을 상대로 저항하는 구조로 보인다. 맵 중앙에 위치한 넓은 개활지와 사방으로 뻗은 도로, 그리고 곳곳에 배치된 방어 시설들이 인상적이다. 특히, 맵의 대칭성이나 주요 길목의 배치로 볼 때, 플레이어 간의 협력이 필수적이거나 일정 수준의 전략적 판단이 요구될 것으로 예상된다. 맵의 색상 배치와 구조가 전체적으로 깔끔하고, 사막 분위기가 잘 어우러져 있어 시각적 만족도가 높다. 다만, 맵 내부에 배치된 구조물이나 방어 시설의 구분이 명확하지 않아, 초보 플레이어에게는 접근성이 떨어질 수 있다. 이러한 맵은 주로 4인용으로 제작되었을 가능성이 높으며, 플레이 시간은 약 30분 내외로 예상된다. 추천 대상은 중급 이상의 플레이어로, 전략적 사고와 빠른 판단력이 요구되는 맵이기 때문이다. 플레이 전에는 맵의 주요 길목과 방어 포인트를 사전 확인할 필요가 있으며, 팀원과의 원활한 커뮤니케이션이 필수적이다. 또한, 맵의 밸런스가 어떻게 구성되었는지에 따라 난이도가 크게 달라질 수 있으므로, 사전 정보를 충분히 확보하는 것이 중요하다. Sword in the Moon 2.1, the latest version of the popular StarCraft: Brood War custom map series, appears to be a defense-style custom map set against a desert tile background. Based on the visible elements in the map image, players are likely tasked with defending a central base or key structures against waves of enemy units. The map features a wide central open area, roads branching out in multiple directions, and scattered defensive structures, suggesting a design that requires strategic planning and teamwork. The symmetrical layout and strategic placement of key routes imply that coordination among players is essential for success. The color scheme and structure are clean and cohesive, with the desert theme enhancing visual appeal. However, the indistinct separation between structures and defensive points may pose challenges for beginner players. This map is likely designed for 4 players, with an estimated playtime of around 30 minutes. It is recommended for intermediate to advanced players who possess strategic thinking and quick decision-making skills. Before playing, it is crucial to scout the map's main routes and defensive points, and effective communication with teammates is vital. Additionally, the difficulty level may vary significantly depending on the map's balance, so gathering preliminary information is highly advisable.
Fastest [BooM]
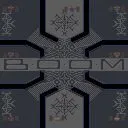
스타크래프트 브루드워의 고전 밀리 맵 《Fastest [BooM]》은 4인용 맵으로, 우주 테마의 타일셋을 기반으로 제작된 빠른 템포의 대결 맵이다. 맵의 전체적인 구도는 중앙에 넓은 평지가 펼쳐져 있으며, 각 플레이어의 시작 지점은 맵의 코너에 배치되어 있다. 시작 지점과 중앙 평지 사이에는 좁은 통로가 연결되어 있어 초반부터 빠르게 전투가 벌어질 수 있는 구조로 설계되었다. 맵의 네 변에는 각각의 플레이어 기지가 있으며, 기지 주변에는 미네랄과 가스가 배치되어 초기 자원 확보가 용이하다. 맵의 특징 중 하나는 맵 중앙의 넓은 공간으로, 대규모 전투가 벌어질 수 있는 공간이 확보되어 있어 전략적인 움직임이 요구된다. 또한, 맵의 테두리에는 방어 시설로 추정되는 구조물이 배치되어 있어 맵의 테두리에서 전투가 벌어질 가능성도 있다. 이 맵은 빠른 전투와 전략적인 움직임이 중시되는 맵으로, 초보자와 숙련자 모두 즐길 수 있는 밸런스를 갖추고 있다. 특히, 빠른 전투로 인해 맵의 플레이 시간은 상대적으로 짧아지는 특징이 있으며, 플레이어 간의 실시간 교전이 빈번하게 발생한다. 플레이 전에는 맵의 구조와 시작 지점 사이의 통로, 중앙 평지의 넓이를 숙지하는 것이 중요하다. 또한, 미네랄과 가스의 배치도 전략적인 자원 확보에 영향을 미치므로, 초반 자원 관리에도 주의가 필요하다.Fastest [BooM] is a classic Brood War melee map designed for 4 players, featuring a space-themed tileset and a fast-paced combat structure. The map layout consists of a central open area connected to each player's starting position via narrow corridors, enabling early confrontations. Each player's base is located at the corners of the map, equipped with mineral and gas resources for initial resource gathering. The spacious central area allows for large-scale battles, while defensive structures along the map edges suggest potential edge conflicts. This map emphasizes quick combat and strategic movement, offering balanced gameplay for both beginners and experienced players. Due to its fast-paced nature, matches tend to conclude in shorter durations with frequent real-time engagements between players. Before playing, it's crucial to familiarize oneself with the map's structure, corridor paths, and central open space. Additionally, the placement of minerals and gas impacts early resource management, making strategic planning essential from the start.
미로 디펜스 2.55 (Maze Defense 2.55)
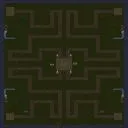
Maze Defense 2.55는 스타크래프트: 브루드워의 디펜스 장르 유즈맵으로, 미로 형태의 맵에서 적을 막아내는 страте적 재미를 느낄 수 있는 맵입니다. 맵의 중앙에 위치한 미로 구조는 플레이어들이 방어선을 구축하고, 끊임없이 밀려오는 적을 상대해야 하는 구조로 구성되어 있습니다. 미로의 입구와 출구가 나뉘어져 있어, 적의 공격을 예측하며 병력을 배치해야 하는 전략적 깊이가 특징입니다. 4인용 맵으로, 각 플레이어는 자신의 기지 주변에 방어 건물을 설치하고, 지원 병력을 배치할 수 있습니다. 미로의 복잡한 구조는 적의 진격을 지연시키는 동시에, 아군의 병력을 효율적으로 배치할 수 있는 기회를 제공합니다. 또한 맵 곳곳에 배치된 자원 채취 지역은 전투를 위한 추가 자금을 확보할 수 있게 해줍니다. 맵의 디자인과 밸런스는 초보자부터 숙련자까지 즐길 수 있도록 구성되어 있으며, 특히 디펜스 게임의 기본을 익히기에 좋은 맵으로 평가됩니다. 플레이 전에는 미로의 구조를 충분히 숙지하고, 적의 공격 패턴을 예측하는 훈련이 필요합니다. 또한 방어 건물을 효율적으로 배치하지 않으면 쉽게 무너질 수 있으므로,Resource Management(자원 관리)와 Build Order(건설 순서)에 대한 기본적인 이해가 요구됩니다. 맵의 난이도는 보통 수준으로, 적의 공격 타이밍과 패턴을 익히면 충분히 클리어할 수 있습니다. 이 맵은 디펜스 장르에 입문하고자 하는 플레이어들에게 추천할 만합니다. Maze Defense 2.55 is a defense-style custom map for StarCraft: Brood War, offering strategic fun in navigating maze-like structures while defending against waves of enemies. The map features a central maze with multiple entry and exit points, forcing players to build and position their defenses strategically. Designed for 4 players, each can construct defensive buildings around their base and deploy supporting units. The maze's complexity slows enemy advances while providing opportunities to position troops effectively. Scattered resource collection points allow players to secure additional income for sustained defense. The map's design and balance cater to both beginners and experienced players, making it an excellent choice for learning the fundamentals of defense games. Before playing, it's essential to familiarize yourself with the maze layout and predict enemy attack patterns. Poorly placed defenses can quickly crumble, so understanding basic resource management and build orders is crucial. With a moderate difficulty level, players can overcome the challenges by mastering enemy timing and patterns. This map is highly recommended for those looking to dive into the defense genre.
저격 마을 (Sniper Town)
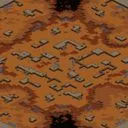
스타크래프트 브루드워 유즈맵 <Sniper Town>은 저격이 메인 콘텐츠인 4인용 디펜스 맵입니다. 맵 곳곳에 배치된 저격수 포지션에서 적 유닛을 조준 사격하는 방식으로 진행되며, 플레이어는 각자의 영역에서 최대한 많은 적을 처치해야 합니다. 맵 중앙에는 넓은 개활지가 펼쳐져 있어 저격 각도가 다양하게 확보되며, 건물이나 언덕 지형을 활용한 엄폐와 기습이 핵심 전략이 됩니다. 내부 맵 설명에 'Sniping just got a whole lot better... Can you dominate Sniper Town?'라는 문구가 있는 것으로 보아, 저격의 재미와 경쟁을 중시한 디자인으로 보입니다. 플레이어의 조준 실력과 패턴 읽기가 승부를 가를 것으로 예상되며, 적의 대량 진출 타이밍이나 패턴을 예측해 미리 자리를 잡는 것이 중요합니다. 맵의 황혼 타일셋 덕분에 분위기가 차분하면서도 전장 feel을 잘 살린 것이 특징입니다. 초보자는 저격 실력이 떨어질 수 있어 어려울 수 있지만, 익숙해지면 저격의 긴장감과 재미를 동시에 느낄 수 있는 맵입니다. 적절한 엄폐물과 시야 확보가 가능한지, 맵을 플레이하기 전 미리 시야를 체크해 보는 것이 좋습니다. 또한, 적의 움직임 패턴을 분석해 공격 타이밍을 잡는 연습도 필요합니다. 저격의 묘미를 즐기고 싶은 플레이어들에게 강력히 추천합니다. Sniper Town is a 4-player defense custom map in StarCraft: Brood War where sniping takes center stage. Players engage in long-range combat from designated sniper positions scattered across the map, with the goal of eliminating as many enemy units as possible within their zones. The central area features open terrain, allowing for diverse sniping angles, while buildings and elevated terrain offer cover for strategic positioning. The internal map description—"Sniping just got a whole lot better... Can you dominate Sniper Town?"—suggests a design focused on the thrill and precision of sniping. Success hinges on players' aiming skills and their ability to predict enemy movement patterns, with timing and positioning being critical. The Twilight tileset enhances the map's ambiance, blending a calm atmosphere with a battle-ready feel. While beginners may find the sniping mechanics challenging, those who adapt quickly will appreciate the tension and excitement of long-range combat. It's advisable to scout the map beforehand to identify key cover points and optimal sniper vantage spots, as well as to study enemy movement patterns to anticipate attack waves. This map is highly recommended for players seeking to experience the art of sniping in StarCraft: Brood War.
4인 서든 스트라이크 (4)Suden Strike l
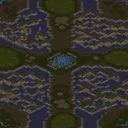
(4)Suden Strike l.scm은 사막 타일셋을 배경으로 한 4인용 밀리 맵이다. 내부 설명에 명시된 승리 조건은 모든 적 건물을 파괴하는 전형적인 섬멸전 방식이며, 별도의 트리거나 스토리 요소 없이 순수한 전투에 집중하도록 설계되었다. 맵을 처음 열어보면 사막 특유의 모래 언덕과 협곡이 어우러진 험준한 지형이 눈에 띄는데, 이는 단순한 장식이 아니라 전술적 선택에 직접 영향을 미치는 핵심 요소로 작용한다. 중앙 지역은 비교적 넓게 트여 있어 대규모 교전이 자주 발생하는 반면, 각 시작 지점은 좁은 입구와 언덕으로 둘러싸여 있어 초반 방어에 유리한 구조다. 특히 앞마당 확장 기지로 이어지는 길목이 좁고 구불구불하게 배치되어 있어, 초반 정찰과 병력 이동 경로를 신중하게 설계해야 한다. 이 맵에서 가장 두드러지는 특징은 풍부한 자원 배치와 그에 따른 빠른 테크 트리 전환 가능성이다. 본진은 미네랄 덩이와 베스핀 가스가 넉넉하게 배치되어 있어 초반 생산력이 매우 높고, 앞마당 확장 역시 비교적 가까운 거리에 자리 잡고 있다. 하지만 확장을 시도하는 순간 좁은 통로에서 적의 견제를 받기 쉬우므로, 단순히 자원만 보고 무리하게 확장했다가는 초반 러시에 무너질 위험이 크다. 중앙 지역에는 추가 멀티가 산재해 있지만, 그 주변은 시야가 탁 트인 평지라 점령하더라도 수비 병력을 충분히 배치하지 않으면 순식간에 빼앗기기 십상이다. 따라서 자원 확보와 병력 배분 사이의 균형을 어떻게 맞추느냐가 이 맵의 핵심 전략 포인트가 된다. 전반적인 플레이 경험은 초반부터 긴장감이 감도는 빠른 템포의 경기를 유도한다. 좁은 길목에서 벌어지는 소규모 교전은 유닛 컨트롤 실력을 시험하고, 중앙 평원에서 벌어지는 대규모 교전은 진영 배치와 화력 집중의 중요성을 부각시킨다. 공중 유닛의 활용도도 상당히 높은 편인데, 지상 경로가 제한적인 탓에 드랍십이나 공대지 유닛으로 우회 공격을 시도하는 플레이가 자주 등장한다. 언덕을 선점한 시즈 탱크나 리버의 포격은 좁은 입구를 틀어막는 강력한 수단이 되며, 이를 뚫기 위한 다방향 공격은 경기의 흐름을 극적으로 바꾸는 변수가 된다. 이 맵은 클래식한 밀리 전투를 선호하면서도 지형을 활용한 전술적 깊이를 즐기는 플레이어에게 특히 적합하다. 초보자에게는 초반 방어가 비교적 수월하게 느껴질 수 있지만, 중반 이후 급격히 넓어지는 전장을 관리하는 데 어려움을 겪을 수 있다. 반면 숙련된 플레이어라면 좁은 입구를 이용한 심리전과 타이밍 러시, 그리고 멀티 견제를 통한 자원 말리기 전략을 다양하게 시도할 수 있다. 플레이 전 반드시 확인해야 할 사항은 맵의 대칭성과 시작 위치 간 거리감이다. 대각선 위치는 비교적 안전한 반면, 인접한 위치는 극도로 가깝기 때문에 초반 올인 전략에 노출되기 쉽다. 따라서 게임 시작 직후 정찰 방향을 신중히 결정하고, 상대의 초반 빌드에 따라 유연하게 대응하는 자세가 요구된다. 이 맵은 단순한 자원 싸움을 넘어 심리전과 타이밍 싸움이 끊임없이 요구되는, 긴장감 넘치는 경험을 제공한다. (4)Suden Strike l.scm is a four-player melee map set against a desert tileset. The internal description states the victory condition is to destroy all enemy buildings, which is the standard annihilation format, and it is designed to focus purely on combat without any additional triggers or story elements. Upon opening the map, the rugged terrain of sand dunes and canyons immediately stands out, and this is not merely decorative but a crucial factor that heavily influences strategic decisions. The central area is relatively open and frequently becomes the stage for large-scale battles, whereas each starting location is surrounded by narrow entrances and elevated ground, offering a defensive advantage in the early game. In particular, the path leading to the natural expansion is narrow and winding, requiring careful planning of early scouting and troop movement routes. The most striking feature of this map is the abundant resource placement and the resulting potential for fast tech switches. The main base provides generous amounts of mineral patches and Vespene gas, enabling very high initial production, and the natural expansion is situated at a relatively close distance. However, the moment you attempt to expand, the narrow choke points make you highly susceptible to enemy harassment, and blindly expanding solely for resources carries a great risk of collapsing to an early rush. Additional multi-resource bases are scattered across the central area, but since these spots are open flatlands with wide sightlines, they can be easily lost if you do not station sufficient defensive forces. Therefore, striking the right balance between resource acquisition and army distribution becomes the core strategic point of this map. The overall gameplay experience encourages a fast-paced match with sustained tension from the very beginning. Small-scale skirmishes in the narrow paths test unit control skills, while large-scale engagements on the central plain highlight the importance of formation and focused firepower. The utility of air units is also considerably high; because the ground routes are limited, bypass attacks using Dropships or air-to-ground units frequently prove effective. Siege Tanks or Reavers positioned on the high ground provide a powerful means of blocking the narrow entrances, and multi-directional attacks to break through these defenses become a dramatic variable that can shift the flow of the game. This map is particularly suitable for players who prefer classic melee strategies while enjoying the tactical depth offered by terrain utilization. Beginners might find the early defense relatively manageable but could struggle to control the rapidly widening battlefield in the mid-game. Conversely, experienced players can employ a variety of strategies, such as psychological warfare using the narrow entrances, well-timed rushes, and resource starvation tactics through multi-base harassment. Before playing, it is essential to check the map's symmetry and the distances between starting positions. Cross positions are relatively safe, but adjacent positions are extremely close, making you highly exposed to early all-in strategies. Therefore, you must carefully decide your scouting direction immediately after the game starts and flexibly adapt to the opponent's initial build order. This map delivers a tense experience that goes beyond a simple resource war, constantly demanding psychological warfare and precise timing.
Betrayal RPG v1.45
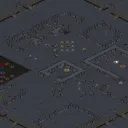
베트레이얼 RPG v1.45는 4인 협력 플레이를 전제로 한 시나리오형 RPG 맵이다. 우주 타일셋을 배경으로 96×96 타일 크기의 전장에서 펼쳐지며, 내부 설명에 따르면 곤경에 처한 마을을 돕는 이야기가 주축을 이룬다. '맵 설정 사용'과 '자막 켜기'를 권장하는 문구에서 트리거 기반 이벤트와 대사 연출이 핵심임을 알 수 있다. 제작자 Daleth가 이메일 주소까지 남긴 점에서 2000년대 초반 배포된 아마추어 창작물로 보이며, 당시 유즈맵 커뮤니티에서 즐겨 쓰던 내러티브 중심 설계 방식을 따른다. 진행은 마을 탐색, 퀘스트 수주, 적 처치, 보상 획득 순환으로 이루어지며 4인 파티가 역할을 분담해 위기를 타개하는 협동 재미에 초점이 맞춰져 있다. 난이도와 플레이 타임은 별도 표기 없으나 일반적인 시나리오 RPG 특성상 초반 진입 장벽은 낮고 중후반 보스전이나 분기 처리에 시간이 소요될 것으로 추정된다. 플레이 전에는 'Use Map Settings' 필수 적용과 자막 표시 여부를 반드시 확인해야 원활한 스토리 진행이 가능하다. Betrayal RPG v1.45 is a scenario-driven RPG map designed for four-player cooperative play. Set on a space tileset across a 96×96 tile battlefield, the map centers on a story where players assist a town in dire trouble, as noted in the internal description. The instruction to 'use map settings' and 'have subtitles on' signals that trigger-based events and dialogue sequences form the core experience. The creator Daleth included an email address, suggesting this is an early 2000s amateur release that follows the narrative-focused design common in the custom map community of that era. Gameplay loops through town exploration, quest acceptance, enemy elimination, and reward acquisition, with emphasis on party role division and cooperative crisis resolution. Difficulty and playtime are not specified, but typical scenario RPGs feature low early barriers with time-consuming boss encounters or branching choices in later stages. Recommended for retro enthusiasts and archive explorers who value story immersion and teamwork. Before playing, verify that 'Use Map Settings' is enabled and subtitles are active to ensure proper story progression.
워크래프트 III: 레이그 오브 카오스 (WarCraft III: Reign of Chaos)
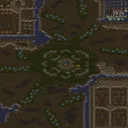
스타크래프트 브루드워의 유즈맵으로 유명한 《워크래프트 III: 리치 왕의 분노》를 모티브로 제작된 《워크래프트 III: 레이그 오브 카오스》(WarCraft III: Reign of Chaos)는 2~4명의 플레이어가 각각 네 종족 중 하나를 선택해 경쟁하는 전략형 디펜스 맵이다. 맵의 배경은 사막 타일셋으로 구성되어 있으며, 중앙의 고대 사원 '잃어버린 신전'을 중심으로 각 종족이 영토를 확장하고 자원을 관리하는 방식으로 진행된다. 맵의 핵심 목표는 상대방의 건물을 파괴하고 신전을 차지하는 것이며, 이를 위해 플레이어는 종족별 고유 유닛과 건물을 활용해야 한다. 네 종족(언데드, 나이트 엘프, 휴먼, 오크)은 각기 다른 스타일을 지녀 전략적 다양성을 제공하지만, 맵의 밸런스는 종족 간 균형이 맞춰져 있는 것으로 보인다. 맵의 구조는 중앙 신전을 중심으로 방사형으로 영토가 배치되어 있어 초반_resource_수집과 방어 전략이 중요하다. 또한, 맵 곳곳에 배치된 자원 지대와 미네랄, 가스 등 자원 분포는 플레이어 간의 경쟁을 유도하며, 초반 방어선 구축과 중반 테크트리 관리가 승패를 좌우할 수 있다. 맵의 난이도는 종족 선택과 전략적 판단에 따라 달라질 수 있지만, 대체로 초보자도 손쉽게 접근할 수 있는 구조로 설계된 것으로 추정된다. 이 맵은 종족별 특성과 전략적 깊이를 즐기고 싶은 플레이어들에게 적합하며, 특히 팀플레이보다는 1:1이나 2:2 대결에서 그 진가가 발휘될 것으로 보인다. 다만, 맵의 난이도나 밸런스에 대한 구체적인 정보는 제공되지 않아, 플레이 전에는 종족별 특징과 맵 구조를 숙지하는 것이 중요하다. 맵의 인디 제작 느낌이 강하지만,WarCraft III: Reign of Chaos라는 타이틀이 주는 친숙함과 전략적 깊이가 이 맵의 주요 장점이다. 플레이 시간은 30분 내외로 예상되지만, stratégique_변수와 종족 선택에 따라 더 길어질 수도 있다. 추천 대상은 스타크래프트 브루드워의 유즈맵을 즐기는 플레이어, 특히 종족별 전략을 탐구하고 싶은 유저들에게 알맞은 작품이다. WarCraft III: Reign of Chaos is a strategy defense map inspired by WarCraft III: The Frozen Throne, a well-known WarCraft III custom map from StarCraft: Brood War. The map allows 2 to 4 players to compete by selecting one of four races, each with unique units and buildings. Set in a desert tile environment, the game revolves around the central ancient temple, "Lost Temple," where players expand their territory and manage resources. The main objective is to destroy enemy structures and capture the temple by leveraging each race’s distinct strengths. The four races—Undead, Night Elf, Human, and Orc—offer diverse playstyles, ensuring strategic depth while maintaining balanced inter-race competition. The radial layout of territories around the central temple emphasizes early resource gathering and defensive positioning. Scattered resource nodes, including minerals and gas, fuel competition, while early base defense and mid-game tech progression often determine victory. While difficulty varies depending on race selection and strategy, the map is designed to be accessible even to beginners. It caters to players who enjoy exploring race-specific traits and strategic depth, particularly excelling in 1v1 or 2v2 matchups rather than team play. However, specific details on balance or difficulty are not provided, so familiarizing oneself with race characteristics and map structure before playing is recommended. Despite its indie feel, the map benefits from the familiarity and strategic richness of the WarCraft III: Reign of Chaos title. Matches typically last around 30 minutes, though length can vary based on strategic choices and race selection. It is best suited for players who enjoy StarCraft: Brood War custom maps, especially those interested in deep race-based strategies.
로프트 클랜 챌린지 (LoftenClanChallenge)
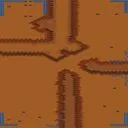
스타크래프트 브루드워의 유즈맵 중 하나로 보이는 이 맵은 ‘LoftenClanChallenge.scx’라는 파일명을 통해 컴까기 형식의 디펜스 맵으로 추정된다. 내부 맵 제목은 ‘Untitled Scenario’이지만 내부 설명에 ‘모든 적 건물 파괴’가 명시되어 있어, 밀리나 컴까기 장르의 핵심이 되는 목표가 있음을 알 수 있다. 맵의 전체적인 색감은 황혼 타일셋으로 구성되어 있으며, 4096x4096의 넓은 맵 크기에서 상대방 기지를 파괴하는 전략적 요소가 강조된다. 네 명의 플레이어가 참여할 수 있는 이 맵은, 넓은 공간을 활용한 기지 확장과 방어 구조물의 배치, 혹은 공격 루트의 최적화가 승패를 좌우할 것으로 보인다. 특히 컴까기 디펜스 장르의 특성상, 플레이어는 초반 자원 수집과 병력 구축을 신속히 진행해야 하며, 상대방의 공격 패턴을 예측해 방어선을 구축하거나 선공으로 승리를 가져가야 한다. 맵의 난이도는 초보자보다는 최소한의 전략 이해가 필요한 ‘보통’ 수준으로 예상되며, 넓은 맵을 활용한 넓은 시야와 빠른 판단력이 요구된다. 플레이 전에는 맵의 중앙 지역과 주요 길목에 설치된 방어 시설물의 배치, 그리고 자원 분포 지역을 사전에 확인하는 것이 중요하다. 또한, 상대방과의 동맹이나 협공 가능성도 염두에 두어야 한다. 추천 대상으로는 스타크래프트의 기본적인 조작과 전략을 익힌 플레이어들이나, 넓은 맵에서의 전투 경험을 쌓고자 하는 유저들에게 적합할 것이다. 특히 컴까기 디펜스 장르에 관심 있는 유저들에게는 한 번쯤 시도해 볼만한 맵으로 보인다. 다만, 맵의 내부 설명이 다소 간략하여 구체적인 승리 조건이나 세부 규칙은 확인하기 어려우므로, 플레이 전 게임 내 규칙 설명을 꼼꼼히 읽어보는 것이 좋다. 이 맵은 넓은 공간을 활용한 전략적 요소와 상대방 기지 파괴라는 단순한 목표를 통해, 스타크래프트의 기본적인 재미와 긴장감을 느낄 수 있는 좋은 유즈맵 중 하나다. This untitled StarCraft: Brood War custom map, identified by the filename 'LoftenClanChallenge.scx', appears to be a defense-focused UMS (Use Map Settings) map within the computer-killing (comp-kagi) genre. The internal description explicitly states 'Destroy all enemy buildings,' which aligns with the core objective of most melee or comp-kagi maps. The map utilizes the Twilight tileset, featuring a warm, orange-toned terrain that spans 4096x4096 units, providing ample space for strategic base expansion, defensive structures, and maneuvering. Designed for four players, the gameplay likely revolves around rapid resource gathering, army composition, and either establishing a strong defensive line or launching a decisive early offensive to dismantle opponents. Given the genre's demands, players will need to balance between economy management and military pressure, making quick decisions based on the opponent's movements and map control. The difficulty is expected to be 'moderate,' as it requires a solid understanding of StarCraft's mechanics and the ability to adapt to dynamic battlefields. Before playing, it’s crucial to scout the map’s central regions, key pathways, and resource distributions to plan an effective strategy. Players should also consider potential alliances or betrayals, as is common in multiplayer comp-kagi scenarios. This map is recommended for those familiar with StarCraft’s core mechanics and looking to refine their strategic depth in large-scale battles. While the internal description is minimal, the straightforward objective of destroying enemy buildings ensures a clear and engaging experience. The wide-open spaces and strategic depth make it a worthwhile challenge for fans of the defense genre, offering a blend of tension, planning, and execution.
하트우드 (Heartwood)
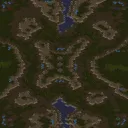
이 맵은 스타크래프트: 브루드워의 밀리 기반 맵으로, 4명의 플레이어가 자연의 숲 가운데 위치한 평지에서 대결을 펼치는 구조를 가지고 있다. 맵의 중심부는 넓은 평지로 이루어져 있으며, 각 플레이어의 시작 지점은 숲으로 둘러싸인 형태로 배치되어 있다. 시작 지점 주변에는 자원 멀티가 배치되어 있어 초반 자원 확보가 중요하며, 지형상 숲이 자연스러운 방어 역할을 해주는 특징이 있다. 맵의 모서리 부분은 사막 타일셋으로 처리되어 있어 시야 확보는 원활하지만, 중앙 평지에서는 상대방의 움직임을 포착하기 어려울 수 있어 조심스러운 플레이가 필요하다. 대부분의 밀리 맵과 마찬가지로 symmetrical(대칭형) 구조를 띄고 있어 각 플레이어의 시작 조건이 동일하다. 그러나 숲이 제공하는 시야 차단 효과와 멀티 지역 접근성 차이로 인해 전략적 선택이 갈릴 수 있다. 예를 들어, 초반에 숲을 정리하여 시야를 확보하거나, 반대로 숲을 활용한 기습 플레이를 시도할 수 있다. 맵의 크기가 4096x4096으로 상당히 넓어 전면전보다는 자원 확보와 멀티 확보가 중요하며, 특히 후반으로 갈수록 중앙 지역을 장악하는 플레이가 승패를 좌우할 가능성이 높다. 추천하는 플레이 방식은 안정적인 멀티 확보와 together(동시) 전진을 기본으로 하면서, 상대방의 빈틈을 노린 기습 또는 방어 플레이를 병행하는 것이다. 특히 숲이 많은 지형 특성상 정찰 유닛의 중요성이 커지며, 정찰을 소홀히 하면 예상치 못한 기습에 당할 수 있다. 또한 자원 멀티의 확보 여부가 승패에 큰 영향을 미치므로, 초반부터 자원 채취에 집중하고, 상대방의 멀티 지역을 견제하는 플레이도 고려해볼 만하다. 이 맵은 초보부터 상급자까지 폭넓은 플레이어층을 타겟으로 하며, symmetrical 구조와 넓은 맵 크기 덕분에 다양한 전략적 선택을 할 수 있어 재플레이성이 높은 편이다. 다만, 숲으로 인한 시야 문제와 넓은 맵 크기로 인해 컨트롤이 필요한 맵이므로, 맵을 처음 플레이하는 유저는 시야 확보와 정찰에 집중하는 것이 좋다. This map is a *Brood War* melee-based Starcraft map where four players battle in an open field at the heart of a dense forest. The center of the map is a wide plain, while each player’s starting position is surrounded by trees, providing natural defensive cover. Resource expansions near the starting areas make early resource collection crucial, and the forest terrain naturally restricts enemy movements, offering strategic advantages. The map follows a symmetrical layout common in most melee maps, ensuring equal starting conditions for all players. However, the forest’s line-of-sight blocking and varying accessibility to expansions create room for diverse strategic decisions. Players may choose to clear the forest for better vision or use it for surprise attacks. With a large 4096x4096 map size, the focus shifts from direct combat to securing resources and expansions, with control over the central area often determining victory in later stages. A recommended playstyle involves prioritizing stable expansion and coordinated advances while also capitalizing on enemy weaknesses with ambushes or defensive maneuvers. Due to the dense forest, scouting becomes critical—neglecting it can lead to unexpected attacks. Resource control is also vital, so early mining and pressuring enemy expansions should be key considerations. Designed for players of all skill levels, this map’s symmetrical structure and expansive size allow for varied strategies, making it highly replayable. However, its reliance on forest cover and large scale demands strong map awareness, so new players should focus on vision control and scouting.
전쟁의 계속 (The War Continues)
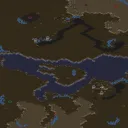
스타크래프트 브루드워의 'The War Continues' 맵은 내부 제목이 'Untitled Scenario'로 표기되어 있지만, 실제로는 밀리(mill) 장르에 가까운 대형 맵으로 추정된다. 맵은 황무지 테마의 넓은 평야와 언덕, 협곡으로 구성되어 있으며, 중앙에 넓은 평야가 펼쳐져 있어 초기 전투가 집중될 가능성이 높다. 맵의 4인 플레이 구조는 각 플레이어 간 경쟁을 유도하며, 특히 맵 중앙의 넓은 공간은 빠른 전투와 전략적 움직임을 요구할 것으로 보인다. ‘Destroy all enemy buildings’를 승리 조건으로 명시한 점에서, 이는 기존 밀리 맵과 동일한 목표를 가지고 있음을 알 수 있다. 다만, 맵의 크기가 4096x4096으로 매우 넓고, 타일셋이 황무지인 점, 그리고 중앙 지역이 평평하다는 특징을 고려할 때, 초반 전투 후 teritorial control(영토 점유) 전략이 중요해질 가능성이 크다. 초보자보다는 중수 이상의 플레이어에게 적합할 것으로 보이며, 넓은 맵을 활용한 다양한 전술적 선택지가 존재할 것으로 예상된다. 초기 빌드 오더와 자원 분배가 승패를 가를 가능성이 높으므로, 플레이 전 맵의 지형적 특징을 숙지하는 것이 중요하다. 또한, 맵의 넓이와 중앙 평야의 존재는 특정 종족의 장점을 극대화할 수 있는 구조로, 테란의 경우 벙커링이나Siege Tank 활용이, 프로토스의 경우 광전사 러시나 질럿 스톰 활용이 유리할 수 있다. 저그의 경우 뮤탈리스크나 히드라리스크의 운영이 빛을 발할 가능성이 높다. 넓은 맵 특성상, 초반 빠른 멀티 테스팅과.resource expansion이 승리의 열쇠가 될 가능성이 크다. 따라서 이 맵은 전략적 깊이와 종족 간 상성 이해도가 필요한 플레이어들에게 추천된다. 특히, 넓은 맵에서 벌어지는 장기전 전략을 즐기는 유저들에게 적합할 것으로 보인다. This StarCraft: Brood War map, internally titled 'Untitled Scenario' but distributed as 'The War Continues.scm', is a large-scale multiplayer arena that leans heavily toward the MELEE genre while incorporating classic mill-style mechanics. The map features a barren-themed terrain with vast plains, hills, and valleys, creating a strategic landscape where early engagements are likely to occur in the central open area. Designed for four players, the structure naturally encourages direct competition, particularly given the expansive central space that demands quick tactical decisions. The victory condition—'Destroy all enemy buildings'—confirms its alignment with traditional mill mechanics, where map control and resource management are key. However, with its massive 4096x4096 grid and barren-themed tileset, this map favors territorial control strategies, especially after initial skirmishes. While accessible to intermediate players, it offers enough depth for advanced strategies, particularly in how players utilize the wide-open central zone for multi-front attacks or defensive maneuvers. Early build orders and efficient resource allocation are likely to determine the match’s outcome, making it essential for players to study the terrain before committing to a strategy. The map’s layout gives certain races distinct advantages: Terran players may benefit from bunker rushes or Siege Tank control, Protoss could leverage Zealot storm tactics or fast expansions, and Zerg might favor Mutalisk harassment or Hydralisk defenses. Given the expansive nature of the map, securing multiple bases early and maintaining efficient resource expansion will be crucial. As such, this map is best suited for players who enjoy strategic depth, long-term planning, and race-specific advantages in large-scale battles. It’s particularly recommended for those who appreciate the nuances of MELEE-style maps with a twist of mill mechanics.
最近登録されたマップ
新たに追加されたファイルとバージョンをご確認ください。
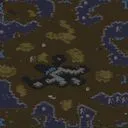
회복 작전 (Recovery) - 4인 유즈맵
스타크래프트 브루드워 유즈맵 <Recovery.scx>는 사실상 ‘제목 없는 시나리오’라는 간단한 설명 그대로 적과 모든 건물을 파괴하는 미니멀한 목표를 지닌 맵입니다. 내부 맵 제목과 설명만으로는 장르와 플레이 스타일을 명확히 유추하기 어려운 점이 특징인데요, 기본적으로 제공되는 정보에 따르면 ‘Destroy all enemy buildings’라는 승리 조건은 밀리(Melee) 스타일의 맵으로 분류되어 있지만, 4인용 맵임에도 불구하고 팀 구분이 없어 각 플레이어가 독립적으로 적 건물을 파괴해야 한다는 점에서 팀 밀리나 협동 요소가 전혀 없습니다. 이 때문에 맵의 구조는 단순하게 중앙에 위치한 4개의 시작 지점이 균등하게 배치되어 있으며, 각 플레이어의 본진 위치가 상대적으로 멀지 않게 배치되어 있어 초반부터 치열한 전투가 벌어질 가능성이 큽니다. 황무지 타일셋을 사용한 덕분에 맵의 분위기는 황량하고 전투에 집중할 수 있는 분위기를 연출합니다. 다만, 맵의 규모가 1024x1024 크기임에도 불구하고 해상도가 4096x4096에 맞춰져 있어 타일 단위가 128x128로 세밀하게 구성되어 있어 전투가 벌어질 공간은 생각보다 넓지 않을 수 있습니다. 이 맵은 기본적으로 밀리 스타일이지만, 제공된 정보가 워낙 제한적이어서 맵의 구체적인 밸런스나 전략적 요소는 유추하기 어렵습니다. 플레이어는 각자 자신의 본진을 지키며 적의 건물을 파괴하는 동시에 방어 태세를 갖추어야 하는데, 맵에 특정한 방어 시설이나 보너스 자원이 배치되어 있지 않다면Resource Management가 단순할 수밖에 없습니다. 따라서 이 맵은 초보자보다는 기본적인 스타크래프트 전략과 미니맵 활용 능력을 갖춘 플레이어에게 적합하며, 빠른 전투와 건물 파괴를 중심으로 한 플레이 스타일을 선호하는 유저들에게 추천됩니다. 맵의 승리 조건이 매우 명확한 만큼, 전략보다는 순간적인 판단력과 병력 운용 능력이 중요한 포인트가 될 것입니다. 또한, 맵의 제목이 ‘Untitled Scenario’로 되어 있어 검색이나 분류 과정에서 혼란을 줄 수 있으니, 플레이 전 맵의 내부 설명을 꼼꼼히 확인하는 것이 좋습니다. 이 맵은 다운로드 후 자체적인 밸런스 조정이나 추가 규칙 없이도 즉시 플레이가 가능한 간단한 구조를 가지고 있지만, 추후 유즈맵 커뮤니티에서 추가된 트리거나 밸런스 패치가 적용된 버전이 있다면 이를 확인하는 것이 좋습니다. This Brood War custom map, Recovery.scx, appears to be a minimalist scenario where the sole objective is to destroy all enemy buildings, as indicated by the in-game description, 'Destroy all enemy buildings.' Despite being classified under the MELEE genre in the database, the absence of team divisions and the lack of additional context suggest it leans more toward a straightforward competitive format rather than a traditional team-based melee match. The map features four evenly spaced starting positions for players, ensuring that initial engagements occur relatively early in the game. The use of the Badlands tileset gives the map a stark, combat-focused atmosphere, though the 1024x1024 map size with a 4096x4096 resolution and 128x128 tile units may limit the spatial dynamics of battles. The simplicity of the victory condition means that strategic depth is minimal, relying instead on quick decision-making and efficient unit management. Players are expected to balance offense and defense without the aid of specialized structures or resources, making it more suitable for those with a solid grasp of basic StarCraft mechanics. The lack of a clear title or additional metadata could pose challenges for players trying to locate the map, so verifying the internal description before downloading is advisable. While the map’s design is straightforward and playable out of the box, potential community-driven balance adjustments or patches should be considered for an optimal experience.
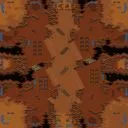
4:4 컴까기 그랜드 라인 15업 (4:4 Compkagi Grand Line 15up)
스타크래프트 브루드워의 대표적인 컴까기 유즈맵인 〈4:4 컴까기 그랜드 라인 15업〉은 한정된 공간에서 수많은 적을 상대로 끈질기게 버티며 최종 목표를 달성하는 전략적 플레이가 요구되는 맵이다. 맵의 전체적인 구조는 중앙에 넓은 평지가 펼쳐져 있고, 그 주변을 따라 복잡한 언덕 지형과 좁은 통로가 배치되어 있어 플레이어는 끊임없이 전략을 갱신해야 한다. 특히 맵 곳곳에 배치된 미네랄과 가스 геisers는 자원 확보와 방어라인 구축의 핵심으로, 초반부터 자원 관리에 신경 써야 한다. 방어 건물인 터렛과 포토캐논을 적절히 배치하여 적의 공격을 분산시키고, 필요 시에는 유닛을 소모하면서까지 방어선을 유지하는 판단력이 중요하다. 맵의 특징 중 하나는 ‘15업’ 시스템으로, 플레이어는 각자 15레벨까지의 유닛을 업그레이드할 수 있으며, 이를 통해 강력한 조합을 구성할 수 있다. 그러나 레벨이 오를수록 필요한 자원의 양도 증가하기 때문에Resource Management가 필수적이며, 잘못된 판단은 곧 패배로 이어질 수 있다. 또한, 맵의 중간중간 배치된 특수 아이템이나 구조물은 게임의 판도를 뒤집을 수 있는 변수로 작용하니, 이를 활용할 수 있는 플레이어는 상대적으로 유리한 위치를 선점할 수 있다. 이 맵은 4명의 플레이어가 각각의 팀을 구성해 경쟁하는 팀전 방식으로 진행되며, 승리를 위해서는 개인의 실력뿐만 아니라 팀원 간의 커뮤니케이션과 협력이 절대적으로 요구된다. 초보 플레이어의 경우 방어 라인 구축과 자원 관리에 어려움을 느낄 수 있지만, 꾸준한 연습을 통해 점차 숙련도를 높일 수 있는 장점이 있다. 또한, 맵의 난이도는 보통 수준으로 설정되어 있지만, 상대방의 조합과 전략에 따라 급격히 어려워질 수 있어 항상 변수에 대응할 준비가 필요하다. 게임을 시작하기 전에는 자신의 조합과 방어 전략을 미리 계획해 두고, 상대방의 움직임을 관찰하며 유연하게 대처하는 것이 중요하다. 이 맵은 단순한 디펜스 게임을 넘어서, 전략적 사고와Resource Management 능력을 동시에 요구하는 고차원적인 플레이 경험을 제공한다. 초보자와 숙련자 모두 재미있게 즐길 수 있는 만큼, 스타크래프트 유즈맵의 정석을 느낄 수 있는 작품 중 하나로 손꼽힌다. StarCraft: Brood War's classic tower-defense custom map, *4:4 Tower Defense Grand Line 15 Upgrades*, challenges players to survive relentless enemy waves in a confined space while achieving a final objective. The map features a central open plain surrounded by intricate hill terrain and narrow passages, forcing players to constantly adapt their strategies. Strategically placed mineral patches and vespene geysers scattered across the map serve as key resources for both resource gathering and defense line construction, requiring careful management from the start. Proper placement of defensive structures like turrets and photon cannons to disperse enemy attacks—and even sacrificing units to hold the line when necessary—are crucial decisions. A defining feature is the "15 Upgrades" system, where players can upgrade units up to level 15, enabling powerful combinations. However, higher levels demand significantly more resources, making resource management essential; poor decisions can quickly lead to defeat. Special items or structures scattered throughout the map can shift the game's momentum, and players who leverage them gain a significant advantage. The map is played as a four-player team competition, where victory depends not only on individual skill but also on team communication and coordination. Beginners may struggle with defense line setup and resource management, but consistent practice helps improve proficiency. While the map is designed at a moderate difficulty level, its challenge can escalate sharply depending on opponents' compositions and strategies, so players must always be ready to adapt. Before starting, planning your unit composition and defense strategy is vital, and observing opponents' movements to respond flexibly is key. Beyond a simple defense game, this map demands both strategic thinking and resource management, offering a sophisticated gameplay experience. Enjoyable for both beginners and veterans, it stands out as a quintessential example of StarCraft custom maps.
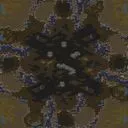
고전 감성 밀리 (4)Nostalgic 0.91
스타크래프트 브루드워의 고전 밀리 맵인 '(4)Nostalgic 0.91'은 4인용 맵으로, 황무지 타일셋을 기반으로 제작된 symmetrical(대칭) 디자인과 군데군데 배치된 미네랄과 가스 채취를 위한 스타팅 포인트가 특징이다. 맵의 이름은 'Nostalgic'이라는 단어에서 알 수 있듯이, 과거의 스타크래프트 밀리 맵을 연상시키는 분위기를 가지고 있으며, 특히 4인용 대칭형 맵의 클래식한 구조를 따르고 있다. 맵의 중앙에는 비교적 넓은 오픈 공간이 펼쳐져 있으며, 양측의 시작 지점은 바위를 사이에 두고 떨어져 있어 초반의 전략적 선택이 중요할 것으로 보인다. 미네랄과 가스의 배치 또한 균등하게 분배되어 있어, 초보자부터 숙련자까지 모두 공정한 플레이가 가능할 것으로 예상된다. 이 맵은 초창기 스타크래프트의 밀리 맵 디자인 요소를 재현하면서도, 최신 버전인 0.91로 리마스터되어 그래픽적 안정성과 플레이abilidad(플레이 적합성)을 높였다. 내부 맵 설명에서도 'Original idea by Rose.of.Dream'과 'Remastered by Testbug'라는 문구가 나타나 있듯이, 과거의 아이디어를 현대적으로 재해석한 점이 돋보인다. 또한, 'Special thanks to KM- and TT1'이라는 제작진의 감사를 표한 점에서도Community(커뮤니티)의 중요성을 강조하고 있다. 플레이 스타일은 기본적인 테란, 저그, 프로토스 간의 상성 관계를 고려한 밀리 대전이 될 것이며, symmetrical(대칭) 구조 덕분에 팀플레이에서도 균형 잡힌 전투가 가능할 것으로 보인다. 특히 중앙 지역의 넓은 개활지는 대규모 병력 교전이나 전략적 기습에 적합할 것이며, 바위와 언덕 지형을 활용한 방어 전략도 유효할 것이다. 초보 플레이어의 경우 미네랄과 가스의 균등한 배치 덕분에 자원 관리와 본진 방어에 집중할 수 있으며, 숙련자라면 초반 러시나 타이밍 공격에 유리한 환경을 제공받을 수 있다. 이 맵은 과거의Classic(클래식) 스타크래프트 밀리 맵을 좋아하는 유저들에게 특히 추천할 만하며, symmetrical(대칭) 구조와 균형 잡힌 자원 배치를 통해 밸런스 있는 플레이를 즐길 수 있을 것이다. 또한, 리마스터된 그래픽과 최적화된 구조는 과거의 명작을 현대적으로 재해석했다는 점에서 의미가 있다. 추천하는 플레이 대상은 스타크래프트 밀리 맵의 클래식한 감각을 선호하는 모든 이들에게 적합하며, 특히 4인 대칭형 맵의 전략적 깊이를 즐기고자 하는 유저들에게 강추한다. Before diving into the gameplay, players should check the mineral and gas distribution around their starting bases to plan early strategies. The central open area is ideal for large-scale battles, so controlling this zone early can dictate the flow of the game. Beginners should focus on resource management and base defense, while experienced players can exploit the symmetrical layout for aggressive rushes or defensive plays. The remastered graphics and balanced design make this map a nostalgic yet fresh experience for both veterans and newcomers alike.
도로 교차 (Roadcrossing)
황무지 테마의 4인용 밀리 맵으로, 적 건물 파괴를 목표로 하는 간결한 구성이 돋보인다. 중앙을 가로지르는 넓은 도로가 맵 전체를 가르고 있어 양측 база가 직접 대치하기보다는 우회로를 활용한 기습이나 시야 싸움으로 전개될 가능성이 크다. 도로 양옆으로 펼쳐진 황량한 평야는 초기 자원 확보에 유리한 반면, 좁은 길목이 주요 교전 지점으로 작용해 치열한 전투가 벌어질 소지가 많다. 테란과 프로토스가 유리한 고지대를 선점하는 동시에, 저그의 경우 도로 주변의 평야를 활용한 기동전으로 균형을 맞출 수 있는 설계다. 시야 확보와 진형 싸움의 중요성이 부각되는 맵으로, 초반 러시 거리와 mineral line의 배치에 따라 게임의 흐름이 크게 좌우될 수 있다. 도로가 양쪽 база를 잇는 주요 통로 역할을 하면서도, 중앙의 넓은 공간은 대규모 병력 집결을 유도해 대규모 전투가 벌어질 가능성이 높다. 또한 도로 양옆의 평야는 시야 확보와 정찰에 유리한 지점들이 scattered되어 있어, 맵 리딩 능력이 승패를 가르는 중요한 요소가 될 것이다. 초보자와 숙련자 모두 즐길 수 있는 밸런스형 맵으로, 간단한 목표와는 달리 전략적 깊이가 필요한 구조다. 특히 도로 주변의 지형지물이 전투 시 후퇴 경로나 방어선 구축에 영향을 미치므로, 맵의 특징을 빠르게 파악하고 활용하는 플레이어가 유리할 것이다. 또한 mineral line의 안정성과 확장 가능성도 고려해야 하므로, 초반 자원 관리에 신경을 써야 한다. 이 맵은 4인용 밀리 매치에서 긴장감 넘치는 전투와 다양한 전략적 선택을 제공할 것으로 예상된다. 도로와 평야의 조화가 인상적인 가운데, 각 종족의 특성과 플레이 스타일에 따라 전혀 다른 양상으로 전개될 수 있는 점이 흥미로운 포인트다. --- The 4-player melee map set on the Badlands tileset offers a straightforward objective of destroying all enemy structures, but its layout introduces strategic depth through a central road that bisects the terrain. The wide road cutting across the map forces players to either engage directly or maneuver around it, favoring flanking maneuvers and vision control over frontal assaults. The surrounding barren plains provide ample space for early resource gathering, yet the narrow passages created by the road act as natural choke points where intense battles are likely to erupt. Vision and positioning become critical factors in this map, as the road serves as the primary route between bases while the open plains allow for rapid troop movements. The scattered high-ground spots along the roadside offer strategic advantages, turning vision control and reconnaissance into key skills that can dictate the flow of the game. Large-scale engagements are probable due to the spacious central area, which can accommodate massive troop clusters, making map awareness and timing crucial for success. This balanced map caters to both beginners and experienced players, offering a simple objective with complex strategic layers. The terrain around the road influences retreat paths and defensive setups, rewarding players who quickly adapt and utilize the map’s features. Early resource management and expansion opportunities also play a pivotal role, as securing mineral lines early can provide a significant advantage. With its blend of straightforward objectives and intricate tactical possibilities, this map promises tense and dynamic matches in 4-player melee scenarios. The harmony between the road and plains creates a layout where each race’s strengths and playstyles can lead to vastly different game outcomes, making every match a unique challenge.
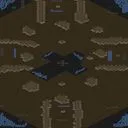
미지의 전투 (Untitled Scenario)
이 맵은 스타크래프트 브루드워의 기본 밀리 맵을 기반으로 한 유즈맵으로, 4명의 플레이어가 각자의 기지를 건설하고 상대방의 건물을 모두 파괴하는 것을 목표로 한다. 맵의 구조는 황무지 타일셋을 사용한 4096x4096 크기로, 중앙에 넓은 평지가 있으며 사방을 둘러싼 언덕 지형이 특징이다. 각 플레이어는 시작 지점에서 가까운 언덕에 기지를 건설할 수 있으며, 맵의 중앙 평지에서Resource를 채취하거나, 언덕을 넘어 적의 기지로 진출하는 전략적 선택이 필요하다. 기본적인 자원 수급과 테크트리 구축이 가능한 구조로, 밀리 맵의 특성을 살리면서도 유즈맵으로서의 플레이감을 제공한다. 맵의 균형은 각 플레이어의 시작 위치가 대칭적으로 배치되어 있어 공정성을 유지하고 있다. 그러나 내부 맵 설명이 '모든 적 건물 파괴'로만 제시되어 있어, 승리 조건이 표준 밀리(네크서스/커맨드 센터 파괴)인지 또는 특정 건물을 노리는지 명확하지 않다. 플레이 전에는 맵 에디터에서 승리 조건을 확인하는 것이 중요할 것으로 보인다. 이 맵은 밀리 맵으로 분류되어 있지만, 유즈맵으로서의 활용도가 높기 때문에 밀리 또는 UMS(유즈맵)로도 충분히 즐길 수 있는 구조다. 특히 기지 건설과Resource 관리, 진영 간의 전투가 메인 콘텐츠로, 스타크래프트의 기본 전략을 연습하고자 하는 플레이어에게 적합하다. 맵의 symmetrical한 구조는 초보자도 쉽게 접근할 수 있도록 도와주며, 중앙 평지에서Resource를 두고 벌어지는 전투는 긴장감을 높이는 요소다. 다만, 맵의 크기가 상당히 넓어Resource가 다소 부족하게 느껴질 수 있으므로, Resource 채취 전략을 신중히 세워야 한다. 또한, 언덕 지형이 numerous하게 배치되어 있어, 시야 확보와 진출 경로 선택이 승패를 좌우할 수 있다. 이 맵은 밀리 맵의 틀을 유지하되, 유즈맵으로서의 재미를 더하기 위해Resource 배치나 건물 배치 등을 미세 조정해볼 여지가 있다. 초보 플레이어는Resource 관리와 테크트리 우선순위를 익히는 데 집중하고, 숙련자는Resource 확보와 진출 타이밍을 전략적으로 계획하는 것이 중요하다. 전체적으로는 밸런스가 잘 잡힌 맵으로, 다양한 플레이 스타일을 시도해볼 수 있는 유용한 유즈맵이다. This map is a custom StarCraft: Brood War game mode based on the standard melee map, where four players construct their bases and aim to destroy all enemy buildings. The terrain features a 4096x4096 size with a barren tileset, including a central flat area surrounded by elevated terrain. Each player starts on an elevated section near their base, allowing strategic resource gathering or direct advances toward enemy territories. The map maintains symmetry, ensuring fair starting positions for all players. While the internal map description suggests a simple 'destroy all enemy buildings' victory condition, it does not specify whether this refers to standard melee objectives (e.g., destroying Nexus or Command Center) or a custom target. Players should verify the win condition in the map editor before starting. Though classified as a melee map, its design makes it highly adaptable for UMS (Use Map Settings) custom gameplay. The primary focus is on base building, resource management, and faction-based combat, making it ideal for players looking to practice core StarCraft strategies. The symmetrical layout eases accessibility for beginners, while the central flat area fosters tense battles over resources. However, the map's large size may lead to perceived resource scarcity, demanding careful strategic planning. The numerous elevated terrains add depth, requiring smart path selection and vision control for success. While the map maintains a balanced melee structure, there is room for adjustments to enhance its UMS appeal, such as tweaking resource distribution or building placements. Beginners should prioritize mastering resource management and tech-tree progression, while experienced players can experiment with advanced strategies like timing attacks or multi-front assaults. Overall, this is a well-balanced map offering diverse playstyles and serving as a valuable custom map for StarCraft enthusiasts.
4인 서든 스트라이크 (4)Suden Strike l
(4)Suden Strike l.scm은 사막 타일셋을 배경으로 한 4인용 밀리 맵이다. 내부 설명에 명시된 승리 조건은 모든 적 건물을 파괴하는 전형적인 섬멸전 방식이며, 별도의 트리거나 스토리 요소 없이 순수한 전투에 집중하도록 설계되었다. 맵을 처음 열어보면 사막 특유의 모래 언덕과 협곡이 어우러진 험준한 지형이 눈에 띄는데, 이는 단순한 장식이 아니라 전술적 선택에 직접 영향을 미치는 핵심 요소로 작용한다. 중앙 지역은 비교적 넓게 트여 있어 대규모 교전이 자주 발생하는 반면, 각 시작 지점은 좁은 입구와 언덕으로 둘러싸여 있어 초반 방어에 유리한 구조다. 특히 앞마당 확장 기지로 이어지는 길목이 좁고 구불구불하게 배치되어 있어, 초반 정찰과 병력 이동 경로를 신중하게 설계해야 한다. 이 맵에서 가장 두드러지는 특징은 풍부한 자원 배치와 그에 따른 빠른 테크 트리 전환 가능성이다. 본진은 미네랄 덩이와 베스핀 가스가 넉넉하게 배치되어 있어 초반 생산력이 매우 높고, 앞마당 확장 역시 비교적 가까운 거리에 자리 잡고 있다. 하지만 확장을 시도하는 순간 좁은 통로에서 적의 견제를 받기 쉬우므로, 단순히 자원만 보고 무리하게 확장했다가는 초반 러시에 무너질 위험이 크다. 중앙 지역에는 추가 멀티가 산재해 있지만, 그 주변은 시야가 탁 트인 평지라 점령하더라도 수비 병력을 충분히 배치하지 않으면 순식간에 빼앗기기 십상이다. 따라서 자원 확보와 병력 배분 사이의 균형을 어떻게 맞추느냐가 이 맵의 핵심 전략 포인트가 된다. 전반적인 플레이 경험은 초반부터 긴장감이 감도는 빠른 템포의 경기를 유도한다. 좁은 길목에서 벌어지는 소규모 교전은 유닛 컨트롤 실력을 시험하고, 중앙 평원에서 벌어지는 대규모 교전은 진영 배치와 화력 집중의 중요성을 부각시킨다. 공중 유닛의 활용도도 상당히 높은 편인데, 지상 경로가 제한적인 탓에 드랍십이나 공대지 유닛으로 우회 공격을 시도하는 플레이가 자주 등장한다. 언덕을 선점한 시즈 탱크나 리버의 포격은 좁은 입구를 틀어막는 강력한 수단이 되며, 이를 뚫기 위한 다방향 공격은 경기의 흐름을 극적으로 바꾸는 변수가 된다. 이 맵은 클래식한 밀리 전투를 선호하면서도 지형을 활용한 전술적 깊이를 즐기는 플레이어에게 특히 적합하다. 초보자에게는 초반 방어가 비교적 수월하게 느껴질 수 있지만, 중반 이후 급격히 넓어지는 전장을 관리하는 데 어려움을 겪을 수 있다. 반면 숙련된 플레이어라면 좁은 입구를 이용한 심리전과 타이밍 러시, 그리고 멀티 견제를 통한 자원 말리기 전략을 다양하게 시도할 수 있다. 플레이 전 반드시 확인해야 할 사항은 맵의 대칭성과 시작 위치 간 거리감이다. 대각선 위치는 비교적 안전한 반면, 인접한 위치는 극도로 가깝기 때문에 초반 올인 전략에 노출되기 쉽다. 따라서 게임 시작 직후 정찰 방향을 신중히 결정하고, 상대의 초반 빌드에 따라 유연하게 대응하는 자세가 요구된다. 이 맵은 단순한 자원 싸움을 넘어 심리전과 타이밍 싸움이 끊임없이 요구되는, 긴장감 넘치는 경험을 제공한다. (4)Suden Strike l.scm is a four-player melee map set against a desert tileset. The internal description states the victory condition is to destroy all enemy buildings, which is the standard annihilation format, and it is designed to focus purely on combat without any additional triggers or story elements. Upon opening the map, the rugged terrain of sand dunes and canyons immediately stands out, and this is not merely decorative but a crucial factor that heavily influences strategic decisions. The central area is relatively open and frequently becomes the stage for large-scale battles, whereas each starting location is surrounded by narrow entrances and elevated ground, offering a defensive advantage in the early game. In particular, the path leading to the natural expansion is narrow and winding, requiring careful planning of early scouting and troop movement routes. The most striking feature of this map is the abundant resource placement and the resulting potential for fast tech switches. The main base provides generous amounts of mineral patches and Vespene gas, enabling very high initial production, and the natural expansion is situated at a relatively close distance. However, the moment you attempt to expand, the narrow choke points make you highly susceptible to enemy harassment, and blindly expanding solely for resources carries a great risk of collapsing to an early rush. Additional multi-resource bases are scattered across the central area, but since these spots are open flatlands with wide sightlines, they can be easily lost if you do not station sufficient defensive forces. Therefore, striking the right balance between resource acquisition and army distribution becomes the core strategic point of this map. The overall gameplay experience encourages a fast-paced match with sustained tension from the very beginning. Small-scale skirmishes in the narrow paths test unit control skills, while large-scale engagements on the central plain highlight the importance of formation and focused firepower. The utility of air units is also considerably high; because the ground routes are limited, bypass attacks using Dropships or air-to-ground units frequently prove effective. Siege Tanks or Reavers positioned on the high ground provide a powerful means of blocking the narrow entrances, and multi-directional attacks to break through these defenses become a dramatic variable that can shift the flow of the game. This map is particularly suitable for players who prefer classic melee strategies while enjoying the tactical depth offered by terrain utilization. Beginners might find the early defense relatively manageable but could struggle to control the rapidly widening battlefield in the mid-game. Conversely, experienced players can employ a variety of strategies, such as psychological warfare using the narrow entrances, well-timed rushes, and resource starvation tactics through multi-base harassment. Before playing, it is essential to check the map's symmetry and the distances between starting positions. Cross positions are relatively safe, but adjacent positions are extremely close, making you highly exposed to early all-in strategies. Therefore, you must carefully decide your scouting direction immediately after the game starts and flexibly adapt to the opponent's initial build order. This map delivers a tense experience that goes beyond a simple resource war, constantly demanding psychological warfare and precise timing.
레이avage (Ravage)
스타크래프트 브루드워의 밀리 맵으로 유명한 (4)Ravage는 4인용 맵으로, 플레이어 간Resources(자원) 경쟁과 영토 쟁탈이 주된 특징이다. 맵의 중앙에는 거대한 중립 건물이 배치되어 있으며, 이를 둘러싼 자원 지대와 확장 기지가 균형 있게 배치되어 있다. 맵의 이름은 'Ravage'로, '파괴하다' 또는 '약탈하다'라는 의미를 담고 있어, aggressive(공격적인) 플레이 스타일을 유도하는 구조로 추정된다. 맵의 크기는 6144x6144로 상대적으로 넓고, 정글 타일셋을 사용하여 시야가 제한되는 지형이 많아 전략적 판단이 중요하다. 플레이어는 시작 시 자원 기지 1개와 미네랄 5000을 확보한 상태로 시작하며, 추가 자원 기지를 확보하기 위해 중앙 자원 지역이나 상대방 기지 주변을 점령해야 한다. 맵의 특성상 초반Resource(자원) 확보 경쟁이 치열할 것으로 보이며, 중앙 건물을 둘러싼 전투는 맵의 후반부를 좌우할 수 있다. 또한, 정글 지형이 많아 시야 확보와 유닛 이동 경로 선택이 중요해 보인다. 이 맵은Resources(자원) 경쟁과 영토 확장이 주된 목표인 만큼, 초보 플레이어보다는 전략적 사고와 맵 이해도가 필요한 중급 이상의 플레이어에게 적합하다. 특히,Resource(자원) 수집 속도와 유닛 생산 타이밍을 잘 조율해야 하며, 상대방의 움직임을 예측하는 능력이 필요하다. 맵의 symmetrical(대칭) 구조는 밸런스를 유지하는 데 도움을 주지만, 중앙 자원 건물의 존재로 인해 초반 전투가 치열해질 가능성이 크다. 플레이 전에는Resource(자원) 분포와 중앙 건물의 중요성을 숙지하고, 초반Resource(자원) 확보와 방어 전략을 미리 준비하는 것이 좋다. 또한, 정글 지형에서의 시야 확보와 유닛 이동 경로를 미리 계획하면 더 효율적인 플레이가 가능하다. 이 맵은Resources(자원) 경쟁과 영토 확장이 주된 목표인 만큼,Resources(자원) 관리와 전략적 판단이 뛰어난 플레이어에게 추천할 만한 맵이다. It's a savage ravage. The (4)Ravage map in StarCraft: Brood War is a classic 4-player melee map designed for intense resource competition and territorial control. The map features a central neutral structure surrounded by balanced resource distributions and expansion bases, encouraging aggressive playstyles. With a size of 6144x6144 and a jungle tileset, vision control becomes crucial due to the terrain's obstructive nature. Players start with one base and 5000 minerals, requiring strategic expansion to secure additional resources. Early-game resource races are likely, especially around the central neutral building, which can dictate the mid-to-late game. The symmetrical layout ensures balance, but the central structure's presence often leads to fierce early confrontations. This map is best suited for intermediate to advanced players who excel in strategic planning and resource management. Understanding mineral distribution, timing expansions, and predicting opponent movements are key to success. Pre-game preparation should include scouting the resource layout, planning early defenses, and familiarizing oneself with optimal unit movement paths through the jungle terrain. For players who enjoy high-stakes resource competition and tactical territorial control, (4)Ravage offers a challenging and rewarding experience in StarCraft: Brood War's competitive melee scene.
카시노 (M. Cassino [TCW])
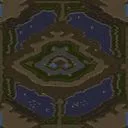
M. Cassino [TCW]는 사막 지형을 배경으로 한 4인용 스타크래프트 브루드워 유즈맵으로,Destory all enemy buildings 라는 간단한 승리 조건을 가진 밀리 맵이다. 맵의 중앙에는 넓은 개활지가 펼쳐져 있으며, 각 플레이어는 고유한 베이스 지역을 확보하고 있다. 베이스 주변에는 미네랄과 가스가 배치되어 있으며, 일정 거리를 두고 적과 마주치게 된다. 맵의 특징은 사막이라는 배경에 맞게 지형이 비교적 평탄하다는 점으로, 이는 전투 시 기동성과 시야 확보에 유리하게 작용한다. 또한, 맵 곳곳에 잔디와 바위가 배치되어 있어 전략적인 위치선정과 시야 싸움의 중요성을 높인다. 플레이어는 기본적으로 4명으로 구성되며, 각 플레이어는 독립된 시작 지역을 확보한 채 상대방의 건물을 파괴하는 방식으로 진행된다. 맵의 밸런스는 비교적 균등한 편으로, 모든 플레이어가 동일한 출발 조건을 갖추고 있지만, 중앙 개활지의 장악 여부가 승패를 좌우할 가능성이 높다. 초보자와 숙련자 모두 즐길 수 있는 밸런스형 맵으로, 전략적인 포지셔닝과 빠른 판단력이 요구된다. 특히, 사막 지형의 시야가 넓기 때문에 스카웃이나 드랍십과 같은 유닛의 활용이 중요할 것으로 보인다. 또한, 맵의 규모가 크기 때문에 자원 채취와 건물을 짓는 타이밍이 타이밍대로 중요하며, 병력 생산과 보급의 균형을 맞추는 것이 필수적이다. 이 맵은 밀리 장르 특유의 긴장감과 전략성을 즐기고 싶은 플레이어들에게 추천할 만하다. 다만, 맵의 규모가 크기 때문에 초보자의 경우 자원 관리와 빌드 오더를 숙지하는 데 다소 시간이 걸릴 수 있다. 따라서, 맵을 플레이하기 전에는 기본적인 빌드 오더와 유닛 조합에 대한 공부를 미리 해두는 것이 좋다. 특히, 사막 지형의 특징을 살려 기동전을 펼치거나, 중앙 개활지를 장악하여 적을 압박하는 전략을 연습해두면 좋다. 이 맵은 스타크래프트 브루드워의 완성도 높은 밸런스형 밀리 맵으로, 다양한 전략과 전술을 시도해보며 즐길 수 있는 작품이다. M. Cassino [TCW] is a four-player StarCraft: Brood War custom map set in a desert terrain, featuring a simple "Destroy all enemy buildings" victory condition. The map has a wide open central battlefield, with each player securing their own base area. Surrounding the bases are minerals and vespene gas, placed at a reasonable distance to ensure early encounters with opponents. The map’s defining trait is its relatively flat terrain, matching the desert setting, which enhances mobility and visibility during battles. Scattered across the map are patches of grass and rocks, adding strategic value to positioning and vision control. Each game consists of four players, each starting in their own isolated region, aiming to destroy the enemy’s structures. The map maintains a balanced design, offering all players identical starting conditions, though controlling the central open area often proves decisive in determining the outcome. Suitable for both beginners and experienced players, M. Cassino demands sharp tactical positioning and quick decision-making. Given the expansive desert terrain with excellent visibility, units like the Scout or Dropship become especially valuable. The map’s large scale also makes resource management and timing for building crucial, requiring players to balance production and supply efficiently. This map is ideal for those seeking the tension and strategy typical of the mill genre. However, due to its size, beginners may need time to master resource control and build orders. It’s advisable to study basic build orders and unit compositions before playing. Practicing mobile warfare that leverages the desert’s open terrain or securing the central battlefield to pressure opponents can be particularly effective. M. Cassino stands out as a well-balanced, high-quality StarCraft: Brood War custom map, offering players a chance to experiment with diverse strategies and tactics for an engaging experience.
マップ選択ガイド
태그는 맵의 핵심 특징을 빠르게 설명하지만 제작 버전마다 규칙이 다를 수 있습니다. 상세 설명에서 권장 인원, 난이도, 플레이 시간과 버전을 함께 확인한 뒤 다운로드하세요.