
프로브 スタークラフト マップコレクション
「프로브」タグが登録されたマップを集めました。ジャンルだけでは見つけにくいプレイ方式、難易度、特徴を中心に、人気のマップと最新マップを比較してみてください。
- 登録マップ
- 8個
- 累計ダウンロード
- 0
- 累計閲覧
- 208
人気マップ
ダウンロードと閲覧の反応が高いマップです。
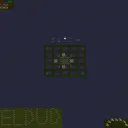
BOMBER PROBE V2.0
스타크래프트 브루드워 유즈맵 '봄버 프로브 V2.0'은 프로브를 조종해 폭탄을 설치하고 상대를 처치하는 아케이드 스타일의 미니게임 맵이다. 최대 7인까지 참여 가능하며, 사막 타일셋 위에서 진행된다. 제목 그대로 프로브가 폭탄을 다루는 '봄버맨' 방식의 플레이가 핵심으로, 좁은 통로와 장애물 사이를 누비며 타이밍 좋게 폭탄을 놓고 피하는 순발력과 심리전이 승부를 가른다. V2.0 표기로 보아 기존 버전에서 밸런스나 맵 구조가 개선된 것으로 보이며, 제작자 'EL-DUDREDGREENYELLOW'의 네이밍이 확인된다. 별도의 트리거나 복잡한 시스템 없이 직관적인 조작만으로 즐길 수 있어 초보자도 쉽게 접근 가능하다. 7인 프리포올 또는 팀전으로 가볍게 즐기기 좋은 파티 게임 성격이 강하며, 짧은 라운드 단위로 반복 플레이하기에 적합하다. 맵은 대칭형 구조로 보이며, 폭탄 설치 후 일정 시간 뒤 폭발해 범위 안의 유닛을 즉사시킨다. 프로브 외에 다른 유닛이나 자원 요소는 없다. 플레이 전에는 맵 옵션에서 승리 조건(최후의 1인 또는 팀 승리) 및 폭탄 데미지, 쿨타임 설정 등을 확인하는 것이 좋다. 밀리 실력과 무관하게 누구나 부담 없이 즐길 수 있는 캐주얼 유즈맵으로 추천한다. StarCraft Brood War UMS map 'Bomber Probe V2.0' is an arcade-style mini-game where players control Probes to plant bombs and eliminate opponents. Up to 7 players can participate on a desert tileset. True to its name, the core gameplay follows a 'Bomberman' style with Probes handling bombs, requiring quick reflexes and mind games as players maneuver through narrow corridors and obstacles to place and dodge bombs. The V2.0 designation suggests balance or structural improvements over a previous version, and the creator 'EL-DUDREDGREENYELLOW' is credited. With no complex triggers or systems, intuitive controls make it accessible to beginners. It suits free-for-all or team play for 7 players, offering a party-game feel with short rounds ideal for repeated matches. The map appears symmetrically structured; bombs detonate after a delay, instantly killing units in range. No units other than Probes or resource mechanics exist. Before playing, check map options for victory conditions (last man/team standing), bomb damage, and cooldown settings. Recommended as a casual UMS map enjoyable regardless of melee skill.
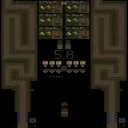
스폰 디펜스 5.85.1 (Spawn Defense 5.85.1)
스타크래프트 브루드워 유즈맵 '스폰 디펜스 5.85.1'은 사막 타일셋을 배경으로 최대 6인이 협력해 밀려오는 적 웨이브를 막아내는 디펜스 장르 맵이다. 내부 설명에 따르면 버그 수정과 난이도 상향이 적용된 논-인피니트 버전이며, 핸디캡 조절 기능과 추가 프로브, 생명력 증가 옵션이 포함되어 있어 초보자부터 숙련자까지 난이도를 유연하게 맞출 수 있다. 플레이어는 시작 지점에서 프로브를 활용해 방어 시설을 건설하거나 유닛을 생산하며, 주기적으로 생성되는 적 병력을 막아내야 한다. 맵 크기 96x128 타일은 넉넉한 건설 공간을 제공하며, 사막 지형의 개방적인 시야는 적 이동 경로를 예측하기 용이하다. 진행 방식은 웨이브 단위로 구성되어 있으며, 각 웨이브 사이 짧은 정비 시간에 자원 관리와 업그레이드, 배치 조정이 이루어진다. 핸디캡 시스템 덕분에 인원 수나 실력 차이에 따른 밸런스 조절이 가능해 솔로 플레이부터 6인 풀파티까지 폭넓게 즐길 수 있다. 추천 대상은 디펜스 장르 입문자, 협동 전략을 선호하는 유저, 그리고 고전 맵의 변형 버전을 체험하고 싶은 올드 유저다. 플레이 전 확인할 점은 버전 표기(5.85.1)가 최신인지, 핸디캡 설정이 의도한 난이도와 맞는지, 그리고 팀원 간 역할 분담(건설, 전투, 자원)을 미리 정하는 것이다. 맵의 핵심 재미는 제한된 자원 안에서 효율적인 방어 라인을 구축하고, 갑작스러운 대형 유닛 출현에 대응하는 긴장감에 있다. 프로브 한 기로 시작해 넥서스와 관문, 포톤 캐논 등을 단계적으로 늘려가는 성장 곡선이 뚜렷하며, 웨이브가 거듭될수록 적 조합이 다양해져 유닛 상성 이해가 중요해진다. 핸디캡 옵션은 적 체력 배율, 웨이브 간격, 초기 자원 등을 세밀하게 조절할 수 있어 반복 플레이 시 새로운 도전이 가능하다. 다만, 맵 설명에 등장하는 'Delta)zC(A' 같은 코드성 문구는 트리거 내부 주석으로 보이며 실제 플레이에는 영향을 주지 않는다. 멀티플레이 시 랙 방지를 위해 그래픽 옵션을 낮추고, 관전자 슬롯을 비워두는 것이 안정적이다. StarCraft Brood War UMS map 'Spawn Defense 5.85.1' is a defense genre map set on a desert tileset where up to six players cooperate to fend off incoming enemy waves. According to the internal description, this non-infinite version includes bug fixes, increased difficulty, adjustable handicap options, an extra probe, and bonus lives, allowing flexible difficulty scaling from beginners to veterans. Players start with a probe to construct defensive structures or produce units, holding off periodically spawned enemy forces. The 96x128 tile map provides ample building space, and the open desert terrain makes it easy to predict enemy paths. Gameplay proceeds in waves, with brief intermissions for resource management, upgrades, and repositioning. The handicap system enables balance adjustments for player count or skill gaps, making solo to full 6‑player parties viable. Recommended for defense newcomers, co‑op strategy fans, and old‑school players wanting to experience a classic variant. Before playing, verify the version (5.85.1) is current, ensure handicap settings match the intended challenge, and assign roles (building, combat, economy) among teammates. The core fun lies in building efficient defense lines with limited resources and reacting to sudden heavy‑unit spawns. Starting from a single probe, the growth curve through Nexuses, Gateways, and Photon Cannons is clear, and enemy compositions diversify wave by wave, demanding unit‑counter knowledge. Handicap options fine‑tune enemy health multipliers, wave intervals, and starting resources, offering fresh challenges on repeat plays. The cryptic string 'Delta)zC(A' in the description appears to be a trigger comment and does not affect gameplay. For stable multiplayer, lower graphics settings and leave observer slots empty to reduce lag.
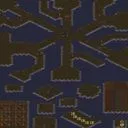
러커 D 18웨이 ~=FINAL=~ (Lurker D 18 Way ~=FINAL=~)
스타크래프트 브루드워의 유즈맵 중 하나로, 프로브를 조종해 광물을 채취하는 독특한 플레이 방식이 돋보이는 ‘러커 D 18 웨이 ~=FINAL=~’는 6인용 맵으로 구성되어 있다. 맵의 이름은 ‘러커’와 ‘D 18’이 조합되어 있으며, ‘웨이’라는 단어는 ‘길’이란 뜻으로, 플레이어가 다양한 경로를 통해 광물을 확보할 수 있도록 설계되었음을 시사한다. 특히 ‘FINAL’이라는 표기는 이 버전이 개발의 최종 단계에 도달했음을 강조하며, 프로브의 광물 채취와 30초 단위의 짧은 라운드가 특징적이다. 내부 설명에서 ‘Modified Version by TerrorMarine&Altarian’이 언급되며, 이 맵이 커뮤니티에 의해 개선된 버전임을 알 수 있다. 이 맵은 프로브를 조종해 광물을 채취하는 동시에, ‘30 Second Rounds’라는 설명에서 알 수 있듯이 짧은 시간 안에 최대한 많은 광물을 확보하는 것이 목표인 것으로 보인다. ‘Upgrades to 255’라는 문구는 광물 채취나 업그레이드 시스템이 최대 255단계까지 존재할 가능성을 시사하며, 이는 플레이어들에게 긴장감을 더하는 요소로 작용할 수 있다. 맵의 디자인상으로는 황무지 타일셋을 활용해 황량한 분위기를 연출하며, 넓은 공간을 활용한 광물 분배와 러커(Lurker)가 등장하는 등 전략적 요소가 포함된 것으로 추정된다. 플레이어는 프로브를 통해 광물을 확보하는 동시에, 맵 곳곳에 배치된 광물이나 추가 자원을 확보하기 위해 경쟁하거나 협력할 수 있다. 짧은 라운드와 최대 255단계의 업그레이드 시스템은 반복적인 플레이와 전략적 선택을 요구하며, 이는 초보자와 숙련자 모두에게 흥미로운 도전 과제를 제공할 수 있다. 특히 광물 채취가 메인 포인트인 만큼, 광물의 배치와 프로브의 이동 경로가 중요하며, 이는 맵을 여러 번 플레이하며 최적의 전략을 찾는 재미가 있다. 이 맵은 프로브를 조종하는 독특한 gameplay와 짧은 라운드, 높은 업그레이드 단계가 특징으로, 프로브를 조종하는 재미와 전략적 선택을 좋아하는 플레이어들에게 추천할 만하다. 또한, ‘FINAL’이라는 표기는 개발의 완료를 의미하므로, 안정적인 플레이가 가능한 버전으로 판단된다. 다만, 광물 채취에만 집중된 게임플레이이기 때문에, 다양한 전략적 요소를 선호하는 플레이어에게는 다소 아쉬울 수 있다. This Brood War custom map, ‘Lurker D 18 Way ~=FINAL=~’, stands out for its unique gameplay centered around controlling Probes to harvest minerals. Designed for 6 players, the map’s name hints at multiple pathways (D 18 Way) and features a ‘FINAL’ designation, suggesting this is a polished, finalized version. The description mentions modifications by TerrorMarine & Altarian, indicating community-driven improvements. The core mechanic revolves around harvesting minerals within 30-second rounds, with an upgrade system that potentially scales up to 255 stages. The use of the Terran wasteland tileset creates a barren, strategic environment, while the presence of Lurkers adds a layer of tactical depth. Players must navigate the map to secure minerals efficiently, balancing speed and resource management. The short rounds and high upgrade ceiling encourage repeated play, rewarding players who refine their strategies over time. The map’s design emphasizes mineral distribution and Probe mobility, making it ideal for those who enjoy resource-focused gameplay. While the mechanics are straightforward, the depth lies in optimizing Probe routes and upgrade investments. Recommended for fans of Probe-centric custom maps, this title offers a fresh take on mineral harvesting with its rapid rounds and extensive upgrade potential. However, players seeking complex multi-faction strategies may find the focus too narrow. Overall, it’s a solid choice for those looking to test their efficiency in a compact, high-stakes environment.
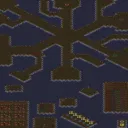
루커 D 18 웨이 FINAL HARD (Lurker D 18 Way FINAL HARD)
스타크래프트 브루드워의 유즈맵 중 하나로, ‘Lurker D 18 Way FINAL HARD’는 다중 지뢰와 프로브를 활용한Resource Management(자원 관리)형 디펜스 맵으로 주목받고 있다. 맵의 중앙에는 거대한 둥근 성역이 자리하고 있으며, 그 주변을 따라 18개의 지뢰가 배치되어 있는데, 이 지뢰들은 일정 시간마다 자동으로 보급되는 프로브를 통해 추가 자원을 확보할 수 있는 구조로 설계되어 있다. 플레이어는 이 자원을 활용해 업그레이드와 방어 시설을 강화해야 하는데, 특히 30초 단위의 라운드가 지나면서 자원 확보 속도가 빨라지며, 업그레이드 한도가 255까지 허용되어 långvarig(장기적인) 전략 구사가 가능하다. 공격을 받기 전까지는 비교적 안정적인 자원 수급이 가능하지만, 방어선을 구축하지 못하면 순식간에 자원이 고갈되어 게임이 어렵게 전개될 수 있다. 맵의 난이도는 ‘HARD’로 명시되어 있지만, 자원 관리와 타이밍 감각이 뛰어난 플레이어라면 충분히 극복할 수 있는 수준으로 보인다. 또한, 맵의 규모는 4096x4096의 넓은 공간을 자랑하며, 황무지 타일셋을 기반으로 한 황량한 분위기가 전체적인 플레이感(감)을 더해준다. 이 맵은 특히Resource Management(자원 관리)와Defense(방어) 요소가 결합된 하이브리드 스타일의 유즈맵으로, 초보자와 숙련자 모두에게 흥미로운 도전을 제공할 것으로 예상된다. 플레이를 시작하기 전에는 자원 확보 루틴과 방어 시설의 배치 타이밍을 충분히 숙지하는 것이 중요하다. This StarCraft: Brood War custom map, ‘Lurker D 18 Way FINAL HARD’, stands out as a Resource Management defense title where players must strategically handle multiple mines and Probes. The map features a central circular zone surrounded by 18 mines, which can be upgraded and supplied with resources through Probes that appear at regular intervals. Players earn resources that can be invested in upgrades, with the cap set at 255, allowing for long-term strategic planning as rounds progress every 30 seconds. While the map starts with steady income, neglecting defense lines can quickly deplete resources and escalate difficulty. Although labeled ‘HARD’, the challenge is balanced for players with strong resource management and timing skills. The 4096x4096 map size, set in a barren wasteland tile, adds to the immersive experience. This hybrid custom map blends Resource Management and Defense mechanics, offering engaging gameplay for both beginners and veterans. Prior to playing, familiarizing oneself with resource income patterns and optimal defense setups is crucial for success.
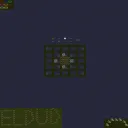
폭격수 프로브 V2.0 (BOMBER PROBE V2.0)
스타크래프트 브루드워의 유즈맵인 <BOMBER PROBE V2.0>은 7명의 플레이어가 참여하는 컴까기 스타일의 디펜스 맵이다. 맵의 중앙에는 거대한 크레이터가 위치해 있으며, 주변으로는 사막 타일셋으로 꾸며진 방어 지점이 배치되어 있다. 플레이어는 각자의 베이스에서 시작해 끊임없이 몰려오는 적의 공세를 방어해야 한다. 맵의 특징은 '프로브' 유닛을 중심으로 한 공격과 방어 시스템으로, 프로브가 일정 시간마다 적의 기지를 향해 폭탄을 투하하는 구조로 보인다. 방어선은 여러 층으로 구성되어 있어 전략적인 배치와 리소스 관리가 중요하며, 적의 공격 패턴이 시간에 따라 변화하는 것으로 추정된다. 특히 맵의 상단과 하단에는 지뢰가 설치되어 있어 무작정 전진하기 힘든 요소도 포함되어 있다. 이 맵은 초보부터 숙련자까지 즐길 수 있도록 난이도가 조절 가능하며, 팀 플레이보다는 개인별로 방어 임무를 수행하는 방식으로 진행되는 것으로 보인다. 또한, 맵 곳곳에 숨겨진 보너스 자원이 배치되어 있어 자원 관리와 전술적 선택이 승패를 좌우할 수 있다. 플레이어는 자신의 베이스와 방어선을 강화하며, 끊임없이 쏟아지는 적의 공세를 막아내야 한다. 맵의 분위기는 사막의 황량한 풍경과 프로브의 기계적인 움직임이 어우러져 독특한 매력을 자아낸다. 추천 대상은 스타크래프트의 유즈맵을 любители 방어와 전략적인 플레이를 즐기는 플레이어들로, 팀플보다는 개인 플레이에 가까운 스타일을 선호하는 유저들에게 알맞다. 플레이 전에는 맵의 구조와 방어선의 중요 포인트를 숙지하는 것이 좋다. 또한, 프로브의 폭탄 투하 타이밍과 적의 공격 패턴을 미리 예측하는 연습이 필요하다. 맵의 난이도는 보통 수준으로 설정되어 있지만, 후반부로 갈수록 적의 공격이 치열해지므로 집중력을 유지해야 한다. Bomber Probe V2.0 is a UMS-style defense map in StarCraft: Brood War designed for 7 players, featuring a probe-based attack and defense system. The map centers around a large crater surrounded by defensive positions in a desert tile set. Players start at their bases and must fend off relentless enemy assaults. The core mechanic involves probes that periodically drop bombs toward enemy bases, while defensive lines are structured in multiple layers, requiring strategic placement and resource management. The top and bottom sections of the map include hidden mines, making reckless advances risky. The difficulty is adjustable, catering to both beginners and experienced players, and the gameplay leans toward individual defense missions rather than team play. Scattered bonus resources across the map add depth to resource management and tactical decision-making. Players must strengthen their bases and defensive lines while countering waves of enemies. The map’s atmosphere blends the desolate desert landscape with the mechanical movements of probes, creating a unique appeal. Targeted players are those who enjoy defense-focused and strategic UMS maps, particularly those who prefer individual styles over team-based gameplay. Before playing, it’s crucial to understand the map layout and key defensive points. Practicing timing the probe bomb drops and anticipating enemy attack patterns is essential. The difficulty is set to medium, but as the game progresses, enemy attacks intensify, demanding sustained focus.
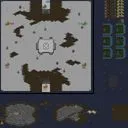
하나의 프로브 3.8 (One Probe 3.8)
One Probe 3.8은 스타크래프트 브루드워의 UMS 맵으로, 맵 제목 그대로 각 플레이어는 하나의 프로브만을 조종하여 상대 프로브를 파괴하는 것이 승리 조건이다. 맵 크기는 4096×4096 타일로 넓지만 실제 전투 구역은 중앙에 마련된 작은 공간으로 제한되어 있어, 프로브의 이동과 공격만이 가능한 순수한 대전 형태를 보여준다. 자원 채집이나 건물 건설은 불가능하며, 프로브의 기본 공격력만으로 싸우므로 타이밍과 위치 선정이 승부를 가른다. 플레이 인원은 최대 6명이며, 팀 구분이 없어 모든 플레이어가 자유 대전을 벌이는 형태다. 라운드가 별도로 존재하지 않고, 한 번의 게임에서 마지막까지 살아남은 프로브가 승자가 된다. 간단한 규칙 덕분에 빠르게 라운드를 restart 할 수 있으며, 짧은 시간에 여러 판을 반복하기에 적합하다. 추천 대상은 스타크래프트의 유닛 특성을 이용한 색다른 미니게임을 즐기고 싶은 유저나, probe 컨트롤 연습을 원하는 초보자이며, 높은 난이도의 전략보다는 반사 신경과 미세 조작이 중요한 플레이를求하는 유저에게 적합하다. 플레이 전에는 맵 설정이 자유 대전인지 확인하고, 동맹이 없으며 프로브만 선택 가능한지 확인해야 한다. 또한 맵이 넓은 만큼 화면 이동에 주의하고, 프로브의 사정거리를 정확히 파악해 상대를 먼저 겨누는 것이 승리의 핵심이다. One Probe 3.8 is a UMS map for StarCraft: Brood War, where, as the title suggests, each player controls only a single probe and must destroy all other probes to win. The map size is 4096×4096 tiles, which is large, but the actual combat area is limited to a small space set up in the center, showing a pure duel format where only probe movement and attack are possible. Resource gathering and building construction are not possible, and fights rely solely on the probe's basic attack, making timing and positioning the key to victory. The map supports up to six players with no team divisions, resulting in a free-for-all battle. There are no separate rounds; the player whose probe survives until the end of a single game is the winner. Thanks to the simple rules, rounds can be restarted quickly, making it suitable for playing multiple matches in a short time. The map is recommended for users who want to enjoy a different kind of mini-game utilizing unit characteristics in StarCraft, or for beginners who wish to practice probe control, rather than high-difficulty strategy, emphasizing reflexes and fine control. Before playing, check that the map is set to free-for-all, that there are no alliances, and that only probes are selectable. Also, because the map is wide, pay attention to screen movement and accurately gauge the probe's attack range to strike the opponent first, which is the key to winning.
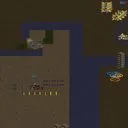
프로브 망할새끼 NEW
프로브 망할새끼 NEW는 사막 타일셋을 배경으로 한 8인용 유즈맵으로, 테란과 프로토스 간 대결을 중심으로 설계된 맵이다. 기본적인 맵 레이아웃은 대칭된 두 진영으로 나뉘며, 각 진영에는 상대측의 프로브 유닛을 효율적으로 제거할 수 있는 좁은 통로와 공격 거점이 배치되어 있다. 게임 시작 직후 양측은 각각의 기지에서 유닛을 생산하고, 제한된 자원 속에서 프로브를 우선적으로 노려야 하는 독특한 목표가 주어진다. 이는 일반적인 메레 전투와는 달리, 프로브를 특정 수 이상 파괴했을 때 승리 조건이 발동되는 방식으로 진행되며, 따라서 일반적인 전투 운영보다 타이밍과 위치 선점이 더 중요해진다. 맵 중앙에는 자원 필드가 sparsely 배치되어 있어, 양측은 자원 확보와 동시에 프로브 사냥을 위한 유닛 배분을 고민해야 한다. 이와 같은 구조는 초보자에게는 프로브의 이동 패턴과 공격 범위를 익히는 좋은 훈련장이 되며, 숙련된 플레이어에게는 미세한 컨트롤과 빠른 결정력을 요구하는 전술적 도전으로 작용한다. 따라서 이 맵은 마이크로 관리 연습을 원하는 테란 유저나, 프로토스 유닛의 약점을 공략하고 싶은 유즈맵 애호가에게 특히 추천한다. 플레이 전에는 맵의 목표 조건이 프로브 파괴 수인지, 제한 시간 있는지 등을 확인하고, 시작 위치를 잘 잡아 초기 병력 배치를 계획하는 것이 승리에 큰 영향을 미친다. 특히 맵의 좁은 통로는 저글링이나 zealot 같은 빠른 유닛이 빠르게 교차할 수 있게 하여, 순간적인 턴 교환과 반격을 즐기는 플레이어에게 적합하다. 또한, 사막 지형의 특성상 시야가 제한되어 있어, 음지와 양지를 오가며 전술을 바꾸는 순간적인 판단력이 승패를 가를 때가 많다. 따라서 이 맵은 짧은 라운드 내에서 빠른 피드백을 원하는 유저에게 적합하며, 팀보다는 개인 실력이 크게 드러나는 모습을 보여준다. Probe Manghalsaekki NEW is an 8-player UMS map set on a desert tileset, designed around a Terran vs. Protoss showdown. The basic map layout splits into two mirrored bases, with each side featuring narrow chokepoints and attack points that allow efficient elimination of the opponent's probe units. Right after the match starts, both sides produce units from their respective bases and are given a unique objective to prioritize probing limited resources. Unlike a standard melee battle, victory is triggered when a certain number of probes are destroyed, making timing and positioning more important than conventional combat execution. The central area contains sparsely placed resource fields, forcing both sides to balance resource gathering with allocating units for probe hunting. This structure serves as a good training ground for beginners to learn probe movement patterns and attack ranges, while challenging experienced players with micro‑control and quick decision‑making tactics. Consequently, this map is especially recommended for Terran players wanting to practice micro management, or for UMS enthusiasts looking to exploit the weaknesses of Protoss units. Before playing, check whether the win condition is based on the number of destroyed probes or a time limit, and plan your initial troop deployment by securing a good starting position, which greatly influences the outcome. Especially, the map’s narrow corridors allow fast units like Zerglings or Zealots to cross quickly, enabling rapid turn exchanges and counterattacks that suit players who enjoy split‑second tactics. Moreover, the desert terrain limits visibility, so shifting tactics between shaded and sunlit areas often demands split‑second judgment that can decide the match. Therefore, the map suits users who want quick feedback in short rounds, highlighting individual skill more than team play.
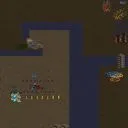
프로브 망할새끼 NEW
프로브 망할새끼 NEW는 스타크래프트 브루드워의 유즈맵으로, 사막 타일셋을 기반으로 한 독특한 맵 구조를 지닌 작품이다. 파일명에서 볼 수 있듯 ‘망프 반값 (외전1)’이라는 부제가 붙어 있어, 기존의 프로브 관련 유즈맵을 변형하거나 확장시킨 형태일 것으로 추정된다. 이 맵은 최대 8인이 동시에 참여할 수 있도록 설계되었으며, 팀 구분이 없어 자유로운 개전 방식이 예상된다. 중심에는 프로브 유닛을 대량으로 생산하거나, 이를 상대방과의 전투 소재로 삼는 트리거가 likely 배치되어 있어, 플레이어는 프로브를 빠르게 늘리면서 자원을 관리하고, 동시에 상대의 프로브를 저지하거나 제거하는 전략을 세워야 할 것이다. 맵 전체가 사막 지형으로 이루어져 있어 시야 확인이 쉽고, 지형적 이점을 활용한 봉쇄나 기습이 가능한 구조로 보이는데, 이는 프로브 특유의 빠른 이동 속도와 결합되어 역동적인 흐름을 만든다. 승리 조건은 명확히 제시되지 않았으나, 일반적으로 이런 유즈맵에서는 특정 수의 프로브를 먼저 파괴하거나, 일정 시간 내에 생존하는 쪽이 승리하는 형태가 많다. 따라서 플레이어는 초반에 프로브 생산 건물을 효율적으로 배치하고, 후반에는 업그레이드나 특수 능력을 활용해 전투력을 높이는 것이 관건이다. 이 맵은 프로브 마이크로컨트롤에 관심이 있는 유저나, 비정상적인 유즈맵을 통해 새로운 전략을 실험해보고 싶은 고인 물 플레이어에게 적합하며, 8인 자유전이라는 점에서 대규모 혼란 속에서도 개인 실력을 발휘할 수 있는 기회를 제공한다. 플레이 전에는 맵의 트리거가 정상 작동하는지 확인하고, 필요 시 최신 버전의 패치를 적용하는 것이 좋다. Probe Manghal Saekki NEW is a StarCraft: Brood War UMS map built on a desert tileset, featuring a unique layout. The file name includes the subtitle "망프 반값 (외전1)", suggesting it is a modified or expanded version of existing probe‑related UMS maps. Designed for up to eight players with no team divisions, the map likely encourages free‑for‑all combat. Central to the gameplay are triggers that probably mass‑produce probe units or use them as combat material, requiring players to quickly expand their probe count while managing resources and devising strategies to block or destroy opponents’ probes. The entirely desert terrain offers clear visibility and opportunities for choke points or ambushes, which, combined with the probe’s inherent speed, creates a dynamic flow. Victory conditions are not explicitly stated, but similar UMS maps often reward the side that destroys a set number of probes first or survives the longest within a time limit. Hence, early efficient placement of probe‑producing structures and later use of upgrades or special abilities are key to success. This map suits players interested in probe micro‑control or those wanting to experiment with unconventional UMS strategies, and the eight‑player free‑for‑all format provides a chance to showcase individual skill amid large‑scale chaos. Before playing, verify that the map’s triggers work correctly and apply the latest patch if needed.
最近登録されたマップ
新たに追加されたファイルとバージョンをご確認ください。
프로브 망할새끼 NEW
프로브 망할새끼 NEW는 스타크래프트 브루드워의 유즈맵으로, 사막 타일셋을 기반으로 한 독특한 맵 구조를 지닌 작품이다. 파일명에서 볼 수 있듯 ‘망프 반값 (외전1)’이라는 부제가 붙어 있어, 기존의 프로브 관련 유즈맵을 변형하거나 확장시킨 형태일 것으로 추정된다. 이 맵은 최대 8인이 동시에 참여할 수 있도록 설계되었으며, 팀 구분이 없어 자유로운 개전 방식이 예상된다. 중심에는 프로브 유닛을 대량으로 생산하거나, 이를 상대방과의 전투 소재로 삼는 트리거가 likely 배치되어 있어, 플레이어는 프로브를 빠르게 늘리면서 자원을 관리하고, 동시에 상대의 프로브를 저지하거나 제거하는 전략을 세워야 할 것이다. 맵 전체가 사막 지형으로 이루어져 있어 시야 확인이 쉽고, 지형적 이점을 활용한 봉쇄나 기습이 가능한 구조로 보이는데, 이는 프로브 특유의 빠른 이동 속도와 결합되어 역동적인 흐름을 만든다. 승리 조건은 명확히 제시되지 않았으나, 일반적으로 이런 유즈맵에서는 특정 수의 프로브를 먼저 파괴하거나, 일정 시간 내에 생존하는 쪽이 승리하는 형태가 많다. 따라서 플레이어는 초반에 프로브 생산 건물을 효율적으로 배치하고, 후반에는 업그레이드나 특수 능력을 활용해 전투력을 높이는 것이 관건이다. 이 맵은 프로브 마이크로컨트롤에 관심이 있는 유저나, 비정상적인 유즈맵을 통해 새로운 전략을 실험해보고 싶은 고인 물 플레이어에게 적합하며, 8인 자유전이라는 점에서 대규모 혼란 속에서도 개인 실력을 발휘할 수 있는 기회를 제공한다. 플레이 전에는 맵의 트리거가 정상 작동하는지 확인하고, 필요 시 최신 버전의 패치를 적용하는 것이 좋다. Probe Manghal Saekki NEW is a StarCraft: Brood War UMS map built on a desert tileset, featuring a unique layout. The file name includes the subtitle "망프 반값 (외전1)", suggesting it is a modified or expanded version of existing probe‑related UMS maps. Designed for up to eight players with no team divisions, the map likely encourages free‑for‑all combat. Central to the gameplay are triggers that probably mass‑produce probe units or use them as combat material, requiring players to quickly expand their probe count while managing resources and devising strategies to block or destroy opponents’ probes. The entirely desert terrain offers clear visibility and opportunities for choke points or ambushes, which, combined with the probe’s inherent speed, creates a dynamic flow. Victory conditions are not explicitly stated, but similar UMS maps often reward the side that destroys a set number of probes first or survives the longest within a time limit. Hence, early efficient placement of probe‑producing structures and later use of upgrades or special abilities are key to success. This map suits players interested in probe micro‑control or those wanting to experiment with unconventional UMS strategies, and the eight‑player free‑for‑all format provides a chance to showcase individual skill amid large‑scale chaos. Before playing, verify that the map’s triggers work correctly and apply the latest patch if needed.
프로브 망할새끼 NEW
프로브 망할새끼 NEW는 사막 타일셋을 배경으로 한 8인용 유즈맵으로, 테란과 프로토스 간 대결을 중심으로 설계된 맵이다. 기본적인 맵 레이아웃은 대칭된 두 진영으로 나뉘며, 각 진영에는 상대측의 프로브 유닛을 효율적으로 제거할 수 있는 좁은 통로와 공격 거점이 배치되어 있다. 게임 시작 직후 양측은 각각의 기지에서 유닛을 생산하고, 제한된 자원 속에서 프로브를 우선적으로 노려야 하는 독특한 목표가 주어진다. 이는 일반적인 메레 전투와는 달리, 프로브를 특정 수 이상 파괴했을 때 승리 조건이 발동되는 방식으로 진행되며, 따라서 일반적인 전투 운영보다 타이밍과 위치 선점이 더 중요해진다. 맵 중앙에는 자원 필드가 sparsely 배치되어 있어, 양측은 자원 확보와 동시에 프로브 사냥을 위한 유닛 배분을 고민해야 한다. 이와 같은 구조는 초보자에게는 프로브의 이동 패턴과 공격 범위를 익히는 좋은 훈련장이 되며, 숙련된 플레이어에게는 미세한 컨트롤과 빠른 결정력을 요구하는 전술적 도전으로 작용한다. 따라서 이 맵은 마이크로 관리 연습을 원하는 테란 유저나, 프로토스 유닛의 약점을 공략하고 싶은 유즈맵 애호가에게 특히 추천한다. 플레이 전에는 맵의 목표 조건이 프로브 파괴 수인지, 제한 시간 있는지 등을 확인하고, 시작 위치를 잘 잡아 초기 병력 배치를 계획하는 것이 승리에 큰 영향을 미친다. 특히 맵의 좁은 통로는 저글링이나 zealot 같은 빠른 유닛이 빠르게 교차할 수 있게 하여, 순간적인 턴 교환과 반격을 즐기는 플레이어에게 적합하다. 또한, 사막 지형의 특성상 시야가 제한되어 있어, 음지와 양지를 오가며 전술을 바꾸는 순간적인 판단력이 승패를 가를 때가 많다. 따라서 이 맵은 짧은 라운드 내에서 빠른 피드백을 원하는 유저에게 적합하며, 팀보다는 개인 실력이 크게 드러나는 모습을 보여준다. Probe Manghalsaekki NEW is an 8-player UMS map set on a desert tileset, designed around a Terran vs. Protoss showdown. The basic map layout splits into two mirrored bases, with each side featuring narrow chokepoints and attack points that allow efficient elimination of the opponent's probe units. Right after the match starts, both sides produce units from their respective bases and are given a unique objective to prioritize probing limited resources. Unlike a standard melee battle, victory is triggered when a certain number of probes are destroyed, making timing and positioning more important than conventional combat execution. The central area contains sparsely placed resource fields, forcing both sides to balance resource gathering with allocating units for probe hunting. This structure serves as a good training ground for beginners to learn probe movement patterns and attack ranges, while challenging experienced players with micro‑control and quick decision‑making tactics. Consequently, this map is especially recommended for Terran players wanting to practice micro management, or for UMS enthusiasts looking to exploit the weaknesses of Protoss units. Before playing, check whether the win condition is based on the number of destroyed probes or a time limit, and plan your initial troop deployment by securing a good starting position, which greatly influences the outcome. Especially, the map’s narrow corridors allow fast units like Zerglings or Zealots to cross quickly, enabling rapid turn exchanges and counterattacks that suit players who enjoy split‑second tactics. Moreover, the desert terrain limits visibility, so shifting tactics between shaded and sunlit areas often demands split‑second judgment that can decide the match. Therefore, the map suits users who want quick feedback in short rounds, highlighting individual skill more than team play.
하나의 프로브 3.8 (One Probe 3.8)
One Probe 3.8은 스타크래프트 브루드워의 UMS 맵으로, 맵 제목 그대로 각 플레이어는 하나의 프로브만을 조종하여 상대 프로브를 파괴하는 것이 승리 조건이다. 맵 크기는 4096×4096 타일로 넓지만 실제 전투 구역은 중앙에 마련된 작은 공간으로 제한되어 있어, 프로브의 이동과 공격만이 가능한 순수한 대전 형태를 보여준다. 자원 채집이나 건물 건설은 불가능하며, 프로브의 기본 공격력만으로 싸우므로 타이밍과 위치 선정이 승부를 가른다. 플레이 인원은 최대 6명이며, 팀 구분이 없어 모든 플레이어가 자유 대전을 벌이는 형태다. 라운드가 별도로 존재하지 않고, 한 번의 게임에서 마지막까지 살아남은 프로브가 승자가 된다. 간단한 규칙 덕분에 빠르게 라운드를 restart 할 수 있으며, 짧은 시간에 여러 판을 반복하기에 적합하다. 추천 대상은 스타크래프트의 유닛 특성을 이용한 색다른 미니게임을 즐기고 싶은 유저나, probe 컨트롤 연습을 원하는 초보자이며, 높은 난이도의 전략보다는 반사 신경과 미세 조작이 중요한 플레이를求하는 유저에게 적합하다. 플레이 전에는 맵 설정이 자유 대전인지 확인하고, 동맹이 없으며 프로브만 선택 가능한지 확인해야 한다. 또한 맵이 넓은 만큼 화면 이동에 주의하고, 프로브의 사정거리를 정확히 파악해 상대를 먼저 겨누는 것이 승리의 핵심이다. One Probe 3.8 is a UMS map for StarCraft: Brood War, where, as the title suggests, each player controls only a single probe and must destroy all other probes to win. The map size is 4096×4096 tiles, which is large, but the actual combat area is limited to a small space set up in the center, showing a pure duel format where only probe movement and attack are possible. Resource gathering and building construction are not possible, and fights rely solely on the probe's basic attack, making timing and positioning the key to victory. The map supports up to six players with no team divisions, resulting in a free-for-all battle. There are no separate rounds; the player whose probe survives until the end of a single game is the winner. Thanks to the simple rules, rounds can be restarted quickly, making it suitable for playing multiple matches in a short time. The map is recommended for users who want to enjoy a different kind of mini-game utilizing unit characteristics in StarCraft, or for beginners who wish to practice probe control, rather than high-difficulty strategy, emphasizing reflexes and fine control. Before playing, check that the map is set to free-for-all, that there are no alliances, and that only probes are selectable. Also, because the map is wide, pay attention to screen movement and accurately gauge the probe's attack range to strike the opponent first, which is the key to winning.
스폰 디펜스 5.85.1 (Spawn Defense 5.85.1)
스타크래프트 브루드워 유즈맵 '스폰 디펜스 5.85.1'은 사막 타일셋을 배경으로 최대 6인이 협력해 밀려오는 적 웨이브를 막아내는 디펜스 장르 맵이다. 내부 설명에 따르면 버그 수정과 난이도 상향이 적용된 논-인피니트 버전이며, 핸디캡 조절 기능과 추가 프로브, 생명력 증가 옵션이 포함되어 있어 초보자부터 숙련자까지 난이도를 유연하게 맞출 수 있다. 플레이어는 시작 지점에서 프로브를 활용해 방어 시설을 건설하거나 유닛을 생산하며, 주기적으로 생성되는 적 병력을 막아내야 한다. 맵 크기 96x128 타일은 넉넉한 건설 공간을 제공하며, 사막 지형의 개방적인 시야는 적 이동 경로를 예측하기 용이하다. 진행 방식은 웨이브 단위로 구성되어 있으며, 각 웨이브 사이 짧은 정비 시간에 자원 관리와 업그레이드, 배치 조정이 이루어진다. 핸디캡 시스템 덕분에 인원 수나 실력 차이에 따른 밸런스 조절이 가능해 솔로 플레이부터 6인 풀파티까지 폭넓게 즐길 수 있다. 추천 대상은 디펜스 장르 입문자, 협동 전략을 선호하는 유저, 그리고 고전 맵의 변형 버전을 체험하고 싶은 올드 유저다. 플레이 전 확인할 점은 버전 표기(5.85.1)가 최신인지, 핸디캡 설정이 의도한 난이도와 맞는지, 그리고 팀원 간 역할 분담(건설, 전투, 자원)을 미리 정하는 것이다. 맵의 핵심 재미는 제한된 자원 안에서 효율적인 방어 라인을 구축하고, 갑작스러운 대형 유닛 출현에 대응하는 긴장감에 있다. 프로브 한 기로 시작해 넥서스와 관문, 포톤 캐논 등을 단계적으로 늘려가는 성장 곡선이 뚜렷하며, 웨이브가 거듭될수록 적 조합이 다양해져 유닛 상성 이해가 중요해진다. 핸디캡 옵션은 적 체력 배율, 웨이브 간격, 초기 자원 등을 세밀하게 조절할 수 있어 반복 플레이 시 새로운 도전이 가능하다. 다만, 맵 설명에 등장하는 'Delta)zC(A' 같은 코드성 문구는 트리거 내부 주석으로 보이며 실제 플레이에는 영향을 주지 않는다. 멀티플레이 시 랙 방지를 위해 그래픽 옵션을 낮추고, 관전자 슬롯을 비워두는 것이 안정적이다. StarCraft Brood War UMS map 'Spawn Defense 5.85.1' is a defense genre map set on a desert tileset where up to six players cooperate to fend off incoming enemy waves. According to the internal description, this non-infinite version includes bug fixes, increased difficulty, adjustable handicap options, an extra probe, and bonus lives, allowing flexible difficulty scaling from beginners to veterans. Players start with a probe to construct defensive structures or produce units, holding off periodically spawned enemy forces. The 96x128 tile map provides ample building space, and the open desert terrain makes it easy to predict enemy paths. Gameplay proceeds in waves, with brief intermissions for resource management, upgrades, and repositioning. The handicap system enables balance adjustments for player count or skill gaps, making solo to full 6‑player parties viable. Recommended for defense newcomers, co‑op strategy fans, and old‑school players wanting to experience a classic variant. Before playing, verify the version (5.85.1) is current, ensure handicap settings match the intended challenge, and assign roles (building, combat, economy) among teammates. The core fun lies in building efficient defense lines with limited resources and reacting to sudden heavy‑unit spawns. Starting from a single probe, the growth curve through Nexuses, Gateways, and Photon Cannons is clear, and enemy compositions diversify wave by wave, demanding unit‑counter knowledge. Handicap options fine‑tune enemy health multipliers, wave intervals, and starting resources, offering fresh challenges on repeat plays. The cryptic string 'Delta)zC(A' in the description appears to be a trigger comment and does not affect gameplay. For stable multiplayer, lower graphics settings and leave observer slots empty to reduce lag.
러커 D 18웨이 ~=FINAL=~ (Lurker D 18 Way ~=FINAL=~)
스타크래프트 브루드워의 유즈맵 중 하나로, 프로브를 조종해 광물을 채취하는 독특한 플레이 방식이 돋보이는 ‘러커 D 18 웨이 ~=FINAL=~’는 6인용 맵으로 구성되어 있다. 맵의 이름은 ‘러커’와 ‘D 18’이 조합되어 있으며, ‘웨이’라는 단어는 ‘길’이란 뜻으로, 플레이어가 다양한 경로를 통해 광물을 확보할 수 있도록 설계되었음을 시사한다. 특히 ‘FINAL’이라는 표기는 이 버전이 개발의 최종 단계에 도달했음을 강조하며, 프로브의 광물 채취와 30초 단위의 짧은 라운드가 특징적이다. 내부 설명에서 ‘Modified Version by TerrorMarine&Altarian’이 언급되며, 이 맵이 커뮤니티에 의해 개선된 버전임을 알 수 있다. 이 맵은 프로브를 조종해 광물을 채취하는 동시에, ‘30 Second Rounds’라는 설명에서 알 수 있듯이 짧은 시간 안에 최대한 많은 광물을 확보하는 것이 목표인 것으로 보인다. ‘Upgrades to 255’라는 문구는 광물 채취나 업그레이드 시스템이 최대 255단계까지 존재할 가능성을 시사하며, 이는 플레이어들에게 긴장감을 더하는 요소로 작용할 수 있다. 맵의 디자인상으로는 황무지 타일셋을 활용해 황량한 분위기를 연출하며, 넓은 공간을 활용한 광물 분배와 러커(Lurker)가 등장하는 등 전략적 요소가 포함된 것으로 추정된다. 플레이어는 프로브를 통해 광물을 확보하는 동시에, 맵 곳곳에 배치된 광물이나 추가 자원을 확보하기 위해 경쟁하거나 협력할 수 있다. 짧은 라운드와 최대 255단계의 업그레이드 시스템은 반복적인 플레이와 전략적 선택을 요구하며, 이는 초보자와 숙련자 모두에게 흥미로운 도전 과제를 제공할 수 있다. 특히 광물 채취가 메인 포인트인 만큼, 광물의 배치와 프로브의 이동 경로가 중요하며, 이는 맵을 여러 번 플레이하며 최적의 전략을 찾는 재미가 있다. 이 맵은 프로브를 조종하는 독특한 gameplay와 짧은 라운드, 높은 업그레이드 단계가 특징으로, 프로브를 조종하는 재미와 전략적 선택을 좋아하는 플레이어들에게 추천할 만하다. 또한, ‘FINAL’이라는 표기는 개발의 완료를 의미하므로, 안정적인 플레이가 가능한 버전으로 판단된다. 다만, 광물 채취에만 집중된 게임플레이이기 때문에, 다양한 전략적 요소를 선호하는 플레이어에게는 다소 아쉬울 수 있다. This Brood War custom map, ‘Lurker D 18 Way ~=FINAL=~’, stands out for its unique gameplay centered around controlling Probes to harvest minerals. Designed for 6 players, the map’s name hints at multiple pathways (D 18 Way) and features a ‘FINAL’ designation, suggesting this is a polished, finalized version. The description mentions modifications by TerrorMarine & Altarian, indicating community-driven improvements. The core mechanic revolves around harvesting minerals within 30-second rounds, with an upgrade system that potentially scales up to 255 stages. The use of the Terran wasteland tileset creates a barren, strategic environment, while the presence of Lurkers adds a layer of tactical depth. Players must navigate the map to secure minerals efficiently, balancing speed and resource management. The short rounds and high upgrade ceiling encourage repeated play, rewarding players who refine their strategies over time. The map’s design emphasizes mineral distribution and Probe mobility, making it ideal for those who enjoy resource-focused gameplay. While the mechanics are straightforward, the depth lies in optimizing Probe routes and upgrade investments. Recommended for fans of Probe-centric custom maps, this title offers a fresh take on mineral harvesting with its rapid rounds and extensive upgrade potential. However, players seeking complex multi-faction strategies may find the focus too narrow. Overall, it’s a solid choice for those looking to test their efficiency in a compact, high-stakes environment.
루커 D 18 웨이 FINAL HARD (Lurker D 18 Way FINAL HARD)
스타크래프트 브루드워의 유즈맵 중 하나로, ‘Lurker D 18 Way FINAL HARD’는 다중 지뢰와 프로브를 활용한Resource Management(자원 관리)형 디펜스 맵으로 주목받고 있다. 맵의 중앙에는 거대한 둥근 성역이 자리하고 있으며, 그 주변을 따라 18개의 지뢰가 배치되어 있는데, 이 지뢰들은 일정 시간마다 자동으로 보급되는 프로브를 통해 추가 자원을 확보할 수 있는 구조로 설계되어 있다. 플레이어는 이 자원을 활용해 업그레이드와 방어 시설을 강화해야 하는데, 특히 30초 단위의 라운드가 지나면서 자원 확보 속도가 빨라지며, 업그레이드 한도가 255까지 허용되어 långvarig(장기적인) 전략 구사가 가능하다. 공격을 받기 전까지는 비교적 안정적인 자원 수급이 가능하지만, 방어선을 구축하지 못하면 순식간에 자원이 고갈되어 게임이 어렵게 전개될 수 있다. 맵의 난이도는 ‘HARD’로 명시되어 있지만, 자원 관리와 타이밍 감각이 뛰어난 플레이어라면 충분히 극복할 수 있는 수준으로 보인다. 또한, 맵의 규모는 4096x4096의 넓은 공간을 자랑하며, 황무지 타일셋을 기반으로 한 황량한 분위기가 전체적인 플레이感(감)을 더해준다. 이 맵은 특히Resource Management(자원 관리)와Defense(방어) 요소가 결합된 하이브리드 스타일의 유즈맵으로, 초보자와 숙련자 모두에게 흥미로운 도전을 제공할 것으로 예상된다. 플레이를 시작하기 전에는 자원 확보 루틴과 방어 시설의 배치 타이밍을 충분히 숙지하는 것이 중요하다. This StarCraft: Brood War custom map, ‘Lurker D 18 Way FINAL HARD’, stands out as a Resource Management defense title where players must strategically handle multiple mines and Probes. The map features a central circular zone surrounded by 18 mines, which can be upgraded and supplied with resources through Probes that appear at regular intervals. Players earn resources that can be invested in upgrades, with the cap set at 255, allowing for long-term strategic planning as rounds progress every 30 seconds. While the map starts with steady income, neglecting defense lines can quickly deplete resources and escalate difficulty. Although labeled ‘HARD’, the challenge is balanced for players with strong resource management and timing skills. The 4096x4096 map size, set in a barren wasteland tile, adds to the immersive experience. This hybrid custom map blends Resource Management and Defense mechanics, offering engaging gameplay for both beginners and veterans. Prior to playing, familiarizing oneself with resource income patterns and optimal defense setups is crucial for success.
폭격수 프로브 V2.0 (BOMBER PROBE V2.0)
스타크래프트 브루드워의 유즈맵인 <BOMBER PROBE V2.0>은 7명의 플레이어가 참여하는 컴까기 스타일의 디펜스 맵이다. 맵의 중앙에는 거대한 크레이터가 위치해 있으며, 주변으로는 사막 타일셋으로 꾸며진 방어 지점이 배치되어 있다. 플레이어는 각자의 베이스에서 시작해 끊임없이 몰려오는 적의 공세를 방어해야 한다. 맵의 특징은 '프로브' 유닛을 중심으로 한 공격과 방어 시스템으로, 프로브가 일정 시간마다 적의 기지를 향해 폭탄을 투하하는 구조로 보인다. 방어선은 여러 층으로 구성되어 있어 전략적인 배치와 리소스 관리가 중요하며, 적의 공격 패턴이 시간에 따라 변화하는 것으로 추정된다. 특히 맵의 상단과 하단에는 지뢰가 설치되어 있어 무작정 전진하기 힘든 요소도 포함되어 있다. 이 맵은 초보부터 숙련자까지 즐길 수 있도록 난이도가 조절 가능하며, 팀 플레이보다는 개인별로 방어 임무를 수행하는 방식으로 진행되는 것으로 보인다. 또한, 맵 곳곳에 숨겨진 보너스 자원이 배치되어 있어 자원 관리와 전술적 선택이 승패를 좌우할 수 있다. 플레이어는 자신의 베이스와 방어선을 강화하며, 끊임없이 쏟아지는 적의 공세를 막아내야 한다. 맵의 분위기는 사막의 황량한 풍경과 프로브의 기계적인 움직임이 어우러져 독특한 매력을 자아낸다. 추천 대상은 스타크래프트의 유즈맵을 любители 방어와 전략적인 플레이를 즐기는 플레이어들로, 팀플보다는 개인 플레이에 가까운 스타일을 선호하는 유저들에게 알맞다. 플레이 전에는 맵의 구조와 방어선의 중요 포인트를 숙지하는 것이 좋다. 또한, 프로브의 폭탄 투하 타이밍과 적의 공격 패턴을 미리 예측하는 연습이 필요하다. 맵의 난이도는 보통 수준으로 설정되어 있지만, 후반부로 갈수록 적의 공격이 치열해지므로 집중력을 유지해야 한다. Bomber Probe V2.0 is a UMS-style defense map in StarCraft: Brood War designed for 7 players, featuring a probe-based attack and defense system. The map centers around a large crater surrounded by defensive positions in a desert tile set. Players start at their bases and must fend off relentless enemy assaults. The core mechanic involves probes that periodically drop bombs toward enemy bases, while defensive lines are structured in multiple layers, requiring strategic placement and resource management. The top and bottom sections of the map include hidden mines, making reckless advances risky. The difficulty is adjustable, catering to both beginners and experienced players, and the gameplay leans toward individual defense missions rather than team play. Scattered bonus resources across the map add depth to resource management and tactical decision-making. Players must strengthen their bases and defensive lines while countering waves of enemies. The map’s atmosphere blends the desolate desert landscape with the mechanical movements of probes, creating a unique appeal. Targeted players are those who enjoy defense-focused and strategic UMS maps, particularly those who prefer individual styles over team-based gameplay. Before playing, it’s crucial to understand the map layout and key defensive points. Practicing timing the probe bomb drops and anticipating enemy attack patterns is essential. The difficulty is set to medium, but as the game progresses, enemy attacks intensify, demanding sustained focus.
BOMBER PROBE V2.0
스타크래프트 브루드워 유즈맵 '봄버 프로브 V2.0'은 프로브를 조종해 폭탄을 설치하고 상대를 처치하는 아케이드 스타일의 미니게임 맵이다. 최대 7인까지 참여 가능하며, 사막 타일셋 위에서 진행된다. 제목 그대로 프로브가 폭탄을 다루는 '봄버맨' 방식의 플레이가 핵심으로, 좁은 통로와 장애물 사이를 누비며 타이밍 좋게 폭탄을 놓고 피하는 순발력과 심리전이 승부를 가른다. V2.0 표기로 보아 기존 버전에서 밸런스나 맵 구조가 개선된 것으로 보이며, 제작자 'EL-DUDREDGREENYELLOW'의 네이밍이 확인된다. 별도의 트리거나 복잡한 시스템 없이 직관적인 조작만으로 즐길 수 있어 초보자도 쉽게 접근 가능하다. 7인 프리포올 또는 팀전으로 가볍게 즐기기 좋은 파티 게임 성격이 강하며, 짧은 라운드 단위로 반복 플레이하기에 적합하다. 맵은 대칭형 구조로 보이며, 폭탄 설치 후 일정 시간 뒤 폭발해 범위 안의 유닛을 즉사시킨다. 프로브 외에 다른 유닛이나 자원 요소는 없다. 플레이 전에는 맵 옵션에서 승리 조건(최후의 1인 또는 팀 승리) 및 폭탄 데미지, 쿨타임 설정 등을 확인하는 것이 좋다. 밀리 실력과 무관하게 누구나 부담 없이 즐길 수 있는 캐주얼 유즈맵으로 추천한다. StarCraft Brood War UMS map 'Bomber Probe V2.0' is an arcade-style mini-game where players control Probes to plant bombs and eliminate opponents. Up to 7 players can participate on a desert tileset. True to its name, the core gameplay follows a 'Bomberman' style with Probes handling bombs, requiring quick reflexes and mind games as players maneuver through narrow corridors and obstacles to place and dodge bombs. The V2.0 designation suggests balance or structural improvements over a previous version, and the creator 'EL-DUDREDGREENYELLOW' is credited. With no complex triggers or systems, intuitive controls make it accessible to beginners. It suits free-for-all or team play for 7 players, offering a party-game feel with short rounds ideal for repeated matches. The map appears symmetrically structured; bombs detonate after a delay, instantly killing units in range. No units other than Probes or resource mechanics exist. Before playing, check map options for victory conditions (last man/team standing), bomb damage, and cooldown settings. Recommended as a casual UMS map enjoyable regardless of melee skill.
マップ選択ガイド
태그는 맵의 핵심 특징을 빠르게 설명하지만 제작 버전마다 규칙이 다를 수 있습니다. 상세 설명에서 권장 인원, 난이도, 플레이 시간과 버전을 함께 확인한 뒤 다운로드하세요.