
컴퓨터 против スタークラフト マップコレクション
「컴퓨터 против」タグが登録されたマップを集めました。ジャンルだけでは見つけにくいプレイ方式、難易度、特徴を中心に、人気のマップと最新マップを比較してみてください。
- 登録マップ
- 4個
- 累計ダウンロード
- 2
- 累計閲覧
- 586
人気マップ
ダウンロードと閲覧の反応が高いマップです。
컴까기 5대2 화이트스톤 (WhiteStone 5vs2)
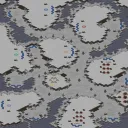
‘컴까기 5대2 화이트스톤’은 스타크래프트: 브루드워의 유즈맵 중에서도 컴퓨터 상대 디펜스 장르에 속하는 맵으로, 플레이어는 총 5명의 유닛으로 2명의 적 컴퓨터를 상대하는 전투를 진행한다. 맵의 이름은 ‘화이트스톤’이란 지역을 배경으로 하며, 빨간색 업그레이드 버튼이 특징적으로 배치된 구조를 가지고 있다. 이미지에서 확인되는 중앙 지역은 넓은 평지 형태로, 각 플레이어의 시작 지점은 맵의 상단과 하단에 나뉘어 배치되어 있으며, 적 컴퓨터의 본진은 맵의 중앙에 위치한 것으로 추정된다. 맵의 테두리에는 숲 지형이 둘러싸고 있어 외부 침입을 막는 구조로 보이며, 중앙 평지 주변으로는 언덕 지형과 좁은 통로가 있는 것으로 보인다. 이러한 지형적 특징은 적의 공격을 방어하거나, 유닛을 효율적으로 배치하는 전략적 요소를 제공할 것으로 예상된다. 이 맵의 핵심은 적 컴퓨터의 끊임없는 공격을 방어하면서 본진을 지켜내는 데 있으며, 5명의 유닛을 조합하여 적절히 배치하고 업그레이드를 통해 전투력을 강화해야 한다. 맵의 구조상 중앙 평지가 주요 전투가 벌어지는 곳이 될 가능성이 높으며, 언덕이나 좁은 통로를 활용하여 적의 접근을 제어하는 전략이 중요할 것으로 보인다. 또한, 빨간색 업그레이드 버튼이 맵 곳곳에 배치되어 있어, 이를 적극적으로 활용하여 유닛의 능력을 강화하는 것이 승리 조건에 큰 영향을 미칠 것으로 예상된다. 이 맵은 초보자들은 물론, 디펜스 장르에 익숙한 플레이어들에게도 흥미로운 도전 과제가 될 수 있다. 적의 공격 패턴을 분석하고, 유닛의 조합과 업그레이드를 전략적으로 계획하는 능력이 요구된다. 또한, 맵의 구조상 좁은 통로나 언덕을 활용한 방어 전략, 또는 유닛의 이동 경로를 고려한 배치 등이 중요해, 단순히 유닛을 생산하는 것만으로는 승리를 장담할 수 없을 것이다. 따라서, 이 맵을 플레이하기 전에는 맵의 구조와 적의 공격 패턴을 충분히 숙지하고, 유닛의 조합과 업그레이드 전략을 미리 계획하는 것이 바람직하다. 추천 대상은 디펜스 장르와 컴퓨터 상대 전투를 즐기는 플레이어들이며, 특히 5대2라는 인원 대비 적의 수에서 오는 긴장감과 전략적 깊이가 매력적으로 느껴질 수 있다. 또한, 맵의 구조와 업그레이드 시스템을 활용하여 다양한 전략을 시도해 보고 싶은 플레이어들에게도 추천할 만한 맵이다. "White Stone" in *Competitive 5 vs. 2* is a user-made defense map in *StarCraft: Brood War*, where players control five units against two enemy AI opponents. The map is set in the "White Stone" region, featuring distinctive red upgrade buttons scattered throughout. The central area, visible in the image, is a vast open plain, with player starting positions divided between the top and bottom of the map. The enemy bases are likely located near the center. The map is bordered by forest terrain, acting as a natural barrier against external assaults. Around the central plain, there are hills and narrow pathways, offering strategic advantages for defense or unit positioning. These terrain features allow players to control enemy movements or optimize unit placement effectively. The core objective is to defend your base from the AI’s relentless waves of attacks while managing five units efficiently. Upgrading units and strategically positioning them—especially around the central battlefield—will be crucial. Leveraging hills and narrow paths to restrict enemy access can turn the tide of battle. Additionally, the red upgrade buttons scattered across the map play a key role in enhancing unit capabilities, directly influencing your chances of victory. This map offers a challenging yet engaging experience for both beginners and experienced defense-map players. Success depends on analyzing enemy attack patterns, planning unit combinations and upgrades, and using the terrain wisely—such as utilizing narrow corridors or elevated positions. Simply producing units without a solid strategy won’t guarantee a win, so understanding the map layout and enemy behavior is essential before diving in. Recommended for players who enjoy defense-style maps and AI combat, this map’s 5 vs. 2 setup delivers intense pressure and deep strategic gameplay. Its structure and upgrade system also encourage experimentation with different tactics, making it a great choice for those looking to test their skills.
그레이트 리프트 밸리 (Great Rift Valley)
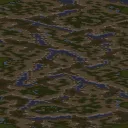
스타크래프트 브루드워의 유즈맵으로 유명한 <그레이트 리프트 밸리(Great Rift Valley)>는 광활한 사막 지형이 펼쳐진 맵으로, 화려한 지형과 독특한 지형 디자인으로 플레이어에게 강렬한 인상을 남기는 디펜스형 유즈맵이다. 맵의 이름은 ‘위대한 협곡’으로 번역할 수 있으며, 내부 맵 설명에서 ‘수천 명의 피가 흐르고 수백만의 영혼이 실려 있다’는 문구로 보아 중후한 스토리나 분위기를 지녔을 것으로 추정된다. 맵의 전체 크기는 4096x8192로 매우 넓은 영역을 차지하고 있어, 넓은 시야와 전략적 움직임이 중요한 맵으로 보인다. 사막 타일셋을 기반으로 한 맵 디자인은 건조하고 황량한 분위기를 자아내며, 협곡やは谷地形이 인상적으로 표현되어 있다. 플레이어는 이 넓은 공간에서 자원 확보와 방어 전략을 동시에 고려해야 하는 구조로 보인다. 맵의 분위기는 중세 전쟁이나 사막 전투를 연상시키며, 디펜스 요소가 강하게 느껴진다. 제공된 메타데이터 상으로는 밀리 분류로 되어 있지만, 실제로는 유즈맵 디펜스 또는 컴퓨터 상대 디펜스(컴까기) 형식으로 제작되었을 가능성이 크다. 넓은 공간과 협곡 지형은 대규모 병력 이동과 방어 포인트 설정을 요구하며, 특히 협곡을 따라 적의 진격을 막아야 하는 구조가 예상된다. 플레이어는 협곡을 중심으로한 방어선 구축과 자원 관리, 적절한 유닛 생산 및 배치를 통해 승리를 노리게 될 것이다. 이 맵의 특징 중 하나는 넓은 맵 크기와 사막 지형으로 인한 시야 확보의 중요성인데, 협곡을 따라 펼쳐진 넓은 평원과 협곡 내부의 좁은 통로 등은 전략적 요충지로 작용할 가능성이 높다. 또한, 넓은 맵에서는 자원 분포가 중요하며, 자원 멀미를 방지하기 위한 효율적인 자원 채취 경로 설계가 필수적일 것이다. 맵의 디자인과 구조상 초보자보다는 중급 이상의 플레이어에게 적합할 것으로 보이며, 넓은 공간을 활용한 다각적인 전략과 방어 라인 구축이 요구된다. 특히 협곡을 중심으로한 방어 라인은 이 맵의 핵심 전략 포인트로 작용할 가능성이 높다. 또한, 넓은 맵에서는 유닛의 이동 경로와 시야 확보가 중요하므로, 시야 확보를 위한 센서 유닛이나 정찰 유닛의 활용도 전략적 관점에서 중요할 것이다. 이 맵은 디펜스 요소 외에도 넓은 공간을 활용한 기동전과Resource management가 결합된 복합적인 전략이 요구되는 맵으로 보인다. 특히, 협곡을 따라 적을 유인하여 방어하는 전략과 함께, 협곡 외부의 넓은 평원에서 자원을 확보하고 병력을 생산하는 균형 잡힌 플레이가 중요할 것이다. 맵의 분위기와 디자인, 넓은 공간은 플레이어에게 긴장감과 전략적 깊이를 제공하며, 다양한 플레이 스타일을 요구하는 유즈맵으로 평가된다. 특히, 넓은 맵에서의Resource management와 방어 전략의 조합은 이 맵의 가장 큰 특징으로 보인다. The *Great Rift Valley* is a renowned custom map from *StarCraft: Brood War*, celebrated for its vast desert terrain. With its striking landscapes and unique design, it leaves a strong impression as a defense-focused custom game. Translated as "Great Canyon," the map’s internal description—"thousands of lives have flowed here, millions of souls have passed"—suggests a rich narrative or atmosphere. Spanning 4096x8192 in size, the map occupies a massive area, emphasizing wide visibility and strategic movement. Its desert-themed tileset evokes a dry, desolate mood, while the canyon and valley terrain stand out vividly. Players must balance resource gathering with defensive tactics across this expansive space. The atmosphere evokes medieval warfare or desert battles, with a strong defensive emphasis. Though classified as a melee map in metadata, it likely functions as a custom defense or AI defense (*compkagi*) mode. The vast space and canyon terrain demand large-scale troop movements and strategic defensive positioning. Players are expected to build defenses around the canyon, manage resources, and deploy units effectively to secure victory. One of the map’s key features is its reliance on vision control due to the expansive desert terrain. The open plains along the canyon and narrow passages within it serve as critical strategic points. Resource distribution across the large map is crucial, requiring efficient harvesting routes to avoid fatigue. Given its design and structure, the map suits intermediate to advanced players, demanding diverse strategies and strong defensive lines—especially around the canyon. Wide spaces also make unit movement and vision control vital, making scout or sensor units strategically important. Beyond defense, the map blends maneuver warfare and resource management, requiring players to balance luring enemies into the canyon while securing resources and producing forces in the open plains. Its immersive atmosphere, expansive design, and strategic depth make it a dynamic custom map that challenges players to adapt their playstyles. The combination of resource management and defense strategies is its defining trait.
고양이와 쥐 in 정글 9.7 (Cat & Mouse in jungle 9.7)
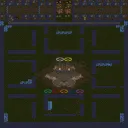
‘고양이와 쥐’ 시리즈로 유명한 ‘Cat & Mouse in jungle 9.7’는 디펜스와 서바이벌이 혼합된 유즈맵으로, 플레이어는 ‘고양이’ 역할을 맡아 끊임없이 몰려오는 ‘쥐’ 무리를 저지해야 한다. 맵은 정글과 바위, 강을 경계를 삼아 중앙에 플레이어 기지가 배치되며,Mouse(쥐)들이 여러 입구와 통로를 통해 끊임없이 공격해 온다. 플레이어는 맵 곳곳의 자원과 방어 건물, 스킬을 활용해Mouse의 진격을 막아내며 최대한 오래 버티는 것이 목표로 보인다. 맵의 특징은 입구와 통로의 배치로Mouse의 공격을 예측하고 방어선을 구축하는 전략이 중요하다는 점이다.Mouse의 공격 패턴은 랜덤하게 보일 수 있지만, 일정 주기로 몰려오기 때문에 방어 건물과 유닛의 배치, 자원 관리가 핵심이다. 또한, 맵의 일부 구역은Mouse가 지나갈 때만 활성화되는 트리거가 존재할 가능성이 있으며, 중앙 지역은Mouse의 주요 통로로 추정된다. 이 맵은 1인 또는 다인 플레이가 가능하며, 특히 혼자서Mouse의 끊임없는 공격을 방어하는 서바이벌 요소와 디펜스 요소가 결합된 점이 특징이다. 초보자는Mouse의 공격 패턴을 파악하기 어렵기 때문에 어려움을 느낄 수 있지만, 방어 건물과 유닛의 효율적인 배치와 자원 관리를 통해 점차 극복할 수 있다. 이 맵을 즐기기 위해서는Mouse의 공격 타이밍과 통로의 특성을 잘 이해하고, 자신의 방어 체계를 꾸준히 개선하는 것이 중요하다. 또한,Mouse의 공격이 집중되는 지역을 미리 방어하는 전략이 필요할 것으로 보인다. 이 맵은 디펜스와 서바이벌을 좋아하는 플레이어에게 추천하며, 특히Mouse의 공격을 버티는 재미와 전략적 깊이가 매력적이다. ‘Cat & Mouse in Jungle 9.7,’ a well-known map from the ‘Cat & Mouse’ series, blends defense and survival mechanics. Players take on the role of the ‘Cat,’ tasked with stopping endless waves of ‘Mouse’ enemies. The map features jungles, rocks, and rivers as natural boundaries, with the player’s base situated centrally. Mice infiltrate through multiple entrances and pathways, continuously pressing the attack. To hold them off, players must utilize scattered resources, defensive structures, and special abilities, aiming to survive as long as possible. The map’s design emphasizes strategic placement of entrances and pathways, requiring players to anticipate Mouse movements and fortify defenses. While the Mice’s attack patterns may seem random, they arrive in waves at set intervals, making efficient building placement, unit management, and resource allocation critical. Certain areas of the map might activate only when Mice pass through, and the central region appears to be a major thoroughfare for their advances. The map supports both solo and multiplayer modes, with its standout feature being the fusion of survival and defense elements—players must endure relentless assaults alone or with allies. Beginners may struggle to decipher the Mice’s attack patterns, but mastering defensive structures, unit positioning, and resource control can help overcome these challenges. Success hinges on understanding attack timing, pathway dynamics, and continuously refining one’s defensive setup. Prioritizing preemptive defenses in high-traffic areas is also key. Ideal for players who enjoy defense and survival challenges, this map shines in its tense, strategic gameplay, where the thrill of enduring Mouse onslaughts and the depth of tactical planning make it highly engaging.
엔더스 게임 배틀 룸 V.4.4 (Ender's Game Battle Room V.4.4)
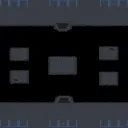
‘엔더스 게임 배틀 룸 V.4.4’는 코코가 수정했으며 발렌타인이 제작한 스타크래프트 브루드워 유즈맵으로, 소설 <엔더스 게임>의 전투 룸을 모티브로 한 대형 전투 맵이다. 맵 크기는 6144x6144로 우주 타일셋을 사용하며, 최대 6명의 플레이어가 참여할 수 있다. 맵 중앙에는 넓은 전투 공간이 펼쳐져 있으며, 각 플레이어는 시작 지점에서 병력을 꾸려 전투 룸으로 진입해 상대방을 제압하는 방식으로 진행된다. 맵 구조는 대칭형으로 설계되어 공정한 전투가 가능하도록 배려했으며, 전투 공간 주위에는 장애물이 배치되어 있어 전술적 움직임을 요구한다. 이 맵은 ‘컴퓨터 против’ 스타일의 전투 맵으로, 플레이어는 스타크래프트의 기본 유닛을 활용해 상대방을 공격하고 방어해야 한다. 전투 룸 내부는 넓은 평지로 이루어져 있어 대규모 전투가 가능하며, 맵 곳곳에 배치된 자원 미네랄과 가스는 전투 중 병력 보충에 활용할 수 있다. 맵의 난이도는 맵의 넓이와 병력 구성에 따라 달라질 수 있으며, 초보 유저는 소규모 전투에 집중하고 숙련된 유저는 대규모 병력 운용과 전술적 움직임을 요구한다. ‘엔더스 게임 배틀 룸 V.4.4’는 대규모 전투와 전략적 플레이를 즐기고 싶은 유저들에게 추천할 만한 맵이다. 맵의 밸런스는 수정 버전인 만큼 비교적 안정적이지만, 특정 유닛 조합에 따라 유리한 전략이 존재할 수 있어 다양한 조합을 시도해 보는 것이 좋다. 또한, 전투 룸의 넓은 공간을 활용한 기습 공격이나 방어 전술을 연습할 수 있어, 스타크래프트의 기본 전투 요소뿐만 아니라 전술적 사고를 키우는 데에도 도움이 된다. 플레이 전 맵의 구조와 자원 분포를 숙지하고, 자신의 병력 구성과 상대방의 전략을 신중히 판단하는 것이 중요하다. Ender's Game Battle Room V.4.4 is a StarCraft: Brood War custom map modified by Coco based on the original creation by Valentine, inspired by the Battle Room from the novel Ender's Game. The map features a massive 6144x6144 size using the space tileset, allowing up to 6 players to participate. At the center lies a vast combat arena where players deploy armies from their starting positions and engage in direct combat to eliminate opponents. The map adopts a symmetrical design to ensure balanced gameplay, with obstacles strategically placed around the combat area to encourage tactical maneuvering. It functions as a 'vs. computer' style battle map, where players utilize StarCraft's standard units to attack and defend. The expansive combat zone enables large-scale battles, and scattered mineral patches and gas geysers around the map provide resources for army reinforcement during combat. Difficulty varies depending on army composition and map control, with beginners focusing on small-scale engagements and experienced players mastering large-scale unit management and tactics. Ender's Game Battle Room V.4.4 is highly recommended for players seeking large-scale battles and strategic depth in custom maps. While the modified version aims for balanced gameplay, certain unit compositions may hold advantages, so experimenting with different strategies is advised. The spacious arena encourages the practice of ambush tactics, defensive maneuvers, and overall tactical thinking beyond basic combat mechanics. Before playing, familiarizing oneself with the map layout and resource distribution is crucial, as is carefully assessing one's army composition and predicting opponents' strategies for optimal performance.
最近登録されたマップ
新たに追加されたファイルとバージョンをご確認ください。
엔더스 게임 배틀 룸 V.4.4 (Ender's Game Battle Room V.4.4)
‘엔더스 게임 배틀 룸 V.4.4’는 코코가 수정했으며 발렌타인이 제작한 스타크래프트 브루드워 유즈맵으로, 소설 <엔더스 게임>의 전투 룸을 모티브로 한 대형 전투 맵이다. 맵 크기는 6144x6144로 우주 타일셋을 사용하며, 최대 6명의 플레이어가 참여할 수 있다. 맵 중앙에는 넓은 전투 공간이 펼쳐져 있으며, 각 플레이어는 시작 지점에서 병력을 꾸려 전투 룸으로 진입해 상대방을 제압하는 방식으로 진행된다. 맵 구조는 대칭형으로 설계되어 공정한 전투가 가능하도록 배려했으며, 전투 공간 주위에는 장애물이 배치되어 있어 전술적 움직임을 요구한다. 이 맵은 ‘컴퓨터 против’ 스타일의 전투 맵으로, 플레이어는 스타크래프트의 기본 유닛을 활용해 상대방을 공격하고 방어해야 한다. 전투 룸 내부는 넓은 평지로 이루어져 있어 대규모 전투가 가능하며, 맵 곳곳에 배치된 자원 미네랄과 가스는 전투 중 병력 보충에 활용할 수 있다. 맵의 난이도는 맵의 넓이와 병력 구성에 따라 달라질 수 있으며, 초보 유저는 소규모 전투에 집중하고 숙련된 유저는 대규모 병력 운용과 전술적 움직임을 요구한다. ‘엔더스 게임 배틀 룸 V.4.4’는 대규모 전투와 전략적 플레이를 즐기고 싶은 유저들에게 추천할 만한 맵이다. 맵의 밸런스는 수정 버전인 만큼 비교적 안정적이지만, 특정 유닛 조합에 따라 유리한 전략이 존재할 수 있어 다양한 조합을 시도해 보는 것이 좋다. 또한, 전투 룸의 넓은 공간을 활용한 기습 공격이나 방어 전술을 연습할 수 있어, 스타크래프트의 기본 전투 요소뿐만 아니라 전술적 사고를 키우는 데에도 도움이 된다. 플레이 전 맵의 구조와 자원 분포를 숙지하고, 자신의 병력 구성과 상대방의 전략을 신중히 판단하는 것이 중요하다. Ender's Game Battle Room V.4.4 is a StarCraft: Brood War custom map modified by Coco based on the original creation by Valentine, inspired by the Battle Room from the novel Ender's Game. The map features a massive 6144x6144 size using the space tileset, allowing up to 6 players to participate. At the center lies a vast combat arena where players deploy armies from their starting positions and engage in direct combat to eliminate opponents. The map adopts a symmetrical design to ensure balanced gameplay, with obstacles strategically placed around the combat area to encourage tactical maneuvering. It functions as a 'vs. computer' style battle map, where players utilize StarCraft's standard units to attack and defend. The expansive combat zone enables large-scale battles, and scattered mineral patches and gas geysers around the map provide resources for army reinforcement during combat. Difficulty varies depending on army composition and map control, with beginners focusing on small-scale engagements and experienced players mastering large-scale unit management and tactics. Ender's Game Battle Room V.4.4 is highly recommended for players seeking large-scale battles and strategic depth in custom maps. While the modified version aims for balanced gameplay, certain unit compositions may hold advantages, so experimenting with different strategies is advised. The spacious arena encourages the practice of ambush tactics, defensive maneuvers, and overall tactical thinking beyond basic combat mechanics. Before playing, familiarizing oneself with the map layout and resource distribution is crucial, as is carefully assessing one's army composition and predicting opponents' strategies for optimal performance.
고양이와 쥐 in 정글 9.7 (Cat & Mouse in jungle 9.7)
‘고양이와 쥐’ 시리즈로 유명한 ‘Cat & Mouse in jungle 9.7’는 디펜스와 서바이벌이 혼합된 유즈맵으로, 플레이어는 ‘고양이’ 역할을 맡아 끊임없이 몰려오는 ‘쥐’ 무리를 저지해야 한다. 맵은 정글과 바위, 강을 경계를 삼아 중앙에 플레이어 기지가 배치되며,Mouse(쥐)들이 여러 입구와 통로를 통해 끊임없이 공격해 온다. 플레이어는 맵 곳곳의 자원과 방어 건물, 스킬을 활용해Mouse의 진격을 막아내며 최대한 오래 버티는 것이 목표로 보인다. 맵의 특징은 입구와 통로의 배치로Mouse의 공격을 예측하고 방어선을 구축하는 전략이 중요하다는 점이다.Mouse의 공격 패턴은 랜덤하게 보일 수 있지만, 일정 주기로 몰려오기 때문에 방어 건물과 유닛의 배치, 자원 관리가 핵심이다. 또한, 맵의 일부 구역은Mouse가 지나갈 때만 활성화되는 트리거가 존재할 가능성이 있으며, 중앙 지역은Mouse의 주요 통로로 추정된다. 이 맵은 1인 또는 다인 플레이가 가능하며, 특히 혼자서Mouse의 끊임없는 공격을 방어하는 서바이벌 요소와 디펜스 요소가 결합된 점이 특징이다. 초보자는Mouse의 공격 패턴을 파악하기 어렵기 때문에 어려움을 느낄 수 있지만, 방어 건물과 유닛의 효율적인 배치와 자원 관리를 통해 점차 극복할 수 있다. 이 맵을 즐기기 위해서는Mouse의 공격 타이밍과 통로의 특성을 잘 이해하고, 자신의 방어 체계를 꾸준히 개선하는 것이 중요하다. 또한,Mouse의 공격이 집중되는 지역을 미리 방어하는 전략이 필요할 것으로 보인다. 이 맵은 디펜스와 서바이벌을 좋아하는 플레이어에게 추천하며, 특히Mouse의 공격을 버티는 재미와 전략적 깊이가 매력적이다. ‘Cat & Mouse in Jungle 9.7,’ a well-known map from the ‘Cat & Mouse’ series, blends defense and survival mechanics. Players take on the role of the ‘Cat,’ tasked with stopping endless waves of ‘Mouse’ enemies. The map features jungles, rocks, and rivers as natural boundaries, with the player’s base situated centrally. Mice infiltrate through multiple entrances and pathways, continuously pressing the attack. To hold them off, players must utilize scattered resources, defensive structures, and special abilities, aiming to survive as long as possible. The map’s design emphasizes strategic placement of entrances and pathways, requiring players to anticipate Mouse movements and fortify defenses. While the Mice’s attack patterns may seem random, they arrive in waves at set intervals, making efficient building placement, unit management, and resource allocation critical. Certain areas of the map might activate only when Mice pass through, and the central region appears to be a major thoroughfare for their advances. The map supports both solo and multiplayer modes, with its standout feature being the fusion of survival and defense elements—players must endure relentless assaults alone or with allies. Beginners may struggle to decipher the Mice’s attack patterns, but mastering defensive structures, unit positioning, and resource control can help overcome these challenges. Success hinges on understanding attack timing, pathway dynamics, and continuously refining one’s defensive setup. Prioritizing preemptive defenses in high-traffic areas is also key. Ideal for players who enjoy defense and survival challenges, this map shines in its tense, strategic gameplay, where the thrill of enduring Mouse onslaughts and the depth of tactical planning make it highly engaging.
그레이트 리프트 밸리 (Great Rift Valley)
스타크래프트 브루드워의 유즈맵으로 유명한 <그레이트 리프트 밸리(Great Rift Valley)>는 광활한 사막 지형이 펼쳐진 맵으로, 화려한 지형과 독특한 지형 디자인으로 플레이어에게 강렬한 인상을 남기는 디펜스형 유즈맵이다. 맵의 이름은 ‘위대한 협곡’으로 번역할 수 있으며, 내부 맵 설명에서 ‘수천 명의 피가 흐르고 수백만의 영혼이 실려 있다’는 문구로 보아 중후한 스토리나 분위기를 지녔을 것으로 추정된다. 맵의 전체 크기는 4096x8192로 매우 넓은 영역을 차지하고 있어, 넓은 시야와 전략적 움직임이 중요한 맵으로 보인다. 사막 타일셋을 기반으로 한 맵 디자인은 건조하고 황량한 분위기를 자아내며, 협곡やは谷地形이 인상적으로 표현되어 있다. 플레이어는 이 넓은 공간에서 자원 확보와 방어 전략을 동시에 고려해야 하는 구조로 보인다. 맵의 분위기는 중세 전쟁이나 사막 전투를 연상시키며, 디펜스 요소가 강하게 느껴진다. 제공된 메타데이터 상으로는 밀리 분류로 되어 있지만, 실제로는 유즈맵 디펜스 또는 컴퓨터 상대 디펜스(컴까기) 형식으로 제작되었을 가능성이 크다. 넓은 공간과 협곡 지형은 대규모 병력 이동과 방어 포인트 설정을 요구하며, 특히 협곡을 따라 적의 진격을 막아야 하는 구조가 예상된다. 플레이어는 협곡을 중심으로한 방어선 구축과 자원 관리, 적절한 유닛 생산 및 배치를 통해 승리를 노리게 될 것이다. 이 맵의 특징 중 하나는 넓은 맵 크기와 사막 지형으로 인한 시야 확보의 중요성인데, 협곡을 따라 펼쳐진 넓은 평원과 협곡 내부의 좁은 통로 등은 전략적 요충지로 작용할 가능성이 높다. 또한, 넓은 맵에서는 자원 분포가 중요하며, 자원 멀미를 방지하기 위한 효율적인 자원 채취 경로 설계가 필수적일 것이다. 맵의 디자인과 구조상 초보자보다는 중급 이상의 플레이어에게 적합할 것으로 보이며, 넓은 공간을 활용한 다각적인 전략과 방어 라인 구축이 요구된다. 특히 협곡을 중심으로한 방어 라인은 이 맵의 핵심 전략 포인트로 작용할 가능성이 높다. 또한, 넓은 맵에서는 유닛의 이동 경로와 시야 확보가 중요하므로, 시야 확보를 위한 센서 유닛이나 정찰 유닛의 활용도 전략적 관점에서 중요할 것이다. 이 맵은 디펜스 요소 외에도 넓은 공간을 활용한 기동전과Resource management가 결합된 복합적인 전략이 요구되는 맵으로 보인다. 특히, 협곡을 따라 적을 유인하여 방어하는 전략과 함께, 협곡 외부의 넓은 평원에서 자원을 확보하고 병력을 생산하는 균형 잡힌 플레이가 중요할 것이다. 맵의 분위기와 디자인, 넓은 공간은 플레이어에게 긴장감과 전략적 깊이를 제공하며, 다양한 플레이 스타일을 요구하는 유즈맵으로 평가된다. 특히, 넓은 맵에서의Resource management와 방어 전략의 조합은 이 맵의 가장 큰 특징으로 보인다. The *Great Rift Valley* is a renowned custom map from *StarCraft: Brood War*, celebrated for its vast desert terrain. With its striking landscapes and unique design, it leaves a strong impression as a defense-focused custom game. Translated as "Great Canyon," the map’s internal description—"thousands of lives have flowed here, millions of souls have passed"—suggests a rich narrative or atmosphere. Spanning 4096x8192 in size, the map occupies a massive area, emphasizing wide visibility and strategic movement. Its desert-themed tileset evokes a dry, desolate mood, while the canyon and valley terrain stand out vividly. Players must balance resource gathering with defensive tactics across this expansive space. The atmosphere evokes medieval warfare or desert battles, with a strong defensive emphasis. Though classified as a melee map in metadata, it likely functions as a custom defense or AI defense (*compkagi*) mode. The vast space and canyon terrain demand large-scale troop movements and strategic defensive positioning. Players are expected to build defenses around the canyon, manage resources, and deploy units effectively to secure victory. One of the map’s key features is its reliance on vision control due to the expansive desert terrain. The open plains along the canyon and narrow passages within it serve as critical strategic points. Resource distribution across the large map is crucial, requiring efficient harvesting routes to avoid fatigue. Given its design and structure, the map suits intermediate to advanced players, demanding diverse strategies and strong defensive lines—especially around the canyon. Wide spaces also make unit movement and vision control vital, making scout or sensor units strategically important. Beyond defense, the map blends maneuver warfare and resource management, requiring players to balance luring enemies into the canyon while securing resources and producing forces in the open plains. Its immersive atmosphere, expansive design, and strategic depth make it a dynamic custom map that challenges players to adapt their playstyles. The combination of resource management and defense strategies is its defining trait.
컴까기 5대2 화이트스톤 (WhiteStone 5vs2)
‘컴까기 5대2 화이트스톤’은 스타크래프트: 브루드워의 유즈맵 중에서도 컴퓨터 상대 디펜스 장르에 속하는 맵으로, 플레이어는 총 5명의 유닛으로 2명의 적 컴퓨터를 상대하는 전투를 진행한다. 맵의 이름은 ‘화이트스톤’이란 지역을 배경으로 하며, 빨간색 업그레이드 버튼이 특징적으로 배치된 구조를 가지고 있다. 이미지에서 확인되는 중앙 지역은 넓은 평지 형태로, 각 플레이어의 시작 지점은 맵의 상단과 하단에 나뉘어 배치되어 있으며, 적 컴퓨터의 본진은 맵의 중앙에 위치한 것으로 추정된다. 맵의 테두리에는 숲 지형이 둘러싸고 있어 외부 침입을 막는 구조로 보이며, 중앙 평지 주변으로는 언덕 지형과 좁은 통로가 있는 것으로 보인다. 이러한 지형적 특징은 적의 공격을 방어하거나, 유닛을 효율적으로 배치하는 전략적 요소를 제공할 것으로 예상된다. 이 맵의 핵심은 적 컴퓨터의 끊임없는 공격을 방어하면서 본진을 지켜내는 데 있으며, 5명의 유닛을 조합하여 적절히 배치하고 업그레이드를 통해 전투력을 강화해야 한다. 맵의 구조상 중앙 평지가 주요 전투가 벌어지는 곳이 될 가능성이 높으며, 언덕이나 좁은 통로를 활용하여 적의 접근을 제어하는 전략이 중요할 것으로 보인다. 또한, 빨간색 업그레이드 버튼이 맵 곳곳에 배치되어 있어, 이를 적극적으로 활용하여 유닛의 능력을 강화하는 것이 승리 조건에 큰 영향을 미칠 것으로 예상된다. 이 맵은 초보자들은 물론, 디펜스 장르에 익숙한 플레이어들에게도 흥미로운 도전 과제가 될 수 있다. 적의 공격 패턴을 분석하고, 유닛의 조합과 업그레이드를 전략적으로 계획하는 능력이 요구된다. 또한, 맵의 구조상 좁은 통로나 언덕을 활용한 방어 전략, 또는 유닛의 이동 경로를 고려한 배치 등이 중요해, 단순히 유닛을 생산하는 것만으로는 승리를 장담할 수 없을 것이다. 따라서, 이 맵을 플레이하기 전에는 맵의 구조와 적의 공격 패턴을 충분히 숙지하고, 유닛의 조합과 업그레이드 전략을 미리 계획하는 것이 바람직하다. 추천 대상은 디펜스 장르와 컴퓨터 상대 전투를 즐기는 플레이어들이며, 특히 5대2라는 인원 대비 적의 수에서 오는 긴장감과 전략적 깊이가 매력적으로 느껴질 수 있다. 또한, 맵의 구조와 업그레이드 시스템을 활용하여 다양한 전략을 시도해 보고 싶은 플레이어들에게도 추천할 만한 맵이다. "White Stone" in *Competitive 5 vs. 2* is a user-made defense map in *StarCraft: Brood War*, where players control five units against two enemy AI opponents. The map is set in the "White Stone" region, featuring distinctive red upgrade buttons scattered throughout. The central area, visible in the image, is a vast open plain, with player starting positions divided between the top and bottom of the map. The enemy bases are likely located near the center. The map is bordered by forest terrain, acting as a natural barrier against external assaults. Around the central plain, there are hills and narrow pathways, offering strategic advantages for defense or unit positioning. These terrain features allow players to control enemy movements or optimize unit placement effectively. The core objective is to defend your base from the AI’s relentless waves of attacks while managing five units efficiently. Upgrading units and strategically positioning them—especially around the central battlefield—will be crucial. Leveraging hills and narrow paths to restrict enemy access can turn the tide of battle. Additionally, the red upgrade buttons scattered across the map play a key role in enhancing unit capabilities, directly influencing your chances of victory. This map offers a challenging yet engaging experience for both beginners and experienced defense-map players. Success depends on analyzing enemy attack patterns, planning unit combinations and upgrades, and using the terrain wisely—such as utilizing narrow corridors or elevated positions. Simply producing units without a solid strategy won’t guarantee a win, so understanding the map layout and enemy behavior is essential before diving in. Recommended for players who enjoy defense-style maps and AI combat, this map’s 5 vs. 2 setup delivers intense pressure and deep strategic gameplay. Its structure and upgrade system also encourage experimentation with different tactics, making it a great choice for those looking to test their skills.
マップ選択ガイド
태그는 맵의 핵심 특징을 빠르게 설명하지만 제작 버전마다 규칙이 다를 수 있습니다. 상세 설명에서 권장 인원, 난이도, 플레이 시간과 버전을 함께 확인한 뒤 다운로드하세요.