
복합형 スタークラフト マップコレクション
「복합형」タグが登録されたマップを集めました。ジャンルだけでは見つけにくいプレイ方式、難易度、特徴を中心に、人気のマップと最新マップを比較してみてください。
- 登録マップ
- 3個
- 累計ダウンロード
- 0
- 累計閲覧
- 56
人気マップ
ダウンロードと閲覧の反応が高いマップです。
마제 디펜스 2.0 (Maze Defense 2.0)
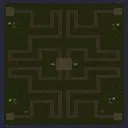
스타크래프트 브루드워의 대표적인 유즈맵 장르 중 하나인 ‘미로 디펜스’가 한층 더 진화한 버전, 〈마제 디펜스 2.0(Maze Defense 2.0)〉은 복잡한 미로 구조를 바탕으로 한 전략적인 방어형 맵으로, 플레이어들이 한정된 자원을 효율적으로 활용하면서 적의 공격을 막아내야 하는 긴장감 넘치는 경험을 제공한다. 맵의 전체적인 분위기는 사막 타일셋을 활용해 건조하고 모래먼지가 가득한 듯한 황무지 feel을 자아내며, 널찍한 평지 사이로 구불구불한 미로가 펼쳐져 있다. 맵의 핵심은 바로 이 미로 구조에 있는데, 플레이어는 시작 지점에서부터 중앙으로 진입하는 적군을 예상치 못한 길목에서 저지하거나, 미로를 우회시켜 지치게 만드는 전술을 구사해야 한다. 미로의 길목 곳곳에는 방어 건물을 설치할 수 있는 공간이 마련되어 있으며, 특히 좁은 통로에서는 적의 움직임을 제한할 수 있어 방어 효율을 극대화할 수 있다. 또한, 맵의 구석구석에 숨겨진 자원 채취 지역이나 보너스 오브젝트가 배치되어 있어, 이를 확보하는 것이 승리의 관건이 된다. 초반에는 비교적 수비에 집중하며 자원을 모으는 것이 중요하지만, 후반으로 갈수록 적의 공격 패턴이 다양해지고 강도가 세지므로 전략적인 대처가 필수적이다. 특히, 4인 플레이를 기준으로 설계된 이 맵은 팀 플레이를 적극 권장하며, 개개인의 판단과 협력이 승리를 좌우하는 중요한 요소로 작용한다. 맵의 난이도는 초보자부터 숙련자까지 모두 즐길 수 있도록 단계적으로 조절할 수 있는 구조로, 처음 접하는 유저들도 쉽게 적응할 수 있도록 배려되어 있다. 그러나 미로의 복잡한 구조를 제대로 이해하지 못하고 무작정 방어에만 집중하면 자원이 부족해지는 상황이 발생할 수 있으니, 맵을 플레이하기 전 미리 구조를 숙지하는 것이 좋다. 또한, 적의 공격 루트나 약점을 파악하는 것이 승리 전략의 핵심으로, 단순히 방어 건물을 짓는 것만으로는 한계가 있으므로 유연한 대처가 요구된다. 〈마제 디펜스 2.0〉은 방어형 유즈맵의 classic한 재미를 느낄 수 있을 뿐만 아니라, 전략과 협력의 중요성을 다시 한번 되새기게 해주는佳作라 할 수 있다. 특히, 사막이라는 배경이 주는 시각적 분위기와 함께 긴장감 넘치는 전투가 어우러져 몰입감을 극대화하는 장점이 있다. 이 맵을 플레이하면 누구나 한 번쯤은 ‘왜 이 길을 선택했을까?’라는 생각을 하게 될 정도로 미로의 설계가巧妙하다는 점도 큰 매력 중 하나다. 여러 번 플레이하면서 미로의 숨은 길이나 전략적 포인트를 발견할 때마다 새로운 재미를 느낄 수 있을 것이다. 이 맵을 추천하는 대상은 디펜스 장르를 좋아하는 유저는 물론, 전략적 사고를 즐기는 모든 스타크래프트 유즈맵 플레이어에게 적합하다. 특히, 팀 플레이를 선호하는 유저라면 더욱 재미있게 즐길 수 있을 것이다. 마지막으로, 미로의 복잡한 구조를 제대로 활용하지 못해 어려움을 겪고 있다면, 먼저 싱글 플레이 모드나 연습 모드에서 구조를 익힌 뒤 도전해 보는 것도 좋은 방법이다. 이 맵을 통해 방어 전략의 깊이를 느낄 수 있을 것이다. Maze Defense 2.0 is an evolved version of the classic maze defense genre in StarCraft: Brood War, offering a more strategic and immersive defensive experience. Built around a complex maze structure, the map challenges players to efficiently manage limited resources while fending off enemy attacks in a tense, high-stakes environment. The map adopts a desert tile set, evoking a barren, dust-filled wasteland that enhances the atmosphere. Wide-open plains are interspersed with winding, labyrinthine paths that force players to outmaneuver opponents. The maze’s design is central to the gameplay—players must anticipate enemy movements from the starting point, ambush them at unexpected choke points, or exhaust them by forcing them through circuitous routes. Strategic placement of defensive structures is key, particularly in narrow corridors where they can maximize efficiency by restricting enemy mobility. Hidden throughout the map are resource collection zones and bonus objectives, securing these often proves decisive in securing victory. While early gameplay emphasizes defense and resource accumulation, later stages introduce increasingly varied and intense enemy assaults, demanding adaptive tactics. Designed with four-player coordination in mind, the map strongly encourages teamwork, where individual decision-making and cooperation are critical to success. The difficulty is thoughtfully tiered, making it accessible to both beginners and experienced players. However, players who rush into defense without understanding the maze’s layout risk depleting their resources, so familiarizing oneself with the map beforehand is essential. Mastery also hinges on identifying enemy attack routes and vulnerabilities—relying solely on static defenses is insufficient, as flexibility is key to overcoming challenges. Maze Defense 2.0 delivers the classic thrill of defensive custom maps while reinforcing the importance of strategy and teamwork. The desert setting enhances immersion, blending visual atmosphere with heart-pounding combat. The maze’s clever design—so intricate that players may find themselves second-guessing their path choices—adds to its appeal, rewarding repeated plays as hidden routes and strategic nuances are uncovered. Ideal for fans of the defense genre and players who enjoy strategic StarCraft custom maps, the experience is especially satisfying for those who prefer cooperative play. If the maze’s complexity feels overwhelming, practicing in single-player or training modes before diving in is a smart approach. Ultimately, Maze Defense 2.0 offers a deep dive into defensive strategy, making it a must-try for any custom map enthusiast.
메이즈 디펜스 12 파이널 (Maze Def 12 Final)
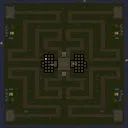
스타크래프트 브루드워의 ‘메이즈 디펜스(MAZE DEF)’ 시리즈 중 하나로 추정되는 ‘메이즈 디펜스 12 파이널(Maze Def 12 Final)’은 미로와 디펜스 요소를 결합한 퍼즐형 유즈맵이다. 맵의 중앙에는 복잡한 구조의 미로가 배치되어 있으며, 미로 주변으로 적의 웨이브가 끊임없이 몰려오는 구조가 보인다. 플레이어는 미로를 통과하는 경로를 직접 설계하거나, 아군의 유닛을 배치해 적을 방어하는 동시에 미로의 출구를 확보해야 한다. 미로의 구조는 플레이어의 전략과 실시간 조정에 따라 유동적으로 변형될 수 있으며, 적의 공격 패턴도 미로의 형태에 따라 달라지는 것으로 보인다. 맵의 난이도는 미로의 복잡도와 웨이브의 강도에 따라 조절되며, 초보자부터 숙련자까지 다양한 수준의 플레이어가 즐길 수 있도록 구성된 것으로 추정된다. 특히 미로 디자인과 방어 매커니즘의 조화가 이 맵의 핵심 포인트로, 단순히 길을 찾는 것이 아니라 적을 효율적으로 방어하면서도 출구를 확보해야 하는 다중 과제가 특징이다. 맵의 배경은 사막 타일셋을 사용해 건조한 분위기를 연출하며, 미로의 복잡한 구조와 대비되는 깔끔한 디자인으로 플레이어의 집중력을 높이는 데 기여한다. 이 맵을 플레이하기 전에는 미로의 구조와 적의 공격 패턴을 사전에 숙지하는 것이 중요하며, 특히 방어 유닛의 배치와 자원 관리에 신경 써야 한다. 또한, 맵의 난이도를 조절할 수 있는 옵션이 존재하는지 확인해보는 것도 좋다. 이 맵은 스타크래프트의 전략성과 퍼즐 요소를 동시에 즐기고 싶은 게이머에게 추천할 만한 작품이다. 미로 탈출과 방어라는 두 가지 핵심 메커니즘이 조화를 이룬 덕분에, 반복 플레이를 통해 새로운 전략을 시도해 볼 수 있는 재미가 있다. 특히 혼자 또는 소규모 팀으로 플레이할 때 집중력을 발휘할 수 있으며, 팀워크가 중요한 경우 팀원 간의 의사소통이 원활해야 한다. 이 맵은 기본적인 스타크래프트 조작법에 익숙한 플레이어라면 누구나 접근할 수 있지만, 높은 난이도에서는 전략적 사고와 순간적인 판단력이 요구된다. 미로의 구조를 외우거나, 적의 공격을 예측하는 능력이 있으면 보다 수월하게 플레이할 수 있을 것이다. 맵의 전체적인 밸런스는 아직 확인되지 않지만, 시리즈의 다른 버전들과 비교했을 때 ‘파이널’이라는 제목답게 최종 형태의 디자인과 난이도가 적용되었을 가능성이 크다. 퍼즐형 디펜스 맵을 좋아하는 유저라면, 이 맵이 제공하는 도전 과제를 즐길 수 있을 것이다. 특히 맵의 구조와 방어 메커니즘이 복잡할수록, 플레이어의 창의성과 전략적 사고가 빛을 발하는 순간이 많아진다. 이 맵을 통해 스타크래프트의 새로운 재미를 발견해 보길 바란다. "Maze Def 12 Final" appears to be a puzzle-style custom map from the *Maze Defense (MAZE DEF)* series in *StarCraft: Brood War*, blending maze navigation with defense elements. At its center lies a complex maze structure, surrounded by waves of enemies that continuously assault the perimeter. Players must either design a path through the maze or strategically position friendly units to fend off attacks while securing the exit. The maze’s layout can adapt dynamically based on player strategy and real-time adjustments, and enemy attack patterns seem to shift in response to its changing shape. The difficulty scales with the maze’s complexity and wave intensity, catering to both beginners and seasoned players. The map’s standout feature is the seamless integration of maze design and defense mechanics, transforming it from a simple pathfinding challenge into a multi-layered task that demands efficient enemy containment and exit control. Using a desert tileset, the map’s dry, rugged aesthetic contrasts with its clean, precise design, enhancing player focus. Prior to playing, it’s crucial to study the maze’s layout and enemy behaviors, paying close attention to unit placement and resource management. Checking for difficulty-adjustment options is also advisable. This map is ideal for gamers seeking to enjoy *StarCraft*’s strategic depth alongside puzzle-solving elements. Its dual focus on maze navigation and defense offers replay value, allowing players to experiment with new strategies through repeated attempts. Whether played solo or in small teams, the map demands sharp focus, with effective communication being key in team-based modes. While accessible to anyone familiar with basic *StarCraft* controls, higher difficulties require strategic foresight and quick decision-making. Memorizing the maze’s structure and predicting enemy movements can significantly ease gameplay. Though its overall balance hasn’t been fully verified, the "Final" in its title suggests it represents the series’ most refined design and challenge. For fans of puzzle defense maps, "Maze Def 12 Final" delivers a compelling challenge, with its intricate mechanics rewarding creativity and tactical thinking. Give it a try to uncover a fresh layer of fun in *StarCraft*.
라쿤시티 UBCS, S.T.A.R.S 작전 (Raccoon-City UBCS, S.T.A.R.S, NG)
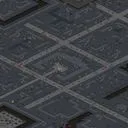
이 맵은 1998년 9월 24일, 테이코社가 바이러스 유출로 혼란에 빠진 라쿤시티에 무장 병력이 진입하는 서바이벌 디펜스 형식의 유즈맵입니다. 내부 설명에 따르면, 치안총감 아이언스가 계엄령을 선포하고 도시를 봉쇄하는 절박한 순간을 배경으로 하며, 플레이어는 최후의 시간을 맞이한 도시를 구하기 위해 출동합니다. 맵 구성은 도시 중심부와 외곽 도로, 폐쇄 구역으로 나뉘며, 곳곳에 배치된 적 유닛과 구조물을 상대해야 합니다. 도로 블록과 건물 사이에 숨겨진 길목을 활용해 적의 공격을 피해가며, 보급로를 확보하는 것이 핵심 전략이 됩니다. 건물과 도로가 복잡하게 얽힌 지형은 시야를 가리는 요소로 작용하기도 하지만, 반대로 적의 이동 경로를 차단하는 요인으로도 활용할 수 있습니다. 맵의 분위기는 바이오하자드 시리즈의 초기 설정과 유사하며, 치밀한 시나리오 연출이 돋보입니다. 다만, 맵 특성상 적의 공격 패턴이 반복되는 경우가 많아, 초반 세팅과 방어 라인 구축이 승패를 가를 가능성이 높습니다. 초보 플레이어는 맵의 복잡한 길목과 적의 배치에戸惑하기 쉽지만, 익숙해지면 strategic depth가 있는 플레이가 가능합니다. 추천 대상은 스타크래프트의 디펜스 장르를 선호하는 플레이어이며, 특히 바이오하자드 팬이나 스토리성이 강한 맵을 좋아하는 유저에게 적합합니다. 플레이 전에는 맵의 주요 길목과 보급로, 그리고 적 배치 위치를 미리 숙지하는 것이 중요합니다. 또한, 아군 유닛의 초반 생산과 방어선 구축을 신속히 진행해야 하며, 자원 확보와 방어 건물의 배치를 중시해야 합니다. 맵의 난이도는 내장된 적의 공격력과 수비 density에 따라 달라질 수 있으므로, 초반 공세를 어떻게 버티느냐가 관건입니다. This is a survival defense UMS map set in Raccoon City on September 24, 1998, when T-Virus outbreaks force martial law. Players take on the role of Umbrella's special forces, racing against time to contain the outbreak by securing roadblocks and eliminating threats across the city's grid-like streets. The map features a dense urban layout with multiple choke points, hidden alleys, and critical supply routes that must be defended or controlled. Players must balance aggressive sorties with tactical retreats to avoid being overwhelmed by relentless enemy waves, which include zombies, infected civilians, and rogue Umbrella forces. The terrain's complexity offers both cover and ambush opportunities, rewarding players who master the map's geography. While the premise draws heavily from the Resident Evil franchise, the gameplay leans into classic Brood War mechanics—resource management, unit positioning, and macro efficiency are key. Newcomers may struggle with the map's layout and enemy density, but veterans will appreciate the strategic depth in base fortification and counterattacks. Ideal for fans of hardcore defense maps or narrative-driven UMS titles, this map demands preparation: scouting the main lanes, prioritizing early defenses, and adapting to the enemy's evolving tactics. Difficulty fluctuates based on enemy aggression and resource availability, making early resilience crucial to survival.
最近登録されたマップ
新たに追加されたファイルとバージョンをご確認ください。
라쿤시티 UBCS, S.T.A.R.S 작전 (Raccoon-City UBCS, S.T.A.R.S, NG)
이 맵은 1998년 9월 24일, 테이코社가 바이러스 유출로 혼란에 빠진 라쿤시티에 무장 병력이 진입하는 서바이벌 디펜스 형식의 유즈맵입니다. 내부 설명에 따르면, 치안총감 아이언스가 계엄령을 선포하고 도시를 봉쇄하는 절박한 순간을 배경으로 하며, 플레이어는 최후의 시간을 맞이한 도시를 구하기 위해 출동합니다. 맵 구성은 도시 중심부와 외곽 도로, 폐쇄 구역으로 나뉘며, 곳곳에 배치된 적 유닛과 구조물을 상대해야 합니다. 도로 블록과 건물 사이에 숨겨진 길목을 활용해 적의 공격을 피해가며, 보급로를 확보하는 것이 핵심 전략이 됩니다. 건물과 도로가 복잡하게 얽힌 지형은 시야를 가리는 요소로 작용하기도 하지만, 반대로 적의 이동 경로를 차단하는 요인으로도 활용할 수 있습니다. 맵의 분위기는 바이오하자드 시리즈의 초기 설정과 유사하며, 치밀한 시나리오 연출이 돋보입니다. 다만, 맵 특성상 적의 공격 패턴이 반복되는 경우가 많아, 초반 세팅과 방어 라인 구축이 승패를 가를 가능성이 높습니다. 초보 플레이어는 맵의 복잡한 길목과 적의 배치에戸惑하기 쉽지만, 익숙해지면 strategic depth가 있는 플레이가 가능합니다. 추천 대상은 스타크래프트의 디펜스 장르를 선호하는 플레이어이며, 특히 바이오하자드 팬이나 스토리성이 강한 맵을 좋아하는 유저에게 적합합니다. 플레이 전에는 맵의 주요 길목과 보급로, 그리고 적 배치 위치를 미리 숙지하는 것이 중요합니다. 또한, 아군 유닛의 초반 생산과 방어선 구축을 신속히 진행해야 하며, 자원 확보와 방어 건물의 배치를 중시해야 합니다. 맵의 난이도는 내장된 적의 공격력과 수비 density에 따라 달라질 수 있으므로, 초반 공세를 어떻게 버티느냐가 관건입니다. This is a survival defense UMS map set in Raccoon City on September 24, 1998, when T-Virus outbreaks force martial law. Players take on the role of Umbrella's special forces, racing against time to contain the outbreak by securing roadblocks and eliminating threats across the city's grid-like streets. The map features a dense urban layout with multiple choke points, hidden alleys, and critical supply routes that must be defended or controlled. Players must balance aggressive sorties with tactical retreats to avoid being overwhelmed by relentless enemy waves, which include zombies, infected civilians, and rogue Umbrella forces. The terrain's complexity offers both cover and ambush opportunities, rewarding players who master the map's geography. While the premise draws heavily from the Resident Evil franchise, the gameplay leans into classic Brood War mechanics—resource management, unit positioning, and macro efficiency are key. Newcomers may struggle with the map's layout and enemy density, but veterans will appreciate the strategic depth in base fortification and counterattacks. Ideal for fans of hardcore defense maps or narrative-driven UMS titles, this map demands preparation: scouting the main lanes, prioritizing early defenses, and adapting to the enemy's evolving tactics. Difficulty fluctuates based on enemy aggression and resource availability, making early resilience crucial to survival.
마제 디펜스 2.0 (Maze Defense 2.0)
스타크래프트 브루드워의 대표적인 유즈맵 장르 중 하나인 ‘미로 디펜스’가 한층 더 진화한 버전, 〈마제 디펜스 2.0(Maze Defense 2.0)〉은 복잡한 미로 구조를 바탕으로 한 전략적인 방어형 맵으로, 플레이어들이 한정된 자원을 효율적으로 활용하면서 적의 공격을 막아내야 하는 긴장감 넘치는 경험을 제공한다. 맵의 전체적인 분위기는 사막 타일셋을 활용해 건조하고 모래먼지가 가득한 듯한 황무지 feel을 자아내며, 널찍한 평지 사이로 구불구불한 미로가 펼쳐져 있다. 맵의 핵심은 바로 이 미로 구조에 있는데, 플레이어는 시작 지점에서부터 중앙으로 진입하는 적군을 예상치 못한 길목에서 저지하거나, 미로를 우회시켜 지치게 만드는 전술을 구사해야 한다. 미로의 길목 곳곳에는 방어 건물을 설치할 수 있는 공간이 마련되어 있으며, 특히 좁은 통로에서는 적의 움직임을 제한할 수 있어 방어 효율을 극대화할 수 있다. 또한, 맵의 구석구석에 숨겨진 자원 채취 지역이나 보너스 오브젝트가 배치되어 있어, 이를 확보하는 것이 승리의 관건이 된다. 초반에는 비교적 수비에 집중하며 자원을 모으는 것이 중요하지만, 후반으로 갈수록 적의 공격 패턴이 다양해지고 강도가 세지므로 전략적인 대처가 필수적이다. 특히, 4인 플레이를 기준으로 설계된 이 맵은 팀 플레이를 적극 권장하며, 개개인의 판단과 협력이 승리를 좌우하는 중요한 요소로 작용한다. 맵의 난이도는 초보자부터 숙련자까지 모두 즐길 수 있도록 단계적으로 조절할 수 있는 구조로, 처음 접하는 유저들도 쉽게 적응할 수 있도록 배려되어 있다. 그러나 미로의 복잡한 구조를 제대로 이해하지 못하고 무작정 방어에만 집중하면 자원이 부족해지는 상황이 발생할 수 있으니, 맵을 플레이하기 전 미리 구조를 숙지하는 것이 좋다. 또한, 적의 공격 루트나 약점을 파악하는 것이 승리 전략의 핵심으로, 단순히 방어 건물을 짓는 것만으로는 한계가 있으므로 유연한 대처가 요구된다. 〈마제 디펜스 2.0〉은 방어형 유즈맵의 classic한 재미를 느낄 수 있을 뿐만 아니라, 전략과 협력의 중요성을 다시 한번 되새기게 해주는佳作라 할 수 있다. 특히, 사막이라는 배경이 주는 시각적 분위기와 함께 긴장감 넘치는 전투가 어우러져 몰입감을 극대화하는 장점이 있다. 이 맵을 플레이하면 누구나 한 번쯤은 ‘왜 이 길을 선택했을까?’라는 생각을 하게 될 정도로 미로의 설계가巧妙하다는 점도 큰 매력 중 하나다. 여러 번 플레이하면서 미로의 숨은 길이나 전략적 포인트를 발견할 때마다 새로운 재미를 느낄 수 있을 것이다. 이 맵을 추천하는 대상은 디펜스 장르를 좋아하는 유저는 물론, 전략적 사고를 즐기는 모든 스타크래프트 유즈맵 플레이어에게 적합하다. 특히, 팀 플레이를 선호하는 유저라면 더욱 재미있게 즐길 수 있을 것이다. 마지막으로, 미로의 복잡한 구조를 제대로 활용하지 못해 어려움을 겪고 있다면, 먼저 싱글 플레이 모드나 연습 모드에서 구조를 익힌 뒤 도전해 보는 것도 좋은 방법이다. 이 맵을 통해 방어 전략의 깊이를 느낄 수 있을 것이다. Maze Defense 2.0 is an evolved version of the classic maze defense genre in StarCraft: Brood War, offering a more strategic and immersive defensive experience. Built around a complex maze structure, the map challenges players to efficiently manage limited resources while fending off enemy attacks in a tense, high-stakes environment. The map adopts a desert tile set, evoking a barren, dust-filled wasteland that enhances the atmosphere. Wide-open plains are interspersed with winding, labyrinthine paths that force players to outmaneuver opponents. The maze’s design is central to the gameplay—players must anticipate enemy movements from the starting point, ambush them at unexpected choke points, or exhaust them by forcing them through circuitous routes. Strategic placement of defensive structures is key, particularly in narrow corridors where they can maximize efficiency by restricting enemy mobility. Hidden throughout the map are resource collection zones and bonus objectives, securing these often proves decisive in securing victory. While early gameplay emphasizes defense and resource accumulation, later stages introduce increasingly varied and intense enemy assaults, demanding adaptive tactics. Designed with four-player coordination in mind, the map strongly encourages teamwork, where individual decision-making and cooperation are critical to success. The difficulty is thoughtfully tiered, making it accessible to both beginners and experienced players. However, players who rush into defense without understanding the maze’s layout risk depleting their resources, so familiarizing oneself with the map beforehand is essential. Mastery also hinges on identifying enemy attack routes and vulnerabilities—relying solely on static defenses is insufficient, as flexibility is key to overcoming challenges. Maze Defense 2.0 delivers the classic thrill of defensive custom maps while reinforcing the importance of strategy and teamwork. The desert setting enhances immersion, blending visual atmosphere with heart-pounding combat. The maze’s clever design—so intricate that players may find themselves second-guessing their path choices—adds to its appeal, rewarding repeated plays as hidden routes and strategic nuances are uncovered. Ideal for fans of the defense genre and players who enjoy strategic StarCraft custom maps, the experience is especially satisfying for those who prefer cooperative play. If the maze’s complexity feels overwhelming, practicing in single-player or training modes before diving in is a smart approach. Ultimately, Maze Defense 2.0 offers a deep dive into defensive strategy, making it a must-try for any custom map enthusiast.
메이즈 디펜스 12 파이널 (Maze Def 12 Final)
스타크래프트 브루드워의 ‘메이즈 디펜스(MAZE DEF)’ 시리즈 중 하나로 추정되는 ‘메이즈 디펜스 12 파이널(Maze Def 12 Final)’은 미로와 디펜스 요소를 결합한 퍼즐형 유즈맵이다. 맵의 중앙에는 복잡한 구조의 미로가 배치되어 있으며, 미로 주변으로 적의 웨이브가 끊임없이 몰려오는 구조가 보인다. 플레이어는 미로를 통과하는 경로를 직접 설계하거나, 아군의 유닛을 배치해 적을 방어하는 동시에 미로의 출구를 확보해야 한다. 미로의 구조는 플레이어의 전략과 실시간 조정에 따라 유동적으로 변형될 수 있으며, 적의 공격 패턴도 미로의 형태에 따라 달라지는 것으로 보인다. 맵의 난이도는 미로의 복잡도와 웨이브의 강도에 따라 조절되며, 초보자부터 숙련자까지 다양한 수준의 플레이어가 즐길 수 있도록 구성된 것으로 추정된다. 특히 미로 디자인과 방어 매커니즘의 조화가 이 맵의 핵심 포인트로, 단순히 길을 찾는 것이 아니라 적을 효율적으로 방어하면서도 출구를 확보해야 하는 다중 과제가 특징이다. 맵의 배경은 사막 타일셋을 사용해 건조한 분위기를 연출하며, 미로의 복잡한 구조와 대비되는 깔끔한 디자인으로 플레이어의 집중력을 높이는 데 기여한다. 이 맵을 플레이하기 전에는 미로의 구조와 적의 공격 패턴을 사전에 숙지하는 것이 중요하며, 특히 방어 유닛의 배치와 자원 관리에 신경 써야 한다. 또한, 맵의 난이도를 조절할 수 있는 옵션이 존재하는지 확인해보는 것도 좋다. 이 맵은 스타크래프트의 전략성과 퍼즐 요소를 동시에 즐기고 싶은 게이머에게 추천할 만한 작품이다. 미로 탈출과 방어라는 두 가지 핵심 메커니즘이 조화를 이룬 덕분에, 반복 플레이를 통해 새로운 전략을 시도해 볼 수 있는 재미가 있다. 특히 혼자 또는 소규모 팀으로 플레이할 때 집중력을 발휘할 수 있으며, 팀워크가 중요한 경우 팀원 간의 의사소통이 원활해야 한다. 이 맵은 기본적인 스타크래프트 조작법에 익숙한 플레이어라면 누구나 접근할 수 있지만, 높은 난이도에서는 전략적 사고와 순간적인 판단력이 요구된다. 미로의 구조를 외우거나, 적의 공격을 예측하는 능력이 있으면 보다 수월하게 플레이할 수 있을 것이다. 맵의 전체적인 밸런스는 아직 확인되지 않지만, 시리즈의 다른 버전들과 비교했을 때 ‘파이널’이라는 제목답게 최종 형태의 디자인과 난이도가 적용되었을 가능성이 크다. 퍼즐형 디펜스 맵을 좋아하는 유저라면, 이 맵이 제공하는 도전 과제를 즐길 수 있을 것이다. 특히 맵의 구조와 방어 메커니즘이 복잡할수록, 플레이어의 창의성과 전략적 사고가 빛을 발하는 순간이 많아진다. 이 맵을 통해 스타크래프트의 새로운 재미를 발견해 보길 바란다. "Maze Def 12 Final" appears to be a puzzle-style custom map from the *Maze Defense (MAZE DEF)* series in *StarCraft: Brood War*, blending maze navigation with defense elements. At its center lies a complex maze structure, surrounded by waves of enemies that continuously assault the perimeter. Players must either design a path through the maze or strategically position friendly units to fend off attacks while securing the exit. The maze’s layout can adapt dynamically based on player strategy and real-time adjustments, and enemy attack patterns seem to shift in response to its changing shape. The difficulty scales with the maze’s complexity and wave intensity, catering to both beginners and seasoned players. The map’s standout feature is the seamless integration of maze design and defense mechanics, transforming it from a simple pathfinding challenge into a multi-layered task that demands efficient enemy containment and exit control. Using a desert tileset, the map’s dry, rugged aesthetic contrasts with its clean, precise design, enhancing player focus. Prior to playing, it’s crucial to study the maze’s layout and enemy behaviors, paying close attention to unit placement and resource management. Checking for difficulty-adjustment options is also advisable. This map is ideal for gamers seeking to enjoy *StarCraft*’s strategic depth alongside puzzle-solving elements. Its dual focus on maze navigation and defense offers replay value, allowing players to experiment with new strategies through repeated attempts. Whether played solo or in small teams, the map demands sharp focus, with effective communication being key in team-based modes. While accessible to anyone familiar with basic *StarCraft* controls, higher difficulties require strategic foresight and quick decision-making. Memorizing the maze’s structure and predicting enemy movements can significantly ease gameplay. Though its overall balance hasn’t been fully verified, the "Final" in its title suggests it represents the series’ most refined design and challenge. For fans of puzzle defense maps, "Maze Def 12 Final" delivers a compelling challenge, with its intricate mechanics rewarding creativity and tactical thinking. Give it a try to uncover a fresh layer of fun in *StarCraft*.
マップ選択ガイド
태그는 맵의 핵심 특징을 빠르게 설명하지만 제작 버전마다 규칙이 다를 수 있습니다. 상세 설명에서 권장 인원, 난이도, 플레이 시간과 버전을 함께 확인한 뒤 다운로드하세요.