
레벨 방식 スタークラフト マップコレクション
「레벨 방식」タグが登録されたマップを集めました。ジャンルだけでは見つけにくいプレイ方式、難易度、特徴を中心に、人気のマップと最新マップを比較してみてください。
- 登録マップ
- 2個
- 累計ダウンロード
- 0
- 累計閲覧
- 104
人気マップ
ダウンロードと閲覧の反応が高いマップです。
탱크 디펜스 1000 (Tank Defense 1ooo)
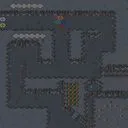
스타크래프트 브루드워의 디펜스 장르 유즈맵 'Tank Defense 1ooo'는 시즈 탱크와 영웅 유닛을 활용해 적의 웨이브 공격을 방어하는 컴까기 스타일의 맵이다. 맵 중앙에 위치한 본진을 중심으로 적 기지까지 좁은 길목이 뻗어 있으며, 이 길목을 따라 끊임없이 몰려오는 적을 상대로 시즈 탱크를 배치하고 영웅을 육성해가며 방어전을 펼치는 구조다. 이미지 상에서 확인되는 본진의 배치와 길목의 좁은 통로가 특징적이며, 적의 공격 루트가 제한되어 있어 방어전략을 세우는 재미가 있다. 맵 좌측과 우측에 영웅 선택 구역이 보이며, 이를 통해 플레이어는 상황에 맞는 영웅을 선택해 전투를 보조할 수 있다. 맵의 규모는 3072x2048로 비교적 넓은 편이지만, 방어 루트가 집중되어 있어 플레이 시간은 20레벨에 걸쳐 진행될 것으로 추정된다. 이 맵의 가장 큰 특징은 시즈 탱크의 활용과 영웅 시스템에 있다. 시즈 탱크는 원거리에서 강력한 공격력을 발휘해 적을 제압할 수 있으며, 영웅은 고유한 스킬을 보유하고 있어 전투를 보조하거나 위기 상황을 극복하는 데 도움을 준다. 특히 적의 공격이 점점 강력해지는 20레벨 시스템은 플레이어의 전략적 선택과 적응력을 요구한다. 또한 맵의 길목이 좁아 시즈 탱크의 포격 범위를 활용한 효율적인 방어가 가능하다는 점도 특징이다. 다만, 영웅의 선택과 업그레이드는 신중히 결정해야 하며, 초반 자원 관리와 시즈 탱크의 배치 타이밍이 승패를 좌우할 수 있다. 초보자도 쉽게 접근할 수 있지만, 고레벨로 갈수록 전략의 깊이가 요구되는 맵으로, 반복 플레이를 통해 최적의 방어 전략을 찾아가는 재미가 있다. 추천 대상은 디펜스 맵을 즐기는 플레이어 및 컴까기 경험을 쌓고 싶은 유저들이다. 플레이 전에는 영웅의 스킬과 시즈 탱크의 특성을 숙지하고, 자원 관리와 배치 위치를 미리 계획하는 것이 중요하다. Tank Defense 1ooo is a UMS-style defense custom map in StarCraft: Brood War where players defend their base against waves of enemies using Siege Tanks and hero units. The map features a central base with a narrow path leading to enemy structures, forcing players to strategically position Siege Tanks along choke points while managing hero units for additional support. The left and right sides of the map show hero selection areas, allowing players to choose units that complement their playstyle. The map's size is 3072x2048, offering ample space, but the concentrated defense paths keep gameplay focused and engaging. The core mechanics revolve around Siege Tanks' long-range firepower and hero abilities, which become increasingly crucial as the 20 levels progress. Each level introduces stronger enemy waves, requiring players to adapt their strategies, upgrade units, and manage resources efficiently. The narrow pathways make it ideal for Siege Tank sniping, but poor placement or lack of hero coordination can lead to overwhelm. While the game is accessible for beginners, higher levels demand deeper strategic thinking and quick decision-making. The repetitive yet evolving nature of the levels encourages players to refine their tactics over multiple sessions. This map is best suited for fans of defense games and players looking to improve their micro and macro skills in StarCraft custom maps. Before playing, familiarize yourself with hero abilities and Siege Tank positioning to maximize efficiency during intense waves.
트리키 바운드 (Tricky Bound)
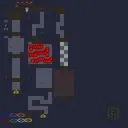
스타크래프트 브루드워의 유즈맵 'Tricky Bound'는 6인용 디펜스 장르로, 5단계의 레벨을 progressively하게 돌파하는 형식의 맵입니다. 화면 중앙에 배치된 거대한 보라색 크리스탈이 주요 방어 목표로, 플레이어는 이 목표를 보호하며 끊임없이 몰려오는 적들을 방어해야 합니다. 크리스탈 주변에는 방어 건물이 설치되지 않은 빈 공간이 넓게 펼쳐져 있으며, 맵 가장자리의 좁은 통로와 입구들이 주요 공격 루트가 됩니다. 각 레벨은 난이도가 점진적으로 상승하며, 적의 종류와 수가 증가합니다. 크리스탈 주변의 빈 공간은 플레이어의 전략적 배치와 움직임을 요구하며, 좁은 입구들은 방어선을 구축하기에 적합한 위치입니다. 맵의 디자인상으로는 방어 건물이 없는 빈 공간이 많아 초기 방어가 다소 취약해 보일 수 있으나, 좁은 통로와 입구들이 자연스럽게 방어 포인트를 제공합니다. 플레이어는 각 레벨의 보스를 격파하거나 일정 시간 동안 버티는 방식으로 승부를 겨루며, 레벨이 올라갈수록 더 강력한 적들과 패턴을 상대해야 합니다. 맵의 플레이 시간은 약 30분 내외로 예상되며, 난이도는 초보자부터 숙련자까지 폭넓은 유저가 즐길 수 있도록 조절되어 있습니다. 특히 디펜스 장르에 익숙한 유저라면 더욱 전략적으로 플레이할 수 있으며, 레벨을 클리어할 때마다 느껴지는 성취감이 큰 매력입니다. 그러나 크리스탈 주변의 넓은 빈 공간이 공격을 받기 쉬운 구조이므로, 초보자의 경우 방어 건물 배치와 유닛 관리에서 어려움을 느낄 수 있습니다. 따라서 적절한 유닛 조합과 건물 배치를 연습하는 것이 중요합니다. 이 맵은 디펜스와 서바이벌 요소를 결합한 유즈맵으로, 특히 레벨별로 변하는 적의 패턴과 보스전을 즐기고 싶은 유저들에게 추천합니다. 또한, 다인 멀티플레이 환경에서 팀워크와 협동이 중요한 요소로 작용할 수 있어, 팀 플레이를 선호하는 유저들에게도 적합합니다. 플레이 전에는 각 레벨의 패턴과 적의 종류를 잘 숙지하고, 방어 건물과 유닛의 효율적인 배치 방법을 미리 계획하는 것이 중요합니다. 또한, 크리스탈 주변의 넓은 공간을 최대한 활용하여 방어선을 구축하는 전략이 필요합니다. 이 맵은 기존 디펜스 맵과는 차별화된 레벨 시스템과 점진적 난이도 상승이 특징으로, 반복 플레이를 통해 더욱 전략적인 플레이가 가능하다는 장점이 있습니다. 다만, 넓은 공간과 좁은 입구 간의 밸런스가 다소 아쉬운 부분이 있어, 숙련된 플레이어는 더 효율적인 방어 전략을 구사할 수 있습니다. "Tricky Bound," a StarCraft: Brood War custom map, is a 6-player defense game where players progressively clear five levels. The main objective is protecting a massive purple crystal located at the center of the screen, fending off waves of relentless enemies. Surrounding the crystal is a vast open area without defensive structures, while narrow pathways and entrances at the map’s edges serve as the primary attack routes. Each level increases in difficulty, with more enemy types and greater numbers. The open space around the crystal demands strategic positioning and movement, while the narrow entrances are ideal for setting up defensive lines. Though the lack of defensive structures in the open area may seem weak at first glance, the confined paths naturally create strong defensive points. Players defeat bosses or survive for a set duration to progress, facing increasingly powerful enemies and more complex patterns as levels advance. The expected playtime is around 30 minutes, with difficulty adjusted to suit both beginners and experts. Those familiar with defense games will find it particularly engaging, as the sense of accomplishment upon clearing each level is a major draw. However, the wide open space around the crystal makes it vulnerable to attacks, so beginners may struggle with unit management and building placement. Practicing effective unit compositions and defensive setups is key. This map blends defense and survival elements, making it ideal for players who enjoy adapting to shifting enemy patterns and boss battles. It also thrives in multiplayer settings, where teamwork and coordination play crucial roles, appealing to those who prefer collaborative play. Before starting, study each level’s patterns and enemy types, plan efficient building and unit placements, and maximize the open space around the crystal to fortify defenses. What sets this map apart is its level-based system and gradual difficulty curve, encouraging repeated play for deeper strategic mastery. Still, the balance between open space and narrow entrances could be refined, allowing skilled players to optimize their defenses even further.
最近登録されたマップ
新たに追加されたファイルとバージョンをご確認ください。
트리키 바운드 (Tricky Bound)
스타크래프트 브루드워의 유즈맵 'Tricky Bound'는 6인용 디펜스 장르로, 5단계의 레벨을 progressively하게 돌파하는 형식의 맵입니다. 화면 중앙에 배치된 거대한 보라색 크리스탈이 주요 방어 목표로, 플레이어는 이 목표를 보호하며 끊임없이 몰려오는 적들을 방어해야 합니다. 크리스탈 주변에는 방어 건물이 설치되지 않은 빈 공간이 넓게 펼쳐져 있으며, 맵 가장자리의 좁은 통로와 입구들이 주요 공격 루트가 됩니다. 각 레벨은 난이도가 점진적으로 상승하며, 적의 종류와 수가 증가합니다. 크리스탈 주변의 빈 공간은 플레이어의 전략적 배치와 움직임을 요구하며, 좁은 입구들은 방어선을 구축하기에 적합한 위치입니다. 맵의 디자인상으로는 방어 건물이 없는 빈 공간이 많아 초기 방어가 다소 취약해 보일 수 있으나, 좁은 통로와 입구들이 자연스럽게 방어 포인트를 제공합니다. 플레이어는 각 레벨의 보스를 격파하거나 일정 시간 동안 버티는 방식으로 승부를 겨루며, 레벨이 올라갈수록 더 강력한 적들과 패턴을 상대해야 합니다. 맵의 플레이 시간은 약 30분 내외로 예상되며, 난이도는 초보자부터 숙련자까지 폭넓은 유저가 즐길 수 있도록 조절되어 있습니다. 특히 디펜스 장르에 익숙한 유저라면 더욱 전략적으로 플레이할 수 있으며, 레벨을 클리어할 때마다 느껴지는 성취감이 큰 매력입니다. 그러나 크리스탈 주변의 넓은 빈 공간이 공격을 받기 쉬운 구조이므로, 초보자의 경우 방어 건물 배치와 유닛 관리에서 어려움을 느낄 수 있습니다. 따라서 적절한 유닛 조합과 건물 배치를 연습하는 것이 중요합니다. 이 맵은 디펜스와 서바이벌 요소를 결합한 유즈맵으로, 특히 레벨별로 변하는 적의 패턴과 보스전을 즐기고 싶은 유저들에게 추천합니다. 또한, 다인 멀티플레이 환경에서 팀워크와 협동이 중요한 요소로 작용할 수 있어, 팀 플레이를 선호하는 유저들에게도 적합합니다. 플레이 전에는 각 레벨의 패턴과 적의 종류를 잘 숙지하고, 방어 건물과 유닛의 효율적인 배치 방법을 미리 계획하는 것이 중요합니다. 또한, 크리스탈 주변의 넓은 공간을 최대한 활용하여 방어선을 구축하는 전략이 필요합니다. 이 맵은 기존 디펜스 맵과는 차별화된 레벨 시스템과 점진적 난이도 상승이 특징으로, 반복 플레이를 통해 더욱 전략적인 플레이가 가능하다는 장점이 있습니다. 다만, 넓은 공간과 좁은 입구 간의 밸런스가 다소 아쉬운 부분이 있어, 숙련된 플레이어는 더 효율적인 방어 전략을 구사할 수 있습니다. "Tricky Bound," a StarCraft: Brood War custom map, is a 6-player defense game where players progressively clear five levels. The main objective is protecting a massive purple crystal located at the center of the screen, fending off waves of relentless enemies. Surrounding the crystal is a vast open area without defensive structures, while narrow pathways and entrances at the map’s edges serve as the primary attack routes. Each level increases in difficulty, with more enemy types and greater numbers. The open space around the crystal demands strategic positioning and movement, while the narrow entrances are ideal for setting up defensive lines. Though the lack of defensive structures in the open area may seem weak at first glance, the confined paths naturally create strong defensive points. Players defeat bosses or survive for a set duration to progress, facing increasingly powerful enemies and more complex patterns as levels advance. The expected playtime is around 30 minutes, with difficulty adjusted to suit both beginners and experts. Those familiar with defense games will find it particularly engaging, as the sense of accomplishment upon clearing each level is a major draw. However, the wide open space around the crystal makes it vulnerable to attacks, so beginners may struggle with unit management and building placement. Practicing effective unit compositions and defensive setups is key. This map blends defense and survival elements, making it ideal for players who enjoy adapting to shifting enemy patterns and boss battles. It also thrives in multiplayer settings, where teamwork and coordination play crucial roles, appealing to those who prefer collaborative play. Before starting, study each level’s patterns and enemy types, plan efficient building and unit placements, and maximize the open space around the crystal to fortify defenses. What sets this map apart is its level-based system and gradual difficulty curve, encouraging repeated play for deeper strategic mastery. Still, the balance between open space and narrow entrances could be refined, allowing skilled players to optimize their defenses even further.
탱크 디펜스 1000 (Tank Defense 1ooo)
스타크래프트 브루드워의 디펜스 장르 유즈맵 'Tank Defense 1ooo'는 시즈 탱크와 영웅 유닛을 활용해 적의 웨이브 공격을 방어하는 컴까기 스타일의 맵이다. 맵 중앙에 위치한 본진을 중심으로 적 기지까지 좁은 길목이 뻗어 있으며, 이 길목을 따라 끊임없이 몰려오는 적을 상대로 시즈 탱크를 배치하고 영웅을 육성해가며 방어전을 펼치는 구조다. 이미지 상에서 확인되는 본진의 배치와 길목의 좁은 통로가 특징적이며, 적의 공격 루트가 제한되어 있어 방어전략을 세우는 재미가 있다. 맵 좌측과 우측에 영웅 선택 구역이 보이며, 이를 통해 플레이어는 상황에 맞는 영웅을 선택해 전투를 보조할 수 있다. 맵의 규모는 3072x2048로 비교적 넓은 편이지만, 방어 루트가 집중되어 있어 플레이 시간은 20레벨에 걸쳐 진행될 것으로 추정된다. 이 맵의 가장 큰 특징은 시즈 탱크의 활용과 영웅 시스템에 있다. 시즈 탱크는 원거리에서 강력한 공격력을 발휘해 적을 제압할 수 있으며, 영웅은 고유한 스킬을 보유하고 있어 전투를 보조하거나 위기 상황을 극복하는 데 도움을 준다. 특히 적의 공격이 점점 강력해지는 20레벨 시스템은 플레이어의 전략적 선택과 적응력을 요구한다. 또한 맵의 길목이 좁아 시즈 탱크의 포격 범위를 활용한 효율적인 방어가 가능하다는 점도 특징이다. 다만, 영웅의 선택과 업그레이드는 신중히 결정해야 하며, 초반 자원 관리와 시즈 탱크의 배치 타이밍이 승패를 좌우할 수 있다. 초보자도 쉽게 접근할 수 있지만, 고레벨로 갈수록 전략의 깊이가 요구되는 맵으로, 반복 플레이를 통해 최적의 방어 전략을 찾아가는 재미가 있다. 추천 대상은 디펜스 맵을 즐기는 플레이어 및 컴까기 경험을 쌓고 싶은 유저들이다. 플레이 전에는 영웅의 스킬과 시즈 탱크의 특성을 숙지하고, 자원 관리와 배치 위치를 미리 계획하는 것이 중요하다. Tank Defense 1ooo is a UMS-style defense custom map in StarCraft: Brood War where players defend their base against waves of enemies using Siege Tanks and hero units. The map features a central base with a narrow path leading to enemy structures, forcing players to strategically position Siege Tanks along choke points while managing hero units for additional support. The left and right sides of the map show hero selection areas, allowing players to choose units that complement their playstyle. The map's size is 3072x2048, offering ample space, but the concentrated defense paths keep gameplay focused and engaging. The core mechanics revolve around Siege Tanks' long-range firepower and hero abilities, which become increasingly crucial as the 20 levels progress. Each level introduces stronger enemy waves, requiring players to adapt their strategies, upgrade units, and manage resources efficiently. The narrow pathways make it ideal for Siege Tank sniping, but poor placement or lack of hero coordination can lead to overwhelm. While the game is accessible for beginners, higher levels demand deeper strategic thinking and quick decision-making. The repetitive yet evolving nature of the levels encourages players to refine their tactics over multiple sessions. This map is best suited for fans of defense games and players looking to improve their micro and macro skills in StarCraft custom maps. Before playing, familiarize yourself with hero abilities and Siege Tank positioning to maximize efficiency during intense waves.
マップ選択ガイド
태그는 맵의 핵심 특징을 빠르게 설명하지만 제작 버전마다 규칙이 다를 수 있습니다. 상세 설명에서 권장 인원, 난이도, 플레이 시간과 버전을 함께 확인한 뒤 다운로드하세요.