スターヒュジ StarCraft HUZY スタークラフト ユーズマップ マップダウンロード コミュニティ
日本語

디펜스 빌드 スタークラフト マップコレクション

「디펜스 빌드」タグが登録されたマップを集めました。ジャンルだけでは見つけにくいプレイ方式、難易度、特徴を中心に、人気のマップと最新マップを比較してみてください。

登録マップ
1個
累計ダウンロード
0
累計閲覧
12

人気マップ

ダウンロードと閲覧の反応が高いマップです。

すべて見る
7vs1 하드 컴퓨터 (7vs1 hard computer) マッププレビュー

7vs1 하드 컴퓨터 (7vs1 hard computer)

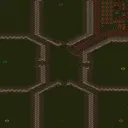
스타크래프트: 브루드워의 유즈맵 중에서도 손꼽히는 난이도와 긴장감을 자랑하는 <7vs1 hard computer>는 7명의 플레이어가 한 명의 적 컴퓨터를 상대로 방어전을 펼치는 디펜스 장르의 클래식 맵이다. 맵의 특징은 무엇보다도 '하드' 난이도로 설정된 컴퓨터의 공격성으로, 플레이어들은 초반부터 끊임없이 밀려오는 적 공세를 efficiently 방어해야 한다. 맵은 사막 타일셋으로 구성되어 있으며, 넓은 개활지가 펼쳐져 있어 자원 확보와 방어선 구축이 필수적이다. 내부 설명에서도 강조하듯, '빌드 디펜스를 빠르게 구축하지 않으면 순식간에 무너진다'는 점에서 플레이어의 판단력과 손속이 가장 중요하다. 주요 전략 포인트는 중앙 멀티 지역을 확보하고 입구 방어선을 튼튼히 구축하는 것이며, 컴퓨터는 끊임없이 러시와 대규모 공격을 시도하므로 자원 관리와 유닛 생산 타이밍이 승부를 가른다. 초보 플레이어보다는 중급 이상의 테란, 프로토스, 저그 유저들에게 추천되며, 특히 빠른 판단력과 팀워크가 요구되는 맵으로, 한 명의 실수로도 전세가 뒤집힐 수 있는 긴박한 전투가 특징이다. 방어선이 약해지는 순간을 노려 컴퓨터가 대규모 공격을 펼치므로, 항상 자원 여유를 유지하고 방어 건물을 보강하는 것이 관건이다. 또한, 7명의 플레이어가 하나의 목표를 공유하는 만큼, 각 플레이어의 역할 분담이 명확해야 한다. 예를 들어, 일부는 방어선 유지에 집중하고, 일부는 자원 수집과 유닛 생산을 담당하는 등 역할 분담이 중요하다. 맵의 긴장감과 난이도는 브루드워 유즈맵의 정점을 찍는 수준으로, 한 번의 실수가 모든 것을 좌우할 수 있는 짜릿한 경험을 제공한다. 이 맵을 공략하기 위해서는 컴퓨터의 공격 패턴을 숙지하고, 방어 건물과 유닛 조합을 최적화하는 것이 필수다. 특히, 컴퓨터의 러시 타이밍을 예측하고 사전에 대비하는 것이 관건으로, 이를 위해서는 반복적인 플레이와 전략 수정이 요구된다. 맵의 난이도와 긴장감 덕분에 숙련자들 사이에서 인기가 높으며, 브루드워 유즈맵의 대표적인 디펜스 장르로 자리매김하고 있다. 플레이 전에는 자신의 종족에 맞는 방어 빌드를 숙지하고, 팀원과의 협력 플레이를 연습하는 것이 중요하다. 또한, 컴퓨터의 공격 패턴을 분석하여 방어선을 보강하는 것이 승리의 열쇠가 될 것이다. Among the many user-made maps in StarCraft: Brood War, <7vs1 Hard Computer> stands out for its intense difficulty and high tension. In this classic defense-style map, seven players must work together to fend off a single enemy AI in a challenging battle. What sets this map apart is the AI's aggressive difficulty setting—players must efficiently defend against relentless enemy assaults from the very beginning. The map features a desert tileset with vast open areas, making resource gathering and establishing a strong defensive line essential. As emphasized in the map's description, failing to quickly build a defensive build order can lead to a swift defeat, making quick decision-making and precise execution critical. Key strategic points include securing the central expansion area and reinforcing the main entrance with a sturdy defensive line. Since the AI constantly launches rushes and large-scale attacks, resource management and timely unit production are crucial to victory. This map is recommended for intermediate to advanced players of Terran, Protoss, and Zerg, requiring sharp judgment and teamwork. A single mistake can shift the tide of battle, so the tension remains high throughout. The AI exploits any weakness in the defense by launching massive attacks, so maintaining resource reserves and reinforcing defensive structures is vital. With seven players sharing one objective, clear role distribution is essential—some must focus on holding the line while others gather resources and produce units. The map's difficulty and tension reach the pinnacle of Brood War custom maps, offering an exhilarating experience where one mistake can decide everything. To master this map, players must study the AI's attack patterns, optimize their defensive structures and unit compositions, and predict rush timings to prepare in advance. This requires repeated play and strategic adjustments. Due to its high difficulty and thrilling gameplay, it remains a favorite among experienced players and is considered a quintessential defense-style map in Brood War custom games. Before playing, it's important to familiarize yourself with your race's defensive build, practice team coordination, and analyze the AI's attack patterns to reinforce your defenses—these elements are the key to victory.

ダウンロード 0 · 閲覧 12 ・ コメント 0

最近登録されたマップ

新たに追加されたファイルとバージョンをご確認ください。

7vs1 하드 컴퓨터 (7vs1 hard computer) マッププレビュー

7vs1 하드 컴퓨터 (7vs1 hard computer)

스타크래프트: 브루드워의 유즈맵 중에서도 손꼽히는 난이도와 긴장감을 자랑하는 <7vs1 hard computer>는 7명의 플레이어가 한 명의 적 컴퓨터를 상대로 방어전을 펼치는 디펜스 장르의 클래식 맵이다. 맵의 특징은 무엇보다도 '하드' 난이도로 설정된 컴퓨터의 공격성으로, 플레이어들은 초반부터 끊임없이 밀려오는 적 공세를 efficiently 방어해야 한다. 맵은 사막 타일셋으로 구성되어 있으며, 넓은 개활지가 펼쳐져 있어 자원 확보와 방어선 구축이 필수적이다. 내부 설명에서도 강조하듯, '빌드 디펜스를 빠르게 구축하지 않으면 순식간에 무너진다'는 점에서 플레이어의 판단력과 손속이 가장 중요하다. 주요 전략 포인트는 중앙 멀티 지역을 확보하고 입구 방어선을 튼튼히 구축하는 것이며, 컴퓨터는 끊임없이 러시와 대규모 공격을 시도하므로 자원 관리와 유닛 생산 타이밍이 승부를 가른다. 초보 플레이어보다는 중급 이상의 테란, 프로토스, 저그 유저들에게 추천되며, 특히 빠른 판단력과 팀워크가 요구되는 맵으로, 한 명의 실수로도 전세가 뒤집힐 수 있는 긴박한 전투가 특징이다. 방어선이 약해지는 순간을 노려 컴퓨터가 대규모 공격을 펼치므로, 항상 자원 여유를 유지하고 방어 건물을 보강하는 것이 관건이다. 또한, 7명의 플레이어가 하나의 목표를 공유하는 만큼, 각 플레이어의 역할 분담이 명확해야 한다. 예를 들어, 일부는 방어선 유지에 집중하고, 일부는 자원 수집과 유닛 생산을 담당하는 등 역할 분담이 중요하다. 맵의 긴장감과 난이도는 브루드워 유즈맵의 정점을 찍는 수준으로, 한 번의 실수가 모든 것을 좌우할 수 있는 짜릿한 경험을 제공한다. 이 맵을 공략하기 위해서는 컴퓨터의 공격 패턴을 숙지하고, 방어 건물과 유닛 조합을 최적화하는 것이 필수다. 특히, 컴퓨터의 러시 타이밍을 예측하고 사전에 대비하는 것이 관건으로, 이를 위해서는 반복적인 플레이와 전략 수정이 요구된다. 맵의 난이도와 긴장감 덕분에 숙련자들 사이에서 인기가 높으며, 브루드워 유즈맵의 대표적인 디펜스 장르로 자리매김하고 있다. 플레이 전에는 자신의 종족에 맞는 방어 빌드를 숙지하고, 팀원과의 협력 플레이를 연습하는 것이 중요하다. 또한, 컴퓨터의 공격 패턴을 분석하여 방어선을 보강하는 것이 승리의 열쇠가 될 것이다. Among the many user-made maps in StarCraft: Brood War, <7vs1 Hard Computer> stands out for its intense difficulty and high tension. In this classic defense-style map, seven players must work together to fend off a single enemy AI in a challenging battle. What sets this map apart is the AI's aggressive difficulty setting—players must efficiently defend against relentless enemy assaults from the very beginning. The map features a desert tileset with vast open areas, making resource gathering and establishing a strong defensive line essential. As emphasized in the map's description, failing to quickly build a defensive build order can lead to a swift defeat, making quick decision-making and precise execution critical. Key strategic points include securing the central expansion area and reinforcing the main entrance with a sturdy defensive line. Since the AI constantly launches rushes and large-scale attacks, resource management and timely unit production are crucial to victory. This map is recommended for intermediate to advanced players of Terran, Protoss, and Zerg, requiring sharp judgment and teamwork. A single mistake can shift the tide of battle, so the tension remains high throughout. The AI exploits any weakness in the defense by launching massive attacks, so maintaining resource reserves and reinforcing defensive structures is vital. With seven players sharing one objective, clear role distribution is essential—some must focus on holding the line while others gather resources and produce units. The map's difficulty and tension reach the pinnacle of Brood War custom maps, offering an exhilarating experience where one mistake can decide everything. To master this map, players must study the AI's attack patterns, optimize their defensive structures and unit compositions, and predict rush timings to prepare in advance. This requires repeated play and strategic adjustments. Due to its high difficulty and thrilling gameplay, it remains a favorite among experienced players and is considered a quintessential defense-style map in Brood War custom games. Before playing, it's important to familiarize yourself with your race's defensive build, practice team coordination, and analyze the AI's attack patterns to reinforce your defenses—these elements are the key to victory.

ダウンロード 0 · 閲覧 12 ・ コメント 0
マップ選択ガイド

태그는 맵의 핵심 특징을 빠르게 설명하지만 제작 버전마다 규칙이 다를 수 있습니다. 상세 설명에서 권장 인원, 난이도, 플레이 시간과 버전을 함께 확인한 뒤 다운로드하세요.