
도라에몽 スタークラフト マップコレクション
「도라에몽」タグが登録されたマップを集めました。ジャンルだけでは見つけにくいプレイ方式、難易度、特徴を中心に、人気のマップと最新マップを比較してみてください。
- 登録マップ
- 17個
- 累計ダウンロード
- 1
- 累計閲覧
- 9
人気マップ
ダウンロードと閲覧の反応が高いマップです。
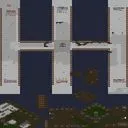
도라에몽의 성큰 (Doraemon's Sunken)
도라에몽의 성큰은 플랫폼 타일셋을 기반으로 한 1024×1024 크기의 UMS 맵으로, 내부 제목과 파일명에서 확인할 수 있듯이 도라에몽 캐릭터를 모티브로 한 성큰 중심의 디펜스 게임을 제공한다. 맵의 전반적인 구조는 중앙에 위치한 성큰 건물을 주거점으로 두고, 그 주변에 방사형으로 배치된 채굴 지역과 방어 구역이 존재한다. 플레이어는 시작 시 기본 드론과 몇 개의 프로브를 주어지며, 초반에 드론 생산을 가속해 미네랄과 가스를 빠르게 확보하는 것이 승리의 핵심이다. 자원이 충분히 모이면 성큰 건물 주변에 포톤 캐논이나 스파인 크롤러와 유사한 방어 시설을 세울 수 있으며, 업그레이드 메뉴를 통해 공격 범위와 피해량을 점진적으로 향상시킬 수 있다. 적 웨이브는 주기적으로 맵 가장자리에서 spawn되며, 웨이브가 진행될수록 유닛의 체력과 공격력이 증가하고, 특수 유닛인 거대 히드라리스크나 몰래킹이 가끔 등장해 방어 라인을 시험한다. 플레이어는 웨이브 사이에 획득한 자원을 이용해 건물 수리나 신규 타워 건설, 그리고 임시 버프 아이템을 구매할 수 있다. 이 맵은 팀 구분이 없이 최대 6명이 동시에 참여할 수 있으며, 각 플레이어는 자신만의 독립된 영역에서 점수를 쌓는데, 점수는 생존 시간과 처치한 적 수에 비례하여 계산된다.そのため 협동보다는 개인의 전략과 마이크로 컨트롤이 더 큰 영향을 미친다. 추천 대상은 성큰이나 디펜스 장르를 즐기는 유저와, 도라에몽 팬에게 친숙한 캐릭터 디자인이 맵 속에 녹아 있어 시각적인 즐거움을 주는 분들이다. 특히 초반 경제 구축과 방어 배치를 동시에 고려해야 하는 멀티태스킹 능력이 요구되므로, 중간 수준 이상의 실력을 가진 플레이어에게 적합하다. 플레이 전에는 초기 드론 타이밍을 30초 내에 끝내고, 성큰 건물의 사각지대를 최소화하기 위해 방사형으로 두 줄 이상의 방어 시설을 배치하는 것을 권장한다. 또한 웨이브 중간에 등장하는 거대 유닛에 대비해 스플래시 데미지가 가능한 타워를 하나 이상 확보해 두면 후기 라인에서 큰 도움이 된다. Doraemon's Sunken is a UMS map built on the platform tileset with a size of 1024×1024, offering a defense‑style game centered on the Sunken structure and themed around Doraemon characters, as indicated by the internal title and file name. The map’s layout centers on a Sunken building placed in the middle, with resource zones and defense sectors arranged radially around it. Players start with a few drones and probes; accelerating drone production early to quickly gather minerals and gas is the key to victory. Once enough resources are collected, players can erect photon cannon‑ or spiny crawler‑like defensive structures around the Sunken core and gradually upgrade their range and damage through the upgrade menu. Enemy waves spawn periodically from the map’s edges, growing stronger in health and attack power as the game progresses, and occasional large units such as giant hydralisks or lurkers appear to test the defensive line. Between waves, spent resources can be used to repair buildings, construct new towers, or purchase temporary buff items. The map supports up to six players simultaneously without team divisions; each player competes in an independent area, earning points based on survival time and number of enemies killed, so individual strategy and micro‑control matter more than cooperation. It is recommended for fans of Sunken‑ or defense‑style gameplay and for Doraemon enthusiasts who will appreciate the familiar character designs woven into the map for visual enjoyment. Because early‑game economic buildup and defensive placement must be managed together, multitasking ability is required, making the map suitable for intermediate‑skill players and above. Before playing, aim to finish initial drone production within 30 seconds and arrange at least two concentric layers of defensive structures around the Sunken building to minimize blind spots. Additionally, securing at least one tower with splash damage in anticipation of the large units that appear mid‑wave can prove decisive in later stages.
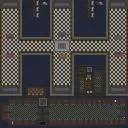
도라에몽의 성큰 [2023 복권 ] (Doraemon's Sunken [2023 Lottery])
도라에몽의 성큰 [2023 복권 ]은 BEATA 버전에서 랜덤 뽑기 기능이 추가된 유즈맵이다. 플레이어는 매 라운드마다 복권 형태로 아이템이나 유닛을 무작위로獲得할 수 있으며, 이를 활용해 자신만의 전략을 구축할 수 있다. 업그레이드 시스템이 존재해서 뽑은 자원을 소비해 유닛이나 건물의 성능을 향상시킬 수 있고, 수동 시작 옵션이 있어 게임 시작 타이밍을 플레이어가 직접 조절할 수 있다. 또한 팀킬 방지 기능이 적용되어 아군에게 의도치 않은 피해를 주는 상황을 줄여 cooperative 플레이시에도 스트레스를 낮춘다. 맵 전체는 플랫폼 타일셋을 사용한 1024x1024 크기로, 넓은 공간에서 이동과 전투가 자연스럽게 이루어진다. 게임 진행 방식은 라운드 기반으로, 각 라운드 종료 후 보상을 재배분하고 다음 라운드에 대비해 자원을 관리하는 루프가 반복된다. 이로 인해 운과 전략이 결합된 독특한 플레이감을 느낄 수 있으며, 단기간 집중해서 플레이하기에 적합한 미니게임 성격을 띤다. 추천 대상은 랜덤 요소를 즐기고 빠른 템포의 전략 변동을 좋아하는 유저이며, 팀플레이를 선호하는 경우 팀킬 방지 옵션 덕분에 편안하게 협력할 수 있다. 플레이 전에는 수동 시작 기능을 활용해 원하는 시점에 게임을 시작하고, 업그레이드 트리를 미리 살펴보며 어떤 방향으로 자원을 투자할지 계획하는 것이 좋다. Doraemon's Sunken [2023 Lottery] is a UMS map that adds a random draw feature in its BEATA version. Players can obtain random items or units each round through a lottery-like draw and use them to build their own strategies. An upgrade system allows spending acquired resources to enhance unit or building performance, and the manual start option lets players control the game start timing themselves. Additionally, a teamkill prevention feature reduces accidental damage to allies, easing stress in cooperative play. The map uses the platform tileset at a size of 1024x1024, providing ample space for natural movement and combat. Gameplay proceeds in rounds: after each round ends, rewards are redistributed and resource management prepares for the next round, creating a loop. This blend of luck and strategy offers a unique play experience, suitable for short, focused sessions as a mini‑game. It is recommended for players who enjoy random elements and enjoy fast‑paced strategic shifts, and the teamkill prevention option makes cooperative play comfortable for those who prefer teamwork. Before playing, use the manual start function to begin at a desired moment, review the upgrade tree in advance, and plan how to allocate resources.
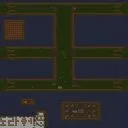
도라에몽 의 Lurker
‘도라에몽의 Lurker’는 스타크래프트 브루드워의 유즈맵으로, 이름 그대로 히어로즈 오브 더 스톰의 롤러, 혹은 스타크래프트의 럴커를 활용한 디펜스 장르의 맵이다. 맵의 전체적인 분위기는 밝고 친근한 도라에몽의 세계관을 기반으로 하고 있지만, 실제 게임 플레이는 디펜스와 생존을 중점으로 구성되어 있다. 맵의 중앙에는 자원과 건물이 배치되어 있으며, 플레이어는 이 자원을 확보하면서 동시에 끊임없이 몰려드는 적의 공격을 방어해야 한다. 맵의 특징은 바로 럴커의 활용에 있다. 럴커는 지상 공격만 가능한 특수한 유닛으로, 디펜스 맵에서 적의 접근을 차단하거나 특정 지점을 방어하는 데 효과적으로 사용된다. 맵 곳곳에 배치된 럴커 포지션과 기지 주변의 방어 시설이 이 맵의 핵심 전략을 구성하며, 플레이어는 언제, 어디서 럴커를 배치할지를 신중히 판단해야 한다. 또한, 맵의 구조는 비교적 넓고 개방되어 있어 적의 공격을 예상하고 대응하기가 용이하다는 장점이 있지만, 반대로 방어가 소홀해지면 순식간에 무너질 위험도 존재한다. 맵의 진행은 단계별로 나뉘어 있으며, 각 단계마다 적의 공격 패턴과 강도가 달라진다. 초반에는 약한 적들이 무더기로 몰려오지만, 후반부로 갈수록 강력한 적들이 등장해 플레이어의 방어 능력을 시험한다. 이러한 구조는 플레이어에게 긴장감을 유지하게 하며, 전략적인 사고와 빠른 대처 능력을 요구한다. 맵의 난이도는 대체로 ‘보통’ 정도로 평가되며, 초보 플레이어도 럴커의 특성과 맵의 구조를 숙지한다면 충분히 즐길 수 있지만, 고수들이라면 더욱 정교한 전략과 손속을 요구받게 된다. 특히, 럴커의 배치와 자원 관리, 그리고 적의 공격 타이밍을 읽는 능력이 게임의 승패를 좌우한다. 이 맵은 디펜스와 전략 게임을 좋아하는 유저들에게 추천하며, 도라에몽의 친근한 세계관과 조합된 게임 플레이가 색다른 재미를 선사할 것이다. 플레이 전에는 반드시 럴커의 특성과 맵 내의 주요 방어 지점을 숙지하고, 각 단계의 적 공격 패턴을 미리 확인해 두는 것이 좋다. 또한, 자원의 부족은 곧 방어력의 약화를 의미하므로 자원 관리에 신경을 써야 한다. 이러한 요소들을 숙지하고 있다면, ‘도라에몽의 Lurker’는 즐거운 시간과 함께 뛰어난 전략적 재미를 제공할 것이다. Lurker by Doraemon is a StarCraft: Brood War custom map that focuses on defense mechanics, utilizing the Lurker unit as a core element of gameplay. The map draws inspiration from the cheerful and familiar world of Doraemon, blending it with strategic defense elements. The central area of the map features resource and building placements, where players must gather resources while defending against relentless enemy waves. The standout feature of this map is its reliance on Lurker units, which excel at ground-based attacks and can effectively block enemy advances or secure key positions. Strategically placed Lurker positions and defensive structures around the base form the core of the gameplay, requiring players to carefully decide where and when to deploy these units. The map’s open and expansive design allows for strategic foresight and adaptability, but it also demands constant vigilance to avoid being overwhelmed. The gameplay progresses through multiple stages, each introducing increasingly powerful enemies with varied attack patterns. Early stages feature weaker, swarming units, while later stages escalate in difficulty, testing the player’s defensive prowess. This structure keeps players engaged and heightens the need for strategic thinking and quick reactions. The map is generally rated as having a moderate difficulty level, making it accessible to newcomers who familiarize themselves with Lurker mechanics and map layout. However, experienced players will find deeper layers of strategy and precision required to succeed. Key factors such as Lurker placement, resource management, and timing against enemy attacks play pivotal roles in determining victory. This map is highly recommended for fans of defense and strategy games, offering a unique twist with its Doraemon-themed world. Before playing, it is essential to understand Lurker mechanics, identify critical defensive positions on the map, and study enemy attack patterns for each stage. Efficient resource management is crucial, as scarcity directly impacts defensive capabilities. With these elements in mind, Lurker by Doraemon promises an engaging and rewarding strategic experience.
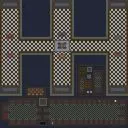
도라에몽의 성큰 [2022] (Doraemon's Sunken [2022])
도라에몽의 성큰 [2022] (Doraemon's Sunken [2022])는 스타크래프트 브루드워 유즈맵 세계관에서 클래식한 추억과 현대적인 편의성을 동시에 느껴볼 수 있는 독특한 스타크래프트 맵입니다. 이 맵은 기존의 유명한 방어형 유즈맵 규칙을 바탕으로 제작되었으며, 오랜 시간 동안 유저들 사이에서 사랑받아 온 콘셉트에 새로운 숨결을 불어넣은 작품으로 추정됩니다. 내부 맵 설명에 따르면 누군가에 의해 새롭게 패치된 버전이며, 지형을 한층 더 깔끔하게 다듬고 배경 음악과 다양한 편의 기능을 추가하여 플레이의 완성도를 높인 것이 가장 큰 특징입니다. 기존 작품의 향수를 기억하는 유저들에게는 반가움을 선사하는 동시에, 정돈된 구조 덕분에 처음 접하는 플레이어들도 비교적 쉽게 적응할 수 있는 접근성을 갖추고 있습니다. 전체적인 진행 방식은 밀리 전투와는 차별화된 방식으로, 제한된 공간 속에서 몰려오는 적들을 상대하거나 정해진 목표를 달성하는 데 초점이 맞춰져 있습니다. 플랫폼 타일셋을 기반으로 펼쳐지는 전장은 깔끔하게 정돈된 지형 덕분에 유닛의 이동과 배치 흐름을 한눈에 파악하기 용이하며, 사운드 요소와 기능적 보완이 어우러져 몰입감을 높여줍니다. 친구들과 함께 호흡을 맞추며 색다른 방어 및 생존 플레이를 즐기고 싶어 하는 유저들에게 적합한 유즈맵이며, 특히 가벼운 마음으로 옛 감성을 느끼며 즐길 수 있는 스타크래프트 유즈맵을 찾는 이들에게 추천할 만합니다. 플레이를 시작하기 전에는 추가된 BGM과 수정된 지형의 동선을 미리 파악하는 것이 유리하며, 최대 6인의 인원이 함께 즐길 수 있는 만큼 팀원 간의 협동과 역할 분담이 승패를 좌우하는 중요한 요소로 작용할 것입니다. 방어와 생존의 재미를 균형 있게 담아낸 이번 버전은 클래식 유즈맵의 매력을 재확인할 수 있는 좋은 기회가 될 것입니다. Doraemon's Sunken [2022] is a unique StarCraft map that allows players to experience both classic nostalgia and modern convenience within the StarCraft Brood War UMS map universe. This map is built upon familiar defense-style custom map rules, breathing new life into a concept that has been loved by users for a long time. According to the internal map description, this is a newly patched version by someone who neatly refined the terrain and added background music and various functional features to enhance the overall gameplay completion. It offers a sense of welcome familiarity to users who remember the nostalgia of the original work while providing an accessible structure that allows newcomers to adapt relatively easily. The overall progression style differs from traditional melee combat, focusing on dealing with incoming enemies within a limited space or achieving set objectives. The battlefield, set against a platform tileset, makes it easy to grasp the movement and placement flow of units at a glance thanks to the cleanly organized terrain, while integrated sound elements and functional improvements enhance immersion. It is a suitable custom map for users who want to enjoy a different kind of defense and survival play in cooperation with friends, and it is especially recommended for those looking for a StarCraft UMS map where they can enjoy old-school emotions with a light heart. Before starting the play, it is advantageous to understand the newly added BGM and the modified terrain paths in advance, and since up to six players can participate together, cooperation and role distribution among team members will serve as important factors determining victory or defeat. This version, which balances the fun of defense and survival, will be a great opportunity to reaffirm the charm of classic custom maps.
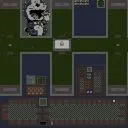
도라에몽 성큰 Easy 3.33.1
도라에몽 성큰 Easy 3.33.1은 스크래프트 브루드워용 UMS 맵으로, 도라에몽 캐릭터를 배경으로 한 탱크 중심의 방어형 게임이다. 1024x1024 플랫폼 타일셋을 사용하며 최대 6명이 동시에 플레이할 수 있다. 주요 메커니즘은 탱크 내구력 조절과 자동 배속 활용이며, 배속을 방어 시설에 붙이면 게임이 튕길 수 있으니 주의가 필요하다. 이는 속도 트리거가 민감함을 의미하고, 플레이어는 배속과 무장을 적절히 조합해 탱크 생존 시간을 늘려야 한다. 적 웨이브가 지속해서 등장하면, 플레이어는 탱크를 앞세워 라인을 막거나 전진하여 적을 소탕한다. 난이도는 명시되지 않았으나, 내구력 패치와 속도 제어가 핵심이라 중급 이상의 전략이 요구된다고 추정된다. 맵의 시각적 요소는 도라에몽의 익살스러운 스프라이트와 미래지향적인 탱크 디자인이 조화를 이루며, 배경음악은 경쾌한 멜로디가 전투의 긴박감을 높인다. 이러한 분위기는 플레이어에게 친숙하면서도 새로운 도전 의식을 불러일으킨다. 도라에몽 팬이나 탱크 방어 게임을 즐기는 유즈맵 애호가에게 적합하며, 간단한 조작과 명확한 목표로 입문자도 부담 없이 즐길 수 있다. 재플레이 가치는 다양한 탱크 조합과 배속 타이밍 실험에 달려 있어 반복 플레이 시 새로운 전략을 발견할 수 있다. 플레이 전에는 자동 배속 방식과 탱크 업그레이드 경로를 확인하는 것이 좋다. Doraemon Sunken Easy 3.33.1 is a UMS map for StarCraft Brood War, featuring Doraemon characters in a tank‑centric defense game. The map uses a 1024×1024 platform tileset and allows up to six players to play simultaneously. Its core mechanics involve adjusting tank durability and utilizing the auto‑speed function; attaching speed to defensive structures can cause the game to crash, so caution is advised. This indicates that speed‑related triggers are highly sensitive, and players must combine speed and armaments wisely to extend tank survivability. As enemy waves keep arriving, players use their tanks to block lanes or advance to eliminate foes. The difficulty is not explicitly stated, but because durability patching and speed control are central, intermediate or higher strategic thinking is likely required. The map’s visual elements blend Doraemon’s whimsical sprites with futuristic tank designs, while the background music features an upbeat melody that heightens the tension of combat. This atmosphere gives players a familiar feel while also presenting a fresh challenge. The map suits Doraemon fans and UMS lovers who enjoy tank‑based defense, offering simple controls and clear objectives that newcomers can approach without hesitation. Replay value lies in experimenting with different tank loadouts and speed timings, allowing players to discover new strategies on each playthrough. Before playing, check how the auto‑speed works and review the tank upgrade paths.
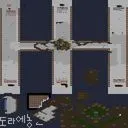
도라에몽 의 Sunken II
도라에몽의 Sunken II는 플랫폼 타일셋을 기반으로 한 1024x1024 크기의 UMS 맵으로, 제목에서 볼 수 있듯이 도라에몽 캐릭터를 앞세운 성큰 관련 콘텐츠가 중심이다. 내부 설명에 있는 'H A R D' 표시는 이 맵이 하드 모드로 설계되었음을 시사하며, 플레이어는 주로 컴퓨터가 조종하는 성큰 유닛과 구조물을 상대하거나, 이를 방어하는 방식으로 진행되는 것으로 추정된다. 맵은 6인 참가자를 지원하며 팀 구분이 명시되어 있지 않아 기본적으로 개인전 혹은 자유 협력 형태가 일반적일 것으로 보인다. gameplay는 성큰을 거점으로 한 지역 장악 혹은 파도 형태로 다가오는 적 공세를 막아내는 디펜스적인 요소가 강하며, 순간적인 판단과 정확한 마이크로 관리가 승패를 좌우한다. 따라서 초보자보다는 스타크래프트 브루드워의 유닛 상성 건물 타이밍 등에 어느 정도 익숙한 중급자 이상에게 적합하며, 도라에몽 팬이라면 친숙한 캐릭터 이미지가 추가적인 몰입감과 재미를 제공한다. 플레이 전에는 하드 난이도를 고려하여 멀티태스킹 능력과 빠른 반응 속도를 준비하는 것이 좋으며, 가능한 경우 음성 채팅을 통해 실시간 전략을 공유하면 협력 플레이 시 유리한 고지를 점할 수 있다. 또한 맵이 성큰 중심이라는 점을 감안하여 저글링이나 히드라리스크 같은 빠른 유닛을 활용한 rush 전략보다는 천천히 힘을 축적하며 방어선을 구축하는 접근이 보다 효과적일 수 있다. 전반적으로는 성큰 기반의 전략적 전투와 인기 캐릭터 테마가 결합된 독특한 유즈맵으로, 짧은 시간 안에 intensa한 플레이를 원하는 사용자에게 추천한다. Doraemon's Sunken II is a UMS map built on the platform tileset with a size of 1024x1024, as suggested by the title it centers on Doraemon-themed Sunken content. The 'H A R D' notation in the description implies the map is designed as a hard mode, where players likely face computer‑controlled Sunken units and structures or defend against them. The map supports six players without explicit team divisions, so free‑for‑all or loose cooperation is typical. Gameplay focuses on holding a Sunken‑based position or repelling waves of enemy attacks, giving it a strong defense flavor; quick decision‑making and precise micro‑control decide victory or defeat. It is therefore better suited for intermediate‑to‑advanced players who are familiar with StarCraft: Brood War unit matchups and timing, while Doraemon fans will enjoy the familiar character imagery as an extra immersion factor. Before playing, prepare for the hard difficulty by sharpening multitasking and reaction speed, and if possible use voice chat to share real‑time strategies for cooperative advantage. Because the map revolves around Sunken structures, a slow‑building defense is often more effective than a rush with fast units like Zerglings or Hydralisks. Overall, it is a distinctive UMS that blends Sunken‑centric tactics with a popular character theme, recommended for those seeking intense, short‑duration play.
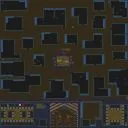
도라에몽: 진구 vs 퉁퉁이 1.1
도라에몽: 진구 vs 퉁퉁이 1.1은 인기 애니메이션 도라에몽의 친숙한 캐릭터들을 스타크래프트 브루드워 맵 속으로 재해석하여 유저들에게 색다른 재미를 선사하는 독특한 UMS 유즈맵입니다. 본 맵은 진구와 퉁퉁이의 피할 수 없는 대결이라는 흥미진진한 설정을 바탕으로 제작되었으며, 맵 전체에 구현된 다양한 구역과 지형적 특징이 플레이어의 호기심을 자극합니다. 황무지 타일셋을 기반으로 넓은 전장이 펼쳐져 있으며, 중앙의 거점과 주변에 배치된 독립된 공간들은 각 진영 간의 치열한 공방전과 전략적인 대립 구도를 예고합니다. 특히 퉁퉁이 세력이 자동으로 생성된다는 내부 설명에서 유추할 수 있듯, 플레이어들은 밀고 밀리는 긴장감 넘치는 전투 속에서 기민하게 대처해야 하는 몰입감 높은 플레이 경험을 마주하게 됩니다. 최대 8인의 플레이어를 수용할 수 있어 여러 유저가 모여 가볍고 유쾌하게 즐기기 좋으며, 어린 시절 만화로 접하던 캐릭터들이 전장에서 부딪히는 모습을 보는 것만으로도 색다른 즐거움을 느낄 수 있습니다. 정형화된 밀리 맵에서 벗어나 가벼운 마음으로 이색적인 대전과 독특한 연출을 즐기고 싶은 스타크래프트 브루드워 유저들에게 적합하며, 친구들과 함께 모여 진구와 퉁퉁이 중 진정한 승자가 누구일지 직접 가려보는 유쾌한 시간을 선사합니다. 플레이를 시작하기 전에는 내부 설명에 언급된 것처럼 유닛 생성 방식이나 전장 구조를 미리 파악하고, 각 구역의 특징을 활용해 전략을 세우는 것이 유리합니다. Doraemon: Nobita vs Gian 1.1 is a unique UMS usemap that recreates the familiar characters from the popular animation Doraemon within the world of StarCraft: Brood War, delivering a fresh and entertaining experience to users. Based on the compelling premise of an inevitable showdown between Nobita and Gian, this map features various zones and terrain characteristics implemented throughout the entire layout that instantly stimulate the curiosity of players. A vast battlefield is established on a wasteland tileset, where a central stronghold and independently arranged surrounding spaces foreshadow intense skirmishes and strategic confrontational structures between opposing factions. As inferred from the internal description noting that Gian's forces are automatically spawned, players will encounter an immersive gameplay experience where they must respond deftly amidst a tense battle of pushing and pulling. Accommodating up to 8 players, it is well-suited for multiple users to gather and enjoy casually and lightheartedly, and just watching characters from childhood animations clash on the battlefield brings a distinct kind of amusement. It is recommended for StarCraft: Brood War users who wish to step away from standardized melee maps and casually enjoy unconventional battles and unique presentations, offering a delightful time to gather with friends and determine who the true winner between Nobita and Gian will be. Before starting the play, it is advantageous to understand the unit spawning methods and battlefield structure mentioned in the internal description, and to formulate strategies by utilizing the characteristics of each zone.
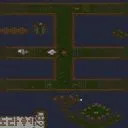
도라에몽 의 Sunken 럴커 30
도라에몽 의 Sunken 럴커 30은 플랫폼 타일셋을 바탕으로 한 1024x1024 크기의 유즈맵으로, 제작자 정지훈이 처음 만든 기초 틀에 박승훈이 일부 요소를 추가해 현재 형태를 갖췄다. 지도 전체에 흩어져 있는 썬큰 럴커는 지상에 숨어 있다가 적 유닛이 접근하면 순간적으로 올라와 공격을 가하는 형태로 배치되어 있어, 플레이어는 계속해서 경계하며 움직여야 한다. 주요 목표는 파일명에 암시된 대로 대량의 럴커를 처치하거나, 일정 시간 동안 생존하는 것이며, 정확한 승리 조건은 내부 트리거에 따라 달라질 수 있으나 대부분의 버전에서는 일정량의 적을 제거하면 스테이지가 클리어되는 방식으로 진행된다. 플레이 인원은 최대 6명으로 설정되어 있어 협동 플레이가 가능하며, 팀 구분이 없으므로 모든 플레이어가 동일한 목적을 공유하게 된다. 지형은 비교적 평평한 플랫폼 타일로 이루어져 있어 시야 확보가 쉬우나, 럴커의 은신 위치가 예측하기 어려워 순간적인 반사 신경과 유닛 컨트롤이 중요하다. 초반에는 적은 수의 럴커가 나타나지만 시간이 지날수록 spawn 빈도와 수가 증가하며, 이에 따라 자원 관리와 유닛 업그레이드 시점이 승패를 좌우한다. 따라서 이 맵은 반사 속도와 전략적 배치를 동시에 요구하는 중급 이상의 플레이어에게 적합하며, 혼자서도 충분히 도전감을 느낄 수 있고, 여럿이 함께 플레이 시 서로의 위치를 커버하며 효율적인 사냥이 가능해 재미를 더한다. 플레이 전에는 맵 옵션에서 유닛 제한 및 자원 설정을 확인하고, 혹시 있는 트리거 기반의 시간 제한이나 보너스 라운드 유무를 살펴보는 것이 좋다. Doraemon's Sunken Lurker 30 is a UMS map built on the platform tileset with a size of 1024x1024, originally created by creator Jeong Ji-hoon and later modified by Park Seung-hoon to reach its current form. Scattered across the map, Sunken Lurkers remain burrowed underground and pop up to attack when enemy units approach, requiring players to stay constantly alert and move carefully. The main objective, as hinted by the filename, is either to eliminate a large number of lurkers or to survive for a set period of time; exact victory conditions may vary depending on internal triggers, but in most versions clearing a stage is achieved by destroying a certain number of enemies. The map supports up to six players with no team divisions, so all participants share the same goal. Terrain is relatively flat platform tiles, making vision easy, but the lurkers' hidden positions are hard to predict, making quick reflexes and unit control essential. In the early game only a few lurkers appear, but as time passes their spawn frequency and number increase, making resource management and timing of upgrades crucial to victory. Thus this map suits intermediate‑and‑above players who need both fast reaction and strategic placement; it offers a satisfying challenge even when played solo, and when enjoyed with others players can cover each other's positions for efficient hunting and added fun. Before playing, check the map options for unit limits and resource settings, and verify whether any trigger‑based time limits or bonus rounds are present.
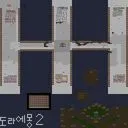
도라에몽 의 Sunken II
도라에몽의 Sunken II는 플랫폼 타일셋을 바탕으로 한 4096×4096 규모의 넓은 맵으로, 제목에서 암시하듯 선큰 유닛(러커)이 주요 전투 요소로 추정된다. 파일명에 포함된 '드론많이' 표현은 다수의 드론 유닛이등장하거나 이를 활용한 자원·생산 전략이 중요함을 시사한다. 제공된 메타데이터에 따르면 최대 6명이 동시에 참여할 수 있으며, 팀 구분이 명시되지 않아 개인전 혹은 자유 협력 형태일 가능성이 높다. 내부 설명에서 강조된 'HARD' 표현은 난이도가 상향 조정된 상태임을 나타내며, 선큰 유닛의 은신·급습 특성을 살린 전술적 플레이가 요구될 것으로 보인다. 플레이어는 높은 지형과 낮은 지형을 오가며 선큰 유닛을 매설하거나 탐지하는 작업을 반복하게 되며, 광활한 맵 크기 때문에 시야 확보와 이동 경로 계획이 승패에 큰 영향을 미친다. 일반적으로 이런 유즈맵은 선큰 유닛을 중심으로 한 교전이나 방어 작전이 주를 이루며, 드론을 이용한 보급이나 생산 보조가 병행될 수 있다. 추천 대상은 선큰 유닛 운영에 익숙한 중급 이상의 플레이어와, 도라에몽을 테마로 한 재미있는 시나리오를 즐기고자 하는 유저이다. 플레이 전에는 맵 크기로 인한 소요 시간을 고려해 초반에 기지 건설과 감시 준비를 철저히 하는 것이 좋으며, 드론 수가 많을 경우 자원 관리와 인구 제한에 유의해야 한다. 또한, 단축키를 활용한 빠른 유닛 전환을 연습해두면 효율적인 운영이 가능할 것이다. Doraemon's Sunken II is a large map measuring 4096×4096 based on the platform tileset, and the title suggests that sunken units (lurkers) are likely a central combat element. The filename's "many drones" hint implies that numerous drone units may appear or that drone‑based resource and production strategies are important. According to the provided metadata, up to six players can participate simultaneously, and with no explicit team division it is likely a free‑for‑all or loosely cooperative match. The internal description's emphasis on "HARD" indicates an elevated difficulty level, implying that tactical play leveraging the sunken unit's burrow and ambush abilities will be required. Players will repeatedly place or detect sunken units while moving between high and low terrain, and because the map is expansive, vision control and route planning become critical factors. Generally, this type of UMS focuses on engagements or defenses centered around sunken units, with drones possibly providing supplemental supply or production assistance. The map is recommended for intermediate‑or‑above players familiar with sunken unit mechanics and for users who enjoy lighthearted Doraemon‑themed scenarios. Before playing, consider the potential length due to the map's size and prepare early base construction and scouting; if many drones are involved, monitor resource intake and population limits closely. Practicing quick unit switching via hotkeys will also help maintain efficient management throughout the match.
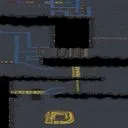
도라에몽 - 진구의 마계대모험 (Doraemon - Nobita's Great Adventure into the Underworld)
도라에몽 - 진구의 마계대모험(Doraemon - Nobita's Great Adventure into the Underworld)은 스타크래프트 브루드워 맵에서 즐길 수 있는 독특한 분위기의 유즈맵이다. 유명 애니메이션 IP인 도라에몽의 세계관을 차용하여 제작된 이 맵은, 플레이어들이 힘을 합쳐 거대한 적을 상대하는 협동 플레이 중심의 구성을 보여준다. 내부 맵 설명에서 대마왕을 처치하는 것이 최종 목표임을 암시하고 있어, 일반적인 대전 방식의 밀리 장르와는 전혀 다른 방식으로 진행된다. 전체적인 맵 구조를 살펴보면 플레이어들이 자원을 채취하고 유닛을 생산하여 세력을 갖추는 공간과, 적의 공세를 방어하거나 진격하는 통로가 유기적으로 배치된 모습이다. 우주 타일셋을 배경으로 하여 어둡고 신비로운 분위기를 자아내며, 다수의 플레이어가 동시에 참여할 수 있는 넓은 공간 활용도가 돋보인다. 특히 여러 명의 인원이 각자의 역할을 분담하거나 함께 협력하여 미로 같은 지형을 돌파하고 강력한 적 세력에 맞서는 과정에서 흥미진진한 플레이 경험을 느낄 수 있다. 스타크래프트 유즈맵 특유의 트리거와 목표 지향적인 진행 방식을 선호하는 유저들에게 적합하며, 친구들과 함께 방을 만들어 가벼우면서도 몰입감 있게 즐길 만한 요소를 갖추고 있다. 플레이를 시작하기 전에는 협동을 위한 기본적인 역할 분담이나 자원 관리 방식을 미리 파악해 두는 것이 원활한 진행에 도움이 된다. Doraemon - Nobita's Great Adventure into the Underworld is a unique Use Map Settings scenario available in StarCraft: Brood War. Utilizing the world of the famous animated series Doraemon, this map features a cooperative-focused gameplay design where players join forces to confront formidable foes. The internal description hints that defeating the Great Demon King is the ultimate objective, distinguishing it completely from standard melee maps. Looking at the overall structure, areas for gathering resources and producing units are organically connected with paths designed to defend against enemy waves or advance forward. Set against a space tileset, it creates a dark and mysterious atmosphere, complemented by a spacious layout that accommodates multiple players simultaneously. Players can experience engaging gameplay as they divide roles, cooperate to navigate maze-like terrains, and counter powerful enemy forces. It is recommended for users who enjoy trigger-driven progression typical of StarCraft custom maps, offering an immersive yet casual experience when played with friends. Before starting, understanding basic role division and resource management strategies will help ensure a smooth cooperative run.
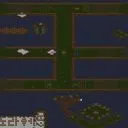
도라에몽 의 Sunken 럴커 30
도라에몽 의 Sunken 럴커 30은 플랫폼 타일셋을 기반으로 한 4096×4096 크기의 UMS 맵으로, 내부 파일名は '-_도라에몽(럴커추가200마리).scx'이며, 제작자 정지훈과 수정자 박승훈이 협업한 결과물이다. 제목에서 알 수 있듯이 Sunken 구조물과 30기의 럴커가 주요 요소로 배치되어 있어, 플레이어는 이들 유닛과의 상호작용을 통해 목표를 달성해야 한다. 맵은 6인 플레이를 지원하며 팀 구성이 지정되지 않아 자유대전 또는 협동 플레이 모두 가능하지만, 대부분의 유즈맵과 마찬가지로 AI 상대나 협동 미션 형태로 즐기는 것이 일반적이다. 진행 방식은 특정 구역에 배치된 Sunken과 럴커를 처리하거나, 이를 이용해 적을 저지하는 디펜스 스타일이 강하게 느껴지며, 자원 수집보다는 유닛의 위치와 타이밍이 승패를 좌우한다. 따라서 빠른 판단과 마이크로 컨트롤이 중요한데, 초보자보다는 어느 정도 스타크래프트 브루드워의 유닛 조작에 익숙한 중급 플레이어에게 적합하다. 플레이 전에는 맵 내에 숨겨진 트리거나 시간 제한이 있는지 확인하고, 필요 시 동맹 설정이나 공유 자원 옵션을 조정하는 것이 좋다. 또한, 플랫폼 타일셋 특성상 지형이 평평해 시야 확보가 쉬우나, 럴커의 사거리와 은신 위치를 미리 파악하지 않으면 예기치 못한 피해를 입을 수 있다. 이런 점을 고려해 전략적인 배치와 타이밍 조절을 연습한다면, 맵이 제공하는 독특한 럴커 압박감을 즐길 수 있다. Doraemon's Sunken Lurker 30 is a UMS map built on the platform tileset with a size of 4096×4096, internal file name '-_도라에몽(럴커추가200마리).scx', created by author Jeong Ji-hoon and modified by Park Seung-hoon. As the title suggests, Sunken structures and thirty lurkers are placed as key elements, requiring players to interact with these units to achieve the objective. The map supports six players; since team composition is not specified, both free-for-all and cooperative play are possible, but like most UMS maps it is usually enjoyed against AI or in cooperative missions. The gameplay focuses on clearing or utilizing the placed Sunken and lurkers, giving a strong defense‑style feel where positioning and timing matter more than resource gathering. Quick judgment and micro‑control are essential, making the map better suited for intermediate players who are familiar with unit control in StarCraft: Brood War rather than beginners. Before playing, check for any hidden triggers or time limits and adjust alliance settings or shared resource options if needed. Although the flat platform terrain provides good visibility, failing to recognize the lurkers’ range and ambush positions can lead to unexpected damage. By practicing strategic placement and timing control, players can enjoy the unique lurker pressure that this map offers.
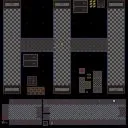
도라에몽 성큰 SPACE COR-3
도라에몽 성큰 SPACE COR-3는 스타크래프트 브루드워 UMS 유즈맵 장르에서 독특한 컨셉과 재미를 제공하는 맵이다. 유명 애니메이션 캐릭터인 도라에몽의 요소를 차용하고, 우주를 배경으로 성큰 콜로니와 다양한 유닛 배치를 활용하는 방식으로 진행된다. 전체적인 맵 구조를 살펴보면 플레이어들이 진지를 구축하고 몰려오는 적들의 공세를 방어하거나 특정 조건을 만족해가며 협력하는 형태의 플레이가 이루어질 것으로 추정된다. 특히 맵 내부 설명에서 자동 배속 시스템이 적용되어 있으므로 방 제목에 별도의 배속을 설정하면 게임이 튕길 수 있다는 점을 미리 숙지해야 한다. 이를 통해 원활한 플레이를 위해서는 방 생성 시 주의사항을 꼼꼼히 확인하고 입장하는 것이 중요하다는 것을 알 수 있다. 최대 6명이 함께 즐길 수 있는 다인용 유즈맵으로 설계되어 있어, 여러 플레이어와 손발을 맞추며 협동하는 재미를 극대화한다. 우주 타일셋을 기반으로 한 독특한 공간 배치와 성큰 중심의 방어전 구조는 기존의 밀리 맵과는 다른 신선한 긴장감을 선사한다. 평소 성큰 디펜스류의 유즈맵이나 독특한 컨셉의 협동 플레이를 선호하는 유저들에게 좋은 선택지가 될 수 있다. 게임을 시작하기 전 방제 설정에 유의하고, 동료 플레이어들과 호흡을 맞춰 몰려오는 위기를 극복해 나가는 재미를 만끽해 보기를 권장한다. Doraemon Sunken SPACE COR-3 is a map that offers a unique concept and fun within the StarCraft Brood War UMS use-map genre. It incorporates elements of the famous animation character Doraemon and proceeds by utilizing Sunken Colonies and various unit placements set in outer space. Looking at the overall map structure, it is presumed that players build bases, defend against incoming enemy waves, or cooperate to fulfill specific conditions. In particular, the internal map description notes that an automatic game speed system is applied, so players must be aware that setting a separate speed in the game room title may cause the game to crash. This indicates that checking room creation precautions carefully before entering is essential for a smooth gameplay experience. Designed as a multi-player use-map that can be enjoyed by up to 6 players, it maximizes the fun of coordinating and cooperating with others. The unique spatial arrangement based on the space tileset and the Sunken-centric defense structure provide a fresh tension different from standard melee maps. It can be a great choice for users who generally prefer Sunken defense-style use-maps or cooperative play with distinctive concepts. Before starting the game, it is recommended to pay attention to room title settings and enjoy the fun of overcoming incoming crises in sync with fellow players.
最近登録されたマップ
新たに追加されたファイルとバージョンをご確認ください。
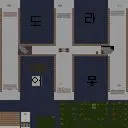
도라에몽의 성큰 II 보스
도라에몽의 성큰 II 보스(Doraemon Sunken II Boss)는 스타크래프트 브루드워 맵 유즈맵 중에서도 독특한 방어형 콘텐츠와 개성 있는 테마를 결합한 흥미로운 작품이다. 이 맵은 인기 애니메이션 도라에몽의 요소를 활용하여 플레이어들에게 친숙하면서도 색다른 재미를 선사한다. 전체적인 구조는 밀리 자원이 아닌, 성큰 콜로니와 특정 유닛들을 배치하거나 활용해 몰려오는 적의 공세를 방어하고 보스를 상대하는 방식으로 진행된다. 내부 설명에 따르면 약간의 영웅 유닛들이 추가되어 있으며, 플레이어 간의 협력을 바탕으로 위기를 극복하는 구조를 띠고 있다. 맵의 지형은 플랫폼 타일셋을 기반으로 넓은 공간과 독특한 진영 배치가 이루어져 있어, 초보자부터 고수까지 다양한 플레이어들이 함께 모여 즐기기에 적합하다. 플레이어는 고유의 위치에서 자원을 관리하고 유닛을 조합하며, 끊임없이 이어지는 적의 웨이브를 막아내야 한다. 특히 보스전이라는 핵심 콘텐츠가 존재하여 일반적인 디펜스나 입구막기류 맵과는 또 다른 긴장감을 자아낸다. 영웅 유닛의 활용도와 팀원 간의 역할 분담이 승패를 가르는 중요한 요소로 작용하며, 협동 플레이의 묘미를 극대화한다. 스타크래프트 브루드워 유즈맵에서 색다른 방어전이나 보스 레이드 형태의 협동 플레이를 선호하는 유저들에게 추천할 만하며, 친구들과 함께 전략을 짜며 몰입하기 좋은 맵이다. 플레이 전에는 맵 설명에 언급된 것처럼 팀원들과의 소통과 협동이 필수적이므로, 이탈하지 않고 끝까지 호흡을 맞추는 것이 승리의 지름길임을 기억하는 것이 좋다. Doraemon Sunken II Boss is an engaging custom map for StarCraft: Brood War that combines unique defensive content with a distinct theme. This map utilizes elements from the popular animation Doraemon to offer players a familiar yet refreshing experience. The overall structure revolves around defending against incoming enemy waves and confronting bosses by strategically placing and utilizing Sunken Colonies and specific units rather than standard melee gameplay. According to the internal description, a few hero units have been added, creating a setup where players must overcome crises through mutual cooperation. The terrain is based on the platform tileset, featuring spacious areas and unique faction placements suitable for players of varying skill levels to enjoy together. Players must manage resources from their respective positions, combine units, and fend off continuous enemy waves. In particular, the core content of boss battles creates a different kind of tension compared to standard defense or blocking maps. The effectiveness of hero units and the division of roles among teammates serve as crucial factors determining victory, maximizing the appeal of cooperative play. It is recommended for users who prefer cooperative play featuring unique defense battles or boss raids in StarCraft: Brood War custom maps, making it a great map to immerse oneself in while strategizing with friends. Before playing, as mentioned in the map description, communication and teamwork with teammates are essential, so keeping pace until the end without leaving is the key to victory.
도라에몽: 진구 vs 퉁퉁이 1.1
도라에몽: 진구 vs 퉁퉁이 1.1은 인기 애니메이션 도라에몽의 친숙한 캐릭터들을 스타크래프트 브루드워 맵 속으로 재해석하여 유저들에게 색다른 재미를 선사하는 독특한 UMS 유즈맵입니다. 본 맵은 진구와 퉁퉁이의 피할 수 없는 대결이라는 흥미진진한 설정을 바탕으로 제작되었으며, 맵 전체에 구현된 다양한 구역과 지형적 특징이 플레이어의 호기심을 자극합니다. 황무지 타일셋을 기반으로 넓은 전장이 펼쳐져 있으며, 중앙의 거점과 주변에 배치된 독립된 공간들은 각 진영 간의 치열한 공방전과 전략적인 대립 구도를 예고합니다. 특히 퉁퉁이 세력이 자동으로 생성된다는 내부 설명에서 유추할 수 있듯, 플레이어들은 밀고 밀리는 긴장감 넘치는 전투 속에서 기민하게 대처해야 하는 몰입감 높은 플레이 경험을 마주하게 됩니다. 최대 8인의 플레이어를 수용할 수 있어 여러 유저가 모여 가볍고 유쾌하게 즐기기 좋으며, 어린 시절 만화로 접하던 캐릭터들이 전장에서 부딪히는 모습을 보는 것만으로도 색다른 즐거움을 느낄 수 있습니다. 정형화된 밀리 맵에서 벗어나 가벼운 마음으로 이색적인 대전과 독특한 연출을 즐기고 싶은 스타크래프트 브루드워 유저들에게 적합하며, 친구들과 함께 모여 진구와 퉁퉁이 중 진정한 승자가 누구일지 직접 가려보는 유쾌한 시간을 선사합니다. 플레이를 시작하기 전에는 내부 설명에 언급된 것처럼 유닛 생성 방식이나 전장 구조를 미리 파악하고, 각 구역의 특징을 활용해 전략을 세우는 것이 유리합니다. Doraemon: Nobita vs Gian 1.1 is a unique UMS usemap that recreates the familiar characters from the popular animation Doraemon within the world of StarCraft: Brood War, delivering a fresh and entertaining experience to users. Based on the compelling premise of an inevitable showdown between Nobita and Gian, this map features various zones and terrain characteristics implemented throughout the entire layout that instantly stimulate the curiosity of players. A vast battlefield is established on a wasteland tileset, where a central stronghold and independently arranged surrounding spaces foreshadow intense skirmishes and strategic confrontational structures between opposing factions. As inferred from the internal description noting that Gian's forces are automatically spawned, players will encounter an immersive gameplay experience where they must respond deftly amidst a tense battle of pushing and pulling. Accommodating up to 8 players, it is well-suited for multiple users to gather and enjoy casually and lightheartedly, and just watching characters from childhood animations clash on the battlefield brings a distinct kind of amusement. It is recommended for StarCraft: Brood War users who wish to step away from standardized melee maps and casually enjoy unconventional battles and unique presentations, offering a delightful time to gather with friends and determine who the true winner between Nobita and Gian will be. Before starting the play, it is advantageous to understand the unit spawning methods and battlefield structure mentioned in the internal description, and to formulate strategies by utilizing the characteristics of each zone.
EUD 도라에몽과 술래잡기 2
EUD 도라에몽과 술래잡기 2는 사막 타일셋을 배경으로 한 6인용 자유 대전 맵으로, 기본 목표는 상대의 모든 건물을 파괴하는 것입니다. 맵은 6144×6144 크기의 넓은 전장을 제공하며, 중앙에 위치한 넓은 평지와 몇 개의 고지대로 구성돼 있어 전술적인 위치 선정이 중요합니다. 초반에는 자원을 빠르게 확보해 본진 방어와 동시에 공격 진형을 잡아야 하며, 건물 배치가 자유롭기 때문에 방어 타워와 생산 건물을 적절히 배치해 상대의 진격을 저지할 수 있습니다. 사막 환경 특성상 시야가 넓고 이동 속도가 비교적 빠르므로, 정찰 유닛을 활용해 적의 위치를 파악하고 기습 공격을 시도하는 것이 유리합니다. 게임 진행 중에는 건물 파괴와 동시에 유닛 생산이 중단되므로, 방어 라인을 무너뜨린 뒤 빠르게 재건하거나 새로운 건물을 세워 전력을 회복해야 합니다. 이 맵은 빠른 전투와 지속적인 압박을 즐기는 플레이어에게 적합하며, 특히 멀티플레이어 환경에서 다양한 전략을 시험하고 싶은 유저에게 추천합니다. 플레이 전에는 건물 배치와 방어 타워 위치를 미리 계획하고, 자원 채집 루트를 파악해 초반에 경제적 우위를 확보하는 것이 중요합니다. EUD Doraemon and Tag Game 2 is a 6‑player free‑for‑all map set on a desert tileset, where the core objective is to destroy all enemy buildings. The map spans 6144×6144 pixels, offering a large battlefield composed of an open central plain and several elevated areas, making positional tactics crucial. Early game focuses on rapid resource gathering to build both defensive structures and attack forces, while the freedom to place buildings allows players to set up towers and production facilities to block opponents’ advances. The desert setting provides wide sightlines and relatively fast unit movement, so scouting units are valuable for locating enemies and launching surprise attacks. Since unit production halts when a building is destroyed, breaking an opponent’s defenses and quickly rebuilding or establishing new structures is essential for maintaining momentum. This map suits players who enjoy fast‑paced combat and constant pressure, especially those looking to experiment with varied strategies in multiplayer. Before playing, plan building layouts and tower placements, and identify resource routes to secure an early economic advantage.
도라에몽 (경도버젼) (Doraemon Hard Version)
도라에몽 (경도버젼)은 우주 타일셋을 배경으로 한 7인용 UMS 맵으로, 상점 시스템과 비밀상점을 추가해 아이템 수집과 캐릭터 성장에 중점을 둔 RPG 스타일을 제공한다. 맵은 넓은 평원과 몇 개의 언덕으로 구성되어 있으며, 중앙에 위치한 상점에서 체력 포션, 공격력 주문, 방어 스크롤 등을 살 수 있다. 특정 조건을 만족하면 비밀상점이 열려 고급 장비와 희귀 아이템을 얻을 수 있어 중후반 전략의 핵심이다. 비밀상점의 열림 조건은 일정량의 미네랄 수집 또는 특정 몬스터 처치와関连되어 있다. 플레이어는 초반에 자원을 채집해 상점에서 장비를 구매하고, 후반에는 비밀상점을 찾아 강력한 무기를 장착해 상대방에 우위를 점한다. 이 맵은 개인전 형태이지만 순간적인 동맹이나 적대가 생겨 매 라운드마다 새로운 전개가 필요하다. 아이템 조합에 따라 근거리, 원거리, 지원형 등으로 플레이 스타일을 바꾸는 재미가 있으며, 성장에 필요한 자원은 맵 곳곳에散布된 광물과 가스이다. 지형상의 좁은 통로와 높은 곳은 은신이나 기습에 적합해 전술적인 움직임을 가능하게 한다. 초보자도 쉽게 접근할 수 있도록 기본 설명이 상점 인터페이스에 탑재되어 있지만, 고수들은 비밀상점 조건을 정확히 파악하고 최적 루트를 설계해야 점수를 높일 수 있다. 예상 플레이 시간은 20~40분이며, RPG와 아이템 파밍을 좋아하는 유저에게 추천한다. 플레이 전에는 상점 목록과 비밀상점 조건을 확인하고 초기 자원 배분을 계획하는 것이 좋다. 우주 타일셋 특유의 어두운 배경과 은은한 별빛 효과가 분위기를 끌어올려 탐색의 재미를 증폭시킨다. 또한, 맵 곳곳에 숨겨진 미니 이벤트-trigger가 있어 특정 조건을 달성하면 일시적인 버프나 추가 자원을 얻을 수 있어 반복 플레이 시 새로운 요소를 발견할 수 있다. 플레이어는 이러한 숨은 요소를 찾아내며 자신만의 최적 경로를 설계함으로써 높은 점수와 만족감을 얻을 수 있다. 이 맵은 여러 번 플레이해도 새로운 전략을 발견할 수 있는 깊이 있는 설계로, 아이템 트리 조합과 지형 활용을 끊임없이 실험하는 플레이어에게 오래도록 즐길 거리를 제공한다. Doraemon (Hard Version) is a 7‑player UMS map set on a space tileset, featuring a shop system and a secret shop that emphasize item collection and character growth in an RPG‑style experience. The map consists of wide plains and a few hills, with a central shop where players can buy health potions, attack scrolls, and defense scrolls. When certain conditions are met, the secret shop opens, granting access to high‑end gear and rare items that become crucial for mid‑ to late‑game strategy. The secret shop’s opening condition is tied to gathering a certain amount of minerals or defeating specific monsters. Players gather resources early to purchase equipment from the shop, then seek out the secret shop in the late game to equip powerful weapons and gain an advantage over opponents. Although the map is played as a free‑for‑all, temporary alliances or rivalries can arise, forcing new tactics each round. Depending on item combinations, players can adopt melee, ranged, or support roles, adding variety to their playstyle. Resources needed for growth are scattered minerals and gases across the map, and efficient collection routes heavily influence victory. Narrow passages and high ground suit ambushes and hiding, enabling tactical maneuvers. Beginner‑friendly tooltips are built into the shop interface, but experts must precisely decipher the secret shop’s conditions and design optimal routes to maximize points. Expected playtime ranges from 20 to 40 minutes, and the map is recommended for users who enjoy RPG elements and item‑farming gameplay. Before playing, check the shop list and the secret‑shop requirements, and plan initial resource allocation. The space tileset’s dark backdrop and subtle starlight effects enhance immersion and amplify the fun of exploration. Moreover, hidden mini‑event triggers scattered throughout the map provide temporary buffs or extra resources when specific conditions are met, offering fresh discoveries on repeat runs. Players who seek out these hidden elements and devise their own optimal routes can achieve higher scores and greater satisfaction. This map’s deep design lets players uncover new strategies even after many plays, continually experimenting with item‑tree combinations and terrain use to provide lasting enjoyment.
도라에몽의 모험기! (Doraemon's Adventure!)
도라에몽의 모험기!는 플랫폼 타일셋을 사용한 4096×4096 크기의 유즈맵으로, 내부 설명에 따라 퉁퉁이엄마를 처치하고 세계를 구하는 것이 주된 목표이다. 플레이어는 맵 곳곳에 배치된 적 유닛과 오브젝트를 찾아다니며 전투를 벌이고, 특정 지역으로 이동하여 보스를 물리친 뒤 엔딩을 볼 수 있다. 전체적인 흐름은 선형적인 스테이지 구성을 띠며, 중간에 아이템を獲得하거나 조건을 만족시켜야 다음 구간으로 나아갈 수 있는 형태이다.このため 플레이어는 탐색과 전투를 균형 있게 진행해야 하며, 단순히 적을 무찌르는 것보다는 맵 내 트리거를 활성화시키는 것이 승리의 핵심이다. 그래픽은 기본 플랫폼 타일셋을 그대로 사용했으나, 스크립트를 통해 특수한 이벤트와 대사가 삽입되어 스토리텔링에 중점을 둔 모습을 보여준다.こうした 점에서 이 맵은 순수한 전투 중심의 메레이나 디펜스보다는 스토리 기반의 유즈맵을 좋아하는 유저에게 적합하다. 혼자 플레이하거나 최대 5명까지 협동하여 진행할 수 있어, 친구와 함께 역할 분담을 하며 공략하는 재미도 있다. 플레이 전에는 맵이 cp949 인코딩으로 저장되어 있어 한글이 깨지지 않도록 확인하고, 필요 시 최신 버전의 스타크래프트 브루드워와 호환되는지 점검하는 것이 좋다. 또한 내부 설명에 나타난 제작자 표기를 존중하며, 맵을 배포하거나 수정할 때는 원저자의 허락을 받는 것이 예의이다. Doraemon's Adventure! is a UMS map built on the platform tileset with a size of 4096×4096. According to its description, the main objective is to defeat Gian's mother and save the world. Players explore the map, locate enemy units and objects, engage in combat, and move to specific areas to defeat the boss and view the ending. The progression follows a linear stage structure; players must acquire items or satisfy conditions to advance to the next section. Therefore, a balance of scouting and fighting is required, and victory hinges on activating map triggers rather than merely destroying enemies. Although the graphics use the default platform tileset, special events and dialogue are inserted via scripts, emphasizing storytelling. This map suits users who prefer story‑driven UMS over pure melee or defense maps. It can be played solo or cooperatively by up to five players, offering fun in role‑division and teamwork with friends. Before playing, verify that the map’s cp949 encoding preserves Korean text correctly and check compatibility with the latest StarCraft: Brood War patch if needed. Also respect the creator’s credit noted in the description; obtain the original author’s permission before distributing or modifying the map.
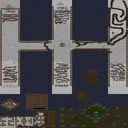
도라에몽 의 Sunken 영웅추
도라에몽 의 Sunken 영웅추는 플랫폼 타일셋을 기반으로 한 128x128 타일의 넓은 맵으로, 성큰 콜로니 지형을 중심으로 설계된 유즈맵이다. 내부 설명에 따르면 하드 난이도의 영웅이 무작위로 추첨되어 등장하며, 플레이어는 이 영웅을 활용해 맵 내에 놓인 적 유닛이나 환경 요소를 처리해야 한다. 게임 방식은 영웅 선택 후 제한된 시간 안에 목표를 달성하거나 파도를 막는 디펜스 형태라고 추정된다. 최대 6명이 참여할 수 있으며 팀 구분 없이 개인전 혹은 자유 협전으로 진행된다. 복잡한 트리거 없이 단순한 랜덤 영웅 생성과 기본 전투 시스템만으로 구성돼 초보자도 규칙을 쉽게 이해하고, 반복 플레이 시 다양한 영웅 조합을 경험할 수 있다는 점이 매력이다. 다만 영웅의 능력치가 높아서 초반에 어려움을 느낄 수 있으므로, 사전에 각 영웅의 스킬을 확인하는 것이 승리에 도움이 된다. 추천 대상은 랜덤 요소를 즐기고 빠른 전투를 선호하는 유저이며, 짧은 세션을 원하는 경우에도 적합하다. 플레이 전에는 맵 버전과 클라이언트 호환성을 확인하고, 가능하면 친구와 협력해 영웅 시너지를 노려보는 것이 좋다. 시각적으로는 깔끔한 플랫폼 배경과 성큰 지형이 은신 및 기습 전략을 가능하게 해 각 라운드마다 새로운 전술을 요구한다. 영웅 추첨의 완전한 랜덤성은 특정 영웅에 의존하지 않게 하고 다양한 조합을 시도하도록 유도해 전략적 사고와 즉각적 적응력을 키운다. 전체적으로 도라에몽 의 Sunken 영웅추는 간단한 메커니즘 속에 전략적 깊이를 숨긴 유즈맵으로, 짧은 시간 안에 짜릿한 전투를 원하는 스타크래프트 브루드워 팬에게 권장한다. Doraemon's Sunken Hero Pick is a spacious map built on the platform tile set with 128x128 tiles, centered around sunken colony terrain as a UMS. According to the internal description, hard‑difficulty heroes are randomly drawn and appear, and players must use these heroes to deal with enemy units or environmental elements placed on the map. The gameplay is estimated to involve achieving a goal within a time limit after hero selection or defending against waves in a tower‑defense style. Up to six players can join, with no team divisions, so the match proceeds as a free‑for‑all or loose cooperation. Because the map relies only on simple random hero generation and basic combat mechanics without complex triggers, beginners can grasp the rules quickly, and repeated play offers the chance to experience various hero combinations, which is its main appeal. However, the heroes’ high stats can make the early game feel challenging, so checking each hero’s abilities beforehand helps improve the odds of victory. The map is recommended for users who enjoy random elements and fast‑paced combat, and it also suits those looking for a short session. Before playing, verify the map version and client compatibility, and if possible team up with friends to exploit hero synergy. Visually, the clean platform background combined with the sunken colony terrain enables hiding and ambush tactics, requiring a fresh approach each round. The fully random hero draft prevents reliance on any single hero and encourages trying different combinations, fostering strategic thinking and quick adaptation. Overall, Doraemon's Sunken Hero Pick is a UMS that hides deep strategy behind simple mechanics, making it a good choice for StarCraft: Brood War fans who want intense battles in a short time.
도라에몽 성큰 SPACE COR-3
도라에몽 성큰 SPACE COR-3는 스타크래프트 브루드워 UMS 유즈맵 장르에서 독특한 컨셉과 재미를 제공하는 맵이다. 유명 애니메이션 캐릭터인 도라에몽의 요소를 차용하고, 우주를 배경으로 성큰 콜로니와 다양한 유닛 배치를 활용하는 방식으로 진행된다. 전체적인 맵 구조를 살펴보면 플레이어들이 진지를 구축하고 몰려오는 적들의 공세를 방어하거나 특정 조건을 만족해가며 협력하는 형태의 플레이가 이루어질 것으로 추정된다. 특히 맵 내부 설명에서 자동 배속 시스템이 적용되어 있으므로 방 제목에 별도의 배속을 설정하면 게임이 튕길 수 있다는 점을 미리 숙지해야 한다. 이를 통해 원활한 플레이를 위해서는 방 생성 시 주의사항을 꼼꼼히 확인하고 입장하는 것이 중요하다는 것을 알 수 있다. 최대 6명이 함께 즐길 수 있는 다인용 유즈맵으로 설계되어 있어, 여러 플레이어와 손발을 맞추며 협동하는 재미를 극대화한다. 우주 타일셋을 기반으로 한 독특한 공간 배치와 성큰 중심의 방어전 구조는 기존의 밀리 맵과는 다른 신선한 긴장감을 선사한다. 평소 성큰 디펜스류의 유즈맵이나 독특한 컨셉의 협동 플레이를 선호하는 유저들에게 좋은 선택지가 될 수 있다. 게임을 시작하기 전 방제 설정에 유의하고, 동료 플레이어들과 호흡을 맞춰 몰려오는 위기를 극복해 나가는 재미를 만끽해 보기를 권장한다. Doraemon Sunken SPACE COR-3 is a map that offers a unique concept and fun within the StarCraft Brood War UMS use-map genre. It incorporates elements of the famous animation character Doraemon and proceeds by utilizing Sunken Colonies and various unit placements set in outer space. Looking at the overall map structure, it is presumed that players build bases, defend against incoming enemy waves, or cooperate to fulfill specific conditions. In particular, the internal map description notes that an automatic game speed system is applied, so players must be aware that setting a separate speed in the game room title may cause the game to crash. This indicates that checking room creation precautions carefully before entering is essential for a smooth gameplay experience. Designed as a multi-player use-map that can be enjoyed by up to 6 players, it maximizes the fun of coordinating and cooperating with others. The unique spatial arrangement based on the space tileset and the Sunken-centric defense structure provide a fresh tension different from standard melee maps. It can be a great choice for users who generally prefer Sunken defense-style use-maps or cooperative play with distinctive concepts. Before starting the game, it is recommended to pay attention to room title settings and enjoy the fun of overcoming incoming crises in sync with fellow players.
도라에몽 의 Sunken 럴커 30
도라에몽 의 Sunken 럴커 30은 플랫폼 타일셋을 기반으로 한 4096×4096 크기의 UMS 맵으로, 내부 파일名は '-_도라에몽(럴커추가200마리).scx'이며, 제작자 정지훈과 수정자 박승훈이 협업한 결과물이다. 제목에서 알 수 있듯이 Sunken 구조물과 30기의 럴커가 주요 요소로 배치되어 있어, 플레이어는 이들 유닛과의 상호작용을 통해 목표를 달성해야 한다. 맵은 6인 플레이를 지원하며 팀 구성이 지정되지 않아 자유대전 또는 협동 플레이 모두 가능하지만, 대부분의 유즈맵과 마찬가지로 AI 상대나 협동 미션 형태로 즐기는 것이 일반적이다. 진행 방식은 특정 구역에 배치된 Sunken과 럴커를 처리하거나, 이를 이용해 적을 저지하는 디펜스 스타일이 강하게 느껴지며, 자원 수집보다는 유닛의 위치와 타이밍이 승패를 좌우한다. 따라서 빠른 판단과 마이크로 컨트롤이 중요한데, 초보자보다는 어느 정도 스타크래프트 브루드워의 유닛 조작에 익숙한 중급 플레이어에게 적합하다. 플레이 전에는 맵 내에 숨겨진 트리거나 시간 제한이 있는지 확인하고, 필요 시 동맹 설정이나 공유 자원 옵션을 조정하는 것이 좋다. 또한, 플랫폼 타일셋 특성상 지형이 평평해 시야 확보가 쉬우나, 럴커의 사거리와 은신 위치를 미리 파악하지 않으면 예기치 못한 피해를 입을 수 있다. 이런 점을 고려해 전략적인 배치와 타이밍 조절을 연습한다면, 맵이 제공하는 독특한 럴커 압박감을 즐길 수 있다. Doraemon's Sunken Lurker 30 is a UMS map built on the platform tileset with a size of 4096×4096, internal file name '-_도라에몽(럴커추가200마리).scx', created by author Jeong Ji-hoon and modified by Park Seung-hoon. As the title suggests, Sunken structures and thirty lurkers are placed as key elements, requiring players to interact with these units to achieve the objective. The map supports six players; since team composition is not specified, both free-for-all and cooperative play are possible, but like most UMS maps it is usually enjoyed against AI or in cooperative missions. The gameplay focuses on clearing or utilizing the placed Sunken and lurkers, giving a strong defense‑style feel where positioning and timing matter more than resource gathering. Quick judgment and micro‑control are essential, making the map better suited for intermediate players who are familiar with unit control in StarCraft: Brood War rather than beginners. Before playing, check for any hidden triggers or time limits and adjust alliance settings or shared resource options if needed. Although the flat platform terrain provides good visibility, failing to recognize the lurkers’ range and ambush positions can lead to unexpected damage. By practicing strategic placement and timing control, players can enjoy the unique lurker pressure that this map offers.
マップ選択ガイド
태그는 맵의 핵심 특징을 빠르게 설명하지만 제작 버전마다 규칙이 다를 수 있습니다. 상세 설명에서 권장 인원, 난이도, 플레이 시간과 버전을 함께 확인한 뒤 다운로드하세요.