
건물 방어 スタークラフト マップコレクション
「건물 방어」タグが登録されたマップを集めました。ジャンルだけでは見つけにくいプレイ方式、難易度、特徴を中心に、人気のマップと最新マップを比較してみてください。
- 登録マップ
- 5個
- 累計ダウンロード
- 0
- 累計閲覧
- 266
人気マップ
ダウンロードと閲覧の反応が高いマップです。
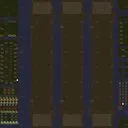
0 디펜더스 v. 2.2 (0 Defenders v. 2.2)
스타크래프트 브루드워의 대표적인 디펜스 장르 유즈맵인 〈0 Defenders v. 2.2〉는 플레이어가 건물을 지키며 끊임없이 몰려드는 적들을 상대로 버티는 것이 핵심인 맵입니다. ‘시민 45마리’라는 파일명에서 짐작할 수 있듯이, 플레이어는 초기 자원으로 시민 유닛을 확보한 후 건물을 건설하고 병력을 양성해 적의 공격을 방어해야 합니다. 맵의 배경은 사막 타일셋으로 구성되어 있으며, 중앙에 위치한 본진 지역을 중심으로 외곽에서 끊임없이 적이 등장하는 구조로 디자인되었습니다. 적의 공세는 시간이 지날수록 점점 강해지는데, 초반에는 약한 저글링이나 마린이 무리 지어 공격해오지만, 후반부로 갈수록 테란 바이크, 프로토스 드라군, 저그 뮤탈리스크 등 다양한 조합의 병력이 등장합니다. 플레이어는 시민을 생산해 자원을 채집하고, 건물을 지어 병력을 업그레이드하며, 방어 타워를 설치해 외곽 지역을 방어하는 전략을 세울 수 있습니다. 그러나 시민 수가 제한적이므로 자원 관리와 병력 배치에 신중한 판단이 요구됩니다. 특히 방어 타워의 건설 위치는 외곽 길목에 맞춰 설치해야 하며, 병력의 조합도 상황에 따라 유동적으로 변화시켜야 합니다. 이 맵은 초보 플레이어에게는 자원 관리와 기본적인 병력 운용을 익힐 수 있는 좋은 훈련장이 되며, 숙련자들에게는 전략적 깊이를 더하는 도전 과제가 됩니다. 맵의 긴장감과 지속적인 전투가 특징으로, 플레이어는 끊임없이 몰려오는 적을 상대로 얼마나 오랫동안 버틸 수 있을까라는 질문에 답을 찾아야 합니다. 또한, 4096x4096의 넓은 맵 크기는 외곽 지역까지의 긴 이동 거리를 요구해, 병력의 이동과 방어 라인의 구축을 신중히 계획해야 합니다. 이 맵을 플레이하기 전에는 최소한의 방어 타워 건설과 병력 조합에 대한 기본 전략을 숙지하는 것이 좋습니다. 시민 유닛의 생산과 관리가 이 맵의 핵심이기 때문에, 자원 부족으로 인한 병력 부족을 방지하기 위해 초반에는 신속한 cittad 건설과 자원 채집에 집중해야 합니다. 또한, 외곽의 주요 길목에 방어 타워를 설치해 적의 접근을 최소화하는 것이 중요합니다. 초반에는 소규모의 병력으로 적을 방어하되, 자원이 충분히 모이면 점차 병력을 늘려 나가야 합니다. 이 맵은 특히 디펜스 장르에 대한 이해와 전략적 사고를 필요로 하며, 끊임없는 전투와 자원 관리 사이에서 균형을 잡는 것이 승리를 좌우합니다. 이를 위해 플레이어는 맵의 구조와 적의 공세 패턴을 빠르게 파악하는 ability가 요구됩니다. "0 Defenders v. 2.2" is a classic defense genre custom map in *StarCraft: Brood War*, where players must defend their buildings against relentless waves of enemies. As suggested by the filename "citizen 45," players start with a set number of civilian units, which they use to gather resources, construct buildings, and train forces to fend off attacks. The map features a desert tileset, with the player's main base at the center and enemies spawning continuously from the outskirts. The enemy attacks escalate over time, beginning with weaker units like Zerglings or Marines but later introducing more formidable forces such as Terran Vultures, Protoss Dragoons, and Zerg Mutalisks in varied combinations. Players must balance resource management, building upgrades, and tower placements to defend key outer pathways. However, since civilian units are limited, careful planning is essential to avoid resource shortages or inefficient force deployment. For beginners, this map serves as an excellent training ground to practice resource control and basic unit management, while experienced players will find it a strategic challenge with deeper tactical demands. The map’s tension lies in its sustained combat, forcing players to endure as long as possible against endless waves. Its vast 4096x4096 size also requires thoughtful positioning of defenses and troop movements to cover the long distances between key areas. Before playing, it’s crucial to familiarize yourself with basic tower placements and force compositions, as civilian unit production and management are central to survival. Early focus should be on rapid tower construction and resource gathering to prevent shortages. Prioritize placing defensive towers at major choke points to minimize enemy advances, and start with smaller forces while gradually expanding as resources allow. Mastery of this map hinges on understanding defense mechanics and balancing constant combat with resource efficiency, demanding quick adaptation to the map’s layout and enemy attack patterns.
빌딩 디펜스 v2.0 (Building Defense v2.0)
스타크래프트 브루드워 유즈맵 '빌딩 디펜스 v2.0'은 6인 협동 디펜스 장르로, 화산 타일셋의 128×128 타일 맵에서 진행된다. 플레이어는 각자 기지를 운영하며 몰려오는 적 유닛으로부터 핵심 건물을 보호하는 것이 주 목표다. 맵 제목에서 알 수 있듯 건물 방어에 초점을 맞춘 구성으로, 입구 막기와 타워 건설 등 전략적 배치가 승패를 가른다. 초반에는 자원 확보와 기본 방어 시설 구축이 중요하며, 중반 이후로는 적 공세 강도가 높아져 유닛 구성과 업그레이드 타이밍을 조절해야 한다. 6인 전원 생존이 필수는 아니지만, 인원 손실 시 방어 라인이 무너질 위험이 커 협동 플레이가 핵심이다. 트리거 기반 웨이브 시스템으로 추정되며, 난이도는 보통 수준으로 입문자도 부담 없이 즐길 수 있다. 단, 맵 설명이 별도로 없어 초반 빌드 오더와 웨이브 패턴을 직접 익혀야 한다. 친구들과 음성 채팅을 병행하면 더욱 원활한 공략이 가능하다. 맵 크기는 중형 규모이며 화산 지형 특유의 용암 지대가 시각적 긴장감을 더한다. 자원은 미네랄과 가스가 기본 배치되어 있고, 추가 확장 가능 여부는 플레이 중 확인해야 한다. 적 웨이브는 지상과 공중이 혼합되어 출현하므로 대공 방어 시설을 소홀히 해서는 안 된다. 종족별로 테란은 벙커와 미사일 터렛, 저그는 가시 촉수와 포자 촉수, 프로토스는 포톤 캐논과 실드 배터리 중심으로 라인을 구축한다. 클리어 조건은 최종 웨이브까지 핵심 건물이 생존하는 것으로 보이며, 버전 표기 v2.0인 만큼 초기 버전 대비 밸런스 조정이 반영되었을 가능성이 높다. 협동 디펜스를 선호하는 유저, 건물 보호 미션을 즐기는 플레이어에게 추천한다. 플레이 전에는 6인 풀파티 구성이 어렵다면 인원 수에 맞춘 난이도 조절 여부를 살펴보는 것이 좋다. StarCraft Brood War UMS map 'Building Defense v2.0' is a 6-player cooperative defense genre played on a 128×128 tile volcanic tileset. Each player manages their own base with the main objective of protecting key structures from incoming enemy waves. As the title suggests, the map focuses on building defense, where strategic placement of choke points and defensive towers determines victory. Early game emphasizes resource gathering and basic defense construction, while mid-to-late game requires adjusting unit composition and upgrade timing as enemy pressure intensifies. While not all six players must survive, losses increase the risk of defensive line collapse, making teamwork essential. The map appears to use a trigger-based wave system with moderate difficulty suitable for newcomers. However, the lack of a map description means players must learn build orders and wave patterns through experience. Voice communication with friends greatly improves coordination. The medium-sized map features lava terrain that adds visual tension. Minerals and gas are placed by default, with potential expansions to be discovered during play. Enemy waves mix ground and air units, so anti-air defenses cannot be neglected. Each race builds differently: Terran relies on bunkers and missile turrets, Zerg on sunken and spore colonies, Protoss on photon cannons and shield batteries. Victory likely requires the core building to survive the final wave, and the v2.0 designation suggests balance adjustments from an earlier version. Recommended for players who enjoy cooperative defense and building protection missions. Before playing, check whether difficulty scales with player count if a full 6-person party cannot be formed.
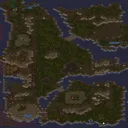
쥬라기 공원 3 (Jurassic Park 3)
스타크래프트 브루드워의 유즈맵 중 하나인 〈Jurassic Park 3〉는 사막 지형을 배경으로 한 디펜스 장르의 맵으로, 플레이어는 각자 독립된 기지에서 끊임없이 몰려오는 적의 공격으로부터 건물을 지켜내야 한다. 맵은 4096x4096의 넓은 사막 평야로 구성되어 있으며, 중앙에 위치한 기지 주변으로 적의 공격로가 여러 갈래로 뻗어 있어 전략적인 방어 라인을 구축할 필요가 있다. 특이하게도 맵의 대부분이 개방된 공간이지만, 일부 지형지물과 오브젝트가 배치되어 있어 적의 진격을 방해하거나 방어 시설을 보호하는 데 활용할 수 있다. 맵의 분위기는 Jurassic Park 시리즈의 사막 지형과 유사한 분위기를 연출하며, 플레이어는 자신의 건물을 지키면서 동시에 적의 기지를 공격할 수 있는 공격로를 확보해야 한다. 맵의 특징 중 하나는 맵 곳곳에 흩어져 있는 오브젝트와 지형이 디펜스에 유리한 요소를 제공한다는 점으로, 이를 잘 활용하면 상대방의 공격을 효과적으로 방어할 수 있다. 또한, 맵의 크기가 크기 때문에 초보 플레이어보다는 어느 정도 경험이 있는 플레이어에게 더 적합한 맵으로 평가된다. 추천하는 플레이 방식은 방어와 공격의 균형을 맞추는 것이며, 특히 건물이 파괴되지 않도록 신중한 자원 관리와 유닛 배치 전략이 중요하다. 맵을 플레이하기 전에는 맵의 주요 공격로와 방어 포인트를 미리 파악해두는 것이 좋다. 또한, 맵의 넓은 공간을 활용한 기동성 있는 유닛 운영도 승리의 열쇠가 될 수 있다. 이 맵은 디펜스 장르를 좋아하는 플레이어라면 반드시 한 번쯤 도전해볼 만한 가치가 있는 맵이다. Jurassic Park 3 is a UMS-style defense map set in a desert terrain, where players must protect their bases from relentless enemy attacks. The 4096x4096 map features an open desert plain with multiple pathways leading to the central base, requiring strategic placement of defensive structures. While the map is mostly open, scattered terrain objects and obstacles can be used to disrupt enemy advances or shield key buildings. The atmosphere evokes the Jurassic Park series' desert landscapes, blending defense mechanics with offensive opportunities to strike enemy bases. The map’s scale and terrain design favor experienced players, as careful resource management and unit positioning are essential to survival. Key strategies include identifying primary attack routes, securing defensive chokepoints, and utilizing the map’s expanse for mobile unit operations. This map is a must-try for defense genre enthusiasts seeking a challenging and immersive experience.
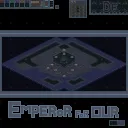
Emperor For Our - T
Emperor For Our - T는 스타크래프트 브루드워의 유즈맵으로, 6명의 플레이어가 한 팀을 이루어 중앙의 거대한 구조물을 surrounded하는 적들을 상대로 전투를 펼치는 디펜스 장르의 맵이다. 중앙에 위치한 대형 건물이 공격받지 않도록 방어선을 구축하고, 끊임없이 몰려드는 적 유닛들을 상대해야 한다. 맵의 구조는 대칭형이며, 중앙 건물을 중심으로 6개의 진출로가 뻗어나가는 형태로 구성되어 있어 각 플레이어는 자신이 맡은 구역의 방어와 적의 처리에 집중할 수 있다. 맵의 배경은 화산 지형으로, 붉은색과 검은색의 색채가Dominant하게 표현되어 있어 플레이어들에게 긴장감을 조성한다. 플레이어는 시작 지점에서 시작하여 각자의 구역으로 이동한 후, 적 유닛이 등장하는 진출로에 방어 건물을 설치하거나 직접 전투를 통해 적을 저지해야 한다. 중앙 건물이 파괴되지 않도록 주의하는 동시에, 적의 공세를 효과적으로 차단하는 것이 핵심 전략이다. 맵의 타일셋은 화산 지형을 기반으로 하여 현실감 있는 전투 환경을 제공하며, 맵의 크기는 4096x4096로 넓은 공간을 활용한 전략적 플레이가 가능하다. 적 유닛은 일정 주기로 생성되며,随着时间的推移, 더 강한 유닛들이 등장하여 방어의 난이도를 높인다. 초보자는 기본적인 방어 건물을 배치하는 전략부터 학습할 수 있으며, 숙련자는 효율적인 자원 관리와 유닛 컨트롤로 적의 공세를 효과적으로 억제할 수 있다. 이 맵은 팀워크와 전략적 사고가 요구되는 만큼, 친구들과 함께 플레이할 때 더욱 재미를 느낄 수 있는 유즈맵으로 추천된다. 플레이 전에는 중앙 건물이 위치한 구역과 각 진출로의 배치, 그리고 적 유닛의 생성 패턴을 미리 숙지하는 것이 중요하다. 또한, 팀원 간의 역할 분담을 명확히 하고, 소통을 통해 효율적인 방어 전략을 구축하는 것이 승리への近道가 될 것이다. Emperor For Our - T is a custom map in StarCraft: Brood War where six players form a team to defend a massive central structure against waves of enemies in a defense-style gameplay. The goal is to build defensive lines around the central building and fend off relentless enemy units. The map features a symmetrical design with six main pathways extending from the central structure, allowing each player to focus on defending their assigned area. The volcanic terrain background, dominated by red and black tones, creates an intense atmosphere. Players start at their designated positions, then move to their zones to set up defensive structures or engage in direct combat to block enemy advances. Keeping the central building intact while effectively countering enemy assaults is key to success. The map’s tileset is based on volcanic terrain, offering a realistic battle environment, and its 4096x4096 size provides ample space for strategic gameplay. Enemies spawn in waves, growing stronger over time, increasing the challenge. Beginners can learn basic defensive strategies, while experienced players can refine resource management and unit control to suppress enemy attacks. This map thrives on teamwork and strategic thinking, making it especially fun to play with friends. Before starting, it’s crucial to familiarize yourself with the central building’s location, the layout of each pathway, and enemy spawn patterns. Clearly assigning roles and maintaining communication among teammates will pave the way to victory.
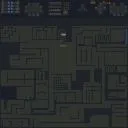
언데드 광기! (The Undead Madness!)
스타크래프트 브루드워의 유즈맵 중 하나로, 언데드 종족을 중심으로 펼쳐지는 디펜스와 서바이벌 요소가 결합된 맵이다. 맵 전체가 얼음과 설원으로 이루어진 타일셋으로 구성되어 있으며, 중앙에 위치한 넓은 공간에서 다수의 적 유닛이 끊임없이 몰려드는 구조가 특징이다. 플레이어는 언데드 종족의 건물을 건설하고 유닛을 생산하여 입구와 주요 거점을 방어해야 하며, 동시에 자원 관리와 건물 관리에도 신경 써야 한다. 맵의 가장자리로 갈수록 난이도가 급격히 상승하는 구조로, 초보자는 맵 중앙에서 버티는 데 집중해야 하고 숙련자는 перифе리(외곽) 지역까지 방어선을 구축하는 전략을 세워야 한다. 언데드 광기!는 단순한 디펜스 맵을 넘어, 끊임없이 쏟아지는 적군을 상대하며 건물을 보호하고 자원을 확보하는 ‘컴까기’ 스타일의 유즈맵으로 분류된다. 맵 곳곳에 배치된 리스폰 포인트에서 적 유닛이 끊임없이 생성되며, 플레이어는 이를 저지하기 위해 건물을 배치하고 유닛을 생산해야 한다. 중앙의 넓은 공간은 초기 방어 거점이지만,随着时间的推移(시간이 지나면), 적의 공격이 점차 강력해지고 수가 많아지면서 방어선을 점차 바깥쪽으로 확장해 나가야 한다. 특히, 맵의 가장자리로 갈수록 적의 종류와 숫자가 기하급수적으로 증가하므로, 초반에 자원을 충분히 확보하고 건물을 안전하게 배치하는 것이 관건이다. 이 맵의 가장 큰 특징은 ‘광기’라는 이름에 걸맞게 끊임없는 압박感(압박감)과 긴장감을 유지할 수 있도록 설계되었다는 점이다. 적의 공격이 멈추지 않기 때문에 플레이어는 항상 다음 공격을 예상하고 방어선을 재구축해야 하며, 자원 관리와 동시에 진행되어야 하므로 멀티태스킹 능력이 요구된다. 또한, 언데드 종족의 특성상 건물이 파괴되었을 때 빠르게 복구하는 능력도 중요하다. 초보 플레이어는 맵의 구조와 적의 공격 패턴을 숙지한 후, 안정적으로 중앙 방어선을 유지하는 데 집중하는 것이 좋으며, 숙련자는 외곽까지 방어선을 넓히며 보너스 자원을 확보하는 전략을 구사할 수 있다. 맵의 난이도는 전반적으로 ‘보통’ 정도로, 끊임없는 압박으로 인해 실수 한 번이 패배로 이어질 수 있으므로 신중한 플레이가 필요하다. 이 맵은 언데드 종족을 선호하는 플레이어나 끊임없는 공격과 방어의 긴장감을 즐기는 유저들에게 강력히 추천할 만하다. StarCraft: Brood War's custom map combines defense and survival elements centered around the Undead faction. The entire map features an icy, snowy tileset, with a key feature being a wide central area where waves of enemy units continuously spawn. Players must construct Undead buildings, produce units, and defend entrances and key locations while managing resources and structures. The difficulty escalates sharply toward the map's edges, so beginners should focus on holding the central area, while experienced players can build defensive lines toward the outskirts. "Undead Madness!" goes beyond a simple defense map—it’s a 'comp stomp' style custom map where players face relentless waves of enemies while protecting buildings and securing resources. Enemy units continuously spawn from respawn points scattered across the map, forcing players to strategically place buildings and produce units to counter them. The central area serves as the initial defensive stronghold, but as time passes, enemy attacks grow stronger and more numerous, requiring players to gradually expand their defenses outward. The edge of the map is especially brutal, with enemy types and numbers increasing exponentially, making early resource gathering and secure building placement crucial. The map’s defining feature is its relentless pressure and tension, fitting its "Madness" title. Since enemy attacks never stop, players must constantly anticipate and rebuild defenses while balancing resource management—a true test of multitasking. Given the Undead’s mechanics, quickly recovering from destroyed buildings is also vital. Beginners should focus on maintaining a stable central defense after learning the map’s layout and enemy patterns, while advanced players can push defenses outward to secure bonus resources. The overall difficulty is moderate, but a single mistake under constant pressure can lead to defeat, demanding careful play. This map is highly recommended for Undead fans or players who enjoy the thrill of nonstop attack and defense.
最近登録されたマップ
新たに追加されたファイルとバージョンをご確認ください。
0 디펜더스 v. 2.2 (0 Defenders v. 2.2)
스타크래프트 브루드워의 대표적인 디펜스 장르 유즈맵인 〈0 Defenders v. 2.2〉는 플레이어가 건물을 지키며 끊임없이 몰려드는 적들을 상대로 버티는 것이 핵심인 맵입니다. ‘시민 45마리’라는 파일명에서 짐작할 수 있듯이, 플레이어는 초기 자원으로 시민 유닛을 확보한 후 건물을 건설하고 병력을 양성해 적의 공격을 방어해야 합니다. 맵의 배경은 사막 타일셋으로 구성되어 있으며, 중앙에 위치한 본진 지역을 중심으로 외곽에서 끊임없이 적이 등장하는 구조로 디자인되었습니다. 적의 공세는 시간이 지날수록 점점 강해지는데, 초반에는 약한 저글링이나 마린이 무리 지어 공격해오지만, 후반부로 갈수록 테란 바이크, 프로토스 드라군, 저그 뮤탈리스크 등 다양한 조합의 병력이 등장합니다. 플레이어는 시민을 생산해 자원을 채집하고, 건물을 지어 병력을 업그레이드하며, 방어 타워를 설치해 외곽 지역을 방어하는 전략을 세울 수 있습니다. 그러나 시민 수가 제한적이므로 자원 관리와 병력 배치에 신중한 판단이 요구됩니다. 특히 방어 타워의 건설 위치는 외곽 길목에 맞춰 설치해야 하며, 병력의 조합도 상황에 따라 유동적으로 변화시켜야 합니다. 이 맵은 초보 플레이어에게는 자원 관리와 기본적인 병력 운용을 익힐 수 있는 좋은 훈련장이 되며, 숙련자들에게는 전략적 깊이를 더하는 도전 과제가 됩니다. 맵의 긴장감과 지속적인 전투가 특징으로, 플레이어는 끊임없이 몰려오는 적을 상대로 얼마나 오랫동안 버틸 수 있을까라는 질문에 답을 찾아야 합니다. 또한, 4096x4096의 넓은 맵 크기는 외곽 지역까지의 긴 이동 거리를 요구해, 병력의 이동과 방어 라인의 구축을 신중히 계획해야 합니다. 이 맵을 플레이하기 전에는 최소한의 방어 타워 건설과 병력 조합에 대한 기본 전략을 숙지하는 것이 좋습니다. 시민 유닛의 생산과 관리가 이 맵의 핵심이기 때문에, 자원 부족으로 인한 병력 부족을 방지하기 위해 초반에는 신속한 cittad 건설과 자원 채집에 집중해야 합니다. 또한, 외곽의 주요 길목에 방어 타워를 설치해 적의 접근을 최소화하는 것이 중요합니다. 초반에는 소규모의 병력으로 적을 방어하되, 자원이 충분히 모이면 점차 병력을 늘려 나가야 합니다. 이 맵은 특히 디펜스 장르에 대한 이해와 전략적 사고를 필요로 하며, 끊임없는 전투와 자원 관리 사이에서 균형을 잡는 것이 승리를 좌우합니다. 이를 위해 플레이어는 맵의 구조와 적의 공세 패턴을 빠르게 파악하는 ability가 요구됩니다. "0 Defenders v. 2.2" is a classic defense genre custom map in *StarCraft: Brood War*, where players must defend their buildings against relentless waves of enemies. As suggested by the filename "citizen 45," players start with a set number of civilian units, which they use to gather resources, construct buildings, and train forces to fend off attacks. The map features a desert tileset, with the player's main base at the center and enemies spawning continuously from the outskirts. The enemy attacks escalate over time, beginning with weaker units like Zerglings or Marines but later introducing more formidable forces such as Terran Vultures, Protoss Dragoons, and Zerg Mutalisks in varied combinations. Players must balance resource management, building upgrades, and tower placements to defend key outer pathways. However, since civilian units are limited, careful planning is essential to avoid resource shortages or inefficient force deployment. For beginners, this map serves as an excellent training ground to practice resource control and basic unit management, while experienced players will find it a strategic challenge with deeper tactical demands. The map’s tension lies in its sustained combat, forcing players to endure as long as possible against endless waves. Its vast 4096x4096 size also requires thoughtful positioning of defenses and troop movements to cover the long distances between key areas. Before playing, it’s crucial to familiarize yourself with basic tower placements and force compositions, as civilian unit production and management are central to survival. Early focus should be on rapid tower construction and resource gathering to prevent shortages. Prioritize placing defensive towers at major choke points to minimize enemy advances, and start with smaller forces while gradually expanding as resources allow. Mastery of this map hinges on understanding defense mechanics and balancing constant combat with resource efficiency, demanding quick adaptation to the map’s layout and enemy attack patterns.
언데드 광기! (The Undead Madness!)
스타크래프트 브루드워의 유즈맵 중 하나로, 언데드 종족을 중심으로 펼쳐지는 디펜스와 서바이벌 요소가 결합된 맵이다. 맵 전체가 얼음과 설원으로 이루어진 타일셋으로 구성되어 있으며, 중앙에 위치한 넓은 공간에서 다수의 적 유닛이 끊임없이 몰려드는 구조가 특징이다. 플레이어는 언데드 종족의 건물을 건설하고 유닛을 생산하여 입구와 주요 거점을 방어해야 하며, 동시에 자원 관리와 건물 관리에도 신경 써야 한다. 맵의 가장자리로 갈수록 난이도가 급격히 상승하는 구조로, 초보자는 맵 중앙에서 버티는 데 집중해야 하고 숙련자는 перифе리(외곽) 지역까지 방어선을 구축하는 전략을 세워야 한다. 언데드 광기!는 단순한 디펜스 맵을 넘어, 끊임없이 쏟아지는 적군을 상대하며 건물을 보호하고 자원을 확보하는 ‘컴까기’ 스타일의 유즈맵으로 분류된다. 맵 곳곳에 배치된 리스폰 포인트에서 적 유닛이 끊임없이 생성되며, 플레이어는 이를 저지하기 위해 건물을 배치하고 유닛을 생산해야 한다. 중앙의 넓은 공간은 초기 방어 거점이지만,随着时间的推移(시간이 지나면), 적의 공격이 점차 강력해지고 수가 많아지면서 방어선을 점차 바깥쪽으로 확장해 나가야 한다. 특히, 맵의 가장자리로 갈수록 적의 종류와 숫자가 기하급수적으로 증가하므로, 초반에 자원을 충분히 확보하고 건물을 안전하게 배치하는 것이 관건이다. 이 맵의 가장 큰 특징은 ‘광기’라는 이름에 걸맞게 끊임없는 압박感(압박감)과 긴장감을 유지할 수 있도록 설계되었다는 점이다. 적의 공격이 멈추지 않기 때문에 플레이어는 항상 다음 공격을 예상하고 방어선을 재구축해야 하며, 자원 관리와 동시에 진행되어야 하므로 멀티태스킹 능력이 요구된다. 또한, 언데드 종족의 특성상 건물이 파괴되었을 때 빠르게 복구하는 능력도 중요하다. 초보 플레이어는 맵의 구조와 적의 공격 패턴을 숙지한 후, 안정적으로 중앙 방어선을 유지하는 데 집중하는 것이 좋으며, 숙련자는 외곽까지 방어선을 넓히며 보너스 자원을 확보하는 전략을 구사할 수 있다. 맵의 난이도는 전반적으로 ‘보통’ 정도로, 끊임없는 압박으로 인해 실수 한 번이 패배로 이어질 수 있으므로 신중한 플레이가 필요하다. 이 맵은 언데드 종족을 선호하는 플레이어나 끊임없는 공격과 방어의 긴장감을 즐기는 유저들에게 강력히 추천할 만하다. StarCraft: Brood War's custom map combines defense and survival elements centered around the Undead faction. The entire map features an icy, snowy tileset, with a key feature being a wide central area where waves of enemy units continuously spawn. Players must construct Undead buildings, produce units, and defend entrances and key locations while managing resources and structures. The difficulty escalates sharply toward the map's edges, so beginners should focus on holding the central area, while experienced players can build defensive lines toward the outskirts. "Undead Madness!" goes beyond a simple defense map—it’s a 'comp stomp' style custom map where players face relentless waves of enemies while protecting buildings and securing resources. Enemy units continuously spawn from respawn points scattered across the map, forcing players to strategically place buildings and produce units to counter them. The central area serves as the initial defensive stronghold, but as time passes, enemy attacks grow stronger and more numerous, requiring players to gradually expand their defenses outward. The edge of the map is especially brutal, with enemy types and numbers increasing exponentially, making early resource gathering and secure building placement crucial. The map’s defining feature is its relentless pressure and tension, fitting its "Madness" title. Since enemy attacks never stop, players must constantly anticipate and rebuild defenses while balancing resource management—a true test of multitasking. Given the Undead’s mechanics, quickly recovering from destroyed buildings is also vital. Beginners should focus on maintaining a stable central defense after learning the map’s layout and enemy patterns, while advanced players can push defenses outward to secure bonus resources. The overall difficulty is moderate, but a single mistake under constant pressure can lead to defeat, demanding careful play. This map is highly recommended for Undead fans or players who enjoy the thrill of nonstop attack and defense.
쥬라기 공원 3 (Jurassic Park 3)
스타크래프트 브루드워의 유즈맵 중 하나인 〈Jurassic Park 3〉는 사막 지형을 배경으로 한 디펜스 장르의 맵으로, 플레이어는 각자 독립된 기지에서 끊임없이 몰려오는 적의 공격으로부터 건물을 지켜내야 한다. 맵은 4096x4096의 넓은 사막 평야로 구성되어 있으며, 중앙에 위치한 기지 주변으로 적의 공격로가 여러 갈래로 뻗어 있어 전략적인 방어 라인을 구축할 필요가 있다. 특이하게도 맵의 대부분이 개방된 공간이지만, 일부 지형지물과 오브젝트가 배치되어 있어 적의 진격을 방해하거나 방어 시설을 보호하는 데 활용할 수 있다. 맵의 분위기는 Jurassic Park 시리즈의 사막 지형과 유사한 분위기를 연출하며, 플레이어는 자신의 건물을 지키면서 동시에 적의 기지를 공격할 수 있는 공격로를 확보해야 한다. 맵의 특징 중 하나는 맵 곳곳에 흩어져 있는 오브젝트와 지형이 디펜스에 유리한 요소를 제공한다는 점으로, 이를 잘 활용하면 상대방의 공격을 효과적으로 방어할 수 있다. 또한, 맵의 크기가 크기 때문에 초보 플레이어보다는 어느 정도 경험이 있는 플레이어에게 더 적합한 맵으로 평가된다. 추천하는 플레이 방식은 방어와 공격의 균형을 맞추는 것이며, 특히 건물이 파괴되지 않도록 신중한 자원 관리와 유닛 배치 전략이 중요하다. 맵을 플레이하기 전에는 맵의 주요 공격로와 방어 포인트를 미리 파악해두는 것이 좋다. 또한, 맵의 넓은 공간을 활용한 기동성 있는 유닛 운영도 승리의 열쇠가 될 수 있다. 이 맵은 디펜스 장르를 좋아하는 플레이어라면 반드시 한 번쯤 도전해볼 만한 가치가 있는 맵이다. Jurassic Park 3 is a UMS-style defense map set in a desert terrain, where players must protect their bases from relentless enemy attacks. The 4096x4096 map features an open desert plain with multiple pathways leading to the central base, requiring strategic placement of defensive structures. While the map is mostly open, scattered terrain objects and obstacles can be used to disrupt enemy advances or shield key buildings. The atmosphere evokes the Jurassic Park series' desert landscapes, blending defense mechanics with offensive opportunities to strike enemy bases. The map’s scale and terrain design favor experienced players, as careful resource management and unit positioning are essential to survival. Key strategies include identifying primary attack routes, securing defensive chokepoints, and utilizing the map’s expanse for mobile unit operations. This map is a must-try for defense genre enthusiasts seeking a challenging and immersive experience.
Emperor For Our - T
Emperor For Our - T는 스타크래프트 브루드워의 유즈맵으로, 6명의 플레이어가 한 팀을 이루어 중앙의 거대한 구조물을 surrounded하는 적들을 상대로 전투를 펼치는 디펜스 장르의 맵이다. 중앙에 위치한 대형 건물이 공격받지 않도록 방어선을 구축하고, 끊임없이 몰려드는 적 유닛들을 상대해야 한다. 맵의 구조는 대칭형이며, 중앙 건물을 중심으로 6개의 진출로가 뻗어나가는 형태로 구성되어 있어 각 플레이어는 자신이 맡은 구역의 방어와 적의 처리에 집중할 수 있다. 맵의 배경은 화산 지형으로, 붉은색과 검은색의 색채가Dominant하게 표현되어 있어 플레이어들에게 긴장감을 조성한다. 플레이어는 시작 지점에서 시작하여 각자의 구역으로 이동한 후, 적 유닛이 등장하는 진출로에 방어 건물을 설치하거나 직접 전투를 통해 적을 저지해야 한다. 중앙 건물이 파괴되지 않도록 주의하는 동시에, 적의 공세를 효과적으로 차단하는 것이 핵심 전략이다. 맵의 타일셋은 화산 지형을 기반으로 하여 현실감 있는 전투 환경을 제공하며, 맵의 크기는 4096x4096로 넓은 공간을 활용한 전략적 플레이가 가능하다. 적 유닛은 일정 주기로 생성되며,随着时间的推移, 더 강한 유닛들이 등장하여 방어의 난이도를 높인다. 초보자는 기본적인 방어 건물을 배치하는 전략부터 학습할 수 있으며, 숙련자는 효율적인 자원 관리와 유닛 컨트롤로 적의 공세를 효과적으로 억제할 수 있다. 이 맵은 팀워크와 전략적 사고가 요구되는 만큼, 친구들과 함께 플레이할 때 더욱 재미를 느낄 수 있는 유즈맵으로 추천된다. 플레이 전에는 중앙 건물이 위치한 구역과 각 진출로의 배치, 그리고 적 유닛의 생성 패턴을 미리 숙지하는 것이 중요하다. 또한, 팀원 간의 역할 분담을 명확히 하고, 소통을 통해 효율적인 방어 전략을 구축하는 것이 승리への近道가 될 것이다. Emperor For Our - T is a custom map in StarCraft: Brood War where six players form a team to defend a massive central structure against waves of enemies in a defense-style gameplay. The goal is to build defensive lines around the central building and fend off relentless enemy units. The map features a symmetrical design with six main pathways extending from the central structure, allowing each player to focus on defending their assigned area. The volcanic terrain background, dominated by red and black tones, creates an intense atmosphere. Players start at their designated positions, then move to their zones to set up defensive structures or engage in direct combat to block enemy advances. Keeping the central building intact while effectively countering enemy assaults is key to success. The map’s tileset is based on volcanic terrain, offering a realistic battle environment, and its 4096x4096 size provides ample space for strategic gameplay. Enemies spawn in waves, growing stronger over time, increasing the challenge. Beginners can learn basic defensive strategies, while experienced players can refine resource management and unit control to suppress enemy attacks. This map thrives on teamwork and strategic thinking, making it especially fun to play with friends. Before starting, it’s crucial to familiarize yourself with the central building’s location, the layout of each pathway, and enemy spawn patterns. Clearly assigning roles and maintaining communication among teammates will pave the way to victory.
빌딩 디펜스 v2.0 (Building Defense v2.0)
스타크래프트 브루드워 유즈맵 '빌딩 디펜스 v2.0'은 6인 협동 디펜스 장르로, 화산 타일셋의 128×128 타일 맵에서 진행된다. 플레이어는 각자 기지를 운영하며 몰려오는 적 유닛으로부터 핵심 건물을 보호하는 것이 주 목표다. 맵 제목에서 알 수 있듯 건물 방어에 초점을 맞춘 구성으로, 입구 막기와 타워 건설 등 전략적 배치가 승패를 가른다. 초반에는 자원 확보와 기본 방어 시설 구축이 중요하며, 중반 이후로는 적 공세 강도가 높아져 유닛 구성과 업그레이드 타이밍을 조절해야 한다. 6인 전원 생존이 필수는 아니지만, 인원 손실 시 방어 라인이 무너질 위험이 커 협동 플레이가 핵심이다. 트리거 기반 웨이브 시스템으로 추정되며, 난이도는 보통 수준으로 입문자도 부담 없이 즐길 수 있다. 단, 맵 설명이 별도로 없어 초반 빌드 오더와 웨이브 패턴을 직접 익혀야 한다. 친구들과 음성 채팅을 병행하면 더욱 원활한 공략이 가능하다. 맵 크기는 중형 규모이며 화산 지형 특유의 용암 지대가 시각적 긴장감을 더한다. 자원은 미네랄과 가스가 기본 배치되어 있고, 추가 확장 가능 여부는 플레이 중 확인해야 한다. 적 웨이브는 지상과 공중이 혼합되어 출현하므로 대공 방어 시설을 소홀히 해서는 안 된다. 종족별로 테란은 벙커와 미사일 터렛, 저그는 가시 촉수와 포자 촉수, 프로토스는 포톤 캐논과 실드 배터리 중심으로 라인을 구축한다. 클리어 조건은 최종 웨이브까지 핵심 건물이 생존하는 것으로 보이며, 버전 표기 v2.0인 만큼 초기 버전 대비 밸런스 조정이 반영되었을 가능성이 높다. 협동 디펜스를 선호하는 유저, 건물 보호 미션을 즐기는 플레이어에게 추천한다. 플레이 전에는 6인 풀파티 구성이 어렵다면 인원 수에 맞춘 난이도 조절 여부를 살펴보는 것이 좋다. StarCraft Brood War UMS map 'Building Defense v2.0' is a 6-player cooperative defense genre played on a 128×128 tile volcanic tileset. Each player manages their own base with the main objective of protecting key structures from incoming enemy waves. As the title suggests, the map focuses on building defense, where strategic placement of choke points and defensive towers determines victory. Early game emphasizes resource gathering and basic defense construction, while mid-to-late game requires adjusting unit composition and upgrade timing as enemy pressure intensifies. While not all six players must survive, losses increase the risk of defensive line collapse, making teamwork essential. The map appears to use a trigger-based wave system with moderate difficulty suitable for newcomers. However, the lack of a map description means players must learn build orders and wave patterns through experience. Voice communication with friends greatly improves coordination. The medium-sized map features lava terrain that adds visual tension. Minerals and gas are placed by default, with potential expansions to be discovered during play. Enemy waves mix ground and air units, so anti-air defenses cannot be neglected. Each race builds differently: Terran relies on bunkers and missile turrets, Zerg on sunken and spore colonies, Protoss on photon cannons and shield batteries. Victory likely requires the core building to survive the final wave, and the v2.0 designation suggests balance adjustments from an earlier version. Recommended for players who enjoy cooperative defense and building protection missions. Before playing, check whether difficulty scales with player count if a full 6-person party cannot be formed.
マップ選択ガイド
태그는 맵의 핵심 특징을 빠르게 설명하지만 제작 버전마다 규칙이 다를 수 있습니다. 상세 설명에서 권장 인원, 난이도, 플레이 시간과 버전을 함께 확인한 뒤 다운로드하세요.