
Collection de cartes StarCraft 드론 관리
Nous avons rassemblé des cartes enregistrées avec le tag '드론 관리'. Comparez les cartes populaires et récentes en vous concentrant sur les styles de jeu, les difficultés et les caractéristiques qui sont difficiles à trouver via un seul genre.
- Cartes enregistrées
- 2éléments
- Téléchargements cumulés
- 0
- Vues cumulées
- 72
Cartes populaires
C'est une carte avec un taux élevé de téléchargements et de consultations.
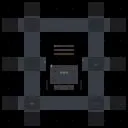
썬켄 10-Way 75 드론즈! (Sunken 10-Way 75 Drones!)
스타크래프트 브루드워의 유즈맵 ‘썬켄 10-Way 75 드론즈!’는 플레이어 한 명이 중앙 해처리에서 시작해 75기의 드론을 생산하고, 이를 10방향의 멀티 지역에 배치하는 컴까기 형식의 맵입니다. 맵 구조는 10개의 메인 멀티 지역이 균등하게 배치되어 있으며, 각 지역은 해처리와 미네랄로 구성되어 있습니다. 중앙 해처리에서 드론을 생산한 후, 플레이어는 지정된 방향(10-Way)으로 드론을 보내 멀티를 점령해야 합니다. 드론 생산과 멀티 점령 외에 추가적인 전투 요소가 없으며, 드론의 수가 많아지면서 멀티 관리가 주된 플레이 포인트가 됩니다. 맵의 특징은 균등한 멀티 배치와 드론 생산에 집중된 시스템으로, 플레이어는 효율적인 드론 생산과 멀티 관리를 통해 승리를 목표로 합니다. 초보자와 숙련자 모두 즐길 수 있지만, 멀티 관리의 난이도가 높기 때문에 전략적인 플레이가 요구됩니다. 특히 드론 수가 많아지면서 리소스 관리와 멀티 방어가 중요해지며, 게임의 지속 시간이 길어질수록 플레이어의 집중력이 중요해집니다. 추천하는 플레이 방식은 드론 생산 효율 극대화와 멀티 지역 방어에 중점을 두는 것입니다. 맵을 플레이하기 전, 중앙 해처리에서 드론 생산 속도와 멀티 지역 간의 거리를 확인하여 전략을 세우는 것이 좋습니다. 또한 드론 수가 많아지면서 리소스가 부족해질 수 있으므로, 멀티 지역 확보와 동시에 자원 관리에 신경 써야 합니다. 이 맵은 컴까기 유저들에게는 드론 관리와 멀티 점령의 재미를 느낄 수 있는 좋은 기회가 될 것입니다. StarCraft: Brood War custom map *Sunken 10-Way 75 Drones!* is a drone-only format where one player starts at the central hatchery, produces 75 drones, and deploys them across ten evenly spaced multi-locations. The map features ten main multi-areas, each equipped with a hatchery and mineral patches. After producing drones at the central hatchery, the player must send them in the designated ten directions to secure each multi. There are no additional combat mechanics—victory hinges on drone production and managing the growing number of multi-locations. Designed for both beginners and veterans, the challenge lies in efficient drone production and multi-management, requiring strategic focus as the game progresses. The longer the match lasts, the more crucial resource control and multi-defense become. Players are advised to optimize drone production efficiency and prioritize defending multi-locations. Before starting, it’s wise to assess drone production speed and the distances between multi-areas to plan accordingly. Since resources can dwindle as drones accumulate, securing multi-locations early while maintaining resource balance is key. For drone-only enthusiasts, this map offers a fun and engaging way to test drone management and multi-securing skills.
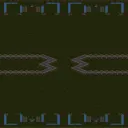
Fastest Possible 2v2 Shared (가능한 한 빠른 2v2Resource 공유)
‘Fastest Possible 2v2 Shared’는 스타크래프트 브루드워에서 2:2로 플레이하는 밀리 맵으로, 플레이어들이 가능한 한 빠르게 자원을 채취하고 전투를 준비할 수 있도록 설계된 특수한 조건의 맵이다. 맵은 전형적인 사막 타일셋으로 구성되어 있으며, 두 팀이 각각 하나의 넥서스를 중심으로Resource Depots, Supply Depots, 그리고 Mineral Fields가 배치되어 있다. 특징적인 점은 Mineral Fields가 단 한 곳에만 모여 있어서 모든 플레이어가 이 하나의 자원 지점에서 자원을 채취해야 한다는 점이다. 맵의 이름에서도 알 수 있듯이, 자원 채취의 효율성과 속도가 승리의 관건이 된다. 플레이어는 시작하자마자 모든 드론을 Mineral Fields로 보내 최대한 빠르게 자원을 확보해야 하며, 동시에 상대방 팀을 제압하기 위한 병력 생산과 진출을 서둘러야 한다. Mineral Fields가 하나뿐이므로 자원 경쟁이 치열해질 수밖에 없고, 이는 맵의 긴장감을 높이는 핵심 요소로 작용한다. 맵의 구조는 비교적 단순하지만, 자원 채취의 중요성과 병력 생산 타이밍의 균형을 맞추는 것이 관건이다. 또한, Mineral Fields가 하나뿐이므로 초반 자원 확보 경쟁에서 뒤처지면 게임을 따라잡기 어려워진다. 이 맵은 초보자보다는 경험이 있는 플레이어들에게 적합하며, 특히 빠른 판단력과 자원 관리 능력이 요구된다. 또한, 팀 간의 조율도 중요하다. Mineral Fields를 두고 벌어지는 자원 전쟁에서 승리하기 위해 팀원 간의 협력이 필수적이다. 맵의 평가는 플레이어의 자원 관리 능력과 병력 운용 전략에 크게 좌우된다. Fastest Possible라는 이름에 걸맞게, 자원 채취와 병력 생산의 속도가 게임의 승패를 가르는 열쇠가 된다. ‘Fastest Possible 2v2 Shared’ is a *StarCraft: Brood War* 2v2 mill map designed to let players gather resources and prepare for battle as quickly as possible. The map features a classic desert tileset, with each team centered around a single Nexus surrounded by Resource Depots, Supply Depots, and Mineral Fields. The standout feature is that all Mineral Fields are clustered in one location, forcing every player to compete for resources at the same spot—making efficient and fast gathering the key to victory, as the map’s name suggests. As soon as the game starts, players must send all their drones to the shared Mineral Fields to secure resources quickly while rushing to produce and deploy forces to overwhelm the opposing team. With only one resource location, competition for minerals becomes intense, heightening the map’s tension. Though the layout is straightforward, success hinges on balancing resource gathering with timely military production. Falling behind in the early scramble for minerals can make it nearly impossible to recover. This map is best suited for experienced players rather than beginners, demanding sharp decision-making and strong resource management. Teamwork is also critical—coordination with teammates is essential to win the resource war at the Mineral Fields. Ultimately, the outcome depends heavily on how well players handle resources and execute their strategies. True to its name, *Fastest Possible*, the speed of gathering and army production determines who wins and who loses.
Cartes récemment ajoutées
Vérifiez les fichiers et versions récemment ajoutés.
썬켄 10-Way 75 드론즈! (Sunken 10-Way 75 Drones!)
스타크래프트 브루드워의 유즈맵 ‘썬켄 10-Way 75 드론즈!’는 플레이어 한 명이 중앙 해처리에서 시작해 75기의 드론을 생산하고, 이를 10방향의 멀티 지역에 배치하는 컴까기 형식의 맵입니다. 맵 구조는 10개의 메인 멀티 지역이 균등하게 배치되어 있으며, 각 지역은 해처리와 미네랄로 구성되어 있습니다. 중앙 해처리에서 드론을 생산한 후, 플레이어는 지정된 방향(10-Way)으로 드론을 보내 멀티를 점령해야 합니다. 드론 생산과 멀티 점령 외에 추가적인 전투 요소가 없으며, 드론의 수가 많아지면서 멀티 관리가 주된 플레이 포인트가 됩니다. 맵의 특징은 균등한 멀티 배치와 드론 생산에 집중된 시스템으로, 플레이어는 효율적인 드론 생산과 멀티 관리를 통해 승리를 목표로 합니다. 초보자와 숙련자 모두 즐길 수 있지만, 멀티 관리의 난이도가 높기 때문에 전략적인 플레이가 요구됩니다. 특히 드론 수가 많아지면서 리소스 관리와 멀티 방어가 중요해지며, 게임의 지속 시간이 길어질수록 플레이어의 집중력이 중요해집니다. 추천하는 플레이 방식은 드론 생산 효율 극대화와 멀티 지역 방어에 중점을 두는 것입니다. 맵을 플레이하기 전, 중앙 해처리에서 드론 생산 속도와 멀티 지역 간의 거리를 확인하여 전략을 세우는 것이 좋습니다. 또한 드론 수가 많아지면서 리소스가 부족해질 수 있으므로, 멀티 지역 확보와 동시에 자원 관리에 신경 써야 합니다. 이 맵은 컴까기 유저들에게는 드론 관리와 멀티 점령의 재미를 느낄 수 있는 좋은 기회가 될 것입니다. StarCraft: Brood War custom map *Sunken 10-Way 75 Drones!* is a drone-only format where one player starts at the central hatchery, produces 75 drones, and deploys them across ten evenly spaced multi-locations. The map features ten main multi-areas, each equipped with a hatchery and mineral patches. After producing drones at the central hatchery, the player must send them in the designated ten directions to secure each multi. There are no additional combat mechanics—victory hinges on drone production and managing the growing number of multi-locations. Designed for both beginners and veterans, the challenge lies in efficient drone production and multi-management, requiring strategic focus as the game progresses. The longer the match lasts, the more crucial resource control and multi-defense become. Players are advised to optimize drone production efficiency and prioritize defending multi-locations. Before starting, it’s wise to assess drone production speed and the distances between multi-areas to plan accordingly. Since resources can dwindle as drones accumulate, securing multi-locations early while maintaining resource balance is key. For drone-only enthusiasts, this map offers a fun and engaging way to test drone management and multi-securing skills.
Fastest Possible 2v2 Shared (가능한 한 빠른 2v2Resource 공유)
‘Fastest Possible 2v2 Shared’는 스타크래프트 브루드워에서 2:2로 플레이하는 밀리 맵으로, 플레이어들이 가능한 한 빠르게 자원을 채취하고 전투를 준비할 수 있도록 설계된 특수한 조건의 맵이다. 맵은 전형적인 사막 타일셋으로 구성되어 있으며, 두 팀이 각각 하나의 넥서스를 중심으로Resource Depots, Supply Depots, 그리고 Mineral Fields가 배치되어 있다. 특징적인 점은 Mineral Fields가 단 한 곳에만 모여 있어서 모든 플레이어가 이 하나의 자원 지점에서 자원을 채취해야 한다는 점이다. 맵의 이름에서도 알 수 있듯이, 자원 채취의 효율성과 속도가 승리의 관건이 된다. 플레이어는 시작하자마자 모든 드론을 Mineral Fields로 보내 최대한 빠르게 자원을 확보해야 하며, 동시에 상대방 팀을 제압하기 위한 병력 생산과 진출을 서둘러야 한다. Mineral Fields가 하나뿐이므로 자원 경쟁이 치열해질 수밖에 없고, 이는 맵의 긴장감을 높이는 핵심 요소로 작용한다. 맵의 구조는 비교적 단순하지만, 자원 채취의 중요성과 병력 생산 타이밍의 균형을 맞추는 것이 관건이다. 또한, Mineral Fields가 하나뿐이므로 초반 자원 확보 경쟁에서 뒤처지면 게임을 따라잡기 어려워진다. 이 맵은 초보자보다는 경험이 있는 플레이어들에게 적합하며, 특히 빠른 판단력과 자원 관리 능력이 요구된다. 또한, 팀 간의 조율도 중요하다. Mineral Fields를 두고 벌어지는 자원 전쟁에서 승리하기 위해 팀원 간의 협력이 필수적이다. 맵의 평가는 플레이어의 자원 관리 능력과 병력 운용 전략에 크게 좌우된다. Fastest Possible라는 이름에 걸맞게, 자원 채취와 병력 생산의 속도가 게임의 승패를 가르는 열쇠가 된다. ‘Fastest Possible 2v2 Shared’ is a *StarCraft: Brood War* 2v2 mill map designed to let players gather resources and prepare for battle as quickly as possible. The map features a classic desert tileset, with each team centered around a single Nexus surrounded by Resource Depots, Supply Depots, and Mineral Fields. The standout feature is that all Mineral Fields are clustered in one location, forcing every player to compete for resources at the same spot—making efficient and fast gathering the key to victory, as the map’s name suggests. As soon as the game starts, players must send all their drones to the shared Mineral Fields to secure resources quickly while rushing to produce and deploy forces to overwhelm the opposing team. With only one resource location, competition for minerals becomes intense, heightening the map’s tension. Though the layout is straightforward, success hinges on balancing resource gathering with timely military production. Falling behind in the early scramble for minerals can make it nearly impossible to recover. This map is best suited for experienced players rather than beginners, demanding sharp decision-making and strong resource management. Teamwork is also critical—coordination with teammates is essential to win the resource war at the Mineral Fields. Ultimately, the outcome depends heavily on how well players handle resources and execute their strategies. True to its name, *Fastest Possible*, the speed of gathering and army production determines who wins and who loses.
Guide de sélection de cartes
태그는 맵의 핵심 특징을 빠르게 설명하지만 제작 버전마다 규칙이 다를 수 있습니다. 상세 설명에서 권장 인원, 난이도, 플레이 시간과 버전을 함께 확인한 뒤 다운로드하세요.