
Collection de cartes StarCraft 나선형
Nous avons rassemblé des cartes enregistrées avec le tag '나선형'. Comparez les cartes populaires et récentes en vous concentrant sur les styles de jeu, les difficultés et les caractéristiques qui sont difficiles à trouver via un seul genre.
- Cartes enregistrées
- 5éléments
- Téléchargements cumulés
- 0
- Vues cumulées
- 233
Cartes populaires
C'est une carte avec un taux élevé de téléchargements et de consultations.
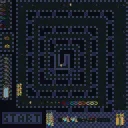
아마징 터렛 스파이럴 헬2 (Amazing Turret Spiral Hell2)
‘Amazing Turret Spiral Hell2’는 스타크래프트 브루드워의 유즈맵으로, 터렛과 스파이럴 구조가 조합된 디펜스 장르의 난이도 높은 맵이다. 맵 제목에서 유추할 수 있듯, ‘Amazing Spiral Hell 2’라는 파일명으로도 널리 알려진 이 맵은shadow turret(그림자 터렛)과 spiral(나선형) 구조가 특징적이다. 내부 맵 설명에 ‘Impossible clear’라고 명시된 것처럼, 플레이어는 제한된 자원과 강력한 적의 공세를 버티며 맵을 탈출하거나 목표를 완수해야 한다. 이미지에서도 확인할 수 있듯, 맵 중앙에는 거대한 나선형 구조물이 있으며, 곳곳에 터렛과 방어 시설이 배치되어 있어 적의 진격을 효과적으로 저지할 수 있도록 설계되어 있다. 또한, 맵의 배경은 화산 타일셋으로 이루어져 있어Dark, Industrial한 분위기를 자아낸다. 이 맵의 핵심은 ‘방어’와 ‘생존’에 중점을 두고 있으며, 플레이어는 끊임없이 밀려오는 적을 처리하면서도 맵의 구조적 특성(나선형 길, 좁은 통로, 터렛 배치)를 활용해야 한다. 특히, 나선형 구조는 적의 접근을 지연시키며, 터렛은 일정 범위 내의 적을 자동으로 공격하는 방식이기 때문에 플레이어는 자원 관리와 위치 선정에 주의를 기울여야 한다. 또한, 맵의 난이도가 높기 때문에 초보자는 클리어하기 어려우며, 숙련된 플레이어라도 반복적인 시도와 전략 수정이 필요하다. 이 맵은 주로 ‘컴퓨터 상대 유즈맵’으로 분류되며, 싱글 플레이 또는 멀티플레이에서 모두 즐길 수 있다. 하지만 맵의 난이도가 매우 높기 때문에, ‘컴까기’(컴퓨터 상대 키우기)나 ‘서바이벌’ 장르에 가깝다고 볼 수 있다. 플레이 전에는 맵의 구조와 터렛 배치, 적의 종류와 패턴을 충분히 숙지하는 것이 중요하다. 또한, 제한된 자원을 효율적으로 활용하기 위한 전략 수립이 필수적이다. 이 맵은 스타크래프트 유즈맵의 정교한 디자인과 높은 난이도를 경험하고자 하는 플레이어들에게 추천된다. Amazing Turret Spiral Hell2 is a Brood War custom map that combines turrets and spiral structures in a high-difficulty defense genre. As the title suggests, this map—also known as Amazing Spiral Hell 2—features shadow turrets and spiral formations as its core mechanics. The internal map description explicitly states 'Impossible clear,' indicating that players must survive relentless enemy waves with limited resources while navigating or escaping the map. The image confirms the presence of a massive spiral structure at the center, surrounded by strategically placed turrets and defensive installations designed to counter enemy advances effectively. The map's background, rendered in volcanic tilesets, adds a dark, industrial ambiance. The map's focus lies in defense and survival, requiring players to manage incoming enemy waves while leveraging the map's structural features—such as spiral pathways, narrow passages, and turret placements—to their advantage. The spiral design delays enemy progression, while turrets automatically engage targets within their range, necessitating careful resource management and positional awareness from the player. Given its high difficulty, newcomers may struggle to clear the map, and even experienced players will need repeated attempts and strategic adjustments. This map is best categorized as a computer-based custom map, playable in both single-player and multiplayer modes. However, its extreme difficulty aligns it more closely with 'computer-kill' (computer enemy survival) or 'survival' genres. Before playing, it is crucial to study the map's layout, turret placements, enemy types, and patterns. Efficient resource utilization and strategic planning are essential for success. This map is recommended for players seeking to experience the intricate design and high challenge of Brood War custom maps.
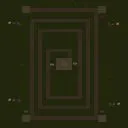
메이즈 스파이럴 디펜스 2 (Maze Spiral Defense 2)
스타크래프트 브루드워의 유즈맵 ‘메이즈 스파이럴 디펜스 2’는 디펜스 장르의 맵으로, 맵의 중앙에 위치한 나선형 미로를 중심으로 적의 공격을 방어하는 것이 주요 목표다. 맵은 4096x4096 크기의 사막 타일셋으로 구성되어 있으며, 플레이어는 4인으로 구성된 팀을 이루어 각자 지정된 구역에서 자원을 확보하고 건물을 건설해 적의 웨이브를 막아내야 한다. 맵의 중앙에 위치한 나선형 구조는 적의 이동 경로를 복잡하게 만들어 방어선을 구축하기 용이하도록 설계되어 있으며, 각 플레이어의 구역은 명확히 구분되어 있어 자원 관리와 건물 배치 전략이 중요하다. 내부 맵 설명에서도 언급된 것처럼, ‘다른 구역에 침범하지 말고 업그레이드를 통해 yourself를 유지하라’는 메시지가 플레이어들에게 개별 구역 내에서의 플레이를 강조하고 있다. 맵의 분위기는 사막 환경답게 건조하고 열악한 느낌을 주며, 이는 방어전에 집중력을 높이는 데 도움을 준다. 방어전을 중심으로 한 전략적 플레이가 필요한 이 맵은, 특히 디펜스 장르를 좋아하는 플레이어들에게 적합하며, 맵의 복잡한 구조와 제한된 자원 속에서 어떻게 효율적으로 방어선을 구축하는지가 핵심 포인트다. 플레이 전에는 각 구역의 자원 분배와 건물 배치, 그리고 업그레이드 우선순위를 미리 계획해두는 것이 승리의 열쇠가 될 것이다. 또한, 맵의 나선형 구조상 중앙을 장악하는 것이 상대방의 공격을 효과적으로 저지할 수 있는 열쇠가 되므로, 중앙 지역을 둘러싼 방어 시설의 배치에 신경을 써야 한다. 사막 타일셋의 특성상 시야가 제한되는 경우가 많아, 시야 확보를 위한 건물이나 유닛의 활용도 전략적으로 고려해야 한다. StarCraft: Brood War’s custom map *Maze Spiral Defense 2* is a defense-oriented map where the core objective is to defend against enemy waves centered around a spiral maze located in the middle of the map. The 4096x4096 desert-themed tileset challenges players to gather resources, construct buildings, and hold off enemy assaults in teams of four, each assigned to a distinct sector. The spiral structure in the center is designed to force enemies into convoluted paths, making it easier to establish defensive lines, while each player’s zone is clearly demarcated, emphasizing the importance of resource management and strategic building placement. As highlighted in the in-game description, the map reinforces the rule: *“Don’t trespass into other zones—maintain your strength through upgrades,”* urging players to focus on their individual sectors. The arid, harsh desert atmosphere enhances concentration during the defense-focused gameplay. Given its heavy emphasis on strategic defense, this map is ideal for players who enjoy the genre, where the challenge lies in efficiently fortifying defenses within the maze’s complexity and limited resources. Success hinges on pre-planning resource distribution, building layouts, and upgrade priorities before engaging. Given the spiral structure, controlling the central area is crucial for effectively blocking enemy advances, so careful placement of defensive structures around the core is essential. The desert tileset’s limited visibility also means players must strategically use buildings or units to secure vision, adding another layer of tactical depth.
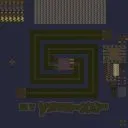
스파이럴 디펜스 (Spiral Defense)
스타크래프트 브루드워의 유즈맵 <스파이럴 디펜스>는 디펜스 장르의 핵심을 '방어'와 '전략'에 맞추어 설계된 맵으로, 플레이어는 끊임없이 밀려오는 적 유닛으로부터 중앙의 핵심 건물을 지켜내야 한다. 맵은 사막 타일셋을 기반으로 4096x4096 크기의 넓은 공간을 차지하며, 나선형으로 배치된 길과 방어 포인트를 따라 적들이 진격해 온다. 내부 맵 설명에 따르면 '28기의 유닛이 끝까지 도달하지 못하게 막아야' 하는 것이 목표로, 이는 단순한 디펜스가 아니라 지속적인 압박과 효율적인 자원 관리가 요구되는 전략 게임이다. 플레이어는 시작 지점에서부터MapSettings를 통해 제공되는 방어 건물과 유닛을 배치할 수 있으며, 적들은 맵의 가장자리에서부터 서서히 움직이기 시작해 점차 중앙으로 접근한다. 방어 라인은 나선형 구조를 따라 형성되어 있어, 플레이어는 방어 건물을 효율적으로 배치하고 업그레이드를 통해 대응력을 높일 수 있다. 맵의 특징은 적의 공격 패턴이 일정하지 않고, 시간이 지날수록 더 많은 수의 유닛이 등장한다는 점이다. 이는 플레이어에게 끊임없는 긴장감을 제공하며, 방어 라인을 재구축하고 자원을 재분배하는 전략적 판단이 요구된다. 추천 대상은 스타크래프트의 디펜스 장르를 즐기는 플레이어, 특히 전략적 사고와 자원 관리에 자신 있는 유저들에게 적합하다. 또한, 팀 플레이를 지원하는 맵으로 보이지는 않지만, 다인 플레이를 통해 팀워크를 발휘할 수 있는 가능성도 열려 있다. 플레이 전에는 방어 건물의 배치 가능 범위와 업그레이드 경로, 적의 공격 타이밍과 패턴을 미리 숙지하는 것이 중요하다. 또한, 맵의 넓은 공간을 효율적으로 활용하기 위해 타일셋과 지형의 특징을 잘 이해해야 한다. Spiral Defense is a user-made defense map in StarCraft: Brood War, designed around the core mechanics of 'defense' and 'strategy.' Players must protect the central core building from waves of enemy units that continuously advance along spiral-shaped paths. Based on the internal map description, the objective is to prevent '28 units from reaching the end,' which elevates the challenge beyond a simple defense scenario, demanding efficient resource management and strategic planning. The map spans a large 4096x4096 desert-themed area, featuring spiral-structured paths and defense points where players can strategically place defensive buildings and units. Enemies emerge from the map's edges and gradually push toward the center, increasing in number over time. The spiral layout forces players to constantly adapt their defensive formations, reinforcing weak points and upgrading structures to withstand stronger assaults. One of the key challenges is the unpredictable enemy patterns, which require players to remain vigilant and make quick tactical decisions. This map is ideal for players who enjoy StarCraft's defense genre and excel in strategic thinking and resource allocation. While it doesn't explicitly support team play, the potential for multiplayer collaboration exists, especially if players coordinate their defense strategies. Before diving in, it's crucial to familiarize yourself with the placement range of defensive buildings, upgrade paths, enemy attack timings, and patterns. Understanding the tile set and terrain features will also help maximize efficiency during gameplay.
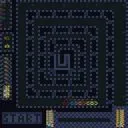
터렛 스파이럴 헬 (Amazing Turret Spiral Hell)
스타크래프트 브루드워의 디펜스 장르 유즈맵인 ‘Amazing Turret Spiral Hell’은 이름 그대로 터렛을 중심으로 한 공격과 방어를 재밌게 뒤섞은 디펜스 게임입니다. 맵의 중앙에는 거대한 나선형 구조물이 펼쳐져 있으며, 플레이어는 이 구조물 주변에 터렛을 배치하여 끊임없이 몰려드는 적 유닛을 방어합니다. 맵의 특징은 나선형 구조물이 단순한 디펜스 맵을 넘어서, 터렛의 배치와 공격 타이밍을 전략적으로 고민하게 만드는 점입니다. 나선형 구조물은 적의 공격 경로를 복잡하게 만들어 방어를 더욱 흥미롭게 만들고, 플레이어는 구조물의 각 층마다 터렛을 효율적으로 배치해야 합니다. 특히, 맵의 이름은 ‘Spiral Hell’로 적 유닛의 밀집도가 높아질수록 게임의 강도가 급격히 올라가는 디펜스 게임의 정점을 보여줍니다. 게임의 진행 방식은 크게 세 가지로 나뉩니다. 첫째, 플레이어는 시작 지점에서 터렛을 건설하고 업그레이드할 수 있습니다. 둘째, 맵 중앙의 나선형 구조물을 따라 끊임없이 공격해오는 적 유닛을 방어해야 하며, 셋째, 구조물의 각 층에서 발생하는 특수 이벤트나 보너스 유닛을 활용하여 더 높은 점수를 획득하는 방식입니다. 적 유닛의 종류는 기본적인 저글링, 질럿, 드라군부터 시작하여 후반으로 갈수록 하이 템플러, 캐리어, 울트라리스크까지 등장합니다. 이를 방어하기 위해 플레이어는 터렛의 종류와 배치, 업그레이드 타이밍을 신중히 결정해야 합니다. 이 맵의 가장 큰 매력은 바로 ‘나선형 구조물’의 디자인입니다. 나선형 구조물은 단순히 방어선을 형성하는 데 그치지 않고, 적의 공격 경로를 조절하여 플레이어에게 전략적인 선택지를 제공합니다. 예를 들어, 나선형 구조물의 외곽에 터렛을 배치하면 적의 접근을 늦추는 동시에 내부로의 침투를 차단할 수 있습니다. 반면, 내부에 터렛을 집중 배치하면 적의 공격 루트를 좁혀 더 효율적으로 방어할 수 있습니다. 이러한 구조는 디펜스 게임의 기본 틀을 벗어나서, 플레이어에게 끊임없는 전략적 고민을 요구합니다. 추천 대상은 디펜스 게임을 즐기는 플레이어라면 누구나 좋습니다. 특히, 디펜스 게임의 기본적인 메커니즘을 익히고 싶거나, 터렛의 배치와 업그레이드에 estratégic thinking을 더하고 싶은 플레이어에게 적합합니다. 또한, 나선형 구조물의 복잡한 디자인은 게임의 난이도를 한층 높여주기 때문에, 숙련자도 새로운 도전을 즐길 수 있습니다. 플레이 전에는 터렛의 종류와 역할, 맵의 나선형 구조에 대한 이해가 필요하며, 적 유닛의 패턴을 미리 숙지하는 것이 좋습니다. 마지막으로, 이 맵은 7명의 플레이어가 동시에 플레이할 수 있지만, 각 플레이어의 역할 분담이 명확하지 않기 때문에 팀 플레이보다는 개인戦中心의 플레이가 더 어울립니다. Amazing Turret Spiral Hell is a unique defense-style custom map for StarCraft: Brood War that blends turret placement and strategic combat into an engaging experience. The map features a massive spiral structure at its core, where players must strategically position turrets to fend off relentless waves of enemy units. The spiral design isn't just for aesthetics; it forces players to think deeply about turret placement and timing, as the complex pathways disrupt enemy movement and create dynamic defense scenarios. The name 'Spiral Hell' hints at the escalating intensity, with enemy waves growing denser and more challenging as the game progresses. The gameplay revolves around three key mechanics: constructing and upgrading turrets from the starting point, defending the spiral structure against waves of enemies, and leveraging special events or bonus units on each layer of the spiral for higher scores. Early waves consist of basic units like Zerglings, Zealots, and Dragoons, but as the game advances, players face elite units such as High Templars, Carriers, and Ultralisks. To counter these threats, players must carefully choose turret types, their placement, and upgrade priorities. The spiral structure is the standout feature of this map. It doesn't just serve as a defensive perimeter but actively shapes the flow of battle. Players can opt to place turrets on the outer layers to slow enemy advances and block infiltration, or focus on inner layers to tightly control enemy routes. This design elevates the map beyond a typical defense game, demanding constant strategic adjustments and adaptability. This map is ideal for players who enjoy defense-style games, especially those looking to refine their turret placement and upgrade strategies. The intricate spiral layout also makes it appealing to veterans seeking a fresh challenge. Players should familiarize themselves with turret roles and the spiral's mechanics before diving in, and studying enemy wave patterns will significantly improve performance. While the map supports up to seven players, its mechanics work best in a solo or individual-focused playstyle rather than strict team coordination.
어메이징 터렛 스파이럴 헬 (Amazing Turret Spiral Hell)
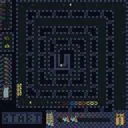
어메이징 터렛 스파이럴 헬은 화산 타일셋을 배경으로 한 7인용 타워 디펜스 유즈맵이다. 맵 제목과 내부 설명에 'Impossible clear'라는 문구가 명시되어 있을 만큼 극한의 난이도를 지향하며, 나선형 경로를 따라 몰려오는 적 웨이브를 터렛 건설만으로 막아내야 하는 구조로 보인다. 제작자 JackTheRimmer가 기반을 만들고 ReparJ가 'Hell Spiraled++' 버전으로 확장했으며, Infinity_Nexus가 레벨을 추가한 협업 맵으로 추정된다. 2048×2048 크기의 대형 맵에 64×64 타일 단위가 적용되어 넓은 전장에서 다수의 플레이어가 각자 구간을 맡거나 공동으로 방어선을 구축하는 협동 플레이가 핵심이다. 화산 지형의 좁은 통로와 용암 지대가 자연스러운 병목 구간을 형성해 터렛 배치의 효율을 극대화하는 지형 이해도가 승패를 가른다. 일반적인 디펜스 맵과 달리 클리어 자체가 도전 과제인 '불가능 클리어' 컨셉이라, 숙련된 디펜스 유저나 고난도 협동 플레이를 원하는 팀에게 적합하다. 플레이 전에는 터렛 업그레이드 트리와 웨이브 구성, 자원 수급 방식을 미리 숙지하고 팀원 간 역할 분담을 명확히 하는 것이 생존 확률을 높이는 열쇠가 된다. 맵 파일명 '(spiral defence).scx'에서도 알 수 있듯 나선형 방어선 구축이 핵심 메커니즘으로 보이며, 7인 풀파티 기준 30분 내외의 긴장감 넘치는 생존 싸움이 펼쳐질 것으로 예상된다. Amazing Turret Spiral Hell is a 7-player tower defense use map set on the volcanic tileset. As the phrase 'Impossible clear' is explicitly stated in the map title and internal description, it aims for extreme difficulty, and the structure appears to require stopping enemy waves rushing along a spiral path using only turret construction. It is presumed to be a collaborative map where JackTheRimmer created the base, ReparJ expanded it as the 'Hell Spiraled++' version, and Infinity_Nexus added levels. With a large 2048×2048 map size and 64×64 tile units, cooperative play is key where multiple players each take charge of sections or jointly build defense lines on the vast battlefield. The narrow passages and lava zones of the volcanic terrain form natural chokepoints, making terrain understanding that maximizes turret placement efficiency the deciding factor of victory or defeat. Unlike typical defense maps, the concept of 'impossible clear' where clearing itself is the challenge makes it suitable for veteran defense users or teams seeking high-difficulty cooperative play. Before playing, familiarizing oneself with the turret upgrade tree, wave composition, and resource acquisition methods, and clearly dividing roles among teammates, becomes the key to increasing survival probability. As can be seen from the map filename '(spiral defence).scx', spiral defense line construction appears to be the core mechanic, and a tense survival battle of around 30 minutes is expected based on a full 7-player party.
Cartes récemment ajoutées
Vérifiez les fichiers et versions récemment ajoutés.
터렛 스파이럴 헬 (Amazing Turret Spiral Hell)
스타크래프트 브루드워의 디펜스 장르 유즈맵인 ‘Amazing Turret Spiral Hell’은 이름 그대로 터렛을 중심으로 한 공격과 방어를 재밌게 뒤섞은 디펜스 게임입니다. 맵의 중앙에는 거대한 나선형 구조물이 펼쳐져 있으며, 플레이어는 이 구조물 주변에 터렛을 배치하여 끊임없이 몰려드는 적 유닛을 방어합니다. 맵의 특징은 나선형 구조물이 단순한 디펜스 맵을 넘어서, 터렛의 배치와 공격 타이밍을 전략적으로 고민하게 만드는 점입니다. 나선형 구조물은 적의 공격 경로를 복잡하게 만들어 방어를 더욱 흥미롭게 만들고, 플레이어는 구조물의 각 층마다 터렛을 효율적으로 배치해야 합니다. 특히, 맵의 이름은 ‘Spiral Hell’로 적 유닛의 밀집도가 높아질수록 게임의 강도가 급격히 올라가는 디펜스 게임의 정점을 보여줍니다. 게임의 진행 방식은 크게 세 가지로 나뉩니다. 첫째, 플레이어는 시작 지점에서 터렛을 건설하고 업그레이드할 수 있습니다. 둘째, 맵 중앙의 나선형 구조물을 따라 끊임없이 공격해오는 적 유닛을 방어해야 하며, 셋째, 구조물의 각 층에서 발생하는 특수 이벤트나 보너스 유닛을 활용하여 더 높은 점수를 획득하는 방식입니다. 적 유닛의 종류는 기본적인 저글링, 질럿, 드라군부터 시작하여 후반으로 갈수록 하이 템플러, 캐리어, 울트라리스크까지 등장합니다. 이를 방어하기 위해 플레이어는 터렛의 종류와 배치, 업그레이드 타이밍을 신중히 결정해야 합니다. 이 맵의 가장 큰 매력은 바로 ‘나선형 구조물’의 디자인입니다. 나선형 구조물은 단순히 방어선을 형성하는 데 그치지 않고, 적의 공격 경로를 조절하여 플레이어에게 전략적인 선택지를 제공합니다. 예를 들어, 나선형 구조물의 외곽에 터렛을 배치하면 적의 접근을 늦추는 동시에 내부로의 침투를 차단할 수 있습니다. 반면, 내부에 터렛을 집중 배치하면 적의 공격 루트를 좁혀 더 효율적으로 방어할 수 있습니다. 이러한 구조는 디펜스 게임의 기본 틀을 벗어나서, 플레이어에게 끊임없는 전략적 고민을 요구합니다. 추천 대상은 디펜스 게임을 즐기는 플레이어라면 누구나 좋습니다. 특히, 디펜스 게임의 기본적인 메커니즘을 익히고 싶거나, 터렛의 배치와 업그레이드에 estratégic thinking을 더하고 싶은 플레이어에게 적합합니다. 또한, 나선형 구조물의 복잡한 디자인은 게임의 난이도를 한층 높여주기 때문에, 숙련자도 새로운 도전을 즐길 수 있습니다. 플레이 전에는 터렛의 종류와 역할, 맵의 나선형 구조에 대한 이해가 필요하며, 적 유닛의 패턴을 미리 숙지하는 것이 좋습니다. 마지막으로, 이 맵은 7명의 플레이어가 동시에 플레이할 수 있지만, 각 플레이어의 역할 분담이 명확하지 않기 때문에 팀 플레이보다는 개인戦中心의 플레이가 더 어울립니다. Amazing Turret Spiral Hell is a unique defense-style custom map for StarCraft: Brood War that blends turret placement and strategic combat into an engaging experience. The map features a massive spiral structure at its core, where players must strategically position turrets to fend off relentless waves of enemy units. The spiral design isn't just for aesthetics; it forces players to think deeply about turret placement and timing, as the complex pathways disrupt enemy movement and create dynamic defense scenarios. The name 'Spiral Hell' hints at the escalating intensity, with enemy waves growing denser and more challenging as the game progresses. The gameplay revolves around three key mechanics: constructing and upgrading turrets from the starting point, defending the spiral structure against waves of enemies, and leveraging special events or bonus units on each layer of the spiral for higher scores. Early waves consist of basic units like Zerglings, Zealots, and Dragoons, but as the game advances, players face elite units such as High Templars, Carriers, and Ultralisks. To counter these threats, players must carefully choose turret types, their placement, and upgrade priorities. The spiral structure is the standout feature of this map. It doesn't just serve as a defensive perimeter but actively shapes the flow of battle. Players can opt to place turrets on the outer layers to slow enemy advances and block infiltration, or focus on inner layers to tightly control enemy routes. This design elevates the map beyond a typical defense game, demanding constant strategic adjustments and adaptability. This map is ideal for players who enjoy defense-style games, especially those looking to refine their turret placement and upgrade strategies. The intricate spiral layout also makes it appealing to veterans seeking a fresh challenge. Players should familiarize themselves with turret roles and the spiral's mechanics before diving in, and studying enemy wave patterns will significantly improve performance. While the map supports up to seven players, its mechanics work best in a solo or individual-focused playstyle rather than strict team coordination.
스파이럴 디펜스 (Spiral Defense)
스타크래프트 브루드워의 유즈맵 <스파이럴 디펜스>는 디펜스 장르의 핵심을 '방어'와 '전략'에 맞추어 설계된 맵으로, 플레이어는 끊임없이 밀려오는 적 유닛으로부터 중앙의 핵심 건물을 지켜내야 한다. 맵은 사막 타일셋을 기반으로 4096x4096 크기의 넓은 공간을 차지하며, 나선형으로 배치된 길과 방어 포인트를 따라 적들이 진격해 온다. 내부 맵 설명에 따르면 '28기의 유닛이 끝까지 도달하지 못하게 막아야' 하는 것이 목표로, 이는 단순한 디펜스가 아니라 지속적인 압박과 효율적인 자원 관리가 요구되는 전략 게임이다. 플레이어는 시작 지점에서부터MapSettings를 통해 제공되는 방어 건물과 유닛을 배치할 수 있으며, 적들은 맵의 가장자리에서부터 서서히 움직이기 시작해 점차 중앙으로 접근한다. 방어 라인은 나선형 구조를 따라 형성되어 있어, 플레이어는 방어 건물을 효율적으로 배치하고 업그레이드를 통해 대응력을 높일 수 있다. 맵의 특징은 적의 공격 패턴이 일정하지 않고, 시간이 지날수록 더 많은 수의 유닛이 등장한다는 점이다. 이는 플레이어에게 끊임없는 긴장감을 제공하며, 방어 라인을 재구축하고 자원을 재분배하는 전략적 판단이 요구된다. 추천 대상은 스타크래프트의 디펜스 장르를 즐기는 플레이어, 특히 전략적 사고와 자원 관리에 자신 있는 유저들에게 적합하다. 또한, 팀 플레이를 지원하는 맵으로 보이지는 않지만, 다인 플레이를 통해 팀워크를 발휘할 수 있는 가능성도 열려 있다. 플레이 전에는 방어 건물의 배치 가능 범위와 업그레이드 경로, 적의 공격 타이밍과 패턴을 미리 숙지하는 것이 중요하다. 또한, 맵의 넓은 공간을 효율적으로 활용하기 위해 타일셋과 지형의 특징을 잘 이해해야 한다. Spiral Defense is a user-made defense map in StarCraft: Brood War, designed around the core mechanics of 'defense' and 'strategy.' Players must protect the central core building from waves of enemy units that continuously advance along spiral-shaped paths. Based on the internal map description, the objective is to prevent '28 units from reaching the end,' which elevates the challenge beyond a simple defense scenario, demanding efficient resource management and strategic planning. The map spans a large 4096x4096 desert-themed area, featuring spiral-structured paths and defense points where players can strategically place defensive buildings and units. Enemies emerge from the map's edges and gradually push toward the center, increasing in number over time. The spiral layout forces players to constantly adapt their defensive formations, reinforcing weak points and upgrading structures to withstand stronger assaults. One of the key challenges is the unpredictable enemy patterns, which require players to remain vigilant and make quick tactical decisions. This map is ideal for players who enjoy StarCraft's defense genre and excel in strategic thinking and resource allocation. While it doesn't explicitly support team play, the potential for multiplayer collaboration exists, especially if players coordinate their defense strategies. Before diving in, it's crucial to familiarize yourself with the placement range of defensive buildings, upgrade paths, enemy attack timings, and patterns. Understanding the tile set and terrain features will also help maximize efficiency during gameplay.
어메이징 터렛 스파이럴 헬 (Amazing Turret Spiral Hell)
어메이징 터렛 스파이럴 헬은 화산 타일셋을 배경으로 한 7인용 타워 디펜스 유즈맵이다. 맵 제목과 내부 설명에 'Impossible clear'라는 문구가 명시되어 있을 만큼 극한의 난이도를 지향하며, 나선형 경로를 따라 몰려오는 적 웨이브를 터렛 건설만으로 막아내야 하는 구조로 보인다. 제작자 JackTheRimmer가 기반을 만들고 ReparJ가 'Hell Spiraled++' 버전으로 확장했으며, Infinity_Nexus가 레벨을 추가한 협업 맵으로 추정된다. 2048×2048 크기의 대형 맵에 64×64 타일 단위가 적용되어 넓은 전장에서 다수의 플레이어가 각자 구간을 맡거나 공동으로 방어선을 구축하는 협동 플레이가 핵심이다. 화산 지형의 좁은 통로와 용암 지대가 자연스러운 병목 구간을 형성해 터렛 배치의 효율을 극대화하는 지형 이해도가 승패를 가른다. 일반적인 디펜스 맵과 달리 클리어 자체가 도전 과제인 '불가능 클리어' 컨셉이라, 숙련된 디펜스 유저나 고난도 협동 플레이를 원하는 팀에게 적합하다. 플레이 전에는 터렛 업그레이드 트리와 웨이브 구성, 자원 수급 방식을 미리 숙지하고 팀원 간 역할 분담을 명확히 하는 것이 생존 확률을 높이는 열쇠가 된다. 맵 파일명 '(spiral defence).scx'에서도 알 수 있듯 나선형 방어선 구축이 핵심 메커니즘으로 보이며, 7인 풀파티 기준 30분 내외의 긴장감 넘치는 생존 싸움이 펼쳐질 것으로 예상된다. Amazing Turret Spiral Hell is a 7-player tower defense use map set on the volcanic tileset. As the phrase 'Impossible clear' is explicitly stated in the map title and internal description, it aims for extreme difficulty, and the structure appears to require stopping enemy waves rushing along a spiral path using only turret construction. It is presumed to be a collaborative map where JackTheRimmer created the base, ReparJ expanded it as the 'Hell Spiraled++' version, and Infinity_Nexus added levels. With a large 2048×2048 map size and 64×64 tile units, cooperative play is key where multiple players each take charge of sections or jointly build defense lines on the vast battlefield. The narrow passages and lava zones of the volcanic terrain form natural chokepoints, making terrain understanding that maximizes turret placement efficiency the deciding factor of victory or defeat. Unlike typical defense maps, the concept of 'impossible clear' where clearing itself is the challenge makes it suitable for veteran defense users or teams seeking high-difficulty cooperative play. Before playing, familiarizing oneself with the turret upgrade tree, wave composition, and resource acquisition methods, and clearly dividing roles among teammates, becomes the key to increasing survival probability. As can be seen from the map filename '(spiral defence).scx', spiral defense line construction appears to be the core mechanic, and a tense survival battle of around 30 minutes is expected based on a full 7-player party.
메이즈 스파이럴 디펜스 2 (Maze Spiral Defense 2)
스타크래프트 브루드워의 유즈맵 ‘메이즈 스파이럴 디펜스 2’는 디펜스 장르의 맵으로, 맵의 중앙에 위치한 나선형 미로를 중심으로 적의 공격을 방어하는 것이 주요 목표다. 맵은 4096x4096 크기의 사막 타일셋으로 구성되어 있으며, 플레이어는 4인으로 구성된 팀을 이루어 각자 지정된 구역에서 자원을 확보하고 건물을 건설해 적의 웨이브를 막아내야 한다. 맵의 중앙에 위치한 나선형 구조는 적의 이동 경로를 복잡하게 만들어 방어선을 구축하기 용이하도록 설계되어 있으며, 각 플레이어의 구역은 명확히 구분되어 있어 자원 관리와 건물 배치 전략이 중요하다. 내부 맵 설명에서도 언급된 것처럼, ‘다른 구역에 침범하지 말고 업그레이드를 통해 yourself를 유지하라’는 메시지가 플레이어들에게 개별 구역 내에서의 플레이를 강조하고 있다. 맵의 분위기는 사막 환경답게 건조하고 열악한 느낌을 주며, 이는 방어전에 집중력을 높이는 데 도움을 준다. 방어전을 중심으로 한 전략적 플레이가 필요한 이 맵은, 특히 디펜스 장르를 좋아하는 플레이어들에게 적합하며, 맵의 복잡한 구조와 제한된 자원 속에서 어떻게 효율적으로 방어선을 구축하는지가 핵심 포인트다. 플레이 전에는 각 구역의 자원 분배와 건물 배치, 그리고 업그레이드 우선순위를 미리 계획해두는 것이 승리의 열쇠가 될 것이다. 또한, 맵의 나선형 구조상 중앙을 장악하는 것이 상대방의 공격을 효과적으로 저지할 수 있는 열쇠가 되므로, 중앙 지역을 둘러싼 방어 시설의 배치에 신경을 써야 한다. 사막 타일셋의 특성상 시야가 제한되는 경우가 많아, 시야 확보를 위한 건물이나 유닛의 활용도 전략적으로 고려해야 한다. StarCraft: Brood War’s custom map *Maze Spiral Defense 2* is a defense-oriented map where the core objective is to defend against enemy waves centered around a spiral maze located in the middle of the map. The 4096x4096 desert-themed tileset challenges players to gather resources, construct buildings, and hold off enemy assaults in teams of four, each assigned to a distinct sector. The spiral structure in the center is designed to force enemies into convoluted paths, making it easier to establish defensive lines, while each player’s zone is clearly demarcated, emphasizing the importance of resource management and strategic building placement. As highlighted in the in-game description, the map reinforces the rule: *“Don’t trespass into other zones—maintain your strength through upgrades,”* urging players to focus on their individual sectors. The arid, harsh desert atmosphere enhances concentration during the defense-focused gameplay. Given its heavy emphasis on strategic defense, this map is ideal for players who enjoy the genre, where the challenge lies in efficiently fortifying defenses within the maze’s complexity and limited resources. Success hinges on pre-planning resource distribution, building layouts, and upgrade priorities before engaging. Given the spiral structure, controlling the central area is crucial for effectively blocking enemy advances, so careful placement of defensive structures around the core is essential. The desert tileset’s limited visibility also means players must strategically use buildings or units to secure vision, adding another layer of tactical depth.
아마징 터렛 스파이럴 헬2 (Amazing Turret Spiral Hell2)
‘Amazing Turret Spiral Hell2’는 스타크래프트 브루드워의 유즈맵으로, 터렛과 스파이럴 구조가 조합된 디펜스 장르의 난이도 높은 맵이다. 맵 제목에서 유추할 수 있듯, ‘Amazing Spiral Hell 2’라는 파일명으로도 널리 알려진 이 맵은shadow turret(그림자 터렛)과 spiral(나선형) 구조가 특징적이다. 내부 맵 설명에 ‘Impossible clear’라고 명시된 것처럼, 플레이어는 제한된 자원과 강력한 적의 공세를 버티며 맵을 탈출하거나 목표를 완수해야 한다. 이미지에서도 확인할 수 있듯, 맵 중앙에는 거대한 나선형 구조물이 있으며, 곳곳에 터렛과 방어 시설이 배치되어 있어 적의 진격을 효과적으로 저지할 수 있도록 설계되어 있다. 또한, 맵의 배경은 화산 타일셋으로 이루어져 있어Dark, Industrial한 분위기를 자아낸다. 이 맵의 핵심은 ‘방어’와 ‘생존’에 중점을 두고 있으며, 플레이어는 끊임없이 밀려오는 적을 처리하면서도 맵의 구조적 특성(나선형 길, 좁은 통로, 터렛 배치)를 활용해야 한다. 특히, 나선형 구조는 적의 접근을 지연시키며, 터렛은 일정 범위 내의 적을 자동으로 공격하는 방식이기 때문에 플레이어는 자원 관리와 위치 선정에 주의를 기울여야 한다. 또한, 맵의 난이도가 높기 때문에 초보자는 클리어하기 어려우며, 숙련된 플레이어라도 반복적인 시도와 전략 수정이 필요하다. 이 맵은 주로 ‘컴퓨터 상대 유즈맵’으로 분류되며, 싱글 플레이 또는 멀티플레이에서 모두 즐길 수 있다. 하지만 맵의 난이도가 매우 높기 때문에, ‘컴까기’(컴퓨터 상대 키우기)나 ‘서바이벌’ 장르에 가깝다고 볼 수 있다. 플레이 전에는 맵의 구조와 터렛 배치, 적의 종류와 패턴을 충분히 숙지하는 것이 중요하다. 또한, 제한된 자원을 효율적으로 활용하기 위한 전략 수립이 필수적이다. 이 맵은 스타크래프트 유즈맵의 정교한 디자인과 높은 난이도를 경험하고자 하는 플레이어들에게 추천된다. Amazing Turret Spiral Hell2 is a Brood War custom map that combines turrets and spiral structures in a high-difficulty defense genre. As the title suggests, this map—also known as Amazing Spiral Hell 2—features shadow turrets and spiral formations as its core mechanics. The internal map description explicitly states 'Impossible clear,' indicating that players must survive relentless enemy waves with limited resources while navigating or escaping the map. The image confirms the presence of a massive spiral structure at the center, surrounded by strategically placed turrets and defensive installations designed to counter enemy advances effectively. The map's background, rendered in volcanic tilesets, adds a dark, industrial ambiance. The map's focus lies in defense and survival, requiring players to manage incoming enemy waves while leveraging the map's structural features—such as spiral pathways, narrow passages, and turret placements—to their advantage. The spiral design delays enemy progression, while turrets automatically engage targets within their range, necessitating careful resource management and positional awareness from the player. Given its high difficulty, newcomers may struggle to clear the map, and even experienced players will need repeated attempts and strategic adjustments. This map is best categorized as a computer-based custom map, playable in both single-player and multiplayer modes. However, its extreme difficulty aligns it more closely with 'computer-kill' (computer enemy survival) or 'survival' genres. Before playing, it is crucial to study the map's layout, turret placements, enemy types, and patterns. Efficient resource utilization and strategic planning are essential for success. This map is recommended for players seeking to experience the intricate design and high challenge of Brood War custom maps.
Guide de sélection de cartes
태그는 맵의 핵심 특징을 빠르게 설명하지만 제작 버전마다 규칙이 다를 수 있습니다. 상세 설명에서 권장 인원, 난이도, 플레이 시간과 버전을 함께 확인한 뒤 다운로드하세요.