
Collection de cartes StarCraft 공세
Nous avons rassemblé des cartes enregistrées avec le tag '공세'. Comparez les cartes populaires et récentes en vous concentrant sur les styles de jeu, les difficultés et les caractéristiques qui sont difficiles à trouver via un seul genre.
- Cartes enregistrées
- 2éléments
- Téléchargements cumulés
- 0
- Vues cumulées
- 52
Cartes populaires
C'est une carte avec un taux élevé de téléchargements et de consultations.
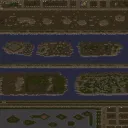
DBZ 사가즈 이블 어드밴스 7F (DBZ - Sagas Evil Adv. 7F)
DBZ - Sagas Evil Adv. 7F는 스타크래프트 브루드워의 유즈맵으로, 원작 드래곤볼 Z의 분위기를 재해석한 디펜스형 맵이다. 이 맵은 ‘전문가 전용’이라는 경고문과 함께 노련한 플레이어들에게 도전적인 경험을 제공한다. 맵의 핵심은 적의 공격을 효과적으로 방어하면서 자원을 관리하고, 강력한 유닛을 생산하여 적 기지를 파괴하는 데 있다. 전체적으로 8192x8192의 넓은 맵 크기를 자랑하며, 사막 타일셋을 활용한 황량한 배경이 특징적이다. 맵의 진행은 점진적으로 어려워지며, 후반부로 갈수록 적의 공격 패턴이 복잡해지고 자원 확보가 어려워진다. 특히, 맵의 중간 지점에 위치한 요충지를 차지하는 것이 승리의 관건으로 보인다. 플레이어는 초반에 자원을 확보한 후, 방어塔를 건설하고 핵심 유닛을 생산하여 적의 공격을 막아내야 한다. 후반에는 대규모 병력을 이끌고 적 기지를 공격하는 전략이 요구된다. 이 맵은 디펜스와 공세를 균형 있게 요구하는 구조로,Resource Management(자원 관리)와 Strategic Positioning(전략적 위치 선점)이 핵심 성공 요소다. 초보 플레이어보다는 적어도 한두 번 이상의 유즈맵 경험이 있는 플레이어에게 적합하며, 특히 드래곤볼 Z의 팬이라면 더욱 몰입감을 느낄 수 있을 것이다. 다만, 맵의 난이도가 높기 때문에 패배 시의 스트레스가 클 수 있으니, 여유를 가지고 접근하는 것이 좋다. 리플레이 감상이나 전략 공유를 통해 자신의 실력을 점검할 수 있는 요소도 포함되어 있어, 반복 플레이가 가능한 구조로 설계되었다. 맵의 버전 7F는 이전 버전 6D를 기반으로 개선된 요소들이 추가된 것으로 추정되며, 제작자 SWoCLeader에 의해 최적화되었다. 전체적으로 이 맵은 전략과 집중력을 요구하는 유즈맵의 정석을 보여준다. DBZ - Sagas Evil Adv. 7F is a StarCraft: Brood War custom map that reimagines the atmosphere of Dragon Ball Z into a challenging defense-style game. The map explicitly warns players with "experts only," setting the tone for a demanding experience. The core gameplay involves efficiently managing resources while defending against enemy attacks and producing powerful units to destroy the enemy base. The map spans a vast 8192x8192 grid, utilizing a desert tileset to create a desolate and immersive backdrop. Progressively, the difficulty ramps up as enemy attack patterns grow more complex and resource gathering becomes increasingly difficult. Securing key strategic positions, particularly mid-map chokepoints, appears to be crucial for victory. Players must balance early resource collection with building defense towers and producing core units to fend off attacks, eventually transitioning into large-scale assaults on the enemy base. The map’s design demands a balance between defense and offense, with Resource Management and Strategic Positioning serving as the primary factors for success. While accessible to newcomers, the high difficulty curve makes it ideal for players with prior custom map experience, especially fans of Dragon Ball Z who will appreciate the thematic immersion. Given its challenging nature, players might experience frustration after losses, so approaching the game with patience is advisable. The map’s structure allows for replayability, with elements like replay viewing and strategy sharing enabling players to refine their skills. Version 7F, developed by SWoCLeader based on version 6D by Pyro1991 and Icankillmeph, likely incorporates refinements and optimizations. Overall, this map exemplifies a classic custom map experience that prioritizes strategy, focus, and adaptability.
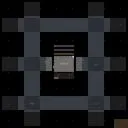
썬컨 D 10-Way V10.5 Sick (Sunken D 10-Way V10.5 Sick)
스타크래프트 브루드워의 유즈맵 계열인 ‘썬컨 D 10-Way’는 기존 디펜스 장르의 틀을 깨는 다채로운 요소와 변칙적 구조가 돋보이는 맵입니다. 맵의 가장 큰 특징은 이름 그대로 10개의 플레이어가 각자 중앙의 방어 기지 또는 자원 채취 지역을 지키며, 끊임없이 몰려드는 적의 공세를 막아내야 한다는 점입니다. 맵 중앙에 위치한 거대한 섬 또는 요새가 주 무대가 되며, 각 플레이어는 지정된 시작 지점에서 출발해 자원을 모으고, 유닛을 생산해 방어선을 구축합니다. 맵 곳곳에 배치된 다리로 연결된 섬들이 있으며, 이 다리를 통해 적의 침입을 차단하거나 역공을 펼칠 수 있습니다. 적의 공격 패턴은 한 가지로 고정되지 않으며, 초반에는 저글링과 질럿 위주로 몰려오다가 점차 하이브리드 유닛이나 테란의 바이오닉 조합으로 변화하는 모습을 보입니다. 플레이어는 이를 예측하고 유연하게 대처해야 합니다. 공격과 방어의 밸런스가 상당히 중요한 맵으로, 초보자들은 중앙 다리near를 지키느라 정신없을 수 있지만, 경험이 쌓이면 각자의 위치와 역할 분담이 중요해집니다. 특히, 맵 상단과 하단에 위치한 ‘보너스 지역’은 자원 채취와 유닛 생산에 도움을 주는 경우가 많기 때문에, 이를 확보하는 것이 승리의 열쇠가 됩니다. 또한, 맵의 난이도는 V10.5 Sick 버전답게 상당히 높습니다. 초반에는 천천히 적응하겠지만, 후반으로 갈수록 쏟아지는 적의 물량과 조합 변화에 대처하기가 만만치 않죠. 하지만 그만큼 전략성과 긴장감이 살아있는 맵이기 때문에, 디펜스 장르를 좋아하는 유저들에게는 필수적으로 추천할 만한 작품입니다. 플레이 전에는 맵의 구조와 다리, 그리고 보너스 지역 위치를 꼭 숙지하세요. 또한, 자원 관리와 유닛 생산 타이밍을 잘 조절하지 않으면 순식간에 밀릴 수 있으니, 초반과 중반의 균형을 맞추는 연습이 필요합니다. 특히, 동맹 플레이가 불가능한 맵이기 때문에 각자의 판단과 대응력이 승부를 가를 것입니다. 맵의 긴장감과 전략성이 뛰어난 만큼, 한 판 한 판이 긴장감 넘치는 경험을 선사할 것입니다. This Brood War custom map, Sunken D 10-Way, stands out in the UMS defense genre with its dynamic layout and unconventional mechanics. The core concept revolves around 10 players defending their central bases or resource zones against relentless enemy waves. The map centers around a massive island or fortress, with each player starting in designated areas to gather resources and produce units for defense. Interconnected islands via bridges allow for strategic maneuvering—either blocking enemy advances or launching counterattacks. Enemy compositions evolve beyond basic early-game units like Zerglings and Zealots, escalating to hybrid forces or Terran bio compositions as the game progresses. Balancing offense and defense is crucial here; beginners may find themselves overwhelmed by the constant pressure on central bridges, but experienced players will thrive by adapting roles and strategies. Upper and lower "bonus regions" often provide additional resources and production advantages, making their control pivotal to victory. The difficulty, as indicated by the V10.5 Sick version, is notably high. Early-game adaptation is manageable, but mid-to-late waves demand sharp strategic thinking to counter evolving enemy tactics. However, the map’s depth and intensity make it a must-play for defense genre enthusiasts. Before diving in, familiarize yourself with the map’s layout, bridge positions, and bonus regions. Efficient resource management and unit production timing are essential—poor decisions can lead to rapid collapses. Since this is a solo-play map, individual judgment and adaptability will determine success. Each match delivers a gripping, high-stakes experience, blending strategy and tension seamlessly.
Cartes récemment ajoutées
Vérifiez les fichiers et versions récemment ajoutés.
썬컨 D 10-Way V10.5 Sick (Sunken D 10-Way V10.5 Sick)
스타크래프트 브루드워의 유즈맵 계열인 ‘썬컨 D 10-Way’는 기존 디펜스 장르의 틀을 깨는 다채로운 요소와 변칙적 구조가 돋보이는 맵입니다. 맵의 가장 큰 특징은 이름 그대로 10개의 플레이어가 각자 중앙의 방어 기지 또는 자원 채취 지역을 지키며, 끊임없이 몰려드는 적의 공세를 막아내야 한다는 점입니다. 맵 중앙에 위치한 거대한 섬 또는 요새가 주 무대가 되며, 각 플레이어는 지정된 시작 지점에서 출발해 자원을 모으고, 유닛을 생산해 방어선을 구축합니다. 맵 곳곳에 배치된 다리로 연결된 섬들이 있으며, 이 다리를 통해 적의 침입을 차단하거나 역공을 펼칠 수 있습니다. 적의 공격 패턴은 한 가지로 고정되지 않으며, 초반에는 저글링과 질럿 위주로 몰려오다가 점차 하이브리드 유닛이나 테란의 바이오닉 조합으로 변화하는 모습을 보입니다. 플레이어는 이를 예측하고 유연하게 대처해야 합니다. 공격과 방어의 밸런스가 상당히 중요한 맵으로, 초보자들은 중앙 다리near를 지키느라 정신없을 수 있지만, 경험이 쌓이면 각자의 위치와 역할 분담이 중요해집니다. 특히, 맵 상단과 하단에 위치한 ‘보너스 지역’은 자원 채취와 유닛 생산에 도움을 주는 경우가 많기 때문에, 이를 확보하는 것이 승리의 열쇠가 됩니다. 또한, 맵의 난이도는 V10.5 Sick 버전답게 상당히 높습니다. 초반에는 천천히 적응하겠지만, 후반으로 갈수록 쏟아지는 적의 물량과 조합 변화에 대처하기가 만만치 않죠. 하지만 그만큼 전략성과 긴장감이 살아있는 맵이기 때문에, 디펜스 장르를 좋아하는 유저들에게는 필수적으로 추천할 만한 작품입니다. 플레이 전에는 맵의 구조와 다리, 그리고 보너스 지역 위치를 꼭 숙지하세요. 또한, 자원 관리와 유닛 생산 타이밍을 잘 조절하지 않으면 순식간에 밀릴 수 있으니, 초반과 중반의 균형을 맞추는 연습이 필요합니다. 특히, 동맹 플레이가 불가능한 맵이기 때문에 각자의 판단과 대응력이 승부를 가를 것입니다. 맵의 긴장감과 전략성이 뛰어난 만큼, 한 판 한 판이 긴장감 넘치는 경험을 선사할 것입니다. This Brood War custom map, Sunken D 10-Way, stands out in the UMS defense genre with its dynamic layout and unconventional mechanics. The core concept revolves around 10 players defending their central bases or resource zones against relentless enemy waves. The map centers around a massive island or fortress, with each player starting in designated areas to gather resources and produce units for defense. Interconnected islands via bridges allow for strategic maneuvering—either blocking enemy advances or launching counterattacks. Enemy compositions evolve beyond basic early-game units like Zerglings and Zealots, escalating to hybrid forces or Terran bio compositions as the game progresses. Balancing offense and defense is crucial here; beginners may find themselves overwhelmed by the constant pressure on central bridges, but experienced players will thrive by adapting roles and strategies. Upper and lower "bonus regions" often provide additional resources and production advantages, making their control pivotal to victory. The difficulty, as indicated by the V10.5 Sick version, is notably high. Early-game adaptation is manageable, but mid-to-late waves demand sharp strategic thinking to counter evolving enemy tactics. However, the map’s depth and intensity make it a must-play for defense genre enthusiasts. Before diving in, familiarize yourself with the map’s layout, bridge positions, and bonus regions. Efficient resource management and unit production timing are essential—poor decisions can lead to rapid collapses. Since this is a solo-play map, individual judgment and adaptability will determine success. Each match delivers a gripping, high-stakes experience, blending strategy and tension seamlessly.
DBZ 사가즈 이블 어드밴스 7F (DBZ - Sagas Evil Adv. 7F)
DBZ - Sagas Evil Adv. 7F는 스타크래프트 브루드워의 유즈맵으로, 원작 드래곤볼 Z의 분위기를 재해석한 디펜스형 맵이다. 이 맵은 ‘전문가 전용’이라는 경고문과 함께 노련한 플레이어들에게 도전적인 경험을 제공한다. 맵의 핵심은 적의 공격을 효과적으로 방어하면서 자원을 관리하고, 강력한 유닛을 생산하여 적 기지를 파괴하는 데 있다. 전체적으로 8192x8192의 넓은 맵 크기를 자랑하며, 사막 타일셋을 활용한 황량한 배경이 특징적이다. 맵의 진행은 점진적으로 어려워지며, 후반부로 갈수록 적의 공격 패턴이 복잡해지고 자원 확보가 어려워진다. 특히, 맵의 중간 지점에 위치한 요충지를 차지하는 것이 승리의 관건으로 보인다. 플레이어는 초반에 자원을 확보한 후, 방어塔를 건설하고 핵심 유닛을 생산하여 적의 공격을 막아내야 한다. 후반에는 대규모 병력을 이끌고 적 기지를 공격하는 전략이 요구된다. 이 맵은 디펜스와 공세를 균형 있게 요구하는 구조로,Resource Management(자원 관리)와 Strategic Positioning(전략적 위치 선점)이 핵심 성공 요소다. 초보 플레이어보다는 적어도 한두 번 이상의 유즈맵 경험이 있는 플레이어에게 적합하며, 특히 드래곤볼 Z의 팬이라면 더욱 몰입감을 느낄 수 있을 것이다. 다만, 맵의 난이도가 높기 때문에 패배 시의 스트레스가 클 수 있으니, 여유를 가지고 접근하는 것이 좋다. 리플레이 감상이나 전략 공유를 통해 자신의 실력을 점검할 수 있는 요소도 포함되어 있어, 반복 플레이가 가능한 구조로 설계되었다. 맵의 버전 7F는 이전 버전 6D를 기반으로 개선된 요소들이 추가된 것으로 추정되며, 제작자 SWoCLeader에 의해 최적화되었다. 전체적으로 이 맵은 전략과 집중력을 요구하는 유즈맵의 정석을 보여준다. DBZ - Sagas Evil Adv. 7F is a StarCraft: Brood War custom map that reimagines the atmosphere of Dragon Ball Z into a challenging defense-style game. The map explicitly warns players with "experts only," setting the tone for a demanding experience. The core gameplay involves efficiently managing resources while defending against enemy attacks and producing powerful units to destroy the enemy base. The map spans a vast 8192x8192 grid, utilizing a desert tileset to create a desolate and immersive backdrop. Progressively, the difficulty ramps up as enemy attack patterns grow more complex and resource gathering becomes increasingly difficult. Securing key strategic positions, particularly mid-map chokepoints, appears to be crucial for victory. Players must balance early resource collection with building defense towers and producing core units to fend off attacks, eventually transitioning into large-scale assaults on the enemy base. The map’s design demands a balance between defense and offense, with Resource Management and Strategic Positioning serving as the primary factors for success. While accessible to newcomers, the high difficulty curve makes it ideal for players with prior custom map experience, especially fans of Dragon Ball Z who will appreciate the thematic immersion. Given its challenging nature, players might experience frustration after losses, so approaching the game with patience is advisable. The map’s structure allows for replayability, with elements like replay viewing and strategy sharing enabling players to refine their skills. Version 7F, developed by SWoCLeader based on version 6D by Pyro1991 and Icankillmeph, likely incorporates refinements and optimizations. Overall, this map exemplifies a classic custom map experience that prioritizes strategy, focus, and adaptability.
Guide de sélection de cartes
태그는 맵의 핵심 특징을 빠르게 설명하지만 제작 버전마다 규칙이 다를 수 있습니다. 상세 설명에서 권장 인원, 난이도, 플레이 시간과 버전을 함께 확인한 뒤 다운로드하세요.