
Colección de mapas de StarCraft 인질 보호
Hemos reunido mapas registrados con la etiqueta '인질 보호'. Compara los mapas populares y los más recientes centrándote en el estilo de juego, la dificultad y las características que son difíciles de encontrar solo por género.
- Mapas registrados
- 3unidades
- Descargas acumuladas
- 0
- Vistas acumuladas
- 178
Mapas populares
Este es un mapa con alta tasa de descargas y visitas.
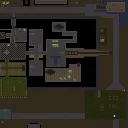
호스트리지 네고시에이션 2 (Hostage Negotiation 2)
스타크래프트 브루드워의 유즈맵 <호스트리지 네고시에이션 2(Hostage Negotiation 2)>는 이름 그대로 인질극 상황을 배경으로 한 디펜스 및 서바이벌 장르의 맵이다. 맵의 전체적인 분위기는 사막 지형을 배경으로 펼쳐지며, 중앙에 위치한 인질들과 테란 건물을 중심으로 적의 공격을 저지하는 플레이가 주를 이룬다. 플레이어는 인질을 보호하면서 동시에 적의 공격을 방어해야 하며, 인질의 체력이 낮아지면 사망할 수 있어 긴장감을 유지할 수 있다. 맵의 구조는 중앙 광장과 같은 넓은 공간을 중심으로 여러 개의 건물과 요새가 배치되어 있으며, 이 요새들을 활용해 적의 진격을 막아내야 한다. 특히, 맵의 좌측과 우측에 위치한 건물들은 방어선의 주요 거점이 되며, 이곳을 지키느냐에 따라 전체적인 전투의 흐름이 달라진다. 맵의 진행은 인질 보호와 적 방어가 동시에 요구되기 때문에 멀티태스킹 능력이 중요한데, 인질의 위치를 주시하며 동시에 방어선을 보강해야 한다. 또한, 맵의 난이도는 인질의 체력 관리와 적의 공격 패턴에 따라 달라지므로, 초보자보다는 경험이 있는 플레이어에게 더 적합한 맵으로 추정된다. 맵의 후반부로 갈수록 적의 공격이 점점 강해지므로, 초반에 방어선을 잘 구축하는 것이 중요하다. 인질의 위치가 맵의 중앙에 집중되어 있어, 중앙을 중심으로 한 방어 전략이 효과적이며, 적의 공격 루트는 주로 좌우 양측에서 오기 때문에 양측의 방어선을 균형 있게 관리해야 한다. 추천 대상으로는 스타크래프트 유즈맵을 любитель级으로 즐기는 플레이어, 디펜스와 서바이벌 장르를 좋아하는 유저, 그리고 인질 보호와 전략적 방어가 동시에 요구되는 맵을 선호하는 게이머들에게 적합할 것으로 보인다. 플레이 전에는 맵의 주요 방어 거점과 인질의 위치를 미리 숙지하고, 초반에 방어선을 구축하는 데에 집중할 필요가 있다. 또한, 인질의 체력이 낮아질 경우 즉시 치료할 수 있는 준비를 갖추는 것이 좋다. 맵의 구조상 인질의 사망을 방지하는 것이 핵심 목표 중 하나이므로, 인질 보호에 소홀하지 않도록 주의해야 한다. 맵의 분위기는 긴박감 넘치는 사막 인질극을 재현하고 있으며, 적의 공격 패턴과 인질의 체력 변화가 플레이어의 전략을 끊임없이 갱신하도록 유도한다. 이러한 요소들 덕분에 <호스트리지 네고시에이션 2>는 단순히 적을 공격하는 것이 아니라, 인질 보호와 방어라는 두 가지 목표를 동시에 달성해야 하는 전략적 깊이를 지닌 맵으로 평가된다. Hostage Negotiation 2 is a defense and survival-style custom map for StarCraft: Brood War, set in a desert landscape where players must protect hostages while defending against enemy attacks. The map features a central area surrounded by buildings and fortresses that serve as key defensive points. Players must manage both hostage protection and base defense simultaneously, with hostages located in the center and their survival dependent on the player's ability to hold the line. The map's structure emphasizes multi-tasking, as players need to monitor hostage health while reinforcing weak points in their defenses. As the game progresses, enemy attacks intensify, making early fortress construction critical. The recommended strategy involves balancing defense on both left and right flanks, with the central area acting as the primary battlefield. This map is ideal for players who enjoy hybrid defense-survival scenarios and those who appreciate maps requiring strategic planning beyond simple combat. Before playing, it's essential to identify key defensive positions and hostage locations, prioritizing early fortress upgrades to mitigate incoming threats. The map's tension stems from the dual objectives of protecting hostages and fending off waves of enemies, creating a dynamic experience that rewards careful planning and adaptability. The desert-themed setting enhances the immersive atmosphere, reinforcing the high-stakes hostage negotiation scenario central to the gameplay.
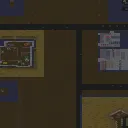
인질 교섭 (Hostage Negotiation)
스타크래프트 브루드워의 유즈맵 〈Hostage Negotiation〉은 인질극 상황을 재현한 디펜스 및 서바이벌 장르의 맵으로, 플레이어는 인질을 보호하며 적의 공격을 방어하는 동시에 극한의 tension을 느껴볼 수 있다. 맵의 중앙에 위치한 인질 구역은 좁은 통로와 엄폐물로 둘러싸여 있어 적의 침투를 어렵게 만들고, 플레이어는 제한된 리소스를 활용해 방어선을 구축해야 한다. 적의 공격 패턴은 랜덤성이 강해 매 게임마다 새로운 전략을 요구하며, 인질의 생명력은 낮아 신속한 대응이 필수적이다. 맵의 지형은 황무지 타일셋을 기반으로 황량한 분위기를 자아내어 긴장감을 한층 높인다. 또한, 맵의 구조상 후방에서 침투하는 적을 주의해야 하며, 인질 구역 주변의Resource를 효율적으로 관리하는 것이 승리의 핵심이다. 초보자도 쉽게 접근할 수 있지만, 난이도가 있는 만큼 숙련된 플레이어는 더욱 전략적인 플레이가 요구된다. 특히, 다수의 적 유닛이 밀집되어 공격해 오는 경우 방어선이 무너지기 쉬우므로,Resource를 보존하고 적절한 타이밍에 반격하는 것이 중요하다. 맵의 긴장감과 서바이벌 요소는 경험이 쌓일수록 더욱 몰입감을 높이며, 인질 보호의 성공 여부가 승패를 가르는 흥미로운 구조를 가지고 있다. 이 맵을 플레이하기 전에는 인질 구역의 위치를 정확히 파악하고, Resource 관리 전략을 미리 세워두는 것이 좋다. 또한, 적의 공격 패턴을 익히기 위해 몇 번의 플레이를 통해 감각을 익히는 것이 추천된다. 이 맵은 디펜스와 서바이벌 장르를 좋아하는 플레이어들에게 특히 어울리며, 협동 플레이를 즐기는 유저들에게도 좋은 선택지가 될 수 있다. Hostage Negotiation is a defense and survival custom map in StarCraft: Brood War that recreates a hostage crisis scenario. Players must protect hostages while defending against enemy attacks, experiencing intense tension throughout the game. The hostage zone in the center of the map is surrounded by narrow passages and cover, making it difficult for enemies to infiltrate. Players must strategically use limited resources to build defensive lines. The enemy's attack patterns are highly randomized, requiring new strategies for each game, while the hostages' low health demands swift responses. The terrain, based on a wasteland tileset, enhances the grim atmosphere. Players must also watch for enemies infiltrating from the rear, as efficient resource management is key to victory. While accessible to beginners, the map's difficulty demands strategic play from experienced players. High concentrations of enemy units can easily break defense lines, so preserving resources and counterattacking at the right time are crucial. The map's tension and survival elements become more immersive with experience, with the success of hostage protection determining the outcome. Before playing, it's recommended to identify the hostage zone's location and plan a resource management strategy. Familiarizing oneself with the enemy's attack patterns through multiple plays is also advised. This map is ideal for players who enjoy defense and survival genres and offers a great option for those who enjoy cooperative gameplay.
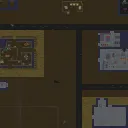
호스티지 네고시에이션 (Hostage Negociation)
스타크래프트: 브루드워의 유즈맵 ‘호스티지 네고시에이션(Hostage Negociation)’은 6인용 디펜스 장르의 맵으로, 플레이어는 적의 공격을 방어하면서 인질을 보호하는 임무를 수행합니다. 맵은 넓은 황무지 타일셋으로 구성되어 있으며, 중앙에는 넓은 개활지가 펼쳐져 있고 주변으로 언덕 지형과 좁은 통로가 배치되어 있습니다. 플레이어는 인질을 보호하는 동시에 적의 다수Wave를 방어해야 하며, 적의 공격 패턴은 점차 강해지는 경향을 보입니다. 맵의 구조상 언덕과 협소한 통로가 다수 존재하여 방어선을 구축하기 용이하지만, 반대로 인질의 위치가 중앙에 가까우면 적의 접근이 용이해질 수 있어 전략적인 위치 선정이 중요합니다. 인질은 맵 내 특정 위치에 고정되어 있으며, 플레이어는 적의 공격을 막아내며 인질을 보호하는 동시에 자원을 확보해 방어 시설이나 유닛을 생산해야 합니다. 적의 공격은 주로 저글링, 히드라리스크, 울트라리스크 등으로 구성되며, 후반으로 갈수록 강해지는 적의 물량을 상대해야 하므로 멀티태스킹과 자원 관리 능력이 요구됩니다. 맵의 밸런스는 중간 정도의 난이도로 설정되어 있으며, 초보 플레이어도 충분히 즐길 수 있지만 지속적인 손싸움이 요구되는 만큼 숙련된 플레이어에게 더 적합할 수 있습니다. 특히 인질을 보호하는 동시에 방어선을 유지해야 한다는 점이 이 맵의 핵심 재미 요소로, 전략적인 플레이가 요구됩니다. 이 맵은 초보자와 중급자 모두에게 추천할 수 있으나, 인질의 위치를 정확히 숙지하고 방어선을 체계적으로 구축하는 능력이 중요합니다. 인질을 잃으면 패배 조건에 가까워지므로, 초반 방어선을 튼튼히 구축하는 것이 중요합니다. 또한, 적의 공격 패턴을 미리 예측하고 자원을 효율적으로 관리하는 것이 승리의 열쇠가 됩니다. 맵의 특징상 긴 플레이 시간이 요구될 수 있으므로, 충분한 시간을 확보하고 플레이하는 것이 좋습니다. StarCraft: Brood War's custom map *Hostage Negotiation* is a 6-player defense genre map where players must defend against enemy attacks while protecting hostages. The map features a wide desert tileset with a large open central area surrounded by elevated terrain and narrow pathways. Players must protect the hostages while fending off increasingly powerful enemy waves, which escalate in difficulty over time. The map's structure includes numerous hills and tight corridors that make it easier to establish defensive lines, though placing hostages too close to the center can leave them vulnerable to enemy advances, making strategic positioning crucial. Hostages are fixed in specific locations on the map, and players must defend them while gathering resources to build defensive structures and units. Enemy forces primarily consist of Zerglings, Hydralisks, and Ultralisks, with later waves becoming progressively stronger. Success requires strong multitasking and resource management skills. The map's difficulty is set at a moderate level, making it accessible for beginners but also engaging for experienced players due to the constant need for quick decision-making. The core appeal lies in balancing hostage protection with maintaining a strong defense, demanding strategic play. This map is recommended for both beginners and intermediate players, though success hinges on memorizing hostage positions and systematically reinforcing defenses. Losing hostages brings players closer to defeat, so a solid early defense is essential. Predicting enemy attack patterns and managing resources efficiently are key to victory. Given the map's potential for long play sessions, it's advisable to set aside sufficient time for an uninterrupted experience.
Mapas registrados recientemente
Consulta los archivos y versiones recién añadidos.
호스트리지 네고시에이션 2 (Hostage Negotiation 2)
스타크래프트 브루드워의 유즈맵 <호스트리지 네고시에이션 2(Hostage Negotiation 2)>는 이름 그대로 인질극 상황을 배경으로 한 디펜스 및 서바이벌 장르의 맵이다. 맵의 전체적인 분위기는 사막 지형을 배경으로 펼쳐지며, 중앙에 위치한 인질들과 테란 건물을 중심으로 적의 공격을 저지하는 플레이가 주를 이룬다. 플레이어는 인질을 보호하면서 동시에 적의 공격을 방어해야 하며, 인질의 체력이 낮아지면 사망할 수 있어 긴장감을 유지할 수 있다. 맵의 구조는 중앙 광장과 같은 넓은 공간을 중심으로 여러 개의 건물과 요새가 배치되어 있으며, 이 요새들을 활용해 적의 진격을 막아내야 한다. 특히, 맵의 좌측과 우측에 위치한 건물들은 방어선의 주요 거점이 되며, 이곳을 지키느냐에 따라 전체적인 전투의 흐름이 달라진다. 맵의 진행은 인질 보호와 적 방어가 동시에 요구되기 때문에 멀티태스킹 능력이 중요한데, 인질의 위치를 주시하며 동시에 방어선을 보강해야 한다. 또한, 맵의 난이도는 인질의 체력 관리와 적의 공격 패턴에 따라 달라지므로, 초보자보다는 경험이 있는 플레이어에게 더 적합한 맵으로 추정된다. 맵의 후반부로 갈수록 적의 공격이 점점 강해지므로, 초반에 방어선을 잘 구축하는 것이 중요하다. 인질의 위치가 맵의 중앙에 집중되어 있어, 중앙을 중심으로 한 방어 전략이 효과적이며, 적의 공격 루트는 주로 좌우 양측에서 오기 때문에 양측의 방어선을 균형 있게 관리해야 한다. 추천 대상으로는 스타크래프트 유즈맵을 любитель级으로 즐기는 플레이어, 디펜스와 서바이벌 장르를 좋아하는 유저, 그리고 인질 보호와 전략적 방어가 동시에 요구되는 맵을 선호하는 게이머들에게 적합할 것으로 보인다. 플레이 전에는 맵의 주요 방어 거점과 인질의 위치를 미리 숙지하고, 초반에 방어선을 구축하는 데에 집중할 필요가 있다. 또한, 인질의 체력이 낮아질 경우 즉시 치료할 수 있는 준비를 갖추는 것이 좋다. 맵의 구조상 인질의 사망을 방지하는 것이 핵심 목표 중 하나이므로, 인질 보호에 소홀하지 않도록 주의해야 한다. 맵의 분위기는 긴박감 넘치는 사막 인질극을 재현하고 있으며, 적의 공격 패턴과 인질의 체력 변화가 플레이어의 전략을 끊임없이 갱신하도록 유도한다. 이러한 요소들 덕분에 <호스트리지 네고시에이션 2>는 단순히 적을 공격하는 것이 아니라, 인질 보호와 방어라는 두 가지 목표를 동시에 달성해야 하는 전략적 깊이를 지닌 맵으로 평가된다. Hostage Negotiation 2 is a defense and survival-style custom map for StarCraft: Brood War, set in a desert landscape where players must protect hostages while defending against enemy attacks. The map features a central area surrounded by buildings and fortresses that serve as key defensive points. Players must manage both hostage protection and base defense simultaneously, with hostages located in the center and their survival dependent on the player's ability to hold the line. The map's structure emphasizes multi-tasking, as players need to monitor hostage health while reinforcing weak points in their defenses. As the game progresses, enemy attacks intensify, making early fortress construction critical. The recommended strategy involves balancing defense on both left and right flanks, with the central area acting as the primary battlefield. This map is ideal for players who enjoy hybrid defense-survival scenarios and those who appreciate maps requiring strategic planning beyond simple combat. Before playing, it's essential to identify key defensive positions and hostage locations, prioritizing early fortress upgrades to mitigate incoming threats. The map's tension stems from the dual objectives of protecting hostages and fending off waves of enemies, creating a dynamic experience that rewards careful planning and adaptability. The desert-themed setting enhances the immersive atmosphere, reinforcing the high-stakes hostage negotiation scenario central to the gameplay.
인질 교섭 (Hostage Negotiation)
스타크래프트 브루드워의 유즈맵 〈Hostage Negotiation〉은 인질극 상황을 재현한 디펜스 및 서바이벌 장르의 맵으로, 플레이어는 인질을 보호하며 적의 공격을 방어하는 동시에 극한의 tension을 느껴볼 수 있다. 맵의 중앙에 위치한 인질 구역은 좁은 통로와 엄폐물로 둘러싸여 있어 적의 침투를 어렵게 만들고, 플레이어는 제한된 리소스를 활용해 방어선을 구축해야 한다. 적의 공격 패턴은 랜덤성이 강해 매 게임마다 새로운 전략을 요구하며, 인질의 생명력은 낮아 신속한 대응이 필수적이다. 맵의 지형은 황무지 타일셋을 기반으로 황량한 분위기를 자아내어 긴장감을 한층 높인다. 또한, 맵의 구조상 후방에서 침투하는 적을 주의해야 하며, 인질 구역 주변의Resource를 효율적으로 관리하는 것이 승리의 핵심이다. 초보자도 쉽게 접근할 수 있지만, 난이도가 있는 만큼 숙련된 플레이어는 더욱 전략적인 플레이가 요구된다. 특히, 다수의 적 유닛이 밀집되어 공격해 오는 경우 방어선이 무너지기 쉬우므로,Resource를 보존하고 적절한 타이밍에 반격하는 것이 중요하다. 맵의 긴장감과 서바이벌 요소는 경험이 쌓일수록 더욱 몰입감을 높이며, 인질 보호의 성공 여부가 승패를 가르는 흥미로운 구조를 가지고 있다. 이 맵을 플레이하기 전에는 인질 구역의 위치를 정확히 파악하고, Resource 관리 전략을 미리 세워두는 것이 좋다. 또한, 적의 공격 패턴을 익히기 위해 몇 번의 플레이를 통해 감각을 익히는 것이 추천된다. 이 맵은 디펜스와 서바이벌 장르를 좋아하는 플레이어들에게 특히 어울리며, 협동 플레이를 즐기는 유저들에게도 좋은 선택지가 될 수 있다. Hostage Negotiation is a defense and survival custom map in StarCraft: Brood War that recreates a hostage crisis scenario. Players must protect hostages while defending against enemy attacks, experiencing intense tension throughout the game. The hostage zone in the center of the map is surrounded by narrow passages and cover, making it difficult for enemies to infiltrate. Players must strategically use limited resources to build defensive lines. The enemy's attack patterns are highly randomized, requiring new strategies for each game, while the hostages' low health demands swift responses. The terrain, based on a wasteland tileset, enhances the grim atmosphere. Players must also watch for enemies infiltrating from the rear, as efficient resource management is key to victory. While accessible to beginners, the map's difficulty demands strategic play from experienced players. High concentrations of enemy units can easily break defense lines, so preserving resources and counterattacking at the right time are crucial. The map's tension and survival elements become more immersive with experience, with the success of hostage protection determining the outcome. Before playing, it's recommended to identify the hostage zone's location and plan a resource management strategy. Familiarizing oneself with the enemy's attack patterns through multiple plays is also advised. This map is ideal for players who enjoy defense and survival genres and offers a great option for those who enjoy cooperative gameplay.
호스티지 네고시에이션 (Hostage Negociation)
스타크래프트: 브루드워의 유즈맵 ‘호스티지 네고시에이션(Hostage Negociation)’은 6인용 디펜스 장르의 맵으로, 플레이어는 적의 공격을 방어하면서 인질을 보호하는 임무를 수행합니다. 맵은 넓은 황무지 타일셋으로 구성되어 있으며, 중앙에는 넓은 개활지가 펼쳐져 있고 주변으로 언덕 지형과 좁은 통로가 배치되어 있습니다. 플레이어는 인질을 보호하는 동시에 적의 다수Wave를 방어해야 하며, 적의 공격 패턴은 점차 강해지는 경향을 보입니다. 맵의 구조상 언덕과 협소한 통로가 다수 존재하여 방어선을 구축하기 용이하지만, 반대로 인질의 위치가 중앙에 가까우면 적의 접근이 용이해질 수 있어 전략적인 위치 선정이 중요합니다. 인질은 맵 내 특정 위치에 고정되어 있으며, 플레이어는 적의 공격을 막아내며 인질을 보호하는 동시에 자원을 확보해 방어 시설이나 유닛을 생산해야 합니다. 적의 공격은 주로 저글링, 히드라리스크, 울트라리스크 등으로 구성되며, 후반으로 갈수록 강해지는 적의 물량을 상대해야 하므로 멀티태스킹과 자원 관리 능력이 요구됩니다. 맵의 밸런스는 중간 정도의 난이도로 설정되어 있으며, 초보 플레이어도 충분히 즐길 수 있지만 지속적인 손싸움이 요구되는 만큼 숙련된 플레이어에게 더 적합할 수 있습니다. 특히 인질을 보호하는 동시에 방어선을 유지해야 한다는 점이 이 맵의 핵심 재미 요소로, 전략적인 플레이가 요구됩니다. 이 맵은 초보자와 중급자 모두에게 추천할 수 있으나, 인질의 위치를 정확히 숙지하고 방어선을 체계적으로 구축하는 능력이 중요합니다. 인질을 잃으면 패배 조건에 가까워지므로, 초반 방어선을 튼튼히 구축하는 것이 중요합니다. 또한, 적의 공격 패턴을 미리 예측하고 자원을 효율적으로 관리하는 것이 승리의 열쇠가 됩니다. 맵의 특징상 긴 플레이 시간이 요구될 수 있으므로, 충분한 시간을 확보하고 플레이하는 것이 좋습니다. StarCraft: Brood War's custom map *Hostage Negotiation* is a 6-player defense genre map where players must defend against enemy attacks while protecting hostages. The map features a wide desert tileset with a large open central area surrounded by elevated terrain and narrow pathways. Players must protect the hostages while fending off increasingly powerful enemy waves, which escalate in difficulty over time. The map's structure includes numerous hills and tight corridors that make it easier to establish defensive lines, though placing hostages too close to the center can leave them vulnerable to enemy advances, making strategic positioning crucial. Hostages are fixed in specific locations on the map, and players must defend them while gathering resources to build defensive structures and units. Enemy forces primarily consist of Zerglings, Hydralisks, and Ultralisks, with later waves becoming progressively stronger. Success requires strong multitasking and resource management skills. The map's difficulty is set at a moderate level, making it accessible for beginners but also engaging for experienced players due to the constant need for quick decision-making. The core appeal lies in balancing hostage protection with maintaining a strong defense, demanding strategic play. This map is recommended for both beginners and intermediate players, though success hinges on memorizing hostage positions and systematically reinforcing defenses. Losing hostages brings players closer to defeat, so a solid early defense is essential. Predicting enemy attack patterns and managing resources efficiently are key to victory. Given the map's potential for long play sessions, it's advisable to set aside sufficient time for an uninterrupted experience.
Guía de selección de mapas
태그는 맵의 핵심 특징을 빠르게 설명하지만 제작 버전마다 규칙이 다를 수 있습니다. 상세 설명에서 권장 인원, 난이도, 플레이 시간과 버전을 함께 확인한 뒤 다운로드하세요.