
Colección de mapas de StarCraft 생존
Hemos reunido mapas registrados con la etiqueta '생존'. Compara los mapas populares y los más recientes centrándote en el estilo de juego, la dificultad y las características que son difíciles de encontrar solo por género.
- Mapas registrados
- 567unidades
- Descargas acumuladas
- 66
- Vistas acumuladas
- 21,681
Mapas populares
Este es un mapa con alta tasa de descargas y visitas.
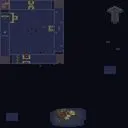
혈압 마라톤 노매너 (Blood Pressure Marathon No Manner)
스타크래프트 브루드워 유즈맵 '혈압 마라톤 노매너'는 제목 그대로 플레이어의 인내심과 혈압을 시험하는 극한의 마라톤 생존 맵이다. 화산 타일셋을 기반으로 128x128 타일의 광활한 맵 크기를 활용해 길고 구불구불한 단일 경로를 구성했으며, 8인 플레이어가 각자 시작점에서 결승점을 향해 달리는 구조로 추정된다. 내부 설명에 '노매너!!!! 그들의 운명은 어디까지 인가? 그를 적으로 보지마라. 마라톤을 달릴수없을수도 있다'라는 문구가 있는 것으로 보아, 협력보다는 방해와 배신, 트롤링이 핵심 재미 요소로 설계된 '노매너' 룰이 적용된 것으로 보인다. 진행 방식은 일반적인 디펜스나 RPG와 달리 점프, 회피, 타이밍 계산 같은 컨트롤 실력이 승부를 가르는 '피하기/마라톤' 장르에 가깝다. 화산 지형 특유의 좁은 다리, 용암 지대, 갑작스러운 유닛 소환 트리거 등이 곳곳에 배치되어 한 번의 실수로 처음부터 다시 시작해야 하는 긴장감을 조성한다. 플레이어 간 물리적 충돌을 이용한 밀치기, 진로 방해, 아군 유닛을 적에게 넘기는 행위 등이 허용되거나 권장되어 심리전 양상도 짙다. 맵 크기가 큰 만큼 완주까지 20~40분 내외가 소요될 것으로 보이며, 중간에 세이브 포인트나 부활 시스템이 없다면 난이도는 '매우 어려움'에 육박한다. 컨트롤에 자신 있고, 예측 불가능한 타인과의 혼돈 속에서 살아남는 쾌감을 즐기는 유저에게 추천한다. 입문자는 혼자 연습 모드로 경로와 트리거 타이밍을 익힌 뒤 멀티플레이에 참여하는 것이 정신 건강에 이롭다. StarCraft Brood War UMS map 'Blood Pressure Marathon No Manner' lives up to its name as an extreme marathon survival map that tests the player's patience and blood pressure. Based on the Volcano tileset, it utilizes a vast 128x128 tile size to create a long, winding single path where eight players presumably race from their respective starting points to the finish line. The internal description reads 'No manner!!!! How far does their fate go? Don't see him as an enemy. You might not be able to run the marathon,' suggesting a 'No Manner' rule set where sabotage, betrayal, and trolling are core mechanics rather than cooperation. Gameplay resembles the 'Dodge/Escape' or 'Marathon' genre where control skills like jumping, dodging, and timing determine success, unlike typical Defense or RPG maps. The volcanic terrain features narrow bridges, lava zones, and sudden unit spawn triggers that create tension where a single mistake sends you back to the start. Physical collision between players is used for pushing, blocking paths, or feeding allies to enemies, adding a heavy psychological warfare element. Given the map size, completion likely takes 20-40 minutes, and without save points or revival systems, difficulty approaches 'Very Hard'. Recommended for users confident in their micro-control who enjoy the thrill of surviving chaos with unpredictable opponents. Beginners should practice alone first to memorize paths and trigger timings before joining multiplayer for their own sanity.
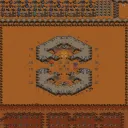
스타쉽 트루퍼스: SE (Starship Troopers: SE)
스타쉽 트루퍼스: SE(Starship Troopers: SE)는 영화 '스타쉽 트루퍼스'의 위스키 전초기지(Whiskey Outpost) 방어전을 모티브로 한 6인 협동 디펜스 유즈맵이다. 제작자 Panzer_Kavalier가 기존 SST 맵들을 기반으로 제작했으며, 황혼 타일셋의 96x96 대형 전장에서 펼쳐진다. 핵심 목표는 밀려드는 저그 무리로부터 전초기지를 사수하고 병력을 증강하며 탄약을 관리해 생존하는 것이다. 맵 구조는 중앙의 본진을 중심으로 다방면에서 적 웨이브가 몰려오는 전형적인 입구막기·서바이벌 형태다. '탄약이 떨어지지 않게 하라'는 설명대로 미네랄·가스 외에 탄약 개념이 트리거로 구현돼 있어, 무분별한 유닛 생산이나 공격 남발 시 보급 차질이 빚어진다. 플레이어는 마린, 파이어뱃, 메딕, 탱크 등 테란 병력을 조합해 진지를 구축하고, 벙커·터렛 등 고정 방어시설로 라인을 굳혀야 한다. 웨이브가 거듭될수록 울트라리스크·디파일러 등 고티어 저그가 등장하므로 업그레이드 타이밍과 병력 분배가 승패를 가른다. 6인 전원 협력이 필수라 한 명이 무너지면 연쇄 붕괴로 이어지기 쉽다. 음성·자막 미션 브리핑과 시네마틱 연출로 몰입감을 높였으며, 난이도는 탄약 관리 숙련도에 따라 보통~어려움 사이로 체감된다. 협동 디펜스와 자원 관리, 영화 팬 서비스까지 즐기고 싶은 유저에게 추천한다. 플레이 전 탄약 시스템 설명 트리거를 반드시 숙지하고, 팀원 간 역할 분담(탱커·딜러·수리·보급)을 논의한 뒤 시작하는 것이 좋다. Starship Troopers: SE is a 6-player cooperative defense UMS map based on the Whiskey Outpost siege from the film Starship Troopers. Created by Panzer_Kavalier using elements from previous SST maps, it plays out on a large 96x96 Twilight tileset. The core objective is to hold the outpost against endless Zerg waves, build up forces, and critically manage an ammunition system. The map structure centers on a main base with enemies attacking from multiple directions, typical of choke-point survival gameplay. As the description warns not to run out of ammo, a custom trigger-based ammunition mechanic exists alongside standard minerals and gas. Indiscriminate unit production or ability spam leads to supply failure. Players must compose Terran forces—Marines, Firebats, Medics, Tanks—and fortify lines with Bunkers and Turrets. As waves progress, high-tier Zerg like Ultralisks and Defilers appear, making upgrade timing and force distribution decisive. Full 6-player cooperation is essential; a single breach often cascades into total collapse. Voice-acted briefings and cinematic triggers enhance immersion. Difficulty feels Normal to Hard depending on ammo management mastery. Recommended for users seeking cooperative defense, resource management, and movie fanservice. Before starting, review the ammo system trigger tutorial and assign roles (tank, DPS, repair, logistics) with teammates.
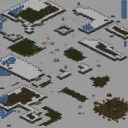
북극에서 살아남기 스페셜 (Survival in the Arctic Special)
스타크래프트 브루드워 유즈맵 중에서도 독특한 생존 테마를 좋아하는 플레이어라면 한 번쯤 주목해 볼 만한 맵이 바로 북극에서 살아남기 스페셜이다. 이번에 소개할 스타크래프트 맵 파일은 북극의 차가운 설원 배경을 바탕으로 펼쳐지는 대표적인 서바이벌 장르의 유즈맵으로, 플레이어는 제한된 환경 속에서 몰려오는 위협을 피해 주어진 시간 동안 버텨내는 것을 핵심 목표로 삼는다. 맵 내부 설명에서 확인할 수 있듯이 정해진 시간 동안 살아남는 것이 승리 조건이므로, 단순한 전투력 과시보다는 자원 관리와 방어선 구축, 그리고 팀원 간의 협력이 생존의 당락을 결정짓는 중요한 요소로 작용한다. 플랫폼 타일셋 특유의 얼어붙은 지형과 고립된 구역들은 극한의 추위 속에서 고군분투하는 듯한 몰입감을 한층 더 끌어올린다. 전체적인 진행 방식은 고립된 거점에서 시작하여 점차 다가오는 공세를 막아내며 장기전을 도모하는 형태로 구성되어 있어, 회차를 거듭할수록 효율적인 동선과 빌드를 연구하는 재미를 느낄 수 있다. 특히 정해진 시간 동안 끈질기게 버텨내야 하는 클래식한 생존 규칙은 요즘 유즈맵들과는 또 다른 긴장감을 선사하며, 오랜 기간 브루드워 커뮤니티에서 사랑받아온 서바이벌 장르만의 매력을 온전히 담아내고 있다. 방어와 생존 위주의 플레이를 선호하거나 친구들과 함께 힘을 합쳐 위기를 극복해 나가는 협동 플레이를 즐기는 유저들에게 알맞은 선택지가 될 수 있다. 게임을 시작하기 전 맵의 지형적 특징을 미리 파악하고, 자원 수급처와 방어에 유리한 요충지를 확인해 두는 것이 원활한 플레이를 위한 좋은 출발점이 될 것이다. Survival maps in StarCraft: Brood War offer unique gameplay experiences, and Survival in the Arctic Special stands out as a distinctive choice for fans of the genre. Set against a chilly snow-covered landscape using the Platform tileset, this custom map challenges players to endure incoming threats within a limited timeframe. According to the in-game description, surviving for a set duration is the primary objective, making resource management, defensive positioning, and cooperation among players essential for success rather than simple offensive power. The isolated terrain features enhance the immersive feeling of struggling in a harsh, frozen environment. Gameplay revolves around starting from a fortified base and gradually withstanding oncoming waves, allowing players to refine their builds and movement strategies with each session. The classic survival rules provide a tense atmosphere distinct from modern custom maps, capturing the enduring appeal of traditional Brood War survival scenarios. This map is recommended for users who prefer defense-oriented gameplay or enjoy cooperative challenges with teammates. Reviewing the terrain layout and potential resource locations before starting will help players prepare for the challenges ahead.
빠른무한에서 좀비막기 (Fast Muhaneseo Zombimakgi)
빠른무한에서 좀비막기는 스타크래프트 브루드워 유즈맵 세계관에서 독특한 생존의 재미를 선사하는 디펜스 장르의 맵입니다. 이 스타크래프트 맵은 플레이어들에게 친숙한 빠른 자원 수급 환경을 바탕으로 하되, 전혀 예상치 못한 위협 요소인 감염체의 습격을 막아내는 긴장감 넘치는 플레이 경험을 제공합니다. 기존의 일반적인 대전 방식에서 벗어나 끝없이 몰려오는 적들을 상대로 방어선을 구축해야 하는 독특한 진행 방식을 가지고 있어, 유저들에게 색다른 협동과 생존의 묘미를 전달합니다. 맵의 구조를 살펴보면, 전장 중앙에 감염체가 스며든다는 설정에 어울리는 형태로 기지 배치와 진입로가 짜여 있습니다. 플레이어들은 풍부한 자원을 바탕으로 빠르게 병력을 생산하고 견고한 요새를 만들어야 합니다. 자원이 빠르게 모인다는 점 덕분에 초반부터 대규모 유닛을 운용하는 화끈한 전투가 가능하며, 쉴 틈 없이 몰아치는 적들의 공세를 막아내기 위해 끊임없이 유닛을 배치하고 위치를 조율해야 합니다. 이러한 플레이 경험은 평소 물량전과 방어 위주의 플레이를 즐기는 유저들에게 강렬한 인상을 남기며, 친구들과 함께 방어선을 나누어 맡거나 유기적으로 협력하는 재미를 극대화합니다. 특히 자원의 여유 속에서 펼쳐지는 대규모 교전과 생존을 위한 사투는 이 맵만의 강력한 추천 포인트라고 볼 수 있습니다. 이 맵은 빠른 자원 환경에서 색다른 디펜스 게임을 즐기고 싶은 분들이나, 끊임없이 몰려오는 적을 막아내는 생존형 유즈맵을 선호하는 유저들에게 안성맞춤입니다. 다만 테스트 버전 성격의 요소를 포함하고 있을 수 있으므로, 플레이 전 최신 버전 여부와 기본적인 맵 규칙을 미리 확인하고 진입하는 것이 좋습니다. 자원이 풍족한 환경에서 쏟아지는 물량을 시원하게 소화하며 생존의 스릴을 만끽하고 싶다면, 이 맵을 통해 색다른 전장의 긴장감을 직접 경험해 보시길 권장합니다. Fast Muhaneseo Zombimakgi is a Defense genre map in the Starcraft Brood War UMS world that delivers a unique survival experience. Based on a familiar fast-resource-gathering environment, this Starcraft map offers a tense gameplay experience of fending off unexpected infection threats. Moving away from standard competitive matches, it features a progress method where players must build defensive lines against endlessly swarming enemies, providing users with a distinct taste of cooperation and survival. Looking at the map structure, the base placements and entry routes are designed to fit the concept of an infection seeping into the center of the battlefield. Players must quickly produce troops and build solid fortresses using abundant resources. The rapid accumulation of resources enables intense combat with large-scale units from the early stages, requiring constant unit placement and position adjustments to withstand relentless enemy offensives. This gameplay experience leaves a strong impression on users who enjoy resource-heavy and defense-oriented play, maximizing the fun of dividing defense lines or cooperating organically with friends. In particular, large-scale engagements and life-or-death survival struggles amidst abundant resources are strong recommended points for this map. This map is tailor-made for those who want to enjoy a unique defense game in a fast-resource environment or prefer survival-type custom maps that block endlessly rushing enemies. However, since it may contain test-version elements, it is advisable to check the latest version and basic map rules before entering. If you want to savor the thrill of survival while clearing out a flood of units in a resource-rich environment, we recommend experiencing this unique battlefield tension directly through this map.
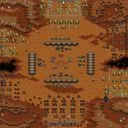
테스트 오브 테란 - 서바이벌 (Test of Terran - Survival)
스타크래프트 브루드워 유즈맵 ‘Test of Terran - Survival’은 제목 그대로 테란 생존 서바이벌을 다루는 맵입니다. 내부 설명에 따르면 플레이어는 생존하며 컴퓨터 유닛과 건물을 파괴하는 것이 목표로, 전형적인 컴까기(컴퓨터와의 전투) 형식의 서바이벌 맵으로 추정됩니다. 맵은 96x96 타일의 황혼 타일셋을 사용하며, 최대 5인 플레이가 가능하도록 설계되어 있어 소규모 파티 플레이에 적합합니다. 게임 시작 후 플레이어는 제한된 자원과 유닛으로 끊임없이 몰려오는 컴퓨터 세력의 공격을 방어하고, 동시에 공격적으로 적 기지를 파괴해야 합니다. 생존과 공격을 동시에 수행해야 하므로 자원 관리와 유닛 컨트롤, 진출 타이밍이 중요하게 작용할 것입니다. 맵 설명만으로는 트리거 기반 이벤트나 특수 능력의 존재 여부는 명확하지 않지만, 일반적인 서바이벌 유즈맵처럼 웨이브 방식으로 적이 등장하거나 특정 시간이 지날수록 난이도가 상승할 가능성이 있습니다. 플레이 경험은 긴장감 넘치는 방어전과 함께 진취적인 공격이 어우러져 지루할 틈이 없는 흐름을 보일 것으로 예상됩니다. 이 맵은 혼자서도 도전할 수 있지만, 5인 협동을 염두에 둔 설계로 보아 친구들과 함께 전략을 나누며 플레이할 때 더욱 재미를 느낄 수 있습니다. 스타크래프트 서바이벌 장르나 컴까기 유즈맵을 즐기는 분들, 특히 테란 종족의 유닛 조합과 방어선 구축에 익숙한 플레이어에게 추천합니다. 플레이 전에는 맵의 구체적인 승리 조건과 적 유닛 구성이 명확하지 않으므로, 초반에 빠르게 정찰하여 적의 공격 패턴을 파악하는 것이 중요합니다. 제작자 Quicksilver69의 다른 작품이나 유사한 생존 맵과 비교해 보는 것도 재미를 더할 수 있습니다. 전반적으로 이 맵은 클래식한 서바이벌 공식을 충실히 따르면서도 테란의 매력을 살린 맵으로 평가할 수 있습니다. Test of Terran - Survival is a StarCraft Brood War use map that focuses on, as the title suggests, a Terran survival scenario. The internal description states the objective is to stay alive while destroying computer units and buildings, indicating a typical survival map with a comp stomp (fighting against computer) element. Built on a 96x96 tile Twilight tileset, the map supports up to 5 players, making it suitable for small party play. After the game starts, players must withstand relentless attacks from enemy forces with limited resources and units while actively destroying the opponent's base. Since both survival and offense are required, resource management, unit control, and push timing are critical. The presence of trigger-based events or special abilities is not entirely clear from the description alone, but like many survival use maps, enemies likely appear in waves or the difficulty escalates over time. The gameplay experience is expected to offer a tense blend of defense and aggressive advances, leaving little room for downtime. While the map can be taken on solo, its 5-player design suggests greater enjoyment when collaborating with friends. This map is recommended for fans of StarCraft survival genres or comp stomp maps, especially players familiar with Terran unit compositions and defensive line construction. Before playing, it is important to note that the exact victory conditions and enemy compositions are not detailed, so early scouting to identify attack patterns is crucial. Comparing it with other works by creator Quicksilver69 or similar survival maps could add to the enjoyment. Overall, this map appears to faithfully follow the classic survival formula while highlighting the distinct charm of the Terran race.
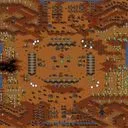
햄버거힐 1.9: 월남전의 지옥 (Test of Survival - Hamburger Hill 1.9)
스타크래프트 브루드워의 대표적인 서바이벌 유즈맵인 <Test of Survival - 햄버거힐1.9>는 이름에서 느껴지듯 치열한 전투가 끊임없이 펼쳐지는 맵이다. 햄버거힐이라는 지명과 월남전의 지옥이라는 설명에서부터 알 수 있듯, 이 맵은 전쟁터의 한복판에서 펼쳐지는 전투를 재현한 것으로 보인다. 맵 중앙에 위치한 넓은 평야와 그 주변을 둘러싼 언덕 지형은 플레이어에게 넓은 시야와 다양한 전략적 선택지를 제공하며, 4차례의 지원부대라는 설명은 끊임없이 몰려오는 적군을 상대로 지속적인 저항을 요구한다는 점을 시사한다. 이 맵은 기본적으로 적군 컴퓨터를 상대로 건물을 파괴하고 유닛을 섬멸하는 Survival(서바이벌) 장르에 속한다. 맵의 구조는 비교적 단순하지만, 넓은 전장과 지속적인 적의 공격은 플레이어에게 전략적 깊이와 긴장감을 동시에 제공한다. 특히 햄버거힐이라는 이름에 걸맞게 맵 곳곳에 흩어져 있는 언덕과 골짜기는 시야 확보와 진형 배치에서 중요한 역할을 한다. 또한, 맵 상단과 하단에 위치한 4차례의 지원부대 지원 지역은 플레이어가 일정 시간마다 추가적인 자원이나 유닛을 확보할 수 있는 기회를 제공하며, 이를 통해 지속적인 전투를 유지할 수 있도록 돕는다. 이 맵을 플레이하기 위해서는 기본적인 스타크래프트 멀티 플레이 전략과 더불어,Earth에서 제공하는 다양한 유닛과 건물의 특성을 숙지하고 있어야 한다. 또한, 넓은 전장과 끊임없는 적의 공격에 대응하기 위한 빠른 판단력과 효율적인 자원 관리 능력이 요구된다. 특히, 초보자의 경우 맵의 구조와 적의 공격 패턴을 충분히 숙지하지 못한 상태에서 플레이할 경우 쉽게 무너질 수 있으므로, 사전 연습이 필수적이다. 이 맵은 주로 혼자서 컴퓨터 상대를 상대로 플레이하는 1인용 맵으로, 난이도는 비교적 높은 편으로 추정된다. 맵의 제목과 설명에서 느껴지는 긴장감과 더불어, 실제 게임 플레이에서도 끊임없는 적의 공격과 제한된 자원으로 인한 압박감이 플레이어에게 지속적인 도전을 안겨준다. 따라서, 이 맵은 기존의 스타크래프트 유저들에게는 새로운 도전 과제로, 초보자에게는 경험을 쌓을 수 있는 좋은 기회로 작용할 수 있을 것이다. StarCraft: Brood War's iconic survival custom map, *Test of Survival - Hamburger Hill 1.9*, lives up to its name with relentless, high-stakes combat unfolding continuously. As the map's name and description—"Hamburger Hill" and "Hell of the Vietnam War"—suggest, it recreates the chaos of a battlefield at its most intense. The wide central plain surrounded by hilly terrain gives players broad visibility and a variety of strategic options, while the mention of four waves of reinforcements implies a constant need to fend off waves of enemy forces. The map primarily falls under the Survival genre, tasking players with destroying enemy buildings and eliminating units against AI-controlled opponents. Though its layout is relatively straightforward, the expansive battlefield and unending enemy assaults deliver both strategic depth and high tension. True to its name, *Hamburger Hill*, scattered hills and valleys across the map play a crucial role in scouting and positioning. Meanwhile, the four reinforcement zones at the top and bottom of the map allow players to secure additional resources or units at regular intervals, helping sustain prolonged combat. To play effectively, players need a solid grasp of StarCraft’s multiplayer mechanics, along with a deep understanding of the unique properties of units and buildings provided by Earth. Fast decision-making and efficient resource management are essential to cope with the vast battlefield and relentless enemy pressure. Beginners, in particular, can easily falter if they don’t first study the map’s layout and enemy attack patterns, making practice sessions a necessity. Designed primarily as a single-player challenge against AI, *Test of Survival - Hamburger Hill 1.9* is considered fairly difficult. The tension suggested by its title and description carries into actual gameplay, where constant enemy attacks and limited resources create sustained pressure. For veteran StarCraft players, it offers a fresh challenge, while for newcomers, it serves as an excellent opportunity to build experience.
수정 수호전 (Crystal Defense)
[18]死守水晶은 단일 플레이어용 디펜스 유즈맵으로, 화산 타일셋 위에 펼쳐진 256×256 타일 전장에서 저그 군단의 파상공세를 막아내는 생존형 진행을 보여준다. 맵 제목인 '죽음을 각오하고 수정(크리스털)을 지킨다'는 의미 그대로, 중앙 또는 특정 거점에 위치한 핵심 구조물을 목표로 몰려드는 저그 유닛들을 제압하며 일정 시간이나 웨이브를 버텨내는 방식이다. 내부 설명에 '기세등등한 저그 대군이 일제히 공격해 오며, 지구 방어 매트릭스의 시동 에너지가 아직 충전되지 않았다'는 문구가 있어, 에너지 충전 완료나 매트릭스 가동까지 시간을 버는 임무형 승리 조건이 적용된 것으로 보인다. 플레이어는 1인으로 시작하며 별도 팀 구분이 없으므로, 자원 채취와 병력 생산, 방어선 구축을 모두 혼자 감당해야 한다. 화산 지형 특유의 좁은 통로와 용암 지대를 활용해 진입로를 제한하고, 벙커·포탑·병력 배치를 조합해 효율적인 방어 라인을 짜는 것이 핵심이다. 저그 특성상 다수의 저글링·히드라리스크·울트라리스크 등이 혼합돼 몰려오므로, 대공·대지 밸런스와 스캔·디텍터 운용이 승패를 가른다. 난이도는 초반 자원 확보와 초반 웨이브 대응에 따라 체감 차이가 크지만, 전체적으로 '보통' 수준에서 시작해 후반 웨이브로 갈수록 '어려움'에 가까운 압박이 오는 구성으로 추정된다. 예상 플레이 타임은 20~30분 내외로, 짧은 호흡으로 집중력 있게 디펜스 감각을 익히거나 빌드 오더를 시험하기에 적합하다. 추천 대상은 디펜스 장르 입문자부터 웨이브 단위 생존 플레이를 선호하는 중급자까지 폭넓다. 플레이 전 확인 포인트는 맵 설정 메뉴에서 난이도·웨이브 수·초기 자원 등 옵션이 제공되는지 여부와, 승리 조건이 '시간 생존'인지 '특정 웨이브 클리어'인지 확인하는 것이다. [18]死守水晶 is a single-player defense UMS map set on a 256×256 volcanic tileset where the player must survive successive Zerg assaults to protect a central crystal structure. The title literally means "Defend the Crystal to the Death," and the internal description notes that a massive Zerg swarm attacks all at once while the Earth Defense Matrix's startup energy has not yet finished charging, suggesting a timed survival or wave-clear objective tied to the matrix activation. As a solo map with no team division, the player handles resource gathering, unit production, and defensive positioning alone. The volcanic terrain's narrow chokepoints and lava borders naturally funnel enemy paths, making bunker-turret-army combinations the core strategic loop. Zerg waves typically mix Zerglings, Hydralisks, and Ultralisks, so balanced anti-air and anti-ground coverage plus detector management become decisive. Difficulty feels moderate early on but ramps toward hard in later waves depending on early economy and wall-off execution. Estimated playtime is 20–30 minutes, offering a compact session ideal for learning defense fundamentals or testing build orders. Recommended for both newcomers to defense maps and intermediate players who enjoy wave-based survival. Before playing, check the map settings menu for adjustable difficulty, wave count, starting resources, and whether the win condition is time-based survival or clearing a specific final wave.
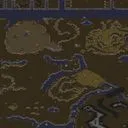
연못에서살아남기1(v2.1)
를 통해 살펴볼 작품은 독특한 생존 테마를 담고 있는 유즈맵인 연못에서살아남기1(v2.1)이다. 이 스타크래프트 맵은 황무지 타일셋을 배경으로 펼쳐지며, 플레이어들이 협력하여 몰려오는 위협 속에서 살아남아야 하는 서바이벌 장르의 진행 방식을 보여준다. 맵 구조를 살펴보면 거대한 연못과 강줄기 지형을 중심으로 사방에 고립된 공간과 좁은 통로들이 배치되어 있다. 이러한 지형적 특징 덕분에 플레이어는 효과적인 방어선 구축과 전략적인 위치 선점이 매우 중요하다. 5인의 인원이 함께 즐길 수 있도록 설계되어 있어, 다수 플레이어 간의 역할 분담과 유기적인 협동 플레이가 게임 승패를 가르는 핵심 요소로 작용한다. 특히 고립된 지형을 활용해 적의 진격을 저지하고 자원을 관리하는 과정에서 긴장감 넘치는 플레이 경험을 느낄 수 있다. 이 맵은 친구들과 함께 머리를 맞대고 협동 서바이벌 장르의 재미를 만끽하고 싶은 유저들에게 알맞은 선택이 될 것이다. 플레이 전에는 좁은 지형에서의 유닛 이동 경로와 방어 배치 위치를 미리 파악해 두는 것이 원활한 진행에 도움이 된다. 클래식한 감성과 생존이라는 명확한 목표를 가진 유즈맵을 찾고 있다면 한 번쯤 도전해 볼 만한 가치가 있는 작품이다. Survival in the Pond 1 (v2.1) is a custom StarCraft Brood War map that features a unique survival theme set against a wasteland tileset. This map follows a survival genre progression where players must cooperate to stay alive amidst incoming threats. Examining the map structure, it centers around large ponds and river channels with isolated areas and narrow passages arranged across the terrain. These geographical features make effective defensive line construction and strategic positioning crucial for the players. Designed to accommodate up to five players, it emphasizes role division and organic cooperative play among multiple participants as key factors in determining victory. In particular, the process of utilizing isolated terrain to block enemy advances and manage resources provides a tense and engaging gameplay experience. This map is a suitable choice for users who want to enjoy the fun of a cooperative survival genre while strategizing together with friends. Before playing, it helps to understand unit movement paths and defensive placement locations in narrow terrain for smooth progression. If you are looking for a custom map with a classic feel and a clear survival objective, this work is definitely worth a try.
30분 동안 버티기 (Survive for 30 Minutes)
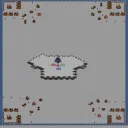
스타크래프트: 브루드워의 유즈맵 ‘30분 동안 버티기 (한스타용)’는 디펜스 장르의 대표적인 생존형 맵으로, 제한 시간 내에 끊임없이 밀려오는 적을 방어하며 버텨야 하는 짜릿한 긴장감을 선사한다. 맵은 중앙에 플레이어 기지가 위치하고, 주변으로 적의 공격 루트가 여러 갈래로 뻗어나가며, 각 루트마다 공세 타이밍과 강도가 조절되어 있는 구조다. 이미지 상단과 하단의_DIRT 테두리 안쪽에 배치된 유닛들은 적의 초기 공격을 표시하며, 중앙의 젤나가 크리스탈과 같은 오브젝트는 스폰 포인트로 추정된다. 플레이어는 제한 시간 30분 동안 각 루트를 방어하면서 자원을 확보하고, 방어선을 구축해야 한다. 특히 맵 하단의 ‘한스타용’이라는 표기는 한국어 사용자를 대상으로 한 맵임을 시사하며, 한스타(한국 스타크래프트) 커뮤니티에서 인기를 얻었을 가능성이 크다. 방어에 성공하면 승리하는 간단한 승리 조건이지만, 끊임없는 적의 압박과 시간 제한은 플레이어에게 전략적 깊이를 요구한다. 초보자보다는 중급 이상의 플레이어에게 적합하며, 디펜스 맵의 기본적인 메커니즘과 맵 리딩 능력을 시험할 수 있는 훌륭한 연습용 맵으로 보인다. 플레이 전에는 맵의 각 루트의 공세 패턴과 주요 스폰 지역을 숙지하는 것이 중요하며, 자원과 방어 시설 배치에 대한 계획을 세우는 것이 핵심이다. StarCraft: Brood War's custom map "Survive for 30 Minutes (Korean Version)" is a standout survival defense game where players must hold out against relentless enemy waves within a strict time limit, delivering an intense and thrilling challenge. The map features a central player base surrounded by multiple branching enemy attack routes, each with carefully timed and varying assaults. Enemies spawn from objects like the central Zerg crystal, while the top and bottom borders marked with _DIRT indicate initial attack directions. Players must defend each route, gather resources, and fortify their defenses over the 30-minute duration. The "Korean Version" label suggests it was designed with Korean StarCraft players in mind, likely gaining popularity within the Korean StarCraft community. While the victory condition is simple—surviving the time limit—the constant enemy pressure and ticking clock demand strategic depth. This map is better suited for intermediate to advanced players, serving as an excellent training ground for mastering defense mechanics and map awareness. Before playing, it’s crucial to study each route’s attack patterns and key spawn points, then plan resource gathering and defensive structures accordingly.
뱀서류 저글링 막기 (Vampire Survivors-style Zergling Blocking)
스타크래프트 브루드워 유즈맵 '뱀서류 저글링 막기'는 인디 게임 '뱀파이어 서바이버즈'의 핵심 재미를 실시간 전략 시뮬레이션 엔진 위에 구현한 1인용 생존형 맵이다. 우주 타일셋 위에 펼쳐진 128×128 타일 크기의 전장에서 플레이어는 단일 유닛을 조작해 끝없이 몰려드는 저글링 무리를 상대하며 생존 시간을 늘려간다. EUD 트리거를 활용한 자체 배속 시스템이 내장되어 있어 별도 설정 없이도 쾌적한 속도 조절이 가능하며, 버전 0.02 테스트 빌드임에도 기본적인 성장 루프와 웨이브 구성이 갖춰져 있다. 진행 방식은 전형적인 액션 로그라이트 문법을 따른다. 적을 처치해 경험치를 얻고 레벨 업 시 무작위로 제시되는 선택지 중 스킬이나 스탯 강화 하나를 고르는 식이다. 근접·원거리 공격 스킬, 이동 속도·체력·공격력 같은 패시브 옵션이 조합되면서 매 판마다 다른 빌드가 완성된다. 저글링은 기본형부터 체력·속도·특수 능력이 변형된 변종까지 단계적으로 등장하며, 후반부로 갈수록 화면 가득 채우는 물량 공세가 펼쳐져 탄막 슈터에 가까운 회피 컨트롤이 요구된다. 맵 크기 4096×4096 픽셀 전역을 자유롭게 오가며 적을 유도하고 스킬 범위를 극대화하는 운영이 핵심이므로, 좁은 입구를 막아 세우는 전통적인 디펜스 감각과는 결이 다르다. 단일 유닛 조작에 집중하는 만큼 멀티태스킹 부담은 낮지만, 실시간 회피와 스킬 쿨타임 관리를 동시에 수행해야 해 순발력과 판단력이 승부를 가른다. 1인용 전용 설계라 협동이나 대전 요소를 기대하기 어렵고, 테스트 버전 특성상 밸런스 조정·버그 수정·콘텐츠 확장이 지속될 여지가 크다. 추천 대상은 '뱀파이어 서바이버즈' 류의 중독성 있는 성장 루프를 스타크래프트 환경에서 체험하고 싶은 유저, 짧은 호흡으로 반복 플레이하며 빌드 연구를 즐기는 솔로 게이머다. 플레이 전에는 EUD 적용 여부와 호환성(리마스터·오리지널 버전 차이)을 확인하고, 자체 배속 단축키를 숙지한 뒤 시작하는 것이 좋다. 현재 버전은 테스트 단계이므로 저장·불러오기 기능 부재나 난이도 급변 구간을 감안하고 가볍게 도전하는 편이 바람직하다. StarCraft Brood War custom map 'Vampire Survivors-style Zergling Blocking (뱀서류 저글링 막기)' implements the core appeal of the indie hit 'Vampire Survivors' on the real-time strategy engine. On a 128×128 tile battlefield set in the space tileset, the player controls a single unit to survive against endless waves of Zerglings, extending survival time as long as possible. An EUD-triggered built-in game speed system allows comfortable speed adjustment without external settings, and despite being a version 0.02 test build, the basic growth loop and wave structure are in place. The progression follows typical action roguelite grammar. Defeat enemies to gain experience, level up, and choose one skill or stat upgrade from random options. Melee and ranged attack skills, plus passive options like movement speed, health, and attack power, combine to create a different build every run. Zerglings appear in stages from basic types to variants with modified health, speed, and special abilities, and in later stages the screen-filling swarms demand bullet-hell-like dodging control. The core strategy involves roaming the full 4096×4096 pixel map to kite enemies and maximize skill ranges, which differs from traditional defense maps that focus on choking narrow entrances. With single-unit control, multitasking burden is low, but real-time dodging and skill cooldown management must be handled simultaneously, making reflexes and decision-making the deciding factors. Designed exclusively for solo play, cooperative or competitive elements are absent, and as a test version, there is ample room for ongoing balance adjustments, bug fixes, and content expansion. Recommended for users who want to experience the addictive growth loop of 'Vampire Survivors'-style games in a StarCraft environment, and solo gamers who enjoy repeated short sessions researching builds. Before playing, verify EUD compatibility (Remastered vs. Original differences) and familiarize yourself with the built-in speed hotkeys. Since the current version is in testing, expect missing save/load functions and sudden difficulty spikes, so approach it as a light challenge.
초원에서 살아남기 LUNATIC (Survive in the Grassland LUNATIC)
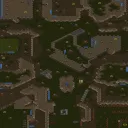
《초원에서 살아남기 LUNATIC》은 스타크래프트 브루드워의 UMS 유즈맵으로, 넓은 초원 지형에서 적절한 자원 관리와 병력 운용을 통해 살아남아야 하는 생존형 디펜스 장르의 맵이다. 맵의 중앙에는 넓은 평지가 펼쳐져 있으며, 외곽으로는 언덕과 협곡이 둘러싸인 구조로, 적의 공격을 방어하면서 자원을 확보하고 건물을 짓는 전략적 요소가 강조된다. 맵 내부는 사막 타일셋으로 구성되어 있어 건물이 배치된 곳과 자연 지형이 대비되어 시각적 구분이 명확하다. 플레이어는 초원 지형에서 시작하며, 주기적으로 밀려오는 적군(주로 저그 종족으로 추정된다)을 상대로 방어선을 구축해야 한다. 링 모양의 방어선 안쪽으로는 자원과 건물을 배치할 수 있는 공간이 마련되어 있어, 초반에는 소수의 병력으로 방어에 집중하고, 중반부터는 적극적인 확장을 노릴 수 있도록 설계된 듯하다. 맵의 난이도는 LUNATIC 등급으로 표시되어 있으며, 이는 최고 난이도를 의미하여 플레이어의 전략적 판단과 반응 속도가 요구된다. 특히 이 맵의 특징은 초원 환경에서 펼쳐지는 생존형 전투로, 넓은 시야와 전략적 요충지를 장악하는 것이 핵심이다. 초반에는 적의 공격을 버티면서 자원을 모아 병력을 증강하고, 중반 이후에는 역공이나 방어선 재정비로 전환해야 한다. 또한 맵의 구조상 언덕과 협곡을 활용한 포지셔닝이 중요하며, 외곽의 협곡 지형은 적의 침공을 늦추는 데 유용할 것으로 보인다. 맵의 크기는 4096x4096으로 상당히 넓어 넓은 시야를 확보할 수 있지만, 동시에 적의 공격 루트가 여러 갈래로 나뉠 수 있어 신중한 대처가 필요하다. 이 맵은 초보보다는 중급 이상의 플레이어에게 적합하며, 특히 디펜스와 생존형 전략 게임을 즐기는 유저들에게 추천할 만하다.LUNATIC 난이도 특성상 한 번의 실수가 치명적일 수 있으니, 초반 자원 관리와 방어 우선순위를 신중히 결정해야 한다. 또한 맵의 구조상 언덕과 협곡을 활용한 전략적 방어선을 구축하는 것이 성패의 열쇠가 될 것이다. This UMS custom map, titled 《초원에서 살아남기 LUNATIC》 (Survive in the Grassland LUNATIC), is a survival defense game set in the expansive terrain of StarCraft: Brood War. The map features a central grassland surrounded by hills and ravines, creating a strategic environment where players must balance resource management and troop deployment while defending against waves of enemy attacks. The gameplay revolves around establishing a defensive perimeter within the grassy interior while expanding resources and structures. The LUNATIC difficulty indicates a high level of challenge, demanding precise strategy and quick reactions from players. The map's desert tileset provides a clear visual contrast between built-up areas and natural terrain, enhancing strategic planning. A key aspect of this map is its emphasis on survival in a grassland setting, where controlling strategic high-ground positions and choke points is crucial. Early gameplay focuses on withstanding enemy assaults while accumulating resources, transitioning to offensive or defensive restructuring in mid-game. The 4096x4096 map size offers ample visibility but also multiple attack routes for enemies, requiring careful positioning and resource allocation. This map is best suited for intermediate to advanced players, particularly those who enjoy defense and survival strategy games. The LUNATIC difficulty means that even minor mistakes can have severe consequences, so players should prioritize early resource management and defensive priorities. Leveraging the map's terrain—such as hills and ravines—for strategic positioning will be key to success.
저그 생존의 시험 (The Test Of Zerg Survival)
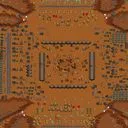
황혼의 어스름이 깔린 불모지 한가운데서 다섯 저그 생존자가 끝없이 밀려오는 적들을 상대하는 서바이벌 맵이다. 전형적인 성장형 생존 장르를 따르며, 개별 유닛이 아닌 저그 종족 전체를 통제하며 기지를 꾸리고 병력을 양성해 점점 거세지는 공세를 견뎌내야 한다. 맵은 중앙 개활지를 중심으로 다섯 플레이어가 방사형으로 배치되어 있으며, 각자 독립된 구역에서 자원을 채취하고 방어선을 구축하게 된다. 초반에는 소규모의 저글링과 히드라리스크가 간헐적으로 몰려오지만, 시간이 지날수록 울트라리스크나 수비군단 같은 고급 유닛이 대규모로 쇄도하는 압박감이 상당하다. 자원은 제한적이지만 서로 다른 진영이 동시에 방어전을 펼치기 때문에, 한쪽이 무너지면 옆 진영까지 침투 경로가 열리는 연쇄적 위험이 존재한다. 이 때문에 단순히 개인 생존을 넘어서 인접한 플레이어와의 암묵적 협력과 방어선 분담이 승패를 가르는 핵심 요소로 작용한다. 황혼 타일셋 특유의 황량한 색감과 음산한 조명은 생존의 긴장감을 한층 배가시키며, 시각적으로도 몰입감 높은 경험을 제공한다. 플레이 방식은 전형적인 베이스 디펜스에 가깝지만, 고립된 개인전이 아니라 다섯 명의 운명이 하나의 방어망으로 얽혀 있다는 점에서 독특한 재미를 선사한다. 초반에는 저글링 다수를 확보해 본진 방어에 집중하고, 중반 이후에는 럴커와 성큰 콜로니를 적절히 배치해 방어선을 견고히 다지는 전략이 유효하다. 후반으로 갈수록 디바우러와 가디언 같은 공중 유닛의 적극 활용이 요구되며, 자원 관리에 실패하면 방어력이 급격히 무너지므로 신중한 빌드 선택이 필요하다. 이 맵은 전통적인 유즈맵 생존 장르를 좋아하는 플레이어에게 권장되며, 특히 팀원 간의 소통과 유기적 방어를 즐기는 유저에게 높은 만족감을 줄 것으로 보인다. 플레이 전에는 반드시 다섯 명이 모두 같은 목표를 공유하고 있는지 확인해야 하며, 한 명이라도 초반에 이탈하거나 방어를 소홀히 하면 전체 판이 조기에 붕괴할 수 있음을 인지하는 것이 중요하다. In the heart of a barren twilight wasteland, five Zerg survivors face an endless onslaught of enemies in this survival map. It follows a classic growth-oriented survival format where you control the entire Zerg race, build up your base, and muster forces to withstand increasingly ferocious attacks. Five players are arranged radially around a central open area, each expanding resources and constructing defenses in their own distinct zone. Early on, small packs of Zerglings and Hydralisks trickle in, but as time passes, high-tier units like Ultralisks and Hunter Killers charge in massive waves, creating immense pressure. Resources are limited, and since all five players defend simultaneously, a breach in one sector opens a cascading danger route into neighboring positions. This transforms the game from mere individual survival into a tense experience where tacit cooperation and shared defensive lines with adjacent players become the decisive factor. The Twilight tileset’s bleak hues and dim lighting amplify the survival tension, delivering a visually immersive experience. The gameplay resembles classic base defense, yet the intertwined fate of five players sharing a single defensive perimeter gives it a distinctive charm. In the early game, it is effective to secure Zergling swarms for point defense, then transition into Lurker and Sunken Colony placements to solidify the front line. As the match progresses, the active use of aerial units like Devourers and Guardians becomes essential, and any failure in resource management can cause a rapid defensive collapse, demanding careful build orders. This map is highly recommended for players who enjoy traditional Use Map survival scenarios, especially those who thrive on communication and flexible defense with allies. Before starting, it is crucial to confirm that all five players share the same commitment to the objective; if even one person drops out early or abandons their defense, the entire session is likely to crumble prematurely.
Mapas registrados recientemente
Consulta los archivos y versiones recién añadidos.
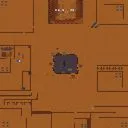
벽짓고 살아남기z [조합편]
스타크래프트 브루드워 유즈맵의 세계에서 생존 장르는 언제나 독보적인 몰입감과 협동의 재미를 선사합니다. 이번에 소개할 작품은 바로 그러한 생존 서바이벌의 매력을 극한으로 끌어올린 스타크래프트 맵, 벽짓고 살아남기z [조합편]입니다. 이 유즈맵은 플레이어가 직접 지형지물을 활용하거나 벽을 건설하여 몰려오는 적들의 공세를 막아내며 최종 생존을 목표로 하는 독특한 구조를 지니고 있습니다. 특히 부제인 조합편이라는 이름에 걸맞게 다양한 요소들을 조합하고 발전시키는 재미가 강조되어 있어, 단순한 방어 플레이를 넘어선 전략적인 수싸움이 핵심으로 작용합니다. 맵의 전체적인 구조를 살펴보면, 플레이어들은 사방에서 압박해 오는 위협 속에서 자신만의 방어 거점을 구축해야 합니다. 황혼 타일셋의 독특한 황량한 분위기 속에서 각자의 공간을 확보하고, 효율적인 자원 운용과 유닛 배치, 그리고 조합 시스템을 적극 활용하는 것이 생존의 당락을 결정짓습니다. 맵 상에 마련된 여러 구역과 지형적 특징은 플레이어에게 다양한 전술적 선택지를 제공하며, 동료들과의 긴밀한 소통과 협동 플레이가 이루어지지 않으면 후반부로 갈수록 급격히 어려워지는 난이도를 체감하게 됩니다. 매 순간 최적의 위치에 벽을 세우고 적의 진격을 지연시키면서 반격의 기회를 노리는 과정은 이 맵만의 강력한 플레이 경험이자 매력 포인트입니다. 이 맵은 평소 타워 디펜스나 입구막기, 그리고 협동 생존 장르의 유즈맵을 즐겨 찾는 플레이어들에게 강력히 추천할 만합니다. 친구들과 함께 역할을 나누어 방어선을 구축하거나, 각자의 구역을 책임지고 버텨내는 과정에서 높은 성취감을 느낄 수 있습니다. 다만, 초행 플레이어의 경우 적들의 공격 타이밍과 조합 공식, 그리고 효율적인 자원 관리에 대한 이해가 부족하면 초반부터 위기를 맞이할 수 있으므로, 플레이 전 전술적인 배치와 조합의 방향성을 미리 구상해 보는 것을 권장합니다. 치밀한 계산과 손발이 맞는 팀워크가 필요한 만큼, 오랫동안 손에 땀을 쥐며 즐길 수 있는 수작입니다. In the world of StarCraft: Brood War custom maps, the survival genre consistently delivers an unmatched level of immersion and cooperative enjoyment. The map introduced here is Build Walls and Survive Z: Combination Version, a StarCraft map that pushes the charm of survival gameplay to its absolute limits. This UMS map features a unique structure where players must utilize terrain and construct physical barriers to fend off relentless waves of enemies with the ultimate goal of survival. True to its subtitle, the combination version emphasizes the fun of mixing and evolving various elements, making strategic tactical decisions—far beyond simple defensive play—the core of the experience. Looking at the overall layout of the map, players must establish their own defensive strongholds amidst threats pressing in from all directions. Set against the desolate atmosphere of the twilight tileset, securing individual spaces, efficient resource management, unit placement, and actively utilizing the combination system determine success or failure. The various zones and terrain features provide players with diverse tactical choices, and without close communication and cooperative play with teammates, the difficulty spikes sharply in the later stages. The process of erecting walls at optimal positions every moment, delaying enemy advances, and seizing opportunities for counterattacks represents this map's powerful gameplay experience and key charm point. This map is strongly recommended for players who regularly enjoy tower defense, barrier blocking, and cooperative survival custom maps. Players can feel a high sense of achievement while dividing roles with friends to build defense lines or holding their ground in their respective zones. However, first-time players may face early crises if they lack understanding of enemy attack timings, combination formulas, and efficient resource management. Therefore, it is recommended to plan out tactical placements and combination directions before diving in. Requiring meticulous calculation and seamless teamwork, this is a masterpiece that offers white-knuckle excitement over a long session.
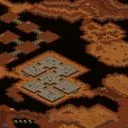
무인도 탐험 3 (Desert Island Exploration 3)
무인도 탐험 3는 황혼 타일셋을 기반으로 한 4인용 UMS 맵으로, 플레이어들이 각자 고립된 섬에서 시작해 점차적으로 영역을 확장하며 경쟁하는 구조를 가지고 있습니다. 맵의 중심부에는 네 개의 주요 섬이 위치하며, 각 섬은 충분한 자원과 자연 장벽으로 형성된 방어적 지형을 특징으로 합니다. 초기 자원 분배가 균등하게 이루어져 있어 공정한 출발점을 제공하며, 중앙에 위치한 중립 유닛이나 보너스 자원을 두고 플레이어들 간의 전략적 대결이 펼쳐집니다. 진행 방식은 기본적으로 자원 확보와 군대 구성, 상대 진영 침투로 이어지며, 다양한 지형 요소가 전술 선택에 중요한 역할을 합니다. 예를 들어, 일부 지역은 좁은 통로를 통해 접근해야 하므로 암석이나 건물로 쉽게 봉쇄할 수 있으며, 다른 지역은 물길을 따라 접근 가능한 형태로 설계되어 해상 유닛 활용도를 높였습니다. 플레이 경험은 개인의 전략 능력과 함께 상대방의 움직임을 예측하고 대응하는 재미를 강조합니다. 특히 초기 단계에서는 안정적인 발전을 추구하되, 적절한 시점에 적진을 탐색하고 약점을 파악하는 것이 승리의 열쇠가 됩니다. 이 맵은 중급 이상의 실력을 가진 플레이어들에게 적합하며, 기본 전략 외에도 다각적인 사고가 요구됩니다. 다만, 처음 접하는 초보자라면 자원 관리와 건물 배치의 중요성을 먼저 익히는 것이 좋습니다. 또한, 게임 내에서 특정 전략만 고수하기보다는 상황 변화에 맞춰 유연하게 대처하는 연습을 할 수 있는 기회를 제공합니다. Exploration of the Deserted Island 3 is a 4-player UMS map based on the Twilight tileset, where players start on isolated islands and gradually expand their territories while competing with each other. At the center of the map are four main islands, each characterized by ample resources and naturally defensive terrain formed by geographical barriers. The initial resource distribution is balanced to ensure a fair starting point for all players, and there are neutral units or bonus resources in the central area that spark strategic confrontations among players. The progression follows a basic structure of securing resources, building armies, and infiltrating enemy camps, with various terrain elements playing a crucial role in tactical decisions. For instance, some areas can only be accessed through narrow passages, which can easily be blocked with rocks or buildings, while others are designed to allow access via waterways, encouraging the use of naval units. The gameplay emphasizes the fun of predicting and responding to opponents' movements alongside individual strategic skills. Especially in the early stages, it's important to focus on stable development while also exploring enemy bases at the right time to identify weaknesses, which is key to victory. This map is suitable for players with intermediate skills or higher, requiring not just basic strategies but also multi-faceted thinking. Beginners encountering this map for the first time should first familiarize themselves with resource management and optimal building placement. Additionally, the game provides an opportunity to practice adapting flexibly to changing situations rather than sticking to a single strategy throughout the match.
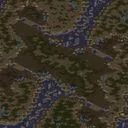
가이아 (WCG Gaia 1.0)
WCG Gaia 1.0은 스타크래프트 브루드워의 유즈맵으로, 생존과 전략이 핵심인 독특한 경험을 제공한다. 이 맵은 최대 4인까지 플레이 가능하며, 각 플레이어는 '가이아(Gaia)'라는 환경적 위협에 맞서 살아남아야 한다. 맵 설명에 따르면, 플레이어는 특정 규칙을 지켜야 하며, 이를 어길 경우 제거될 수 있는 구조로 설계되었다. 전통적인 전투 중심의 맵과 달리, 생존과 자원 관리, 환경 대응이 핵심 요소로 작용하며, 이는 유저에게 긴장감 있는 중반전과 장기적인 전략 수립을 요구한다. 넓은 맵 크기와 사막 테마의 타일셋은 전개 방식에 변화를 주며, 팀전보다는 개인전 중심의 플레이가 적합해 보인다. 초보자보다는 브루드워의 다양한 유즈맵 경험이 있는 유저에게 추천되며, 특히 생존형 게임플레이를 선호하는 플레이어에게 어필할 수 있다. 플레이 전 확인해야 할 포인트로는 '가이아'의 규칙과 페널티 시스템, 자원 분포, 그리고 승리 조건이다. WCG Gaia 1.0 is a StarCraft: Brood War custom map offering a unique gameplay experience centered around survival and strategic decision-making. Designed for up to four players, each participant must survive against 'Gaia', an environmental threat that enforces specific rules. According to the map description, failure to comply may result in elimination. Unlike traditional combat-focused maps, survival, resource management, and environmental adaptation are key, requiring tense mid-game control and long-term strategy. The large map size and desert-themed tileset provide a dynamic battlefield, better suited for solo play than team-based matches. Recommended for experienced Brood War custom map players, especially those who enjoy survival-based gameplay, it is important to understand Gaia’s rules, penalty system, resource distribution, and victory conditions before starting.
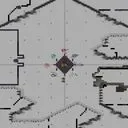
벽짓고 살아남기 언덕[BOSS]
벽짓고 살아남기 언덕[BOSS]은 플랫폼 타일셋을 기반으로 한 96x96 타일 크기의 넓은 맵에서 플레이어가 자원을 모아 벽을 세우고 보스 몬스터의 파도에 맞서는 서바이벌 유즈맵이다. 게임 시작 시 각 플레이어는 언덕의 중앙에 위치한 작은기지에서 기본 자원을 받고, 주변의 광물과 가스를 채취하여 방어 구조물과 업그레이드를 구축한다. 시간이 흐르면서 점점 강해지는 일반 유닛과 주기적으로 등장하는 poderoso 보스가 파도 형태로 공격해 오며, 이를 막기 위해 벽을 쌓고 수비 타워를 배치하며 유닛을 생산해야 한다. 맵은 팀 구분이 없으며 최대 7명의 플레이어가 동시에 참여해 각자 자신만의 방어선을 구축하거나 임시 동맹을 맺어 공동 방어를 할 수 있다. 진행 방식은 라운드 기반이 아니라 지속적인 시간 흐름에 따라 적이 spawn 되므로, 플레이어는 자원 효율과 건물 배치를 끊임없이 고민해야 하며, 보스전이 시작될 때는 집중화력과 빠른 수리가 승리의 키가 된다. 초보자도 기본적인 벽 쌓기와 유닛 생산을 배우면 금방 적응할 수 있지만, 고난이도 보스 패턴을 완벽히 막으려면 멀티태스킹과 전략적인 건물 배치가 요구된다. 따라서 이 맵은 방어형 플레이를 좋아하는 유저와 협동심을 시험하고 싶은 친구 그룹에게 적합하며, 플레이 전에는 맵이 사용 가능한 버전과 cp949 인코딩을 확인하고, 가능한 경우 최신 패치를 적용해 동기화 문제를 방지하는 것이 좋다. Wall-building Survival Hill[BOSS] is a survival UMS map based on the platform tileset, featuring a large 96x96-tile map where players gather resources to build walls and withstand waves of boss monsters. At the start, each player receives basic resources from a small base located at the hill’s center and gathers minerals and gas to construct defensive structures and upgrades. As time passes, regular units grow stronger and a powerful boss appears periodically, attacking in wave form; players must stack walls, place defense towers, and produce units to hold them off. The map has no team divisions, allowing up to seven players to join simultaneously, each constructing their own defense line or forming temporary alliances for cooperative defense. Progress is not round‑based but follows a continuous time flow in which enemies spawn, so players must constantly consider resource efficiency and building placement. When the boss fight begins, concentrated firepower and quick repairs become the key to victory. Beginners can adapt quickly after learning basic wall building and unit production, yet thwarting advanced boss patterns demands multitasking and strategic building layout. Therefore, this map suits players who enjoy defensive play and friends who want to test teamwork; before playing, verify the map’s compatible version and cp949 encoding, and apply the latest patch if possible to avoid synchronization issues.
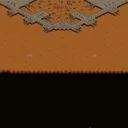
스타쉽 트루퍼스 (Starship Troopers)
스타쉽 트루퍼스는 스타크래프트 브루드워의 UMS 맵으로, 작은 규모의 맵에서 제한된 시간 동안 적의 공격을 버티는 생존형 게임플레이를 제공한다. 맵 크기는 4096×4096 타일이며 황혼 타일셋을 사용해 어두운 우주 기지 분위기를 연출한다. 내부 설명에 따르면 플레이어는 15분 동안 지속되는 웨이브를 막아내야 하며,その間에 유닛 생산 및 방어 구조물을 효율적으로 배치해야 한다. 구체적인 트리거나 스크립트는 알려지지 않았으나, 적의 spawn 패턴과 증가하는 난이도는 시간에 따라 점진적으로 강화되는 것으로 추정된다. 플레이 인원은 최대 5명이며, 협동 모드인지 개별 경쟁 모드인지 명시되지 않아서 보통은 모두 같은 팀으로 함께 생존을 목표로 하는 협동 플레이가 일반적이다. 이와 같이 짧은 플레이 타임과 명확한 목표는 빠른 테스트나 친목 모임에 적합하며, 초보자에게는 유닛 컨트롤과 자원 관리 기본기를 익히기에 좋은 입문용 맵이다. 다만, 맵이 작아 공간이 제한적이므로 유닛 충돌이나 경로 찾기에 주의가 필요하며, 높은 지연 설정을 권장하는 제작자의 언급처럼 네트워크 환경이 원활하지 않을 경우 버벅거림이 발생할 수 있다. 따라서 플레이 전에는 맵 크기와 타일셋을 확인하고, 가능한 한 저 지연 상태에서 실행하며, 15분 내에 목표를 달성할 수 있도록 기본적인 방어 빌드와 보충 전략을 미리 구상하는 것이 좋다. 전반적으로 스타쉽 트루퍼스는 간단하면서도 긴장감 넘치는 서바이벌 경험을 제공하며, 짧은 시간 안에 전략적 판단과 팀워크를 테스트하고 싶은 유저에게 추천한다. Starship Troopers is a UMS map for StarCraft: Brood War that offers a survival-style gameplay where players must withstand enemy attacks for a limited time on a small map. The map size is 4096×4096 tiles and uses the Twilight tileset to create a dark space base atmosphere. According to the internal description, players need to hold out for 15 minutes against incoming waves and must efficiently produce units and place defensive structures during that period. Exact triggers or scripts are undisclosed, but enemy spawn patterns and increasing difficulty appear to gradually intensify over time, as inferred. The map supports up to five players; whether it is cooperative or competitive is not specified, so it is generally played with all participants on the same team aiming to survive together. The short playtime and clear objective make it suitable for quick tests or casual gatherings, and beginners can use it to practice basic unit control and resource management. However, the limited space may cause unit collision or pathfinding issues, and as the author advises setting high latency, unstable network conditions could lead to lag. Therefore, before playing, one should verify the map size and tileset, run it in a low-latency environment, and plan a basic defense and reinforcement strategy to achieve the goal within 15 minutes. Overall, Starship Troopers delivers a simple yet tense survival experience, ideal for users who want to test strategic judgment and teamwork in a short session.
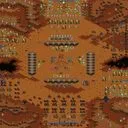
프로토스 생존 테스트 (Test of Protoss - Survival)
Test of Protoss - Survival은 황혼 타일셋을 사용한 96x96 타일 규모의 맵으로, 최대 5명이 참여할 수 있는 서바이벌 유즈맵이다. 게임 시작 시 플레이어는 프로토스 유닛과 건물을 주어지며, 맵 곳곳에 배치된 컴퓨터 적 유닛과 건물을 파괴하면서 살아남아야 한다. 주요 목표는 "Stay Alive"와 "Destroy Computer Units & Buildings" 두 가지 조건을 동시에 만족시키는 것으로, 적의 공격을 막으며 자신만의 방어선과 공격로를 구축해야 한다. 맵은 전형적인 서바이벌 방식처럼 시간에 따라 점점 강해지는 컴퓨터 군대를 상대하며, 자원 관리가 중요한데, 미네랄과 가스는 제한된 지역에만 존재해 효율적인 채취와 빌드 순서가 승패를 좌우한다. 또한, 맵 설명에 있는 Modefy By: tbmtbm 문구에서 알 수 있듯, 수정된 버전이 존재하며, 업데이트를 통해 적의 스폰 패턴이나 건물 배치가 조정될 수 있다. 플레이 전에는 타이셋이 황혼인지 확인하고, 시작 위치가 균등하게 분배되었는지 observer해야 하며, 가능한 경우 동맹을 맺어 공동 방어 전략을 세우는 것이 생존 확률을 높인다. 이 맵은 서바이벌 장르를 좋아하는 유저와, 프로토스 특유의 강력한 유닛을 활용해 전략적인 전투를 즐기고 싶은 중급 이상 플레이어에게 적합하며, 단순 입구 막기나 타워 디펜스보다는 직접 유닛을 컨트롤하며 실시간으로 상황을 판단하는 플레이 스타일을 선호하는 이들에게 추천한다. Test of Protoss - Survival is a survival UMS map that uses the Twilight tileset on a 96x96 tile grid, allowing up to five players to participate. At the start, players are given Protoss units and buildings and must survive while destroying computer-controlled units and buildings scattered across the map. The main objectives are to simultaneously satisfy the "Stay Alive" and "Destroy Computer Units & Buildings" conditions, requiring players to fend off enemy attacks while constructing their own defensive lines and attack routes. Like typical survival maps, the computer forces grow stronger over time, making resource management crucial; minerals and gas are limited to specific areas, so efficient gathering and build order dictate victory or defeat. As noted in the map description’s "Modefy By: tbmtbm" line, a modified version exists, and updates may adjust enemy spawn patterns or building placements. Before playing, verify that the tileset is indeed Twilight, check that starting positions are evenly distributed, and, if possible, form alliances to establish a joint defense strategy that increases survivability. This map is suited for fans of the survival genre and intermediate-to-advanced players who want to enjoy strategic combat using Protoss’ powerful units; it is recommended for those who prefer directly controlling units and making real-time judgments over simple entrance blocking or tower defense styles.
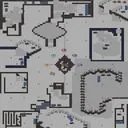
벽짓고 살아남기 어려움 베타 (Wall Building Survival Difficulty Beta)
벽짓고 살아남기 어려움 베타는 플랫폼 타일셋을 사용한 96x96 타일 단위의 넓은 맵에서 최대 8명이 동시에 플레이할 수 있는 서바이벌 유즈맵이다. 플레이어는 처음 주어지는 제한된 자원을 바탕으로 주기적으로 다가오는 적 파동에 대비해 벽과 방어 시설을 세워야 하며, 시간이 지날수록 적의 유형과 공격 강도가 증가한다. 핵심 메커니즘은 자원 채취, 벽 건설, 그리고 적의 경로를 차단하거나 유도하는 입구막기 방식이며, 이를 통해 생존 확률을 높이는 것이 목표이다. 지형은 대부분 평평하지만 몇 가지 높이 차이와 좁은 통로가 존재해 전략적인 배치가 중요하며, 잘못된 벽 위치는 금방 적의 돌파로를 내줄 수 있다. 게임은 정해진 라운드 없이 지속적으로 웨이브가 다가오므로 플레이어의 장기적인 자원 관리와 즉각적인 대응 능력이 승패를 좌우한다. 초보자에게는 난이도 상승이 가파르므로 초반에 벽 배치와 자원 우선순위를 익히는 것이 필요하며, 중간 이상의 실력을 가진 플레이어는 다양한 벽 조합과 함정 설치를 실험해볼 수 있다. 이 맵은 협력보다는 개인 생존에 초점을 맞추고 있으나, 동맹을 맺어 서로의 방어를 보완할 수도 있어 팀 플레이 옵션도 존재한다. 플레이 전에는 맵의 타일셋이 플랫폼이라는 점을 확인해 건물과 유닛의 이동에 제약이 적는지 살펴보고, 시작 자원 설정이 기본값인지 확인하는 것이 좋으며, 베타 버전인 만큼 일부 밸런스 조정이 앞으로 바뀔 수 있다는 점을 염두에 두어야 한다. Wall Building Survival Difficulty Beta is a survival UMS map that uses the platform tileset, featuring a large map with 96x96 tile units where up to eight players can play simultaneously. Players must use the limited resources given at the start to periodically build walls and defensive structures against incoming enemy waves, while enemy types and attack strength increase over time. The core mechanics involve resource gathering, wall construction, and blocking or guiding enemy paths through a entrance‑blocking style, with the goal of increasing survivability. The terrain is mostly flat but includes a few elevation changes and narrow passages, making strategic placement crucial; a poorly placed wall can quickly create a breach for the enemy. Since the game has no set rounds and waves continue indefinitely, long‑term resource management and quick reaction skills determine victory or defeat. Beginners will find the difficulty curve steep, so learning early wall placement and resource priorities is essential, while intermediate and above players can experiment with various wall combinations and trap installations. The map focuses on individual survival rather than cooperation, although forming alliances to reinforce each other’s defenses is possible, offering a team‑play option. Before playing, check that the tileset is platform to ensure buildings and units move with minimal restriction, verify that the starting resources are set to default, and keep in mind that as a beta version some balance adjustments may still change.
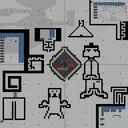
벽짓고 살아남기 (Wall Building Survival)
벽짓고 살아남기(新능력) 맵은 이름 그대로 벽을 건설하고 적의 공격을 버티며 살아남는 것을 목표로 하는 유즈맵이다. 맵 전체가 3072×3072 타일 기반 플랫폼 타일셋으로 구성되어 있어 넓은 평야와 산악 지형이 섞여 있다. 시작 지점 주변에 기본 자원 채취 구역이 배치돼 있으며, 플레이어는 초기 자원을 이용해 벽을 쌓아 방어선을 구축한다. 벽은 일정 시간마다 자동으로 회복되는 것으로 보이며, 적 유닛은 주기적으로 스폰되어 전방에서 몰려온다. 적의 종류와 스폰 위치는 맵 전역에 고르게 분포돼 있어, 어느 방향에서든 공격이 들어올 수 있다. 방어 전략은 단순히 벽을 늘어놓는 것보다, 자원을 효율적으로 관리해 방어 타워나 유닛을 추가 배치하는 것이 중요하다. 또한, 맵 중앙에는 고가의 자원 덩어리가 있어 위험을 감수하고 점령하면 게임 후반에 큰 이점을 얻을 수 있다. 플레이 전에는 자원 배치와 적 스폰 주기를 확인하고, 벽 건설 속도와 회복 속도를 고려해 방어 라인을 설계하는 것이 좋다. 초반에는 방어에 집중하고, 중반 이후에는 적의 공격 패턴을 파악해 반격 타이밍을 잡는 것이 승리의 열쇠가 된다. 혼자서도 7명의 플레이어가 동시에 참여할 수 있어, 친구와 협동하거나 혼자 도전해 볼 수 있다. 전반적으로 전략적 건설과 방어 관리가 핵심인 이 맵은 건설·방어를 즐기는 유저에게 특히 추천한다. Wall Building Survival (New Ability) map lives up to its title by focusing on constructing walls and enduring enemy assaults. The map spans a 3072×3072 grid using the platform tileset, featuring a mix of open plains and rugged hills. At the start area, basic resource nodes are placed, allowing players to spend early minerals on wall construction. Walls appear to regenerate over time, while enemy units spawn periodically from various points across the map, creating threats from multiple directions. Effective defense requires more than just extending walls; managing resources to add defensive towers or units is crucial. A high‑value resource cluster sits near the center, and capturing it despite the risk can provide a significant advantage in the late game. Before playing, check the resource locations and enemy spawn intervals, and design your wall layout considering construction and regeneration speeds. Early game should focus on solidifying defenses, while mid‑to‑late phases benefit from recognizing enemy attack patterns and timing counter‑attacks. The map supports up to seven players simultaneously, making it suitable for solo challenges or cooperative play with friends. Overall, this map emphasizes strategic building and defense management, and is especially recommended for players who enjoy construction‑based gameplay.
Guía de selección de mapas
태그는 맵의 핵심 특징을 빠르게 설명하지만 제작 버전마다 규칙이 다를 수 있습니다. 상세 설명에서 권장 인원, 난이도, 플레이 시간과 버전을 함께 확인한 뒤 다운로드하세요.