StarCraft HUZY Comunidad de descarga de mapas y mapas personalizados de StarCraft
Español

Colección de mapas de StarCraft 벽 디펜스

Hemos reunido mapas registrados con la etiqueta '벽 디펜스'. Compara los mapas populares y los más recientes centrándote en el estilo de juego, la dificultad y las características que son difíciles de encontrar solo por género.

Mapas registrados
1unidades
Descargas acumuladas
0
Vistas acumuladas
58

Mapas populares

Este es un mapa con alta tasa de descargas y visitas.

Ver todo
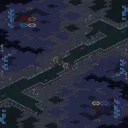
Vista previa del mapa [UED] The Wall (더 월)

[UED] The Wall (더 월)

스타크래프트 브루드워의 유즈맵 《[UED] The Wall》은 밀리 기반의 맵이지만, 그 이름처럼 거대한 벽을 사이에 두고 벌어지는 독특한 대결 구조를 지닌 맵입니다. 맵 중앙을 가로지르는 거대한 벽이 양 진영을 분리하고 있으며, 이 벽은 일방 통행이 가능한 좁은 통로 여러 개로만 통과할 수 있어 전략적인 대결을 유도합니다. 벽 너머에서 상대방의 기지를 확인할 수 있지만, 직접 공격할 수 있는 길은 제한되어 있어 견제와 확장의 중요성이 부각됩니다. 벽의 좁은 통로를 통제하는 플레이어는 상대방의 자원 채취와 expansion을 방해할 수 있으며, 반대로 통로를 잘 방어하지 못하면 일방적으로 밀리는 상황이 발생할 수 있습니다. 이 맵은 8명의 플레이어가 1대 1로 대결하는 구조를 기본으로 하며, 벽을 사이에 두고 벌어지는 견제와 방어, expansion 싸움으로 긴장감을 유지합니다. 벽의 통로를 두고 벌어지는 스나이핑이나 러시, 그리고 빠른 멀티 테스팅 등이 주요 전략 포인트입니다. 또한, 벽 너머의 시야를 확보하기 위해 오버로드나 스캔을 적극 활용하는 것이 관건이며, 통로의 좁은 지형 덕분에 치고 빠지기 전술이나 방어 타워의 효율성이 매우 높아집니다. 맵의 중앙 통로가 좁고 길게 뻗어 있어 테란의 벙커링이나 프로토스의 포톤 캐논 방어망 구축이 용이하다는 점도 특징입니다. 《[UED] The Wall》은 밀리 기반의 맵이지만, 벽을 사이에 둔 독특한 구조로 인해 밀리만의 전략과 유즈맵만의 재미를 동시에 느낄 수 있는 작품입니다. 벽의 통로를 두고 벌어지는 심리전과Resource Management가 핵심이므로, 좁은 길목에서의 싸움에 익숙한 플레이어라면 더욱 즐겁게 플레이할 수 있을 것입니다. 또한, 벽 너머의 시야 싸움과 빠른 판단이 요구되므로, 단순히 자원과 병력만 모으는 것이 아니라 적절한 타이밍에 공격을 감행하거나 방어를 굳히는 전략적 선택이 중요합니다. 벽을 넘는 것이 쉽지 않은 만큼, 초보보다는 어느 정도 경험이 있는 플레이어에게 더욱 추천할 수 있는 맵입니다. StarCraft: Brood War's custom map *<UED> The Wall>* is a melee-based map, but as its name suggests, it features a unique battle structure centered around a massive wall that divides the two sides. A giant wall runs through the center of the map, separating both bases, and the only way to pass through is via several narrow one-way passages, forcing strategic confrontations. While players can see the enemy base beyond the wall, direct attacks are limited, emphasizing the importance of harassment and expansion. Controlling the narrow passages allows players to disrupt enemy resource gathering and expansions, while failing to defend them can lead to one-sided defeats. The map is primarily designed for eight players battling in 1v1 matches, maintaining tension through wall-based harassment, defense, and expansion struggles. Key strategic points include sniping, rushes, and rapid multi-base testing through the wall’s passages. Securing vision beyond the wall using Overlords or scans is crucial, and the narrow terrain makes hit-and-run tactics or defensive towers highly effective. The map’s long, narrow central pathways also make it easy for Terran to deploy bunker rushes or for Protoss to establish photon cannon defenses. Though *<UED> The Wall>* is a melee-based map, its unique wall structure blends traditional melee strategies with custom map-specific fun. The core of the gameplay revolves around psychological warfare and resource management through the wall’s passages, making it especially enjoyable for players familiar with narrow-path combat. Beyond just gathering resources and amassing forces, success requires quick decision-making—knowing when to attack or when to fortify defenses. Since crossing the wall isn’t easy, this map is better suited for players with some experience rather than beginners.

Descargar 0 · Vistas 58 · Comentarios 0

Mapas registrados recientemente

Consulta los archivos y versiones recién añadidos.

Vista previa del mapa [UED] The Wall (더 월)

[UED] The Wall (더 월)

스타크래프트 브루드워의 유즈맵 《[UED] The Wall》은 밀리 기반의 맵이지만, 그 이름처럼 거대한 벽을 사이에 두고 벌어지는 독특한 대결 구조를 지닌 맵입니다. 맵 중앙을 가로지르는 거대한 벽이 양 진영을 분리하고 있으며, 이 벽은 일방 통행이 가능한 좁은 통로 여러 개로만 통과할 수 있어 전략적인 대결을 유도합니다. 벽 너머에서 상대방의 기지를 확인할 수 있지만, 직접 공격할 수 있는 길은 제한되어 있어 견제와 확장의 중요성이 부각됩니다. 벽의 좁은 통로를 통제하는 플레이어는 상대방의 자원 채취와 expansion을 방해할 수 있으며, 반대로 통로를 잘 방어하지 못하면 일방적으로 밀리는 상황이 발생할 수 있습니다. 이 맵은 8명의 플레이어가 1대 1로 대결하는 구조를 기본으로 하며, 벽을 사이에 두고 벌어지는 견제와 방어, expansion 싸움으로 긴장감을 유지합니다. 벽의 통로를 두고 벌어지는 스나이핑이나 러시, 그리고 빠른 멀티 테스팅 등이 주요 전략 포인트입니다. 또한, 벽 너머의 시야를 확보하기 위해 오버로드나 스캔을 적극 활용하는 것이 관건이며, 통로의 좁은 지형 덕분에 치고 빠지기 전술이나 방어 타워의 효율성이 매우 높아집니다. 맵의 중앙 통로가 좁고 길게 뻗어 있어 테란의 벙커링이나 프로토스의 포톤 캐논 방어망 구축이 용이하다는 점도 특징입니다. 《[UED] The Wall》은 밀리 기반의 맵이지만, 벽을 사이에 둔 독특한 구조로 인해 밀리만의 전략과 유즈맵만의 재미를 동시에 느낄 수 있는 작품입니다. 벽의 통로를 두고 벌어지는 심리전과Resource Management가 핵심이므로, 좁은 길목에서의 싸움에 익숙한 플레이어라면 더욱 즐겁게 플레이할 수 있을 것입니다. 또한, 벽 너머의 시야 싸움과 빠른 판단이 요구되므로, 단순히 자원과 병력만 모으는 것이 아니라 적절한 타이밍에 공격을 감행하거나 방어를 굳히는 전략적 선택이 중요합니다. 벽을 넘는 것이 쉽지 않은 만큼, 초보보다는 어느 정도 경험이 있는 플레이어에게 더욱 추천할 수 있는 맵입니다. StarCraft: Brood War's custom map *<UED> The Wall>* is a melee-based map, but as its name suggests, it features a unique battle structure centered around a massive wall that divides the two sides. A giant wall runs through the center of the map, separating both bases, and the only way to pass through is via several narrow one-way passages, forcing strategic confrontations. While players can see the enemy base beyond the wall, direct attacks are limited, emphasizing the importance of harassment and expansion. Controlling the narrow passages allows players to disrupt enemy resource gathering and expansions, while failing to defend them can lead to one-sided defeats. The map is primarily designed for eight players battling in 1v1 matches, maintaining tension through wall-based harassment, defense, and expansion struggles. Key strategic points include sniping, rushes, and rapid multi-base testing through the wall’s passages. Securing vision beyond the wall using Overlords or scans is crucial, and the narrow terrain makes hit-and-run tactics or defensive towers highly effective. The map’s long, narrow central pathways also make it easy for Terran to deploy bunker rushes or for Protoss to establish photon cannon defenses. Though *<UED> The Wall>* is a melee-based map, its unique wall structure blends traditional melee strategies with custom map-specific fun. The core of the gameplay revolves around psychological warfare and resource management through the wall’s passages, making it especially enjoyable for players familiar with narrow-path combat. Beyond just gathering resources and amassing forces, success requires quick decision-making—knowing when to attack or when to fortify defenses. Since crossing the wall isn’t easy, this map is better suited for players with some experience rather than beginners.

Descargar 0 · Vistas 58 · Comentarios 0
Guía de selección de mapas

태그는 맵의 핵심 특징을 빠르게 설명하지만 제작 버전마다 규칙이 다를 수 있습니다. 상세 설명에서 권장 인원, 난이도, 플레이 시간과 버전을 함께 확인한 뒤 다운로드하세요.