
Colección de mapas de StarCraft 다중 웨이브
Hemos reunido mapas registrados con la etiqueta '다중 웨이브'. Compara los mapas populares y los más recientes centrándote en el estilo de juego, la dificultad y las características que son difíciles de encontrar solo por género.
- Mapas registrados
- 2unidades
- Descargas acumuladas
- 0
- Vistas acumuladas
- 130
Mapas populares
Este es un mapa con alta tasa de descargas y visitas.
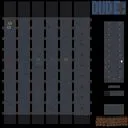
선킨 디펜스 (Sunken Defence)
스타크래프트 브루드워의 -=SUNKEN DEFENCE=-는 서바이벌 장르의 유즈맵으로, 플레이어들이 끊임없이 밀려오는 적 웨이브를 방어하며 생존을 도모하는 구조로 설계되어 있다. 맵은 넓은 바다와 섬으로 구성된 독특한 지형을 자랑하며, 중앙의 요새나據點을 중심으로 적의 공격로를 차단하는 것이 주요 목표로 보인다. 내부 맵 설명에 '5 Players 6 Rows 19 Heros'라는 문구가 포함되어 있어, 5명의 플레이어가 각기 다른 영웅을 조종하며 6줄의 적 웨이브를 상대하는 방식인 것으로 추정된다. 맵 좌측 하단에는 '1 Chance of survival'이라는 문구가 있어, 한 번의 실수가 치명적인 결과를 초래할 수 있는 긴장감을 강조하고 있다. 맵의 특징은 광활한 바다와 섬의 조합으로, 플레이어는 섬에 위치한據點에서 적을 방어하면서 동시에 바다를 활용한 전략적 움직임을展開할 수 있다. 적 웨이브는 맵 우측에서 좌측으로 밀려오며, 각 웨이브마다 19명의 영웅 유닛이 포함되어 있는 것으로 보이며, 이들은 점차 강화되는 패턴을 가질 것으로 예상된다. 맵 우측 상단에는 'Do You have what it takes?'라는 문구가 있어, 플레이어의 숙련도와 전략적 선택이 생존을 좌우한다는 점을 강조하고 있다.Centreal据點 외에도 맵 곳곳에 추가據點이나 보급 거점이 배치되어 있어, 자원의 확보와 전략적 우위를 점하기 위한 포인트로 활용될 수 있다. 이 맵은 특히 팀워크와 실시간 전략이 요구되는 서바이벌 장르의 특성을 잘 반영하고 있으며, 영웅의 조합과 배치,據點의 방어 전략 등이 승패를 가를 것으로 보인다. 초보자보다는 적절한 경험과 전략적 사고를 갖춘 플레이어에게 더 적합할 것으로 예상되며, 한 번의 실수가 모든 것을 좌우할 수 있는 긴장감 넘치는 플레이가 특징이다. 맵의 디자인과 구조는 단순히 적을 막는 것뿐만 아니라, 바다와 섬의 지형을 활용한 기동전과據點 방어의 균형을 맞추는 데 중점을 두고 있는 것으로 보인다. This StarCraft: Brood War custom map, -=SUNKEN DEFENCE=-, falls under the survival genre, challenging players to defend against relentless enemy waves in a uniquely designed underwater and island terrain. The map features a vast ocean interspersed with small islands, where players must fortify central strongholds to repel incoming enemy units. The internal map description mentions '5 Players 6 Rows 19 Heros,' suggesting a gameplay loop where five players control distinct hero units to withstand six progressively difficult enemy waves, each comprising 19 units. The map's layout emphasizes strategic positioning, with players stationed on islands to defend key locations while leveraging the ocean's open spaces for mobility and tactical maneuvering. Enemy waves approach from the right side of the map, moving leftward, and are expected to escalate in difficulty with each successive row. The phrase '1 Chance of survival' in the description underscores the map's punishing difficulty, where a single mistake can lead to defeat. Additionally, scattered supply points and secondary strongholds across the map allow players to gather resources and secure strategic advantages. SUNKEN DEFENCE is tailored for players who enjoy high-stakes survival gameplay, requiring strong teamwork, quick decision-making, and adaptive strategies. The balance between hero unit coordination, stronghold defense, and terrain utilization is crucial for success. While the map's design encourages both defensive and mobile playstyles, its steep learning curve makes it more suited for experienced players. The interplay between the ocean's vastness and the confined islands creates a dynamic battlefield where every choice matters, ensuring a tense and engaging experience for those who dare to take on the challenge.
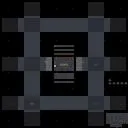
마린 디펜스 10웨이 V9.0 (Marine Defense 10-Way V9.0)
‘마린 디펜스 10웨이 V9.0’은 스타크래프트 브루드워의 대표적인 다중 웨이브 디펜스 유즈맵으로, 10단계에 걸친 끊임없는 적의 공격을 방어해 내는 것이 주된 목표다. 맵 중앙의 넥서스 주변에는 방어 건물을 배치할 수 있는 공간이 넓게 확보되어 있으며, 미네랄과 가스가 풍부하게 배치되어 있어 테란의 경우 보급고와 병영, 포병사령부 등을 통한 방어 라인을 구축할 수 있다. 프로토스 플레이어는 광전사나 집정관, 용기병 등으로 초반을 버틴 뒤, 뒤늦게 차원 관문을 활용한 사이오닉 스톰과 보호막 회복을 통해 역전할 기회를 노릴 수 있으며, 저그 플레이어는 초반 저글링 러시나 뮤탈리스크 테크를 통해 빠르게 공격을 시도하거나, 가디언을 앞세운 후반 방어 전략을 펼칠 수 있다. 맵의 특징은 10단계의 웨이브마다 적의 조합과 공격 패턴이 조금씩 변한다는 점인데, 초반에는 저글링과 히드라, 중반에는 뮤탈과 럴커, 후반에는 울트라리스크와 브루들링이 등장하는 등 단계별로 전략을 다르게 세워야 한다. 또한 맵의 가장자리에는 수송선이나 셔틀을 통한 기습 공격도 빈번히 발생하므로, 센터뿐만 아니라 사이드에도 방어 건물을 배치하는 것이 중요하다. 전체적으로 맵의 밸런스는 초보부터 숙련자까지 즐길 수 있도록 구성되어 있지만, 후반 웨이브로 갈수록 난이도가 급격히 상승하므로 꾸준한Micro 관리와 자원 운용이 필수적이다. 특히 다중 플레이어 모드에서 팀워크가 중요해지며, 각 플레이어의 역할 분담과 실시간 커뮤니케이션이 승패를 좌우할 수 있다. 이 맵을 처음 플레이하는 유저는 초보 단계의 웨이브에서 빌드와 방어 라인 구축을 연습한 뒤, 점차 난이도를 높여가며 숙련도를 높이는 것이 좋다. 맵의 길이는 길지만 한 번의 플레이로 끝나는 것이 아니라, 계속해서 웨이브를 돌파하며 자신의 전략을 개선할 수 있는 점이 장기적인 재미를 준다. 또한, 맵 에디터가 제공하는 다양한 버전과 편집 버전(예: V4.200, V10 등)을 비교해 보며 자신에게 맞는 스타일을 찾는 것도 흥미로운 방법이다. 이 맵은 다중 웨이브 디펜스를 즐기고 싶거나, 스타크래프트의 전략적 깊이를 경험하고 싶은 플레이어에게 강력히 추천한다. ‘Marine Defense 10-Way V9.0’ is a classic multi-wave defense custom map in *StarCraft: Brood War*, where the main objective is to withstand ten relentless waves of enemy attacks. The map features a spacious area around the central Nexus where players can construct defensive buildings, and it’s richly supplied with minerals and gas, allowing Terran players to build supply depots, barracks, and artillery command centers to fortify their defenses. Protoss players can hold out with zealots, archons, or dragoons early on and later leverage warp gates for psionic storms and shield batteries to turn the tide, while Zerg players can rush with zerglings or mutalisks in the early waves or shift to a late-game guardian-based defensive strategy. What sets this map apart is that each of the ten waves introduces slightly different enemy compositions and attack patterns—early waves feature zerglings and hydralisks, mid-game waves include mutalisks and lurkers, and late waves escalate with ultralisks and broodlings—requiring players to adapt their strategies accordingly. Additionally, the map’s edges frequently see ambushes via transports or shuttles, so placing defensive structures not just at the center but also along the sides is crucial. While the map’s balance caters to players of all skill levels, the difficulty ramps up sharply in later waves, making consistent micro-management and resource allocation essential. In multiplayer mode, teamwork becomes vital, as individual roles, coordination, and real-time communication can determine victory or defeat. New players are advised to start with the easier early waves to practice build orders and defensive setups before gradually increasing the challenge to hone their skills. Though the matches are lengthy, the ability to replay and refine strategies across multiple runs adds long-term replay value. Experimenting with different versions or editor variants (e.g., V4.200, V10) can also help players discover their preferred playstyle. This map is highly recommended for those seeking a multi-wave defense experience or aiming to explore the strategic depth of *StarCraft*.
Mapas registrados recientemente
Consulta los archivos y versiones recién añadidos.
선킨 디펜스 (Sunken Defence)
스타크래프트 브루드워의 -=SUNKEN DEFENCE=-는 서바이벌 장르의 유즈맵으로, 플레이어들이 끊임없이 밀려오는 적 웨이브를 방어하며 생존을 도모하는 구조로 설계되어 있다. 맵은 넓은 바다와 섬으로 구성된 독특한 지형을 자랑하며, 중앙의 요새나據點을 중심으로 적의 공격로를 차단하는 것이 주요 목표로 보인다. 내부 맵 설명에 '5 Players 6 Rows 19 Heros'라는 문구가 포함되어 있어, 5명의 플레이어가 각기 다른 영웅을 조종하며 6줄의 적 웨이브를 상대하는 방식인 것으로 추정된다. 맵 좌측 하단에는 '1 Chance of survival'이라는 문구가 있어, 한 번의 실수가 치명적인 결과를 초래할 수 있는 긴장감을 강조하고 있다. 맵의 특징은 광활한 바다와 섬의 조합으로, 플레이어는 섬에 위치한據點에서 적을 방어하면서 동시에 바다를 활용한 전략적 움직임을展開할 수 있다. 적 웨이브는 맵 우측에서 좌측으로 밀려오며, 각 웨이브마다 19명의 영웅 유닛이 포함되어 있는 것으로 보이며, 이들은 점차 강화되는 패턴을 가질 것으로 예상된다. 맵 우측 상단에는 'Do You have what it takes?'라는 문구가 있어, 플레이어의 숙련도와 전략적 선택이 생존을 좌우한다는 점을 강조하고 있다.Centreal据點 외에도 맵 곳곳에 추가據點이나 보급 거점이 배치되어 있어, 자원의 확보와 전략적 우위를 점하기 위한 포인트로 활용될 수 있다. 이 맵은 특히 팀워크와 실시간 전략이 요구되는 서바이벌 장르의 특성을 잘 반영하고 있으며, 영웅의 조합과 배치,據點의 방어 전략 등이 승패를 가를 것으로 보인다. 초보자보다는 적절한 경험과 전략적 사고를 갖춘 플레이어에게 더 적합할 것으로 예상되며, 한 번의 실수가 모든 것을 좌우할 수 있는 긴장감 넘치는 플레이가 특징이다. 맵의 디자인과 구조는 단순히 적을 막는 것뿐만 아니라, 바다와 섬의 지형을 활용한 기동전과據點 방어의 균형을 맞추는 데 중점을 두고 있는 것으로 보인다. This StarCraft: Brood War custom map, -=SUNKEN DEFENCE=-, falls under the survival genre, challenging players to defend against relentless enemy waves in a uniquely designed underwater and island terrain. The map features a vast ocean interspersed with small islands, where players must fortify central strongholds to repel incoming enemy units. The internal map description mentions '5 Players 6 Rows 19 Heros,' suggesting a gameplay loop where five players control distinct hero units to withstand six progressively difficult enemy waves, each comprising 19 units. The map's layout emphasizes strategic positioning, with players stationed on islands to defend key locations while leveraging the ocean's open spaces for mobility and tactical maneuvering. Enemy waves approach from the right side of the map, moving leftward, and are expected to escalate in difficulty with each successive row. The phrase '1 Chance of survival' in the description underscores the map's punishing difficulty, where a single mistake can lead to defeat. Additionally, scattered supply points and secondary strongholds across the map allow players to gather resources and secure strategic advantages. SUNKEN DEFENCE is tailored for players who enjoy high-stakes survival gameplay, requiring strong teamwork, quick decision-making, and adaptive strategies. The balance between hero unit coordination, stronghold defense, and terrain utilization is crucial for success. While the map's design encourages both defensive and mobile playstyles, its steep learning curve makes it more suited for experienced players. The interplay between the ocean's vastness and the confined islands creates a dynamic battlefield where every choice matters, ensuring a tense and engaging experience for those who dare to take on the challenge.
마린 디펜스 10웨이 V9.0 (Marine Defense 10-Way V9.0)
‘마린 디펜스 10웨이 V9.0’은 스타크래프트 브루드워의 대표적인 다중 웨이브 디펜스 유즈맵으로, 10단계에 걸친 끊임없는 적의 공격을 방어해 내는 것이 주된 목표다. 맵 중앙의 넥서스 주변에는 방어 건물을 배치할 수 있는 공간이 넓게 확보되어 있으며, 미네랄과 가스가 풍부하게 배치되어 있어 테란의 경우 보급고와 병영, 포병사령부 등을 통한 방어 라인을 구축할 수 있다. 프로토스 플레이어는 광전사나 집정관, 용기병 등으로 초반을 버틴 뒤, 뒤늦게 차원 관문을 활용한 사이오닉 스톰과 보호막 회복을 통해 역전할 기회를 노릴 수 있으며, 저그 플레이어는 초반 저글링 러시나 뮤탈리스크 테크를 통해 빠르게 공격을 시도하거나, 가디언을 앞세운 후반 방어 전략을 펼칠 수 있다. 맵의 특징은 10단계의 웨이브마다 적의 조합과 공격 패턴이 조금씩 변한다는 점인데, 초반에는 저글링과 히드라, 중반에는 뮤탈과 럴커, 후반에는 울트라리스크와 브루들링이 등장하는 등 단계별로 전략을 다르게 세워야 한다. 또한 맵의 가장자리에는 수송선이나 셔틀을 통한 기습 공격도 빈번히 발생하므로, 센터뿐만 아니라 사이드에도 방어 건물을 배치하는 것이 중요하다. 전체적으로 맵의 밸런스는 초보부터 숙련자까지 즐길 수 있도록 구성되어 있지만, 후반 웨이브로 갈수록 난이도가 급격히 상승하므로 꾸준한Micro 관리와 자원 운용이 필수적이다. 특히 다중 플레이어 모드에서 팀워크가 중요해지며, 각 플레이어의 역할 분담과 실시간 커뮤니케이션이 승패를 좌우할 수 있다. 이 맵을 처음 플레이하는 유저는 초보 단계의 웨이브에서 빌드와 방어 라인 구축을 연습한 뒤, 점차 난이도를 높여가며 숙련도를 높이는 것이 좋다. 맵의 길이는 길지만 한 번의 플레이로 끝나는 것이 아니라, 계속해서 웨이브를 돌파하며 자신의 전략을 개선할 수 있는 점이 장기적인 재미를 준다. 또한, 맵 에디터가 제공하는 다양한 버전과 편집 버전(예: V4.200, V10 등)을 비교해 보며 자신에게 맞는 스타일을 찾는 것도 흥미로운 방법이다. 이 맵은 다중 웨이브 디펜스를 즐기고 싶거나, 스타크래프트의 전략적 깊이를 경험하고 싶은 플레이어에게 강력히 추천한다. ‘Marine Defense 10-Way V9.0’ is a classic multi-wave defense custom map in *StarCraft: Brood War*, where the main objective is to withstand ten relentless waves of enemy attacks. The map features a spacious area around the central Nexus where players can construct defensive buildings, and it’s richly supplied with minerals and gas, allowing Terran players to build supply depots, barracks, and artillery command centers to fortify their defenses. Protoss players can hold out with zealots, archons, or dragoons early on and later leverage warp gates for psionic storms and shield batteries to turn the tide, while Zerg players can rush with zerglings or mutalisks in the early waves or shift to a late-game guardian-based defensive strategy. What sets this map apart is that each of the ten waves introduces slightly different enemy compositions and attack patterns—early waves feature zerglings and hydralisks, mid-game waves include mutalisks and lurkers, and late waves escalate with ultralisks and broodlings—requiring players to adapt their strategies accordingly. Additionally, the map’s edges frequently see ambushes via transports or shuttles, so placing defensive structures not just at the center but also along the sides is crucial. While the map’s balance caters to players of all skill levels, the difficulty ramps up sharply in later waves, making consistent micro-management and resource allocation essential. In multiplayer mode, teamwork becomes vital, as individual roles, coordination, and real-time communication can determine victory or defeat. New players are advised to start with the easier early waves to practice build orders and defensive setups before gradually increasing the challenge to hone their skills. Though the matches are lengthy, the ability to replay and refine strategies across multiple runs adds long-term replay value. Experimenting with different versions or editor variants (e.g., V4.200, V10) can also help players discover their preferred playstyle. This map is highly recommended for those seeking a multi-wave defense experience or aiming to explore the strategic depth of *StarCraft*.
Guía de selección de mapas
태그는 맵의 핵심 특징을 빠르게 설명하지만 제작 버전마다 규칙이 다를 수 있습니다. 상세 설명에서 권장 인원, 난이도, 플레이 시간과 버전을 함께 확인한 뒤 다운로드하세요.