
Colección de mapas de StarCraft 골렘 파괴
Hemos reunido mapas registrados con la etiqueta '골렘 파괴'. Compara los mapas populares y los más recientes centrándote en el estilo de juego, la dificultad y las características que son difíciles de encontrar solo por género.
- Mapas registrados
- 2unidades
- Descargas acumuladas
- 0
- Vistas acumuladas
- 85
Mapas populares
Este es un mapa con alta tasa de descargas y visitas.
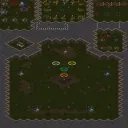
골렘 레벨레이션 v9.1 (Golem Revelation v9.1)
스타크래프트 브루드워의 유즈맵 <골렘 레벨레이션>은 골렘을 파괴하고 공장을 점령하는 전략적 디펜스 장르의 맵으로, 플레이어는 다섯 명의 팀으로 나뉘어 적의 골렘과 골렘 공장을 제거하는 동시에 자신의 골렘을 성장시켜야 한다. 맵은 중앙에 넓은 평지가 펼쳐져 있으며, 네 개의 구석과 중앙에 골렘 공장이 배치되어 있어 공격과 방어의 균형을 맞춰야 한다. 골렘은 일정 시간마다 생성되며, 이를 파괴하지 않으면 적의 골렘이 점점 강해지므로 신속한 대응이 필수다. 플레이어는 골렘을 조종할 수 있으며, 골렘의 체력과 공격력을 업그레이드할 수 있는 시스템이 보인다. 또한, 골렘 공장을 점령하면 추가적인 골렘을 생산할 수 있어 전략의 깊이를 더한다. 맵의 지형은 사막 테마로 디자인되어 있으며, 넓은 개활지뿐만 아니라 곳곳에 바위와 오아시스가 배치되어 골렘의 이동을 방해할 수 있다. 초보자와 숙련자 모두 즐길 수 있는 균형 잡힌 난이도를 제공하며, 팀워크와 빠른 판단력이 승리의 열쇠가 된다. 특히 골렘의 체력 관리와 공장 점령 타이밍을 잘못 잡으면 순식간에 밀릴 수 있어 신중한 플레이가 요구된다. 추천 대상은 디펜스와 전략적 플레이를 좋아하는 유저이며, 특히 팀플레이에 익숙한 플레이어에게 적합하다. 게임을 시작하기 전, 골렘의 업그레이드 경로와 공장 점령의 우선순위를 미리 숙지하는 것이 중요하다. 또한, 골렘의 이동 경로를 미리 파악하여 방어선을 구축하는 것이 승리의 핵심이다. 맵의 균형 잡힌 디자인과 명확한 목표 설정은 플레이어에게 몰입감을 선사하며, 여러 번 플레이해 볼수록 전략적 깊이를 느낄 수 있는佳作이다. 이 맵은 유즈맵 커뮤니티에서도 오랜 인기를 구가한 작품으로, 꾸준한 업데이트와 밸런스 조정을 통해 완성도를 높여왔다는 특징이 있다. The *Golem Revelation* custom map in *StarCraft: Brood War* is a strategic defense game where players, divided into five teams, must destroy enemy golems and their factories while growing their own golems. The map features a central open area with golems spawning every set interval; failing to destroy them allows the enemy’s golems to grow stronger, making quick responses essential. Players can control golems and upgrade their health and attack power, while capturing golems’ factories enables the production of additional units, adding depth to strategy. The desert-themed terrain includes wide open spaces, scattered rocks, and oases that disrupt movement, requiring careful positioning. The balanced difficulty suits both beginners and veterans, rewarding teamwork and swift decision-making. Mismanaging golems’ health or misjudging factory capture timing can lead to sudden losses, demanding cautious play. The map is ideal for those who enjoy defense and strategy, especially players comfortable with team play. Before starting, it’s crucial to understand upgrade paths and factory priorities, as preemptively securing movement routes and establishing defenses are key to victory. Its well-balanced design and clear objectives immerse players, revealing deeper strategies with repeated plays. A long-standing favorite in the custom map community, *Golem Revelation* has maintained popularity through consistent updates and balance adjustments to refine its quality.
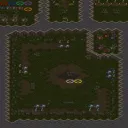
골렘 매드니스: 매스 어택 (Golem Madness: Mass Attack)
‘골렘 매드니스: 매스 어택(Golem Madness: Mass Attack)’은 스타크래프트: 브루드워의 유즈맵으로, 거대한 골렘을 조종하며 적의 건물을 파괴하고 방어선을 구축하는 흥미로운 전략 디펜스 장르의 맵이다. 맵의 전체적인 구조는 사막 지형을 바탕으로 펼쳐지며, 중앙에 위치한 거대한 골렘이 주요 전투의 중심점 역할을 한다. 골렘은 맵 곳곳에 흩어져 있는 자원이나 건물을 파괴할 수 있으며, 플레이어는 이를 조종하거나 방어하는 데 집중하게 된다. 골렘의 체력 관리와 자원 확보가 핵심 전략으로, 골렘을 잃으면 게임의 흐름이 급격히 기울 수 있으므로 신중한 판단이 요구된다. 플레이 방식은 주로 컴퓨터를 상대하는 싱글 플레이 또는 다인 플레이로 구성되며, 맵의 중앙 지역을 중심으로 한 전투가 주를 이룬다. 골렘의 파괴력과 유지력이 게임의 승패를 좌우하기 때문에, 골렘의 체력을 회복시키거나 강화할 수 있는 요소가 맵 곳곳에 배치되어 있는 것으로 추정된다. 또한, 골렘을 보호하거나 적의 공격을 방어하기 위한 건물을 건설할 수 있는 구조물도 존재하는데, 이러한 요소들이 조화를 이루어 전체적인 전략적 깊이를 더한다. 맵의 분위기는 판타지 테마와 결합된 디펜스 장르로, 골렘의 강력함과 전략적 요소가 어우러져 플레이어에게 긴장감을 제공한다. 이 맵은 비교적 초보자보다는 중급 이상의 플레이어에게 더 적합한데, 골렘의 관리와 자원 활용에 대한 이해가 필요하기 때문이다. 또한, 팀 플레이보다는 혼자서 또는 소규모 팀으로 플레이하는 것이 효과적일 것으로 보인다. 맵의 난이도는 골렘의 체력과 공격 패턴에 따라 달라질 수 있으며, 골렘의 파괴력을 최대한 활용할 수 있는 플레이어라면 높은 난이도에서도 좋은 성과를 낼 수 있을 것이다. 플레이 전에는 골렘의 위치와 맵의 주요 구조물을 미리 확인하고, 골렘의 체력 관리와 자원 확보 방법을 숙지하는 것이 중요하다. 또한, 적의 공격 패턴을 분석하여 골렘을 보호할 수 있는 방어 전략을 세우는 것이 게임의 성공을 좌우할 것이다. 맵의 디자인과 전략적 요소들이 어우러져 있는 만큼, 반복 플레이를 통해 더욱 깊은 전략을 발견할 수 있을 것이다. ‘Golem Madness: Mass Attack’ is a *StarCraft: Brood War* custom map where players control a massive golem to destroy enemy buildings and fortify defenses in an engaging strategy defense genre. The map unfolds across a desert terrain, with a colossal golem at the center serving as the focal point of combat. The golem can smash scattered resources and structures throughout the map, and players must focus on either controlling or defending it. Managing the golem’s health and securing resources are key strategies, as losing the golem can quickly swing the game’s momentum, demanding careful decision-making. The gameplay primarily involves single-player or multiplayer matches against AI or other players, with most battles centered around the central area. The golem’s destructive power and durability determine victory or defeat, so various recovery and enhancement elements are likely scattered across the map. Players can also construct buildings to protect the golem or defend against enemy attacks, adding strategic depth to the experience. The map blends a fantasy theme with defense mechanics, creating tension through the golem’s raw strength and tactical elements. This map is better suited for intermediate to advanced players, as it requires a solid grasp of golem management and resource utilization. Solo or small-team play tends to be more effective than large-scale team battles. The difficulty fluctuates based on the golem’s health and attack patterns, but skilled players who maximize its potential can excel even in high-difficulty scenarios. Before playing, it’s crucial to familiarize yourself with the golem’s location and key map structures, as well as mastering health management and resource collection. Analyzing enemy attack patterns to devise protective strategies will also be vital for success. With its well-designed mechanics and strategic depth, repeated playthroughs will reveal even deeper layers of gameplay.
Mapas registrados recientemente
Consulta los archivos y versiones recién añadidos.
골렘 레벨레이션 v9.1 (Golem Revelation v9.1)
스타크래프트 브루드워의 유즈맵 <골렘 레벨레이션>은 골렘을 파괴하고 공장을 점령하는 전략적 디펜스 장르의 맵으로, 플레이어는 다섯 명의 팀으로 나뉘어 적의 골렘과 골렘 공장을 제거하는 동시에 자신의 골렘을 성장시켜야 한다. 맵은 중앙에 넓은 평지가 펼쳐져 있으며, 네 개의 구석과 중앙에 골렘 공장이 배치되어 있어 공격과 방어의 균형을 맞춰야 한다. 골렘은 일정 시간마다 생성되며, 이를 파괴하지 않으면 적의 골렘이 점점 강해지므로 신속한 대응이 필수다. 플레이어는 골렘을 조종할 수 있으며, 골렘의 체력과 공격력을 업그레이드할 수 있는 시스템이 보인다. 또한, 골렘 공장을 점령하면 추가적인 골렘을 생산할 수 있어 전략의 깊이를 더한다. 맵의 지형은 사막 테마로 디자인되어 있으며, 넓은 개활지뿐만 아니라 곳곳에 바위와 오아시스가 배치되어 골렘의 이동을 방해할 수 있다. 초보자와 숙련자 모두 즐길 수 있는 균형 잡힌 난이도를 제공하며, 팀워크와 빠른 판단력이 승리의 열쇠가 된다. 특히 골렘의 체력 관리와 공장 점령 타이밍을 잘못 잡으면 순식간에 밀릴 수 있어 신중한 플레이가 요구된다. 추천 대상은 디펜스와 전략적 플레이를 좋아하는 유저이며, 특히 팀플레이에 익숙한 플레이어에게 적합하다. 게임을 시작하기 전, 골렘의 업그레이드 경로와 공장 점령의 우선순위를 미리 숙지하는 것이 중요하다. 또한, 골렘의 이동 경로를 미리 파악하여 방어선을 구축하는 것이 승리의 핵심이다. 맵의 균형 잡힌 디자인과 명확한 목표 설정은 플레이어에게 몰입감을 선사하며, 여러 번 플레이해 볼수록 전략적 깊이를 느낄 수 있는佳作이다. 이 맵은 유즈맵 커뮤니티에서도 오랜 인기를 구가한 작품으로, 꾸준한 업데이트와 밸런스 조정을 통해 완성도를 높여왔다는 특징이 있다. The *Golem Revelation* custom map in *StarCraft: Brood War* is a strategic defense game where players, divided into five teams, must destroy enemy golems and their factories while growing their own golems. The map features a central open area with golems spawning every set interval; failing to destroy them allows the enemy’s golems to grow stronger, making quick responses essential. Players can control golems and upgrade their health and attack power, while capturing golems’ factories enables the production of additional units, adding depth to strategy. The desert-themed terrain includes wide open spaces, scattered rocks, and oases that disrupt movement, requiring careful positioning. The balanced difficulty suits both beginners and veterans, rewarding teamwork and swift decision-making. Mismanaging golems’ health or misjudging factory capture timing can lead to sudden losses, demanding cautious play. The map is ideal for those who enjoy defense and strategy, especially players comfortable with team play. Before starting, it’s crucial to understand upgrade paths and factory priorities, as preemptively securing movement routes and establishing defenses are key to victory. Its well-balanced design and clear objectives immerse players, revealing deeper strategies with repeated plays. A long-standing favorite in the custom map community, *Golem Revelation* has maintained popularity through consistent updates and balance adjustments to refine its quality.
골렘 매드니스: 매스 어택 (Golem Madness: Mass Attack)
‘골렘 매드니스: 매스 어택(Golem Madness: Mass Attack)’은 스타크래프트: 브루드워의 유즈맵으로, 거대한 골렘을 조종하며 적의 건물을 파괴하고 방어선을 구축하는 흥미로운 전략 디펜스 장르의 맵이다. 맵의 전체적인 구조는 사막 지형을 바탕으로 펼쳐지며, 중앙에 위치한 거대한 골렘이 주요 전투의 중심점 역할을 한다. 골렘은 맵 곳곳에 흩어져 있는 자원이나 건물을 파괴할 수 있으며, 플레이어는 이를 조종하거나 방어하는 데 집중하게 된다. 골렘의 체력 관리와 자원 확보가 핵심 전략으로, 골렘을 잃으면 게임의 흐름이 급격히 기울 수 있으므로 신중한 판단이 요구된다. 플레이 방식은 주로 컴퓨터를 상대하는 싱글 플레이 또는 다인 플레이로 구성되며, 맵의 중앙 지역을 중심으로 한 전투가 주를 이룬다. 골렘의 파괴력과 유지력이 게임의 승패를 좌우하기 때문에, 골렘의 체력을 회복시키거나 강화할 수 있는 요소가 맵 곳곳에 배치되어 있는 것으로 추정된다. 또한, 골렘을 보호하거나 적의 공격을 방어하기 위한 건물을 건설할 수 있는 구조물도 존재하는데, 이러한 요소들이 조화를 이루어 전체적인 전략적 깊이를 더한다. 맵의 분위기는 판타지 테마와 결합된 디펜스 장르로, 골렘의 강력함과 전략적 요소가 어우러져 플레이어에게 긴장감을 제공한다. 이 맵은 비교적 초보자보다는 중급 이상의 플레이어에게 더 적합한데, 골렘의 관리와 자원 활용에 대한 이해가 필요하기 때문이다. 또한, 팀 플레이보다는 혼자서 또는 소규모 팀으로 플레이하는 것이 효과적일 것으로 보인다. 맵의 난이도는 골렘의 체력과 공격 패턴에 따라 달라질 수 있으며, 골렘의 파괴력을 최대한 활용할 수 있는 플레이어라면 높은 난이도에서도 좋은 성과를 낼 수 있을 것이다. 플레이 전에는 골렘의 위치와 맵의 주요 구조물을 미리 확인하고, 골렘의 체력 관리와 자원 확보 방법을 숙지하는 것이 중요하다. 또한, 적의 공격 패턴을 분석하여 골렘을 보호할 수 있는 방어 전략을 세우는 것이 게임의 성공을 좌우할 것이다. 맵의 디자인과 전략적 요소들이 어우러져 있는 만큼, 반복 플레이를 통해 더욱 깊은 전략을 발견할 수 있을 것이다. ‘Golem Madness: Mass Attack’ is a *StarCraft: Brood War* custom map where players control a massive golem to destroy enemy buildings and fortify defenses in an engaging strategy defense genre. The map unfolds across a desert terrain, with a colossal golem at the center serving as the focal point of combat. The golem can smash scattered resources and structures throughout the map, and players must focus on either controlling or defending it. Managing the golem’s health and securing resources are key strategies, as losing the golem can quickly swing the game’s momentum, demanding careful decision-making. The gameplay primarily involves single-player or multiplayer matches against AI or other players, with most battles centered around the central area. The golem’s destructive power and durability determine victory or defeat, so various recovery and enhancement elements are likely scattered across the map. Players can also construct buildings to protect the golem or defend against enemy attacks, adding strategic depth to the experience. The map blends a fantasy theme with defense mechanics, creating tension through the golem’s raw strength and tactical elements. This map is better suited for intermediate to advanced players, as it requires a solid grasp of golem management and resource utilization. Solo or small-team play tends to be more effective than large-scale team battles. The difficulty fluctuates based on the golem’s health and attack patterns, but skilled players who maximize its potential can excel even in high-difficulty scenarios. Before playing, it’s crucial to familiarize yourself with the golem’s location and key map structures, as well as mastering health management and resource collection. Analyzing enemy attack patterns to devise protective strategies will also be vital for success. With its well-designed mechanics and strategic depth, repeated playthroughs will reveal even deeper layers of gameplay.
Guía de selección de mapas
태그는 맵의 핵심 특징을 빠르게 설명하지만 제작 버전마다 규칙이 다를 수 있습니다. 상세 설명에서 권장 인원, 난이도, 플레이 시간과 버전을 함께 확인한 뒤 다운로드하세요.