
Colección de mapas de StarCraft 건물 파괴
Hemos reunido mapas registrados con la etiqueta '건물 파괴'. Compara los mapas populares y los más recientes centrándote en el estilo de juego, la dificultad y las características que son difíciles de encontrar solo por género.
- Mapas registrados
- 55unidades
- Descargas acumuladas
- 1
- Vistas acumuladas
- 1,884
Mapas populares
Este es un mapa con alta tasa de descargas y visitas.
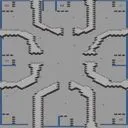
뉴 아이스 헌터스 (New Ice Hunters) (킬)
스타크래프트 브루드워의 아이스 헌터스 맵은 극지방 얼음 지형을 배경으로 펼쳐지는 팀 밀리 유즈맵으로, 4개의 팀이 각각 얼음으로 뒤덮인 섬에서 건물을 건설하고 자원을 채취하며 전투를 벌이는 흥미로운 구조를 자랑한다. 맵 중앙에는 넓은 바다와 빙하가 펼쳐져 있으며, 각 팀의 시작 지점은 섬에 위치해 있어 초반Resource gathering과 방어 전략 수립이 중요한 포인트가 된다. 오브젝트로는 얼음 덩어리와 빙산이 배치되어 있으며, 이 요소들은 맵의 시야와 이동 경로를 제한하는 역할을 한다. 맵의 특성은 좁은 길목과 빙하 길목을 활용한 진입로 방어 및 기습 공격이 유용하다는 점인데, 예를 들어 빙하를 따라 좁은 통로를 막아 상대방의 진출을 방해하거나, 얼음 위에 건물을 배치해 기지를 확장하는 전략이 가능하다. 또한, 각 팀의 시작 지점 주변에는 미네랄과 가스가 제한적으로 배치되어 있어 초반Resource gathering 경쟁이 치열해질 수밖에 없다. 전투는 주로 근접한 거리에서 이루어지며, 맵의 복잡한 지형 때문에 대형 유닛보다는 소형 유닛이나 빠르고 기동성 있는 유닛이 더 큰 활약을 펼칠 것으로 보인다. 이 맵은 팀워크와 전략적 위치 선정이 승리의 열쇠가 되는 만큼, 플레이어들에게는 단순히 유닛을 컨트롤하는 것 이상의 몰입감을 제공할 것이다. 특히, 얼음 지형의 특성을 살린 방어 및 공격 루트를 미리 계획하고 실시간으로 대처하는 능력이 요구된다. 초보 플레이어의 경우, 맵의 지형을 충분히 이해하지 못한 상태로 싸움을 벌이다가 쉽게 무너질 수 있으니, 게임 전 미리 맵을 둘러보며 주요 길목과 자원 위치, 그리고 상대 팀과의 거리를 확인해두는 것이 좋다. 또한, 맵의 얼음 지형은 시야를 가리는 요소로 작용할 수 있으므로, 오버로드나 디텍터 유닛을 적절히 활용하는 것도 전략의 한 부분이 될 것이다. 이 맵은 얼음과 눈이라는 독특한 배경과 더불어 팀 밀리의 기본 틀을 유지하면서도 지형적 특성을 극대화한 점이 특징으로, 스타크래프트의Classic한 팀 밀리 유즈맵의 새로운 변주를 즐기고 싶은 유저들에게 강력히 추천할 만하다. 또한, 맵의 디자인이 얼음으로 뒤덮인 섬의 분위기를 잘 살리고 있어, 게임 플레이 중 시각적 즐거움도 제공한다. 특히, 밤이나 황량한 분위기의 야간 맵으로 설정되어 있다면 더욱 몰입감 있는 플레이가 가능할 것이다. 이 맵을 플레이하기 전에는 반드시 각 팀의 시작 위치와 주요 자원 위치를 숙지하고, 빙하와 얼음 지형의 이동 가능 여부를 확인해 두는 것이 중요하다. 또한, 초반Resource gathering을 원활히 하기 위해, 미네랄과 가스가 배치된 곳을 빠르게 확보하는 전략이 필요하다. 맵의 복잡한 지형은 때로는 플레이어에게 유리하게, 때로는 불리하게 작용할 수 있으므로, 유동적인 전략 수정이 필수적이다. 마지막으로, 이 맵은 팀 간의 협동심이 중요하므로, 팀원과의 원활한 소통과 전략 공유가 게임의 승패를 가를 수 있는 결정적인 요소로 작용할 것이다. StarCraft: Brood War's *Ice Hunters* map features a team melee mode set against an icy polar landscape, where four teams compete by building structures, gathering resources, and battling on ice-covered islands. The map is divided by a vast expanse of ocean and glaciers, with each team starting on their own frozen island—making early resource gathering and defensive planning crucial. Scattered across the map are ice chunks and icebergs, which restrict vision and movement, shaping the flow of combat. The map’s narrow passages and icy corridors make choke point defense and ambushes highly effective. Players can block off narrow paths with ice formations or expand their bases by placing buildings on frozen surfaces. Resources—minerals and gas—are sparsely distributed near starting positions, intensifying early-game competition. Combat tends to occur at close range due to the terrain’s complexity, favoring small, fast, and agile units over larger formations. Victory hinges on teamwork and smart positioning, immersing players beyond mere unit control. A deep understanding of the terrain is essential; newcomers who rush into battle without scouting may struggle. The icy landscape also obscures vision, making Overlords or detector units a key strategic asset. *Ice Hunters* stands out for its unique polar aesthetic while preserving the classic team melee framework, maximizing the map’s thematic and tactical depth. It’s a must-play for those seeking fresh twists on traditional team-based modes, offering both visual appeal and strategic depth—especially when set in a desolate nighttime atmosphere. Before diving in, players should memorize team spawns, key resource locations, and ice traversal paths. Early resource control is vital, and adaptable strategies are necessary to navigate the map’s unpredictable advantages and pitfalls. Above all, strong communication and shared tactics within the team will often decide the match’s outcome.
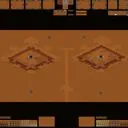
신전부수기5-1: 사막의 성 (Castle of De)
「신전부수기5-1: 사막의 성」은 스타크래프트 브루드워의 유즈맵 중 하나로, 유닛과 건물을 적극 활용해 적의 건물을 파괴하는 ‘신전부수기’ 시리즈의 다섯 번째 작품이다. 맵 제목에서 알 수 있듯이, 사막 지형을 배경으로 한 성곽 형태의 구조물이 특징이며, 플레이어는 이 성에 배치된 건물을 차례대로 파괴해야 한다. 맵 중앙의 넓은 평원과 주변의 성벽, 언덕 지형이 조화를 이루며, 건물이 위치한 성채는 언덕과 협곡으로 둘러싸여 있어 접근 경로가 제한적이다. 적절한 자원 관리와 방어선 구축이 필수적인 이 맵은 주로 컴퓨터를 상대로 진행되는 ‘컴까기’ 장르에 속하며, 일정 규모의 유닛을 동원해 방어塔와 건물을 공격하는 전략적 요소가 강하다. 플레이 방식은 단순하면서도 깊이 있는 전략을 요구한다. 플레이어는 본진에서 자원을 채취해 유닛을 생산하고, 적의 건물이 위치한 성채로 진격해 파괴해야 한다. 성채는 언덕과 협곡으로 보호되어 있어, 적절한 유닛 조합과 공방 업그레이드가 없으면 접근 자체가 어렵다. 특히 중반 이후에는 적의 방어塔와 건물이 밀집된 지역을 돌파해야 하므로, 유닛의 체력 관리와 스킬 사용 타이밍이 중요하다. 맵의 지형적 특징상, 언덕과 협곡을 활용한 방어와 반격이 핵심이며, 플레이어는 이를 바탕으로 적의 공격을 방어하면서도 지속적으로 공격을 감행해야 한다. 이 맵은 초보자와 숙련자 모두 즐길 수 있지만, 난이도 상승에 따라 전략적 깊이가 깊어진다. 초보자라면 방어塔와 건물을 파괴하는 기본적인 공략법부터 숙지해야 하며, 숙련자라면 효율적인 자원 관리와 유닛 조합을 통해 더 빠른 클리어를 노려볼 수 있다. 또한, 맵의 지형과 건물이 배치된 구조상, 팀 플레이가 가능한 구조는 아니지만, 개인전으로도 충분히 재미를 느낄 수 있는 맵이다. 맵 제작자의 언급에 따르면, 지형 디자인에 대한 아쉬움이 있는 만큼, 플레이어는 맵의 구조적 특징을 최대한 활용해 전략을 수립하는 것이 중요하다. 「신전부수기5-1: 사막의 성」은 스타크래프트 브루드워의 유즈맵 중에서도 ‘컴까기’ 장르의 대표작으로 손꼽히며, 특히 건물을 파괴하는 재미와 전략적 깊이가 뛰어나다. 맵의 지형과 건물이 배치된 구조는 플레이어의 전략적 사고를 자극하며, 긴장감 넘치는 전투를 즐길 수 있도록 설계되어 있다. 맵의 난이도는 플레이어의 실력에 따라 조절이 가능하므로, 다양한 전략을 시도해 보며 자신만의 공략법을 찾아보는 것도 좋은 방법이다. 또한, 맵의 배경과 분위기가 사막의 성을 연상케 해, 플레이어의 몰입감을 높이는 데에도 기여한다. 이 맵을 플레이하기 전에는, 맵의 지형과 건물이 배치된 구조를 잘 이해하고, 적절한 자원 관리와 유닛 생산 계획을 세워두는 것이 좋다. 이를 바탕으로, 보다 효율적이고 전략적인 플레이를 즐길 수 있을 것이다. This UMS (User-Made Scenario) map, titled '신전부수기5-1: 사막의 성 (Castle of De)', is a quintessential entry in the 'Temple Destruction' series within StarCraft: Brood War custom maps. The map is set against a desert-themed backdrop, featuring a fortress-like structure where players must systematically destroy enemy buildings. The terrain is strategically designed with central plains, surrounding walls, and elevated hills, creating a challenging environment for unit movement and positioning. The gameplay revolves around resource management and strategic unit deployment. Players start at their base, gathering resources to produce armies, and then advance toward the enemy fortress to destroy its structures. The fortress is protected by elevated terrain and chokepoints, making it difficult to breach without proper unit compositions and upgrades. Mid-game requires players to navigate through densely packed defensive towers and buildings, demanding precise timing for attacks and retreats. The map’s terrain favors defensive play, encouraging players to utilize natural barriers and high ground to their advantage. While accessible to both beginners and experienced players, the map’s depth increases with difficulty. Beginners should focus on basic tactics, such as targeting specific buildings and managing unit health, while advanced players can optimize resource allocation and unit synergies for faster clears. Though designed for single-player against AI, the map’s structure does not support team play. The map’s creator, DraGon[chik], acknowledges limitations in terrain design, urging players to adapt their strategies to the existing layout. '신전부수기5-1: 사막의 성' stands out in the 'competing against AI' genre of StarCraft: Brood War custom maps, offering a blend of strategic depth and immersive desert fortress aesthetics. Its terrain and building placements challenge players to think tactically, balancing offense and defense. The map’s difficulty is scalable, allowing players to refine their strategies over multiple attempts. To maximize enjoyment, players should familiarize themselves with the terrain, plan resource and unit production carefully, and experiment with different approaches to find their optimal playstyle.
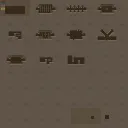
[K런쳐]세상에서가장어려운게임
스타크래프트 브루드워의 유즈맵 「세상에서 가장 어려운 게임」은 이름 그대로 극한의 어려움을 자랑하는 디펜스 장르의 맵이다. 맵의 전체적인 구조는 사막 타일셋으로 꾸며진 넓은 평지 위에 여러 개의 건물이 흩어져 있으며, 플레이어는 이 건물들을 파괴하는 것이 주요 목표로 보인다. 맵 중앙에는 다수의 건물이 밀집되어 있어 초반부터 공격받을 가능성이 높고, 주변에는 소수의 건물이 배치되어 있어 방어선을 구축할 공간이 제한적이다. 맵의 규모는 4096x4096으로 매우 넓지만, 건물 배치와 진행 방식상으로는 밀집된 구역에서 전투가 집중되는 구조로 추정된다. «Destroy all enemy buildings.»라는 간단한 설명에서도 알 수 있듯이, 상대방의 건물을 모두 파괴하는 것이 승리 조건으로 보인다. 이 맵은 난이도를 극대화하기 위해 건물 배치와 맵 구조를 carefully designed한 것으로 보이며, 방어보다는 공격과 기동전을 중시하는 플레이 스타일이 요구된다. 건물 파괴 후 재건축 시간이 없거나 제한적일 가능성이 높아, 빠른 판단과 효율적인 자원 활용이 필수적이다. 또한, 맵의 크기가 넓지만 실제 전투 공간은 좁아져서 미니맵을 적극 활용해야 하며, 다수의 적 유닛이 동시에 공격해올 수 있어 컨트롤과 멀티태스킹 능력이 중요하다. 초보자는 물론 숙련자도 공략을 짜기가 쉽지 않을 만큼 치밀한 밸런싱이 느껴진다. 특히, 맵 이름이 시사하듯 «가장 어려운 게임»이라는 타이틀에 걸맞게, 한 번의 실수가 치명적인 결과를 초래할 수 있으므로 각별한 주의가 필요하다. 이 맵을 즐기기 위해서는 스타크래프트의 기본 mechanics을 숙지한 상태에서 도전하는 것을 추천하며, 디펜스나 공격형 유즈맵을 선호하는 플레이어라면 필수 체험 맵으로 손꼽아 볼 만하다. This StarCraft: Brood War custom map, titled 「The Hardest Game in the World」, is a defense-style UMS map designed to push players to their limits. The map features a vast desert terrain with buildings scattered across the 4096x4096 grid, though combat zones appear concentrated in densely packed clusters. The objective, as indicated by the internal description «Destroy all enemy buildings,» is straightforward: eliminate every structure belonging to opposing players. The map’s layout suggests a deliberate emphasis on high-stakes, fast-paced gameplay where players must prioritize aggression and unit mobility over traditional defensive strategies. With minimal or no time for rebuilding structures, quick decision-making and efficient resource management are critical. The large map size demands constant attention to the minimap, as enemies can launch simultaneous assaults from multiple directions. Novices and veterans alike will find the challenge daunting, as a single misstep could result in irreversible consequences. Given the map’s reputation, players should approach it with a solid grasp of StarCraft mechanics and a preference for high-intensity, attack-focused custom maps. If you enjoy defense or offensive UMS maps, this title is a must-try for testing your skills to the fullest.
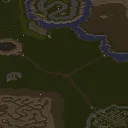
Untitled Scenario
Untitled Scenario는 사막 타일셋을 기반으로 한 UMS(유즈맵) 형태의 전투 맵이다. 화면 중앙에 넓은 사막 평야가 펼쳐지고, 양쪽 끝에 각각 적 진영의 기지와 건물들이 배치되어 있다. 플레이어는 시작 지점에서 유닛을 생산하거나 기존 유닛을 이동시켜 상대 진영의 모든 건물을 파괴하는 것이 목표이며, 건물 파괴를 위한 직접적인 공격 루트와 우회 경로가 동시에 제공된다. 맵 전반에 걸쳐 자원 노드가 몇 군데 흩어져 있어, 초반에 충분한 자원을 확보한 뒤 공격 유닛을 빠르게 생산하는 것이 승리의 핵심 포인트다. 또한 사막 지형 특성상 시야가 넓게 잡히지만, 건물 사이에 놓인 작은 언덕이나 바위가 은폐 지형으로 작용해 기습 공격을 시도할 수 있다. 전투는 주로 빠른 전진과 방어 건물 파괴를 반복하는 리듬을 갖으며, 대규모 전투보다는 소규모 스쿼드 단위의 전투가 빈번하게 일어난다. 따라서 빠른 마이크로 관리와 유닛 조합에 익숙한 플레이어에게 적합하며, 초보자는 유닛 생산 타이밍과 자원 관리에 주의해야 한다. 플레이 전 확인할 사항으로는 시작 시 제공되는 초기 유닛 종류, 자원 노드 위치, 그리고 적 진영의 방어 건물 배치가 있다. 이 요소들을 파악하고 적절히 대응하면 효율적인 공격 루트를 설계할 수 있다. Untitled Scenario is a user‑made map (UMS) built on a desert tileset. The map features a wide desert plain in the center, with each side’s enemy base and buildings positioned at opposite ends. The player starts at a designated point, producing or moving units to destroy all enemy structures; the map provides both direct attack routes and alternative paths for flanking. Scattered resource nodes across the map allow early resource gathering, enabling rapid unit production, which is crucial for victory. While the desert terrain offers broad visibility, small hills and rocks serve as cover, allowing for ambushes. Gameplay follows a rhythm of quick advances and building demolition rather than large‑scale battles, favoring small squad engagements. Consequently, the map suits players comfortable with fast micro‑management and unit composition, though beginners should pay attention to unit production timing and resource handling. Before playing, check the initial unit types, resource node locations, and enemy defensive building placements; understanding these elements helps plan an effective attack route.
Scourcher
스타크래프트 브루드워의 고전 맵 ‘Scourcher’는 5인용 밀리 맵으로, 타일셋은 정글을 배경으로 하고 있다. 맵 크기는 6144x6144로 대규모 전투를 위한 넓은 공간이 특징이며, 192x192 타일 단위로 디자인되어 있다. 맵의 주요 목표는 상대방의 모든 건물을 파괴하는 것으로, 밀리 장르의 기본 틀을 따르지만 맵 구조가 다소 복잡한 편이다. 중앙에 위치한 넓은 평원과 주위에 펼쳐진 숲 지형이 시야를 가리며, 이로 인해 초보자들이 맵을 익히는 데 다소 시간이 걸릴 수 있다. 또한, 맵 양측에 위치한 자원 지역은 중앙보다 상대적으로 협소하여 Mineral Field가 밀집되어 있어 빠른 자원 확보가 중요하다. 이 맵은 5:5 대칭 구조로 디자인되어 있지만, 일꾼의 자원 채취 efficiency를 고려할 때 중앙 자원 지역을 두고 벌어지는 전투가 승패를 가를 가능성이 높다. 초보자들은 이 맵을 플레이하기 전에 ‘Scourcher’라는 맵명이 주는 ‘불타는 듯한 파괴’라는 느낌에 주목하고, 넓은 시야와 자원 분배를 신중히 계획해야 한다. 또한, 맵의 대칭성과 자원 밀집도를 고려해 초반 빌드 오더를 철저히 준비하는 것이 중요하다. 이 맵은 상대방을 빠르게 몰아붙이는 공격형 전략보다는 자원 확보와 건물 방어에 중점을 둔 안정적인 플레이를 요구한다. 특히, Mineral Field가 풍부한 중앙 지역을 장악하는 플레이어가 경기의 흐름을 주도할 가능성이 크므로, 초반 확장과 방어 시설을 구축하는 타이밍을 잘 조율해야 한다. 이 맵은 5인 밀리 대전에서의 전략적 깊이를 제공하며, 팀워크와 개개인의 판단력이 요구되는 맵으로 평가된다. 다만, 맵의 복잡한 지형으로 인해 초보자들은 맵을 충분히 익히지 않고 플레이하면 불리한 상황으로 치닫기 쉽다. 따라서, 이 맵을 처음 플레이하는 유저는 맵의 주요 길목과 자원 위치를 숙지한 뒤, 안정적인 빌드와 방어 전략을 우선적으로 고려하는 것이 좋다. 이 맵은 밀리 장르의 기본기를 연마하고자 하는 유저들에게 좋은 연습용 맵으로도 활용될 수 있다. Scourcher is a classic Brood War melee map designed for 5 players, featuring a jungle tileset. The map spans 6144x6144, offering ample space for large-scale battles, and is built on a 192x192 tile grid. The objective is straightforward—destroy all enemy structures—but the map’s complex layout adds strategic depth. Central open plains surrounded by dense forests restrict visibility, making it challenging for beginners to navigate. Resource distribution is asymmetrical, with mineral fields clustered closer to the center, emphasizing the importance of early-game expansion and efficient resource gathering. The 5v5 symmetrical design forces players to balance aggression with economy, as controlling the central mineral-rich area often dictates the game’s outcome. Players should prioritize scouting and adaptable strategies, as the map’s terrain favors those who secure resources early while maintaining defensive structures. For newcomers, mastering the map’s choke points and resource zones is crucial to avoid falling behind. While Scourcher rewards teamwork and macro-management, its intricate layout can overwhelm inexperienced players. It serves as an excellent training ground for refining build orders and defensive playstyles in melee scenarios, though players should invest time in learning the map’s nuances before jumping into competitive matches.
적 건물 파괴하기 (Destroy Enemy Building)
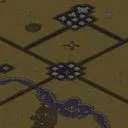
이 맵은 스타크래프트 브루드워의 유즈맵으로, 간단한 디펜스와 테란 유닛을 활용한 공격이 주를 이룬다. 내부 설명에서도 명시된 대로 적 건물 하나를 파괴하는 것이 목표로, 초보자도 쉽게 접근할 수 있는 구조로 설계되었다. 맵 중앙에는 테란의 주요 건물이 배치되어 있고, 주변에는 가시적인 장애물이 없어서 초보자가 전략을 세우기 용이하다. 다만, 적 건물의 위치나 방어 시설을 확인할 수 없기 때문에, 플레이어는 맵을 탐색하며 적의 위치를 파악해야 한다. 맵의 크기는 8192x8192로 넓지만, 실제 플레이 공간은 중앙에 집중되어 있어 큰 혼란 없이 진행할 수 있다. 테란 유닛을 적극 활용하여 적 건물을 파괴하는 것이 핵심인데, 초반에는 SCV를 모아 건설로봇으로 전환하고 테란 병력을 빠르게 확보하는 것이 중요하다. 맵의 밸런스는 비교적 평이한 수준으로, 초보자도 충분히 즐길 수 있지만, 적 건물의 위치를 빨리 찾는 플레이어에게는 더 수월한 플레이가 가능하다. 추천 대상은 스타크래프트 초보자 및 테란 유닛을 좋아하는 플레이어이며, 플레이 전에는 맵의 구조와 테란 유닛의 운영 방법을 숙지하는 것이 좋다. 적 건물의 위치를 빠르게 찾는 데 도움이 되는 탐색 전략을 미리 생각해두면 더 효과적으로 플레이할 수 있을 것이다. 맵의 난이도는 보통 정도로 설정되어 있지만, 적의 위치를 빨리 찾지 못하면 난이도가 높아질 수 있다. 따라서, 맵을 exploring하는 데 중점을 두는 것이 좋다. This map is a StarCraft: Brood War custom map focused on simple defense and Terran unit-based attacks. As stated in the in-game description, the objective is to destroy one enemy building, and the design prioritizes accessibility for beginners. The main Terran structure is placed at the center of the map, with no major obstacles around it, making it easy for new players to plan their strategy. However, since the enemy building's location and defensive structures are hidden, players must explore the map to locate them. While the map size is 8192x8192, the actual playable area is concentrated in the center, preventing excessive chaos during gameplay. The key to success is aggressively using Terran units to destroy the enemy building. Early on, gathering SCVs and converting them into construction workers to secure Terran forces quickly is crucial. The map’s balance is relatively straightforward, making it enjoyable for beginners, though players who find the enemy building faster will have an easier time. This map is recommended for StarCraft beginners and those who enjoy using Terran units. Before playing, it’s wise to familiarize yourself with the map layout and Terran unit management. Developing a scouting strategy to quickly locate the enemy building will make your playthrough more effective. The difficulty is set to moderate, but if you fail to find the enemy position early, the challenge increases significantly. Therefore, prioritizing exploration is essential for success.
레이서스 2 (RACERS 2)
스타크래프트 브루드워의 유즈맵 <RACERS 2>는 고속 레이싱과 전략적인 건물 파괴가 결합된 흥미로운 맵입니다. 7명의 플레이어가 각각의 스타팅 포인트에서 출발해 맵 중앙을 향해 치열한 경쟁을 펼치며, 적 건물들을 파괴하는 것이 목표입니다. 맵은 넓은 황무지 타일셋으로 구성되어 있으며, 좁은 통로와 넓은 평야가 조화를 이뤄 전략적인 움직임이 요구됩니다. 레이싱 요소와 디펜스 요소가 혼합된 이 맵은 단순히 빨리 달리는 것만으로는 승리할 수 없습니다. 적 건물에 도달하기 전에 방어선을 구축하거나, 상대방의 공격을 저지하는 전략이 중요합니다. 특히 중앙에서 벌어지는 교전은 맵의 균형을 좌우하는 핵심 포인트로, 각 플레이어는 자신의 위치와 자원 상태를 고려해 신중한 움직임을 펼쳐야 합니다. 이 맵은 초보자와 숙련자 모두 즐길 수 있도록 설계되었습니다. 초보자는 레이싱 경로를 익히며 전략을 배우고, 숙련자는 상대방을 교란하는 기술과 자원 관리를 통해 승리를 차지할 수 있습니다. 또한, 맵의 넓은 공간은 다양한 플레이 스타일을 가능하게 하며, 팀 플레이보다는 개인전 형식으로 진행됩니다. 플레이 전에는 맵의 지형을 숙지하고, 중앙 교전 포인트를 미리 파악하는 것이 중요합니다. 또한, 자원 채취와 건물 건설을 효율적으로 관리해야 하며, 상대방의 움직임을 예측해 방어선을 강화하는 전략을 세우는 것이 필수입니다. 이 맵은 레이싱과 디펜스의 균형이 잘 조화되어 있어, 단조로운 플레이를 지양하고 다양한 전술을 시도해 볼 수 있는 즐거움을 제공합니다. 이 맵은 스타크래프트 브루드워의 유즈맵 among 다양한 맵 중에서도 독특한 장르로 자리매김하고 있으며, 레이싱과 디펜스의 조합을 경험해 보고 싶은 플레이어들에게Strong 추천할 수 있습니다. This StarCraft: Brood War custom map, <RACERS 2>, blends high-speed racing with strategic base destruction in a thrilling 7-player experience. Set on a vast wasteland tile, the map features narrow pathways and open plains, demanding both speed and tactical foresight. Unlike pure racing games, victory hinges on more than just reaching the center first. Players must balance offensive pushes with defensive preparations, as confrontations in the central arena determine map control. Those who neglect resource management or fail to adapt their strategy often find themselves overwhelmed by coordinated attacks. Designed for accessibility without sacrificing depth, RACERS 2 accommodates both newcomers and veterans. Beginners can focus on mastering the racing route and building basic defenses, while experienced players exploit advanced techniques like path-blocking and resource denial to gain an edge. The absence of forced team play amplifies the competitive nature, making every decision critical. Prior to jumping in, players should study the terrain—identifying chokepoints, resource locations, and potential ambush zones. Efficient gathering and base expansion are vital, as is anticipating enemy movements to fortify key areas. The map’s fusion of racing urgency and base defense creates a dynamic experience where repetitive strategies quickly backfire, rewarding adaptability and quick thinking. Among Brood War’s vast custom map library, RACERS 2 stands out for its genre-blending design, offering a fresh twist that appeals to fans of speed, strategy, and chaos alike.
넥서스 프로토스 대 저그 파이널 1.5 (NEXUS ProVSZergFinal1.5)
스타크래프트 브루드워의 유즈맵 계보에서 오랫동안 사랑받아온 ‘NEXUS ProVSZergFinal1.5’는 프로토스와 저그의 치열한 대결을 한정된 공간에서 펼쳐내는 디펜스형 유즈맵이다. 이 맵은 8명의 플레이어가 2가지 종족으로 나뉘어 넥서스와 스포닝 풀을 지키며, 상대 종족의 건물을 파괴하는 승리를 목표로 삼는다. 맵 중앙에 위치한 ‘넥서스’와 그 주변의 방어 시설은 게임의 핵심으로, 플레이어들은 끊임없이 밀려드는 적군을 상대로 전략을 세워야 한다. 맵의 구조는 황무지 타일셋을 기반으로 하며, 4096x4096의 넓은 공간을 활용해 다층적인 방어 라인과 진입로를 설계할 수 있도록 배려되어 있다. 넥서스를 지키기 위한 입구막기, 스포닝 풀을 방어하는 디펜스, 그리고 상대방의 진영을 공략하는 공격 루트가 유기적으로 연결되어 있어, 종족별 특성과 개인의 전략이 빛을 발하는 게임성이 돋보인다. 초보자는 기본적인 방어와 자원 관리에 집중해야 하며, 숙련자는 효율적인 유닛 조합과 맵 컨트롤로 승부를 가를 수 있도록 구성되어 있다. 특히 ‘Final1.5’라는 버전명에서 알 수 있듯이, 오랜 기간의 피드백을 반영해 밸런스가 조정된 최적화된 버전으로, 안정성과 재미가 균형을 이룬다. 이 맵을 플레이하기 전에는 종족별 기본 유닛의 특성과 건물 배치, 그리고 방어 라인의 중요성을 숙지하는 것이 좋다. 또한, 팀원과의 실시간 소통이 필수적이므로, 게임 전 채팅이나 음성 채널을 활용한 전략 공유가 승률을 크게 좌우할 수 있다. 넥서스 테란 대 프로토스 계열 맵의 팬이라면 반드시 한 번은 도전해볼 만한 작품으로, 디펜스와 공격의 조화로운 균형을 즐길 수 있을 것이다. This classic Brood War custom map, 'NEXUS ProVSZergFinal1.5', pits Protoss against Zerg in a confined defensive battle where players must protect their Nexus and Spawning Pool while destroying the enemy's structures. Designed for 8 players divided into two factions, the game focuses on strategic unit placement and resource management within a 4096x4096 map using the Wasteland tileset. The central Nexus and surrounding defenses create a multi-layered tactical challenge, with clear attack and defense routes that highlight each race's unique strengths. Beginners should prioritize basic unit control and resource gathering, while advanced players can leverage optimized unit compositions and map control for victory. The 'Final1.5' version reflects years of balance adjustments, ensuring a polished and engaging experience. Players are advised to familiarize themselves with race-specific unit behaviors and defensive structures before starting. Effective team communication via in-game chat or voice channels is crucial, as coordinated strategies significantly impact win rates. A must-play for fans of Nexus-style Terran vs. Protoss maps, this UMS offers a harmonious blend of defense and offense for an immersive strategic experience.
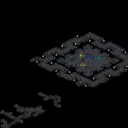
Untitled Scenario
스타크래프트 브루드워의 유즈맵인 〈Untitled Scenario〉는 우주 테마의 광활한 맵에서 적 건물 파괴를 목표로 하는 UMS(Use Map Settings) 장르의 맵이다. 내부 설명에서도 확인할 수 있듯이 '모든 적 건물 파괴'가 승리 조건으로, 기본적인 디펜스와 밀리 요소가 혼합된 구조를 보인다. 3072x3072의 넓은 우주 맵에서 펼쳐지는 전투는 플레이어가 전략적으로 건물을 보호하고 공격로를 선택해야 한다는 점에서 긴장감을 유발한다. 맵의 특징은 넓은 맵 크기만큼이나 복잡한 지형과 요새화된 적 기지 배치에 있다. 중앙을 가로지르는 협곡이나 소규모 언덕, 우주 잔해 등이 자연 장애물로 작용해 진격로를 방해한다. 적 건물은 산개되어 있어 한 번의 공격으로 모든 목표를 소탕하기 어렵고, 방어 타워나 가드 건물도 곳곳에 배치되어 있어 초보 플레이어에게는 다소 까다로운 요소로 작용할 수 있다. 반대로 숙련자는 이러한 구조를 활용해 기습 공격이나 다중 공격로를 설계할 수 있어 전략의 깊이를 느낄 수 있다. 플레이 방식은 대체로 싱글 플레이어 기반의 컴까기(컴퓨터 상대하기) 형식을 띄며, AI가 조종하는 적 건물과 유닛을 상대로 전투를 벌인다. 맵 자체가 방어와 공격의 균형을 맞추도록 설계되어 있어, 단순히 무작정 돌진하는 것보다 적절한 자원 관리와 유닛 조합, 건물 배치 전략이 중요하다. 특히 우주 테마답게 중립 건물이 scarce하여 자원 확보가 어렵다는 점을 고려해야 한다. 또한, 넓은 맵을 효율적으로 활용하지 못하면 적의 반격에 무너질 위험이 크므로 맵 전체를 빠르게 스캔하고 주요 거점을 선점하는 것이 관건이다. 이 맵은 우주 배경의 웅장한 그래픽과 함께 넓은 시야를 제공하는 특성을 살려 긴장감 넘치는 전투를 즐기기에 최적화되어 있다. 초보자는 어려움을 느낄 수 있지만, 적 건물의 배치와 맵의 지형을 익히면 점차 전략적 사고가 요구되는 재미를 느낄 수 있을 것이다. 넓은 맵에서 펼쳐지는 대규모 전투를 즐기고 싶거나, 컴까기 장르의 기본기를 다지고 싶은 플레이어에게 추천할 만하다. 다만 한 번의 실수로 모든 것이 무너질 수 있는 높은 난이도와 좁은 길목에서의 치열한 전투를 감안해야 한다. This Brood War custom map, Untitled Scenario, is a UMS (Use Map Settings) map set in a vast space-themed 3072x3072 battlefield where the core objective is to destroy all enemy buildings. As indicated in the internal description, the victory condition is straightforward—eliminate every enemy structure—yet the execution demands strategic depth due to the map's sprawling design and fortified enemy base layouts. The map's defining feature is its expansive cosmic terrain, featuring canyons, elevated plateaus, and scattered space debris that serve as natural obstacles. Enemy buildings are strategically dispersed, making it nearly impossible to clear all targets in a single push. Additionally, defensive towers and guard structures are interspersed throughout the map, posing significant challenges for inexperienced players. For seasoned players, however, these elements offer opportunities to craft intricate multi-pronged assaults or leverage ambush tactics. Gameplay revolves around a single-player vs. AI format, commonly referred to as "compkagi" (fighting against computer-controlled opponents) in the Korean Brood War community. The map's design emphasizes a balance between defense and offense, rewarding players who manage resources wisely, deploy units effectively, and position buildings strategically. The scarcity of neutral buildings in this space-themed setting further intensifies the challenge, as securing resources becomes a critical early-game priority. Efficient scanning of the entire map and early control of key locations are essential to avoid falling victim to enemy counterattacks. Untitled Scenario excels in delivering an immersive, large-scale combat experience thanks to its grand space-themed visuals and wide field of view. While beginners may find the map daunting, mastering the enemy's building placements and terrain nuances will gradually unveil the deeper strategic layers that make this map engaging. It is particularly recommended for players seeking intense large-scale battles or aiming to hone their skills in the compkagi genre. However, be prepared for high-stakes gameplay where a single mistake can lead to a swift and irreversible defeat, especially in tight choke points.
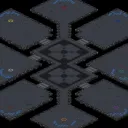
BLOOD BATH
BLOOD BATH은 스타크래프트 브루드워의 클래식 밀리 맵으로, 8명의 플레이어가 동시에 전장에 투입돼 상대의 모든 건물을 파괴하는 것이 목표인 전형적인 전투형 유즈맵이다. 맵 전체는 3072×3072 타일(96×96) 규모의 우주 타일셋으로 구성돼 있어 넓은 이동 공간과 다양한 지형을 제공한다. 시작 지점은 각 플레이어마다 고르게 배치돼 있어 초기 전투가 비교적 균형 잡힌 편이며, 중간에 등장하는 중립 유닛이나 자원 포인트는 전략적 위치를 차지하려는 경쟁을 유발한다. 건물 파괴가 승리 조건이므로 전투 중심의 플레이를 선호하는 유저에게 적합하고, 방어보다는 공격적인 전술이 요구된다. 특히 초반에 빠르게 병력을 모아 적진을 압박하거나, 중반에 상대의 확장 기지를 차단하는 것이 핵심 전략이다. 플레이 전에는 각 플레이어의 시작 위치와 주변 자원 배치를 확인해 초기 빌드 순서를 미리 계획하는 것이 좋으며, 상대의 움직임을 예측해 타이밍을 맞춘 전투를 준비해야 한다. 초보자보다는 기본적인 마크스맨·마린·리프팅·스팀팩 활용에 익숙한 플레이어에게 추천한다. 팀전이 아닌 자유 전투이기 때문에 개인 기량과 순간 판단력이 승패를 좌우한다. BLOOD BATH is a classic melee map for StarCraft: Brood War, designed for up to 8 players who simultaneously enter the battlefield and aim to destroy all enemy buildings. The map spans 3072×3072 pixels (96×96 tiles) using the Space tileset, offering a large open area and varied terrain. Each player starts at a evenly distributed location, providing a fairly balanced early game, while neutral units and resource points in the middle create competition for strategic spots. Since the win condition is building destruction, the map favors aggressive, combat‑focused play rather than defensive tactics. Early‑game strategies typically involve quickly assembling forces to pressure opponents, and mid‑game plans often focus on blocking enemy expansions. Before starting, players should review their spawn point and nearby resources to plan their build order, and anticipate enemy movements to time attacks effectively. The map is best suited for players comfortable with basic Marines, Vultures, Lifts, and Stimpack usage—more experienced than complete beginners. As a free‑for‑all rather than a team match, individual skill and split‑second decisions largely determine the outcome.
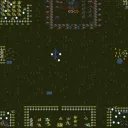
캠프 라이프 (Camp Life)
스타크래프트 브루드워 유즈맵 <Camp Life>는 ‘캠프 라이프’라는 제목 그대로 야생 동물이 플레이어 역할을 맡아 적 건물 파괴를 목표로 하는 독특한 디펜스+밀리 혼합 장르의 맵입니다. 내부 맵 설명에서 ‘크리처가 야생 동물로 플레이한다’는 문구가 확인되며, 맵 이미지에서도 다양한 동물 아이콘과 건물 파괴 이펙트가 보입니다. 8명의 플레이어가 참여하는 이 맵은 기존 밀리처럼 대결을 펼치지만, 동물 캐릭터가 지닌 고유 능력(예: 빠른 이동, 은폐, 회복)이 전투에 영향을 미치며, yksi 스타일로 적 건물을 파괴하는 것이 승리 조건으로 추정됩니다. 맵의 배경은 사막 타일셋으로 구성되어 있으며, 넓은 공간에서 동물들이 활동하는 모습을 볼 수 있습니다. 동물 유닛을 조종하는 재미와 함께 전략적 건물 파괴를 병행해야 하므로, 단순 밀리보다는 동물의 특성을 활용한 창의적인 플레이가 요구됩니다. 초보자는 동물의 능력과 맵 구조를 숙지한 후 도전하는 것이 좋으며, 숙련자는 동물의 특성을 극대화한 빌드 오더를 활용해 승리에 가까워질 수 있습니다. 맵을 시작하기 전, 동물별 스킬과 맵 내 주요 건물을 확인하는 것이 중요합니다. 추가로, 적 건물 파괴 시 나오는 ‘자유’라는 문구는 승리 후 보상이나 해방의 의미를 내포할 가능성이 있습니다. Camp Life is a unique defense-melee hybrid custom map for StarCraft: Brood War where wildlife creatures take on the role of players, aiming to destroy enemy buildings. The internal map description explicitly states, 'Critters do the play as the wildlife,' and the visual elements in the map image support this premise with animal icons and building destruction effects. This 8-player map blends traditional melee combat with creature-specific abilities such as enhanced mobility, stealth, or regeneration, which influence the outcome of battles. The primary objective appears to be the destruction of enemy structures, similar to melee gameplay, but with an added layer of strategy focused on leveraging the unique traits of each animal unit. The desert-themed tile set provides a vast open battlefield where creatures roam freely. While the core gameplay resembles melee, the novelty lies in the creature mechanics, making it more engaging for players who enjoy strategic depth beyond standard unit control. Beginners are advised to familiarize themselves with animal abilities and map layout before diving in, whereas advanced players can optimize build orders tailored to creature strengths. Prior to starting, it is crucial to review each animal's skills and key structures on the map. Additionally, the phrase 'get free!!' upon destroying enemy buildings suggests a possible reward or liberation mechanic upon victory.
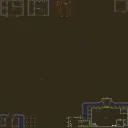
심 시티 5 위드 밀리터리 (SIM CITY 5 with military)
‘심 시티 5 위드 밀리터리’라는 제목으로 알려진 이 스타크래프트 브루드워 유즈맵은 ‘SIM CITY 5 with military.scm’이라는 파일명으로 배포되며, 내부의 맵 제목은 ‘Untitled Scenario’로 표시되어 있다. 맵의 전체 크기는 6144×6144의 거대한 황무지 타일셋으로 구성되어 있으며,Destory all enemy buildings’(적 건물 파괴)라는 간단한 승리 조건만 명시되어 있어 플레이어는 건물을 완파하는 데 집중해야 한다. 이미지에서는 주요 건물이 중앙에 모여 있는 듯한 구조와, 이를 둘러싼 평지가 확인되며, 다수의 플레이어 기지가 지형 여기저기에 배치되어 있는 것으로 보인다. 맵의 규모가 크고 기지 간 거리가 멀기 때문에, 초반 자원 확보와 진출 타이밍이 승패를 좌우할 가능성이 높다. 또한, 맵의 이름과 파일명에서 느낄 수 있듯이, 도시-like한 테마와 군사적 요소가 결합된 것으로 추정되며, 이는 맵의 디자인 요소와도 부분적으로 연결될 수 있다. 다만, 맵의 설명이 매우 간략하고, 내부적으로 어떤 특수 트리거나 이벤트가 포함되어 있는지는 확인되지 않는다. 이러한 구조는 초보 플레이어에게는 다소 복잡하게 느껴질 수 있으나, 경험이 있는 유저들에게는 넓은 시야와 전략적 판단력을 요구하는 매력적인 요소로 다가올 것이다. 특히, 멀티 플레이 시 기지 간 협력과 분쟁이 자연스럽게 발생할 수 있는 구조이기 때문에, 팀플레이와 경쟁을 모두 즐길 수 있는 맵으로 평가된다. 플레이 전에는 맵의 전체적인 배치와 주요 건물이 위치한 곳을 미리 숙지하고, 초반 자원의 확보와 진출 루트를 계획하는 것이 중요하다. 또한, 맵의 이름과 테마에 맞춰 도시-like한 디자인 요소를 활용한 전략을 구사한다면, 더 재미있게 플레이할 수 있을 것이다. This StarCraft: Brood War custom map, known as *Sim City 5 with Military*, is distributed under the filename *SIM CITY 5 with military.scm*, though its internal title appears as *Untitled Scenario*. The map spans a massive 6144×6144 tileset of barren terrain, with the sole victory condition being *"Destroy all enemy buildings"*—forcing players to focus entirely on dismantling structures. The visual layout suggests a central cluster of key buildings surrounded by open plains, with multiple player bases scattered across the terrain. Given the map’s sheer scale and the long distances between bases, securing early resources and timing your initial push will likely determine the outcome. The title and filename hint at a fusion of urban-like aesthetics and military themes, which may subtly influence the map’s design elements. However, the lack of detailed descriptions leaves it unclear whether any special triggers or events are included. While the simplicity of the instructions might overwhelm newcomers, seasoned players will appreciate the emphasis on broad vision and strategic decision-making. The structure naturally encourages cooperation and conflict in multiplayer, making it a versatile map for both team play and competitive matches. Before diving in, study the base placements and key structures, plan your early resource routes, and adapt your strategy to the map’s urban-inspired design for a more engaging experience.
Mapas registrados recientemente
Consulta los archivos y versiones recién añadidos.
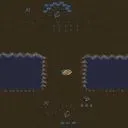
멍청한 듀란1편 (Stupid Duran Part 1)
멍청한 듀란1편은 스타크래프트 브루드워의 전형적인 UMS(유즈맵) 형태를 띠면서도, 건물 파괴를 목표로 하는 명확한 승리 조건을 가지고 있다. 맵은 2048x2048 타일 기반 황무지 배경 위에 배치되어 있어, 넓은 전장을 활용한 전략적 이동이 가능하다. 플레이어는 최대 6명의 인원을 동시에 배치할 수 있으며, 팀 구성이 명시되지 않아 자유로운 1대5 혹은 3대3 구도가 자연스럽게 형성된다. 초반에는 자원을 확보하고 방어 라인을 잡는 것이 중요하며, 중반 이후에는 적의 건물을 집중적으로 공격해 파괴하는 것이 핵심 흐름이다. 맵 곳곳에 자연적인 장애물과 고지대가 배치되어 있어, 시야 확보와 유닛 이동 경로를 미리 계획해야 한다. 특히, 황무지 타일셋 특성상 지형 변화가 적어 유닛 배치와 공격 타이밍이 승패를 좌우한다. 플레이 경험은 비교적 직관적이지만, 상대방이 건물 방어에 집중할 경우 지속적인 압박과 기동성을 활용한 교전이 필요하다. 따라서 빠른 유닛 생산과 효율적인 자원 관리, 그리고 적의 방어 약점을 파악하는 것이 승리의 열쇠가 된다. 초보자보다는 기본적인 마크로와 마이크로 스킬을 갖춘 플레이어에게 적합하며, 특히 건물 파괴를 중심으로 한 전술 연습이나 팀전 연습용으로 활용하기 좋다. 플레이 전에는 맵 내 주요 고지와 자원 채집 지점을 미리 확인하고, 적의 방어 라인을 어떻게 무력화시킬지 전략을 세우는 것이 좋다. The map "멍청한 듀란1편" follows the typical UMS (use map) format of StarCraft: Brood War, featuring a clear objective to destroy all enemy structures. Set on a 2048 × 2048 desert tileset, the large battlefield allows for strategic movement across open terrain. Up to six players can join a single match, and because no team setting is defined, various configurations such as 1‑vs‑5 or 3‑vs‑3 emerge naturally. Early game focuses on securing resources and establishing a defensive line, while mid‑game shifts to concentrated attacks on opponent buildings. Natural obstacles and elevated areas are scattered throughout, requiring careful line‑of‑sight management and path planning. Since the desert tileset offers minimal terrain variation, unit placement and timing become decisive factors. The experience is straightforward but demands continuous pressure and mobility when opponents fortify their bases. Effective unit production, resource handling, and identifying weak points in enemy defenses are essential for victory. This map suits players who have basic macro and micro skills, making it ideal for practicing building‑destruction tactics or team‑based skirmishes. Before starting, review key high‑ground spots and resource nodes, and devise a plan to breach enemy fortifications.
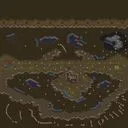
건물 부수러 가기 (Go Destroy Buildings)
건물 부수러 가기는 스타크래프트 브루드워 유즈맵으로, 맵 이름 그대로 플레이어는 건물들을 목표로 삼아 파괴하는 임무를 수행한다. 맵은 황무지 타일셋을 사용한 4096×4096 크기의 광활한 지형으로 구성되어 있으며, 중앙에 위치한 주요 구조물과 주변에 배치된 다양한 건물이 플레이 시야에 들어간다. 플레이어는 각각의 유닛을 소환하거나 기존 유닛을 활용하여 건물을 공격하는데, 공격력은 유닛 종류와 업그레이드에 따라 달라지며, 건물마다 서로 다른 체력과 방어력을 가지고 있어 전략적인 유닛 선택이 중요하다. 게임은 기본적으로 자유전투 형태이며, 팀 구분이 없어 각 플레이어가 독립적으로 점수를 경쟁하는 형태다. 점수는 건물을 파괴할 때마다 누적되며, 특정 건물을 먼저 파괴한 플레이어에게 보너스가 부여될 수 있다. 이러한 구조는 순수 반사 신경과 빠른 결정력을 요구하며, 장시간의 캠페인보다는 짧은 라운드 형태로 즐기기에 적합하다. 따라서 반사 신경이 좋은 플레이어, 빠른 템포를 선호하는 유저, 그리고 친구들과 간단한 경쟁을 원하는 경우에 추천한다. 플레이 전에는 맵이 8인 지원인지 확인하고, 사용 가능한 유닛과 업그레이드 트리가 제한되어 있을 수 있으므로 초기 자원 배분을 확인하는 것이 좋다. 또한, 맵 설명에 있는 유머러스한 언급처럼 과도한 진지함보다는 가벼운 마음으로 즐기는 것이 본 의도에 부합한다. Building Destroy Rush is a StarCraft Brood War UMS map where, as the name suggests, players are tasked with destroying buildings as their objective. The map uses the wasteland tileset on a vast 4096×4096 terrain, with a central main structure and various buildings scattered around that come into view during play. Players attack buildings by summoning units or using existing units; attack power varies by unit type and upgrades, and each building has different hit points and armor, making strategic unit selection important. The game is basically a free-for-all format with no team division, so each player independently competes for points. Points accumulate each time a building is destroyed, and the player who destroys a specific building first may receive a bonus. This structure demands pure reflexes and quick decision-making, making it suitable for short rounds rather than lengthy campaigns. Therefore, it is recommended for players with good reflexes, those who prefer fast-paced gameplay, and anyone looking for a light competition with friends. Before playing, check that the map supports eight players, and verify which units and upgrade trees are available, as they may be limited, so confirming initial resource allocation is advisable. Furthermore, just as the map’s description humorously suggests, enjoying it with a light heart rather than excessive seriousness aligns with its intended spirit.
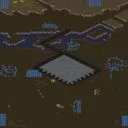
남쪽 공격자 저지 (Fend off Southern attackers)
Fend off Southern attackers는 황무지 타일셋을 기반으로 한 4096×4096 크기의 넓은 맵에서 두 플레이어가 맞붙는 유즈맵이다. 승리는 모든 적 건물을 파괴하는 것으로, 이는 일반적인 메레이 승리 조건과 동일하다. 지형은 주로 평지와 약간의 구릉이 섞여 있어 초기 병력 이동이 수월하며, 자원은 대칭적으로 배치되어 공정한 경쟁을 보장한다. 초반에는 스카웃과 초기 병력 생산을 통해 상대의 접근로를 파악하고, 중반에는 병력 조합과 타이밍 공격을 통해 적 건물에 압박을 가한다. 후반에는 업그레이드와 고급 유닛을 이용해 남은 건물을 정리하며, 맵 크기가 크므로 이동 경로를 미리 계획하는 것이 승리에 큰 영향을 미친다. 각 종족의 특성을 살린 저글링 러시, 마린 탱크 콤보, 질럿 충격 등 다양한 전략을 시도할 수 있으며, 맵 내에 있는 좁은 통로나 높은 지형은 측면을 막거나 고지대를 차지하는 데 유용하다. 전반적인 흐름은 공격적인 성향이 강해 수비보다는 상대 건물을 먼저 무너뜨리는 데 중점을 둔다. 이렇게 구성된 맵은 초보자에게 기본적인 빌드와 유닛 컨트롤을 연습하기에 좋고, 중상급 플레이어에게는 타이밍과 매크로를 시험할 수 있는 무대가 된다. 추천 대상은 2인전을 선호하는 유저이며, 건물 파괴 목표에 관심이 있거나 큰 맵에서의 장거리 작전을 경험해보고 싶은 플레이어에게 적합하다. 플레이 전에는 시작 위치의 자원 분포와 초반 진입로를 확인하고, 자신의 종족에 맞는 초기 빌드를 준비하는 것이 좋다. Fend off Southern attackers is a UMS map set on a desert tileset, featuring a vast 4096×4096 terrain where two players face off. Victory is achieved by destroying all enemy buildings, which mirrors the standard melee win condition. The terrain consists mainly of flat ground with some gentle hills, making early troop movement easy, and resources are placed symmetrically to ensure fair competition. In the early game, scouting and initial unit production help determine the opponent’s approach routes; in the mid‑game, unit composition and timing attacks apply pressure to enemy structures. In the late game, upgrades and high‑tier units are used to clear remaining buildings, and because the map is large, planning movement routes in advance becomes a key factor for victory. Players can exploit each race’s strengths—Zergling rushes, Marine‑Tank combos, Zealot charges, etc.—and the narrow passages or elevated spots on the map are useful for blocking flanks or securing high ground. Overall, the map leans toward an aggressive playstyle that prioritizes destroying the opponent’s buildings over defensive play. This design lets beginners practice basic build orders and unit control, while intermediate players can test their timing and macro skills. It is recommended for users who enjoy 1v1 matches, especially those interested in building‑destruction objectives or wanting to experience large‑scale, long‑range operations on a big map. Before playing, check the resource distribution at the start locations and any early‑game choke points, and prepare a build order suited to your chosen race.
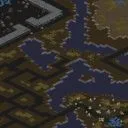
모든 적 건물 파괴 (Untitled Scenario)
스타크래프트 브루드워 유즈맵 'Untitled Scenario'는 테란 건물을 모두 파괴하는 간단한 목표를 지닌 1인용 맵이다. 내부 설명에 따르면 ‘모든 적 건물 파괴’라는 승리 조건만 확인할 수 있으며, 특별한 스토리나 추가 컨텐츠는 제공되지 않는다. 황무지 타일셋을 기반으로 한 넓은 평야 지형이 펼쳐져 있지만, 구조물의 배치가 단순하여 전략적 깊이는 크지 않다. 기본적인 건물 파괴 임무에 초점을 맞추고 있어 초보 유저도 쉽게 접근할 수 있지만, 반대로 다채로운 전략이나 랜덤 요소는 전무한 탓에 플레이VARIETY는 다소 떨어진다. 제공된 정보만으로는 버전, 난이도, 플레이 시간 등에 대한 구체적인 수치가 없으나, 목표가 명확하고 맵 크기가 크지 않아 10~20분 내외로 빠르게 플레이할 수 있을 것으로 추정된다. 테란 전용 맵으로 보이며, 멀티 플레이를 고려하지 않은 싱글 플레이 중심의 구조다. 이 맵은 순수한 ‘파괴 임무’에 특화되어 있어, 스타크래프트의 기본 메카닉과 조작감을 익숙해지는 데 도움이 된다. 그러나 장르적 다양성이나 재플레이성 측면에서는 아쉬움이 남는다. 초보자에게는 부담 없이 접근할 수 있는 반면, 숙련자라면 전략적 깊이를 느끼기 어려울 수 있어 대상 층이 다소 한정적일 수 있다. 맵을 플레이하기 전에는 승리 조건과 맵 크기, 타일셋을 우선 확인할 필요가 있으며, 건물 파괴 외의 추가적인 목표나 특수 조건이 없다는 점을 고려해야 한다. 단순하고 직관적인 구조이지만, 그만큼 접근성 측면에서 장점을 지닌 맵이라 할 수 있다. The StarCraft: Brood War custom map *Untitled Scenario* is a single-player map with a simple objective: destroy all Terran buildings. According to its in-game description, the only victory condition is "destroy all enemy buildings," with no additional story or extra content provided. The map features a vast plain terrain based on a wasteland tileset, but its straightforward structure and lack of complex building placement limit strategic depth. While the focus on basic building destruction makes it easy for beginners to pick up, the absence of varied strategies or random elements results in limited replayability. The provided details don’t include specific stats like version, difficulty, or playtime, but given its clear objective and compact size, it likely takes around 10–20 minutes to complete. Designed exclusively for Terran, the map is structured for single-player rather than multiplayer. This map excels as a pure "destruction mission," helping players familiarize themselves with StarCraft’s core mechanics and controls. However, it lacks genre diversity and replay value, making it more suited for casual play. Beginners will find it accessible, while experienced players may struggle to find meaningful strategic depth, limiting its appeal to a narrower audience. Before playing, it’s important to check the victory condition, map size, and tileset, as there are no additional objectives or special conditions beyond destroying buildings. While its simplicity may seem basic, this straightforward design is also its greatest strength in terms of accessibility.
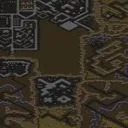
메크커맨더 (MechCommander)
MechCommander는 황무지 타일셋을 사용한 1024x1024 크기의 UMS 맵으로, 적의 모든 건물을 파괴하는 것이 승리 조건이다. 최대 6명이 참여할 수 있으며 팀 구정이 없어 자유대전이나 협력 플레이 형태로 즐길 수 있다. 맵은 광활한 사막 지형을ベース로 하고, 자원 위치와 기지 배치는 편집에 따라 다소 차이가 있으나 보통 중앙에 적 진영이 자리 잡고 둘레에 자원 구역이 펼쳐진다. 게임이 시작되면 각 플레이어는 적 건물을 향해 유닛을 생산하고 업그레이드에 투자하는데, 승리가 건물 완전 제거에 달려 있기 때문에 단순히 적 유닛을 처치하는 것보다 건물에 집중하는 공격 전략이 효과적이다. 초반에는 스카우트를 이용해 적 건물의 위치와 규모를 파악하고, 중반에는 생산 시설을 확충해 지속적인 압박을 가하며, 후반에는 상급 유닛이나 특수 능력을 활용해 견고한 구조물을 빠르게 파괴한다. 맵 크기가 넓어 이동 경로가 길고 황무지에서는 시야 확보와 병력 이동 타이밍이 중요하므로, 초반 정찰을 통해 적 배치를 확인하고 병력 이동 시점을 잘 잡아야 한다. 협력 모드를 선택할 경우 역할을 분담해 한 명은 생산과 업그레이드에 전념하고, 다른 한 명은 전선에서 공격에 집중하면 전반적인 효율이 높아진다. 플레이 전에는 맵에 내장된 트리거나 스크립트가 있는지 확인하고, 버전 호환성도 점검하는 것이 좋다. 유즈맵의 특성상 맞춤 규칙이 존재할 수 있으므로 설명서를 참고해 특정 유닛 제한이나 특별한 능력을 미리 알아두면 보다 원활한 플레이가 가능하다. MechCommander is a UMS map sized 1024x1024 using the wasteland tileset, with the goal of destroying all enemy buildings as the victory condition. Up to six players can participate, and with no fixed team setting it can be enjoyed as a free-for-all or cooperative play. The map is based on a vast desert terrain, and while resource locations and base placements may vary depending on the editor, typically the enemy force is positioned in the center with resource zones spreading outward. When the game starts, each player focuses on producing and upgrading units toward enemy buildings; since victory depends on completely destroying buildings, prioritizing attacks on structures rather than merely killing enemy units is an effective strategy. In the early game, scouting is used to determine the location and size of enemy buildings; in the mid-game, production facilities are expanded to maintain continuous pressure; in the late game, high-tier units or special abilities are employed to swiftly destroy fortified structures. Because the map is large, travel distances are long and in the wasteland securing vision and timing unit movements are crucial, so early reconnaissance to confirm enemy placement and timing of troop movements is essential. When playing cooperatively, roles can be divided with one player focusing on production and upgrades while the other concentrates on frontline attacks, improving overall efficiency. Before playing, check for any embedded triggers or scripts and verify version compatibility. Since UMS maps may have custom rules, consult the description to learn any unit limitations or special abilities beforehand for a smoother experience.
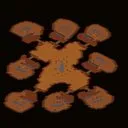
줌크야드 (JunkYard)
스타크래프트 브루드워의 유즈맵 <줌크야드(JunkYard)>는 5인 플레이를 전제로 한 건물 파괴형 디펜스 맵으로, 황혼 테마의 넓은 맵에서 적 건물들을 철저히 파괴하는 것이 목표다. 맵의 이름과 컨셉에서 짐작할 수 있듯, 폐기물을 처리하는Dump Yard의 아이디어가 반영된 것으로 보이며, 적 건물들이 마치 쓰레기더미처럼 여기저기 흩어져 있는 구조로 구성되어 있다. 맵의 크기는 1024x1024 타일로 상당히 넓은 편이며, 전체 해상도는 8192x8192로 세부적인 디자인이 구현되어 있을 가능성이 높다. 플레이 방식은 기본적으로 적 건물을 모두 파괴하는 것이 목표지만, 맵의 특성상 적 건물이 넓게 퍼져 있어 전략적인 이동과 자원 운용이 중요하다. 중앙에 위치한Resource Area는 시작 지점과 연결되어 자원을 확보할 수 있는 주요 포인트이며, 적 건물에 직접 접근하기 전에 방어선을 구축하거나 자원을 효율적으로 관리해야 한다. 맵의 분위기는 황혼 테마답게 어두운 색조가 강하며, 폐기물 처리장이라는 컨셉에 맞게 잔해물과 잔해 더미가 맵 곳곳에 배치되어 있어 시각적 몰입감을 높인다. 이 맵의 가장 큰 특징은 넓은 맵과 흩어진 적 건물들로 인한 ‘탐색과 파괴’의 균형을 맞추는 것이다. 초반에는 소규모 병력으로 적 건물을 정리하면서 자원을 확보하고, 중반부터는 대규모 병력을 모아 주요 거점을 점령하는 전략이 필요할 것으로 보인다. 또한, 적 건물이 맵 여기저기 흩어져 있어 방어塔를 건설하거나 진로를 차단하는 등 방어적인 플레이도 중요하다. 특히 5인 플레이를 고려할 때, 팀 간의 협력이 필수적이며, 개별 플레이어의 역할 분담이 성공 여부를 좌우할 것이다. 이 맵은 초보자보다는 중급 이상의 플레이어에게 적합하며, 넓은 맵과 전략적 요구 사항 때문에 순간적인 판단력이 요구된다. 또한, 자원 관리와 병력 운용을 동시에 고려해야 하기 때문에 멀티태스킹 능력이 뛰어난 플레이어에게 추천할 만하다. 맵의 난이도는 맵 곳곳에 배치된 적 건물과 방어 시설의 배치에 따라 달라질 수 있으므로, 첫 플레이 시에는 맵을 충분히 탐색한 후 본격적인 공격을 시도하는 것이 좋다. StarCraft: Brood War's custom map *JunkYard* is a 5-player building-destruction defense map where the goal is to thoroughly demolish enemy structures on a twilight-themed, expansive battlefield. As the name and concept suggest, the map incorporates the idea of a dump yard, with enemy buildings scattered across the map like piles of trash. The map measures 1024x1024 tiles, making it quite large, and with a full resolution of 8192x8192, its detailed design is likely intricately rendered. While the primary objective is to destroy all enemy buildings, their wide distribution across the map demands strategic movement and resource management. The central Resource Area serves as a key point connected to starting positions, allowing players to secure resources before directly engaging enemy buildings. Before launching an assault, players must either fortify defenses or efficiently allocate resources. True to its twilight theme, the map features a dark color palette, with debris and wreckage scattered throughout to enhance immersion. The map’s defining trait is balancing the dual objectives of exploration and destruction across its vast expanse. Early on, players should clear enemy buildings with small forces to gather resources, then transition to assembling large armies to seize key points mid-game. With buildings spread across the map, constructing defensive towers or blocking paths also plays a crucial role. Since the map is designed for five players, teamwork is essential, and individual role distribution will determine success. This map is best suited for intermediate to advanced players due to its large scale and strategic demands, requiring quick decision-making. Players who excel at multitasking—balancing resource management and troop deployment—will particularly enjoy it. Difficulty can vary based on the placement of enemy buildings and defensive structures, so it’s wise to thoroughly scout the map before launching a full-scale attack.
침공: 지구 (Invasion Earth)
스타크래프트: 브루드워의 유즈맵 중 하나로, ‘Invasion_Earth.scx’라는 파일명으로 배포된 ‘Untitled Scenario’는 이름 그대로 ‘제목 없는 시나리오’라는 정체성을 드러낸다. 내부 설명은 ‘모든 적 건물 파괴’를 목표로 제시하며, 이는 맵의 핵심 메커니즘을 간결하게 요약한다. 사막 타일셋으로 구성된 1024×1024 크기의 넓은 맵은 플레이어가 적의 건물을 찾아 파괴하는 단순한 목표를 달성하는 과정에서 전략적 탐색과 자원 관리 능력을 요구한다. 맵 해상도와 타일 단위가 크고, 타일셋이 사막이라는 점은 넓은 시야와 개방된 전투 공간을 제공하여, 플레이어가 맵 전체를 효율적으로 스캔하고 적의 위치를 예측할 수 있도록 돕는다. 다만, 맵 제목이 ‘Untitled’인 점과 내부 설명이 너무 간결하다는 점은 맵의 장르나 스토리적 배경을 유추하기 어렵게 만든다.Destruction을 중심으로 한 이 맵은 적 건물 파괴에 집중된 구조로, 플레이어는 맵을 탐험하며 적의 건물을 찾아내는 동시에 방어 시설이나 보너스 자원을 활용할 수 있는 기회를 포착해야 한다. 맵의 규모가 크고 개방적이지만, 목표가 명확한 만큼 전략적 사고보다는 신중한 탐험과 타임 관리 능력이 더 중요하게 작용할 수 있다. 특히, 맵의 사막 타일셋은 시야 확보에 용이하지만, 동시에 적의 공격 패턴을 예측하기 어렵게 만드는 요소가 될 수도 있다. 따라서 이 맵은 스타크래프트의 기본 메커니즘을 활용한 단순하면서도 긴장감 있는 경험을 제공하며, 특히Destruction 장르나 ‘건물 파괴’ 중심의 유즈맵을 선호하는 플레이어에게 적합할 것으로 보인다. 플레이 전에는 맵의 전체 구조를 미리 파악하고, 적 건물의 예상 위치를 전략적으로 плани하는 것이 중요하다. 또한, 넓은 맵에서 발생할 수 있는 자원 부족이나 적의 예상치 못한 공격에 대비하기 위해 자원 관리와 방어 전략을 사전에 점검해야 한다. This custom map from *StarCraft: Brood War*, distributed under the filename *Invasion_Earth.scx*, lives up to its name *Untitled Scenario* by offering no narrative or thematic identity. Its in-game description simply states the objective: "Destroy all enemy buildings," a concise summary of the map’s core mechanic. Sprawling across a 1024×1024 desert tileset, the large, open map challenges players to locate and demolish enemy structures while testing their strategic reconnaissance and resource management skills. The expansive tile size and desert setting provide wide visibility and open battlefields, allowing players to scan the entire map efficiently and anticipate enemy movements. However, the lack of a proper title and the overly brief description make it difficult to infer the map’s genre or storyline. Built around a *Destruction*-style objective, the map focuses entirely on eliminating enemy buildings. Players must explore the vast terrain, identify enemy structures, and seize opportunities to use defensive installations or bonus resources. While the map’s openness encourages exploration, the clear objective shifts emphasis from complex strategy to careful scouting and time management. The desert tileset aids visibility but also makes enemy attack patterns harder to predict, adding an element of unpredictability. Ultimately, the map delivers a straightforward yet tense experience rooted in *StarCraft*’s core mechanics, making it ideal for players who enjoy *Destruction*-themed or building-focused custom maps. Before jumping in, it’s crucial to study the map layout, strategically plan potential enemy building locations, and prepare for resource shortages or sudden enemy assaults by reviewing resource management and defensive setups.
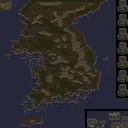
나짓놀 대한민국 (Najitnal Korea)
‘나짓놀 대한민국’은 스타크래프트 브루드워의 유즈맵으로, 7명의 플레이어가 한 팀을 이루어 적 건물만 파괴하는 단순하면서도 중독성 있는 목표를 제공한다. 맵은 8192x8192 크기의 거대한 사막 타일셋으로 구성되어 있으며, 넓은 공간에서 벌어지는 전투는 전략적 움직임을 요구한다.Destory all enemy buildings.라는 간단한 승리 조건이지만, 맵의 넓이와 배치된 자원, 건물을 고려하면Resource gathering이 필수적이며, 초반Resource gathering을 소홀히 하면 적의 빠른 건물 파괴로 인해 패배할 위험이 있다. 특히 7명이 한 팀을 이루어 플레이하기 때문에 팀워크가 중요한데, 한 명이라도Resource gathering을 소홀히 하면 전체적인 자원 수급이 부족해져 건물 업그레이드나 병력 생산에 차질이 빚어진다. 맵의 구조상Resource gathering 지역이 중앙에 집중되어 있어 초반Resource gathering 경쟁이 치열할 것으로 보이며, 이를 바탕으로 한 전략적Resource gathering과 공격 타이밍이 승패를 좌우할 것이다. 또한Resource gathering을 위한 SCV나 드론의 이동 경로가 복잡하게 배치되어 있어,Resource gathering 효율성을 높이기 위한Resource gathering 루트를 미리 계획하는 것이 중요하다.Resource gathering 지역 주변의 지형은 비교적 평탄하여Resource gathering 유닛의 이동에는 큰 문제가 없지만,Resource gathering 지역을 둘러싼 언덕 지형이Resource gathering 유닛의 시야를 가리는 경우가 있어Resource gathering 전술을 세울 때 이를 고려해야 한다.Resource gathering을 위한Resource gathering 건물인 커맨드 센터, 넥서스, 하이브 등은Resource gathering 지역 주변에 배치되어 있으며,Resource gathering을 위한Resource gathering 유닛인 SCV, 프로브, 드론 등은Resource gathering 건물에서 생산된다.Resource gathering이 충분해지면Resource gathering을 바탕으로 한Resource gathering 병력 생산이 가능해지며,Resource gathering 병력은Resource gathering 지역을 벗어나 적의Resource gathering 건물을 파괴하는 데 사용된다.Resource gathering 병력의 조합은Resource gathering 유닛의 종류에 따라 달라질 수 있으며,Resource gathering 유닛의 생산 비용과Resource gathering 생산 시간도Resource gathering 병력의 조합에 영향을 미친다.Resource gathering 지역을 벗어나Resource gathering 지역을 공격하는Resource gathering 병력의 이동 경로는Resource gathering 지역 주변의 지형과Resource gathering 지역 주변의Resource gathering 건물을 고려하여Resource gathering 전략을 수립해야 한다.이 맵은Resource gathering에 중점을 둔Resource gathering 전략 게임이므로,Resource gathering을 효율적으로 수행할 수 있는Resource gathering 능력을 키우는 것이 중요하며,Resource gathering을 바탕으로Resource gathering 병력을 생산하고Resource gathering 지역을 공격하는Resource gathering 전술을 구사할 수 있어야 한다. 초보 플레이어는Resource gathering의 기본적인Resource gathering 전략과Resource gathering 유닛의 특성을 숙지한 후Resource gathering에 임하는 것이 좋으며,Resource gathering 지역 주변의Resource gathering 건물을 파괴하는Resource gathering 전술을 연습해 보는 것이 좋다.Resource gathering 지역이 넓은 만큼Resource gathering에 소요되는Resource gathering 시간도 길어질 수 있으므로,Resource gathering 시간을 효율적으로 관리하는 것도Resource gathering 전략의 한 부분이다.Resource gathering 지역을 벗어나Resource gathering 지역을 공격하는Resource gathering 병력의 이동은Resource gathering 지역 주변의Resource gathering 지형과Resource gathering 건물을 고려하여Resource gathering 전략을 수립해야 하며,Resource gathering 지역을 공격하는Resource gathering 병력의 조합은Resource gathering 유닛의 종류와Resource gathering 생산 비용을 고려하여Resource gathering 전략을 수립해야 한다.Resource gathering 지역을 공격하는Resource gathering 병력의 이동 경로는Resource gathering 지역 주변의Resource gathering 지형과Resource gathering 건물을 고려하여Resource gathering 전략을 수립해야 한다.
Guía de selección de mapas
태그는 맵의 핵심 특징을 빠르게 설명하지만 제작 버전마다 규칙이 다를 수 있습니다. 상세 설명에서 권장 인원, 난이도, 플레이 시간과 버전을 함께 확인한 뒤 다운로드하세요.