
4방향 공격 StarCraft Map Collection
We've gathered maps registered with the '4방향 공격' tag. Compare popular and latest maps focusing on play styles, difficulties, and features that are hard to find through genre alone.
- Registered Maps
- 3items
- Total Downloads
- 1
- Total Views
- 154
Popular Maps
This map has high download and view engagement.
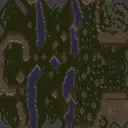
[2]사면매복 (Four Sides Ambush)
스타크래프트 브루드워의 유즈맵 [2]四面埋伏는 플레이어가 혼자서 컴퓨터 상대를 상대하는 컴까기 스타일의 디펜스 맵이다. 맵의 제목과 내부 설명에서 드러나듯, 플레이어는 스토리 라인을 따라遗留据点(남겨진 거점)을 파괴하고 적 세력을 제압하는 임무를 수행한다. 맵의 이름은 '사면매복(四面埋伏)'으로, 네 방향에서 적의 공격이 끊임없이 쏟아지는 디펜스 형식을 띠고 있다. 사막 테마의 타일셋을 기반으로 한 배경은 넓은 평원과 협곡으로 구성되어 있으며, 중앙에 위치한 플레이어 기지 주변으로 적의Spawn지역이 빙 둘러 배치되어 있다. 맵의 구조상 적의 공격 루트는 총 4방향으로 나뉘며, 각 방향에서 주기적으로 적 유닛이 출현한다. 플레이어는 초반부터 강력한 방어 타워를 건설할 수 있는 자원을 확보하며, 맵의 광활한 공간을 활용해 방어선을 구축해야 한다. 특히, 맵의 너비(8192x3072 해상도)가 넓기 때문에 초보 플레이어는 자원 확보와 방어선 구축에 어려움을 느낄 수 있다. 반면, 익숙한 플레이어는 다수의 멀티 멀티태스킹을 통해 효율적인 자원 관리와 타워 배치를 통해 장기전에 대비할 수 있다. 맵의 난이도는 설정된 트리거에 따라 좌우되지만, 일반적으로는 '보통' 수준으로 평가된다. 추천 대상은 스타크래프트의 디펜스 맵을 즐기는 플레이어, 특히 넓은 공간에서의 타워 디펜스 전략을 선호하는 유저에게 적합하다. 플레이 전에는 자원 확보와 초기 방어선 구축에 신경을 써야 하며, 각 방향의 공격 패턴을 숙지하는 것이 중요하다. 맵의 특성상 플레이 시간이 길어질 수 있으므로, 충분한 시간을 투자할 준비가 되어 있어야 한다. 또한, 맵의 해상도가 크기 때문에 저사양 PC에서는 렉이 발생할 수 있어 사양 점검도 추천한다. StarCraft: Brood War's custom map [2]四面埋伏 is a defense-style map where players face off against AI opponents in a solo "comp-ka" (computer-kill) format. As the title and in-game description suggest, players follow the storyline by destroying abandoned outposts (遗留据点) and suppressing enemy forces. The map's name, "사면매복 (Four-Sided Ambush)," reflects its defense structure, where relentless enemy attacks come from all four directions. The desert-themed tileset features vast plains and canyons, with the player's base centrally located and enemy spawn points encircling it. The map is divided into four distinct enemy attack routes, each spawning units periodically. Players start by securing resources to build powerful defensive towers and must construct defensive lines across the expansive terrain. Due to the map's large scale (8192x3072 resolution), beginners may struggle with resource gathering and base defense, while experienced players can optimize resource management and tower placement through multitasking for long-term survival. The difficulty varies based on triggers but is generally rated as "normal." This map is recommended for players who enjoy StarCraft defense maps, especially those who prefer tower defense strategies in wide-open spaces. Before playing, focus on securing resources and setting up early defenses, and familiarize yourself with each direction's attack patterns. Expect lengthy play sessions, so allocate sufficient time. Additionally, the map's high resolution may cause lag on low-end PCs, so checking system requirements is advised.
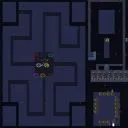
터렛 디펜스 4웨이즈 (Turret D 4 ways)
스타크래프트 브루드워의 디펜스 장르 유즈맵인 'Turret D 4 ways'는 플레이어가 4방향에서 끊임없이 몰려오는 적을 상대로 타워를 건설하고 강화하며 방어전을 펼치는 전형적인 컴까기 형식의 맵이다. 맵 중앙의 영웅 선택 존에서 $를 사용하여 영웅을 배치할 수 있으며, 영웅은 각각 고유한 스킬과 성능을 지녀 전략적 선택이 중요하다. 타워는 기본 방어 건물로 시작하지만, 업그레이드를 통해 더 강력한 대미지와 특수 효과를 부여할 수 있어 후반부로 갈수록 방어 라인이 튼튼해진다. 맵의 특징은 4방향에서 동시에 적이 출현한다는 점으로, 모든 방향을 골고루 방어하지 않으면 한 방향에서 뚫리는 경우가 빈번히 발생한다. 또한, 영웅의 배치와 업그레이드 타이밍이 승패를 좌우하는 핵심 요소로, 초반 자원 관리와 중반 타워 배치 전략이 매우 중요하다. 이 맵은 디펜스 장르의 기본 틀을 유지하면서도 4방향 동시 공격이라는 독특한 변수를 추가해 플레이어의 집중력과 전략적 사고를 요구한다. 특히, 영웅의 스킬 활용과 타워의 효율적인 배치가 승리의 관건이며, 초보 플레이어는 난이도가 다소 높게 느껴질 수 있지만 숙련될수록 긴장감과 성취감을 느낄 수 있는佳作이다. 추천 대상은 디펜스 장르를 좋아하는 플레이어나 타워 디펜스와 컴까기에 관심이 있는 유저이며, 영웅 선택과 타워 업그레이드에 대한 기본적인 이해가 선행되어야 원활한 플레이가 가능하다. 플레이 전에는 맵의 4방향 구조와 영웅의 스킬 종류, 타워 업그레이드 비용을 미리 확인하는 것이 중요하다. 이 맵의 가장 큰 매력은 다중 방향에서의 끊임없는 압박과 영웅의 전략적 활용에 있으며, 이를 극복하는 과정에서 긴장감과 재미를 동시에 느낄 수 있다. StarCraft: Brood War's defense genre custom map, *Turret D 4 ways*, is a classic tower-defense-style game where players build and upgrade towers to fend off endless waves of enemies approaching from all four directions. At the map's center, players can spend in-game currency to deploy heroes, each with unique abilities and performance, making strategic selection crucial. Towers start as basic defensive structures but can be upgraded for increased damage and special effects, gradually strengthening the defense line as the game progresses. A key feature of the map is that enemies spawn simultaneously from all four directions, and failing to evenly defend each side often leads to breaches. The placement of heroes and the timing of tower upgrades are decisive factors in victory, with early resource management and mid-game tower placement strategies playing vital roles. While maintaining the core mechanics of the defense genre, the map introduces a unique twist with its four-directional simultaneous assaults, demanding sharp focus and strategic thinking from players. Success hinges on efficient hero skill utilization and tower placement, and while the difficulty may feel steep for beginners, mastering the mechanics offers a thrilling sense of tension and accomplishment. This map is ideal for fans of the defense genre, tower-defense enthusiasts, or those interested in tower-defense and tower-rush mechanics. A basic understanding of hero selection and tower upgrades is recommended for smooth gameplay. Before playing, it's important to familiarize yourself with the map's four-directional layout, hero skill sets, and tower upgrade costs. The map's greatest appeal lies in the relentless pressure from multiple directions and the strategic use of heroes, delivering both excitement and fun as players overcome these challenges.
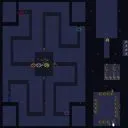
터렛 사원 4방향Final (Turret Temple 4way Final)
스타크래프트 브루드워의 유즈맵 장르 중에서도 독특한 디펜스 형식을 채택한 'Turret Temple 4way Final'은 중앙의 사원과 사방을 둘러싼 네 개의 외곽 지역으로 구성된 맵이다. 플레이어는 각각의 외곽 지역에 배치된 터렛 건물을 활용해 끊임없이 밀려드는 적의 공세를 방어해야 한다. 맵의 특징은 네 방향에서 동시에 공격이 시작된다는 점으로, 각 방향의 방어 난이도를 균일하게 맞춰 설계되었다. 특히 터렛의 재장전 시간과 공격력이 조절되어 있으며, 중앙의 사원 건물이 파괴되지 않도록 보호를 우선해야 한다. 맵의 분위기는 화산 타일셋을 기반으로 하여, 붉은빛과 검은색의 대비가 인상적인 디자인으로 구성되었다. 플레이어는 각자의 터렛을 업그레이드하거나 수리하는 방식으로 자원을 관리하며, 중앙의 사원과의 연계성을 고려한 전략이 요구된다. 초보자는 터렛의 배치와 자원 관리에서 어려움을 느낄 수 있지만, 익숙해지면 각 방향의 공격 패턴을 예측하고 효율적으로 방어할 수 있는 맵이다. 추천 대상은 디펜스 게임을 즐기는 플레이어이며, 특히 팀플레이보다는 1인 플레이에 최적화되어 있다. 플레이 전에는 터렛의 공격 범위와 재장전 시간을 숙지하고, 중앙 사원의 체력을 꾸준히 확인하는 습관이 필요하다. 맵의 난이도는 보통 수준으로, 충분한 연습을 통해 방어 루틴을 익히면 클리어할 수 있다. Turret Temple 4way Final is a unique defense-style custom map in StarCraft: Brood War, featuring a central temple surrounded by four outer regions. Players must defend against waves of enemies by strategically using turret buildings placed in each outer zone. The map’s defining feature is its four-way simultaneous assault design, with balanced difficulty across all directions. Turrets have set reload times and attack power, and protecting the central temple is the top priority. The map’s aesthetic is built on a volcanic tileset, offering a striking contrast of red and black hues. Players manage resources to upgrade or repair turrets while coordinating with the central temple’s defense. Beginners may struggle with turret placement and resource allocation, but with practice, they can learn to predict attack patterns and defend efficiently. This map is best suited for players who enjoy defense games and prefer solo play over team-based strategies. Before playing, familiarize yourself with turret range and reload times, and keep an eye on the central temple’s health. The difficulty is moderate, making it achievable with enough practice to master defense routines.
Recently registered maps
Check newly added files and versions.
터렛 사원 4방향Final (Turret Temple 4way Final)
스타크래프트 브루드워의 유즈맵 장르 중에서도 독특한 디펜스 형식을 채택한 'Turret Temple 4way Final'은 중앙의 사원과 사방을 둘러싼 네 개의 외곽 지역으로 구성된 맵이다. 플레이어는 각각의 외곽 지역에 배치된 터렛 건물을 활용해 끊임없이 밀려드는 적의 공세를 방어해야 한다. 맵의 특징은 네 방향에서 동시에 공격이 시작된다는 점으로, 각 방향의 방어 난이도를 균일하게 맞춰 설계되었다. 특히 터렛의 재장전 시간과 공격력이 조절되어 있으며, 중앙의 사원 건물이 파괴되지 않도록 보호를 우선해야 한다. 맵의 분위기는 화산 타일셋을 기반으로 하여, 붉은빛과 검은색의 대비가 인상적인 디자인으로 구성되었다. 플레이어는 각자의 터렛을 업그레이드하거나 수리하는 방식으로 자원을 관리하며, 중앙의 사원과의 연계성을 고려한 전략이 요구된다. 초보자는 터렛의 배치와 자원 관리에서 어려움을 느낄 수 있지만, 익숙해지면 각 방향의 공격 패턴을 예측하고 효율적으로 방어할 수 있는 맵이다. 추천 대상은 디펜스 게임을 즐기는 플레이어이며, 특히 팀플레이보다는 1인 플레이에 최적화되어 있다. 플레이 전에는 터렛의 공격 범위와 재장전 시간을 숙지하고, 중앙 사원의 체력을 꾸준히 확인하는 습관이 필요하다. 맵의 난이도는 보통 수준으로, 충분한 연습을 통해 방어 루틴을 익히면 클리어할 수 있다. Turret Temple 4way Final is a unique defense-style custom map in StarCraft: Brood War, featuring a central temple surrounded by four outer regions. Players must defend against waves of enemies by strategically using turret buildings placed in each outer zone. The map’s defining feature is its four-way simultaneous assault design, with balanced difficulty across all directions. Turrets have set reload times and attack power, and protecting the central temple is the top priority. The map’s aesthetic is built on a volcanic tileset, offering a striking contrast of red and black hues. Players manage resources to upgrade or repair turrets while coordinating with the central temple’s defense. Beginners may struggle with turret placement and resource allocation, but with practice, they can learn to predict attack patterns and defend efficiently. This map is best suited for players who enjoy defense games and prefer solo play over team-based strategies. Before playing, familiarize yourself with turret range and reload times, and keep an eye on the central temple’s health. The difficulty is moderate, making it achievable with enough practice to master defense routines.
터렛 디펜스 4웨이즈 (Turret D 4 ways)
스타크래프트 브루드워의 디펜스 장르 유즈맵인 'Turret D 4 ways'는 플레이어가 4방향에서 끊임없이 몰려오는 적을 상대로 타워를 건설하고 강화하며 방어전을 펼치는 전형적인 컴까기 형식의 맵이다. 맵 중앙의 영웅 선택 존에서 $를 사용하여 영웅을 배치할 수 있으며, 영웅은 각각 고유한 스킬과 성능을 지녀 전략적 선택이 중요하다. 타워는 기본 방어 건물로 시작하지만, 업그레이드를 통해 더 강력한 대미지와 특수 효과를 부여할 수 있어 후반부로 갈수록 방어 라인이 튼튼해진다. 맵의 특징은 4방향에서 동시에 적이 출현한다는 점으로, 모든 방향을 골고루 방어하지 않으면 한 방향에서 뚫리는 경우가 빈번히 발생한다. 또한, 영웅의 배치와 업그레이드 타이밍이 승패를 좌우하는 핵심 요소로, 초반 자원 관리와 중반 타워 배치 전략이 매우 중요하다. 이 맵은 디펜스 장르의 기본 틀을 유지하면서도 4방향 동시 공격이라는 독특한 변수를 추가해 플레이어의 집중력과 전략적 사고를 요구한다. 특히, 영웅의 스킬 활용과 타워의 효율적인 배치가 승리의 관건이며, 초보 플레이어는 난이도가 다소 높게 느껴질 수 있지만 숙련될수록 긴장감과 성취감을 느낄 수 있는佳作이다. 추천 대상은 디펜스 장르를 좋아하는 플레이어나 타워 디펜스와 컴까기에 관심이 있는 유저이며, 영웅 선택과 타워 업그레이드에 대한 기본적인 이해가 선행되어야 원활한 플레이가 가능하다. 플레이 전에는 맵의 4방향 구조와 영웅의 스킬 종류, 타워 업그레이드 비용을 미리 확인하는 것이 중요하다. 이 맵의 가장 큰 매력은 다중 방향에서의 끊임없는 압박과 영웅의 전략적 활용에 있으며, 이를 극복하는 과정에서 긴장감과 재미를 동시에 느낄 수 있다. StarCraft: Brood War's defense genre custom map, *Turret D 4 ways*, is a classic tower-defense-style game where players build and upgrade towers to fend off endless waves of enemies approaching from all four directions. At the map's center, players can spend in-game currency to deploy heroes, each with unique abilities and performance, making strategic selection crucial. Towers start as basic defensive structures but can be upgraded for increased damage and special effects, gradually strengthening the defense line as the game progresses. A key feature of the map is that enemies spawn simultaneously from all four directions, and failing to evenly defend each side often leads to breaches. The placement of heroes and the timing of tower upgrades are decisive factors in victory, with early resource management and mid-game tower placement strategies playing vital roles. While maintaining the core mechanics of the defense genre, the map introduces a unique twist with its four-directional simultaneous assaults, demanding sharp focus and strategic thinking from players. Success hinges on efficient hero skill utilization and tower placement, and while the difficulty may feel steep for beginners, mastering the mechanics offers a thrilling sense of tension and accomplishment. This map is ideal for fans of the defense genre, tower-defense enthusiasts, or those interested in tower-defense and tower-rush mechanics. A basic understanding of hero selection and tower upgrades is recommended for smooth gameplay. Before playing, it's important to familiarize yourself with the map's four-directional layout, hero skill sets, and tower upgrade costs. The map's greatest appeal lies in the relentless pressure from multiple directions and the strategic use of heroes, delivering both excitement and fun as players overcome these challenges.
[2]사면매복 (Four Sides Ambush)
스타크래프트 브루드워의 유즈맵 [2]四面埋伏는 플레이어가 혼자서 컴퓨터 상대를 상대하는 컴까기 스타일의 디펜스 맵이다. 맵의 제목과 내부 설명에서 드러나듯, 플레이어는 스토리 라인을 따라遗留据点(남겨진 거점)을 파괴하고 적 세력을 제압하는 임무를 수행한다. 맵의 이름은 '사면매복(四面埋伏)'으로, 네 방향에서 적의 공격이 끊임없이 쏟아지는 디펜스 형식을 띠고 있다. 사막 테마의 타일셋을 기반으로 한 배경은 넓은 평원과 협곡으로 구성되어 있으며, 중앙에 위치한 플레이어 기지 주변으로 적의Spawn지역이 빙 둘러 배치되어 있다. 맵의 구조상 적의 공격 루트는 총 4방향으로 나뉘며, 각 방향에서 주기적으로 적 유닛이 출현한다. 플레이어는 초반부터 강력한 방어 타워를 건설할 수 있는 자원을 확보하며, 맵의 광활한 공간을 활용해 방어선을 구축해야 한다. 특히, 맵의 너비(8192x3072 해상도)가 넓기 때문에 초보 플레이어는 자원 확보와 방어선 구축에 어려움을 느낄 수 있다. 반면, 익숙한 플레이어는 다수의 멀티 멀티태스킹을 통해 효율적인 자원 관리와 타워 배치를 통해 장기전에 대비할 수 있다. 맵의 난이도는 설정된 트리거에 따라 좌우되지만, 일반적으로는 '보통' 수준으로 평가된다. 추천 대상은 스타크래프트의 디펜스 맵을 즐기는 플레이어, 특히 넓은 공간에서의 타워 디펜스 전략을 선호하는 유저에게 적합하다. 플레이 전에는 자원 확보와 초기 방어선 구축에 신경을 써야 하며, 각 방향의 공격 패턴을 숙지하는 것이 중요하다. 맵의 특성상 플레이 시간이 길어질 수 있으므로, 충분한 시간을 투자할 준비가 되어 있어야 한다. 또한, 맵의 해상도가 크기 때문에 저사양 PC에서는 렉이 발생할 수 있어 사양 점검도 추천한다. StarCraft: Brood War's custom map [2]四面埋伏 is a defense-style map where players face off against AI opponents in a solo "comp-ka" (computer-kill) format. As the title and in-game description suggest, players follow the storyline by destroying abandoned outposts (遗留据点) and suppressing enemy forces. The map's name, "사면매복 (Four-Sided Ambush)," reflects its defense structure, where relentless enemy attacks come from all four directions. The desert-themed tileset features vast plains and canyons, with the player's base centrally located and enemy spawn points encircling it. The map is divided into four distinct enemy attack routes, each spawning units periodically. Players start by securing resources to build powerful defensive towers and must construct defensive lines across the expansive terrain. Due to the map's large scale (8192x3072 resolution), beginners may struggle with resource gathering and base defense, while experienced players can optimize resource management and tower placement through multitasking for long-term survival. The difficulty varies based on triggers but is generally rated as "normal." This map is recommended for players who enjoy StarCraft defense maps, especially those who prefer tower defense strategies in wide-open spaces. Before playing, focus on securing resources and setting up early defenses, and familiarize yourself with each direction's attack patterns. Expect lengthy play sessions, so allocate sufficient time. Additionally, the map's high resolution may cause lag on low-end PCs, so checking system requirements is advised.
Map selection guide
태그는 맵의 핵심 특징을 빠르게 설명하지만 제작 버전마다 규칙이 다를 수 있습니다. 상세 설명에서 권장 인원, 난이도, 플레이 시간과 버전을 함께 확인한 뒤 다운로드하세요.