
썬큰 디펜스 StarCraft Map Collection
We've gathered maps registered with the '썬큰 디펜스' tag. Compare popular and latest maps focusing on play styles, difficulties, and features that are hard to find through genre alone.
- Registered Maps
- 5items
- Total Downloads
- 0
- Total Views
- 93
Popular Maps
This map has high download and view engagement.
썬큰 디펜스 10웨이 17.9 임파서블 (SunkenD 10Way 17.9 Impossible)
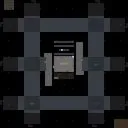
스타크래프트 브루드워의 유즈맵 ‘썬큰 디펜스 10웨이 17.9 임파서블(SunkenD 10Way 17.9 Impossible)’은 디펜스 장르의 대표적인 ‘컴퓨터 상대 유즈맵’으로, 총 25단계에 이르는 난이도별 웨이브를 뚫고 최종 승리를 차지하는 것이 목표다. 맵의 중앙에 위치한 플레이어 기지 주변으로 10방향의 웨이브가 지속적으로 밀려오며, 각 웨이브마다 스캐럽, 뮤탈리스크, 울트라리스크, 가디언 등 다양한 저그 유닛들이 조합되어 공격을 펼쳐온다. 특히 17.9 버전부터는 저글러와 럴커의 조합이 강화되어 맵의 난이도가 한층 높아졌으며, 후속 버전인 12.9나 13.5와 비교했을 때도 피하기와 생존 전략이 더욱 중요해진다. 맵의 구조는 센터 기지에서 멀어질수록 방어가 약화되는 특징이 있어, 초반에는 기지에서 버티면서 자원을 확보하고, 중반부터는 멀티 테란, 멀티 저그 등 추가 기지를 확보하는 전략이 필수적이다. 또한, 맵 상단과 하단에 위치한 추가 멀티 지역은 자원 확보와 방어선을 넓히는 데 핵심적인 역할을 한다. 울트라리스크와 가디언의 조합이 강력한 15단계 이후로는 ‘백워시’ 지역에서도 공격을 방어해야 하며, 이 지역을 소홀히 하면 기지가 순식간에 무너질 수 있다. 초보자라면 10단계까지는 무리 없이 클리어할 수 있지만, 15단계 이후부터는 난이도가 급격히 상승하므로, 방어 건물의 배치와 유닛 조합을 신중히 계획해야 한다. 이 맵은 ‘컴퓨터 상대 디펜스’ 장르에 익숙한 플레이어에게는 훌륭한 도전 과제가 되며, 특히 10웨이의 균형 잡힌 공격 패턴과 단계별 난이도 상승이 흥미로운 플레이 경험을 제공한다. 하지만, 초보자의 경우 난이도 조절이 필요할 수 있으며, 방어塔의 업그레이드와 유닛의 효율적인 관리 전략을 익히는 것이 중요하다. 플레이 전에는 맵의 멀티 지역과 주요 공격 경로, 그리고 후속 웨이브의 유닛 조합을 미리 숙지하고 준비하는 것이 좋다. StarCraft: Brood War's custom map *Sunken Defense 10-Way 17.9 Impossible* is a standout among defense genre custom maps, where the objective is to survive 25 increasingly difficult waves and achieve final victory. Waves continuously assault the player's base from 10 directions around the central starting location, with each wave featuring diverse Zerg unit compositions such as Scourges, Mutalisks, Ultralisks, and Guardians. Starting with version 17.9, the inclusion of Zealots and Lurkers has significantly increased the map's difficulty, making evasion and survival strategies even more crucial compared to earlier versions like 12.9 or 13.5. The map's design weakens defenses the farther they are from the center, so early survival depends on holding the main base while securing resources. As the game progresses, expanding with additional Terran or Zerg bases becomes essential. The upper and lower sections of the map offer critical multi-resource areas that play a key role in resource gathering and expanding defensive lines. After wave 15, where Ultralisks and Guardians dominate, players must also defend the 'Backwash' area—neglecting it can lead to a swift base collapse. While beginners can typically clear up to wave 10 without much trouble, difficulty spikes sharply after wave 15, requiring careful planning of defensive structures and unit compositions. For players familiar with the *computer opponent defense* genre, this map offers an excellent challenge, especially with its balanced 10-way attack patterns and progressively escalating difficulty. However, newcomers may need to adjust the difficulty settings and focus on mastering turret upgrades and efficient unit management strategies. Before playing, it's advisable to familiarize yourself with the map's multi-resource areas, main attack paths, and upcoming wave compositions to prepare effectively.
썬큰 디펜스 10웨이 15.4 임파서블 (SunkenD 10Way 15.4 Impossible)
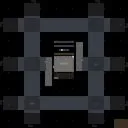
'썬큰 디펜스 10웨이 15.4 임파서블(SunkenD 10Way 15.4 Impossible)'은 스타크래프트 브루드워 유즈맵 중에서도 손꼽히는 고난도 협동 디펜스 맵으로, 최대 10인의 플레이어가 우주 타일셋 위에서 25단계 저그 웨이브를 상대로 생존을 겨루는 구조다. '10웨이(10Way)' 명칭대로 열 개의 독립 진입로가 'Even Mid' 대칭 배치로 구성되어 공평한 자원 분배와 난이도를 제공하며, '임파서블' 표기답게 일반 디펜스와는 차원이 다른 생존 압박이 지속된다. 플레이어는 감염된 커맨드 센터 또는 해처리를 거점으로 자원을 확보해 썬큰 콜로니 위주의 방진을 구축, 저글링부터 울트라리스크까지 진화하는 적 병력을 막아내야 한다. 'Backwash wont kill you' 설명은 후방 우회 병력(백워시)으로 인한 즉사 패널티를 완화해 전방 라인 유지와 업그레이드 타이밍에 집중하도록 유도한 트리거 설계로 보인다. 128x128 타일 기반 4096x4096 해상도는 10인 동시 플레이에 적절한 공간감을 주며, 버전 15.4까지 이어진 업데이트 이력과 'sc-maps.com' 출처는 지속적인 밸런스 검증이 있었음을 시사한다. 이 맵은 단순 타워 배치를 넘어 유닛 상성, 자원 관리, 10명 전원의 역할 분담과 웨이브 클리어 속도 조율이 유기적으로 맞물려야 하는 고차원적 협동을 요구한다. 입문자에게는 진입 장벽이 높으나, 정석 '입구 막기' 메커니즘을 익힌 숙련자 파티에게는 최적의 도전 과제다. 플레이 전 버전 호환성(리마스터/1.16.1), 팀원 간 의사소통 수단, 웨이브별 출현 유닛 공략 숙지 여부를 점검하고 진입하는 것이 생존의 열쇠가 된다. SunkenD 10Way 15.4 Impossible stands out as one of the highest-difficulty cooperative defense maps in the StarCraft Brood War UMS scene. Up to ten players face 25 stages of evolving Zerg waves on a space tileset. The "10Way" designation indicates ten independent lanes arranged in an "Even Mid" symmetrical layout, ensuring fair resource distribution and balanced difficulty. True to its "Impossible" label, the survival pressure far exceeds standard defense maps. Players establish bases around Infested Command Centers or Hatcheries, building Sunken Colony-centric defenses to stop enemies ranging from Zerglings to Ultralisks. The note "Backwash wont kill you" suggests triggers prevent instant loss from rear leaks, letting players focus on front-line upgrades and timing. The 4096x4096 resolution on 128x128 tiles provides ample room for ten players, while the v15.4 history and sc-maps.com origin imply long-term balance refinement. This map demands more than tower placement; it requires deep unit-counter knowledge, economy management, role assignment, and synchronized wave-clearing across all ten slots. The barrier is high for newcomers, but veteran parties mastering classic choke-point defense will find a rewarding challenge. Before starting, verify version compatibility (Remastered/1.16.1), ensure voice communication, and study wave compositions to maximize survival chances.
썬큰 디펜스 10웨이 12.9 임파서블 (SunkenD 10Way 12.9 Impossible)
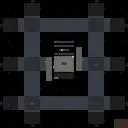
스타크래프트 브루드워 유즈맵 '썬큰 디펜스 10웨이 12.9 임파서블'은 이름 그대로 열 개 진입로를 막아내는 고난이도 타워 디펜스 맵이다. 우주 타일셋 위에 128x128 타일, 4096x4096 해상도로 펼쳐진 전장은 6인 협동 플레이를 기준으로 설계되었으며, 제작자 rion40025의 원작을 breathdeep가 수정해 밸런스를 다듬은 12.9 버전이다. 플레이어는 각자 혹은 공동으로 자원을 모아 저그의 대표적인 고정 포탑인 썬큰 콜로니를 건설하고 업그레이드하며 끝없이 몰려오는 적 웨이브를 버텨내야 한다. 10웨이 구조상 진입로가 많아 초반부터 병력 분산과 자원 배분 판단이 까다롭고, '임파서블' 난이도 표기답게 웨이브 후반부는 압도적인 물량과 특수 유닛 조합으로 밀고 들어와 단 한 번의 실수도 용납하지 않는다. 트리거로 구현된 웨이브 시스템과 업그레이드 트리, 보스전 연출 등은 클래식한 썬큰 디펜스 문법을 충실히 따르면서도 최신 버전에서 난이도 곡선을 세밀하게 조정한 흔적이 보인다. 6명이 모두 생존하려면 음성 채팅이나 빠른 핑으로 타워 집중 구간을 실시간 조율하는 팀워크가 필수적이며, 혼자서 여러 진입로를 맡아야 할 때는 멀티태스킹 한계와 맞닥뜨리게 된다. 입문용으로는 부담스럽지만, 고전 디펜스 감성을 극한까지 끌어올린 맵을 찾는 숙련자에게는 도전욕을 자극하는 좋은 소재다. 플레이 전에는 버전별 웨이브 구성 차이와 랙 유발 트리거 여부, 그리고 팀원 간 역할 분담 규칙을 미리 합의하면 훨씬 수월하게 공략할 수 있다. StarCraft Brood War UMS map 'Sunken Defense 10Way 12.9 Impossible' is, as the name suggests, a high-difficulty tower defense map where players must block ten entry routes. The battlefield, spread across a 128x128 tile grid at 4096x4096 resolution on the space tileset, is designed for six-player cooperative play. This version 12.9 refines the balance of the original work by rion40025, edited by breathdeep. Players must gather resources individually or jointly to build and upgrade the Zerg's iconic static defense, the Sunken Colony, to withstand endless enemy waves. The 10-way structure creates many lanes, making early force distribution and resource allocation decisions difficult. True to its 'Impossible' difficulty rating, later waves push with overwhelming numbers and special unit combinations that tolerate not a single mistake. The trigger-based wave system, upgrade trees, and boss encounters faithfully follow classic Sunken Defense conventions while showing signs of fine-tuned difficulty curves in this latest version. For all six to survive, teamwork coordinating turret focus points in real-time via voice chat or quick pings is essential, and solo players covering multiple lanes will hit multitasking limits. While daunting for beginners, it serves as excellent material for veterans seeking a classic defense experience pushed to its extreme. Before playing, agreeing on role assignments among teammates and checking for version-specific wave differences or lag-inducing triggers will make the strategy much smoother.
썬큰 라인 2 웨이 v5.5xp (Sunken Line 2 Way v5.5xp)
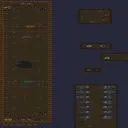
스타크래프트 브루드워 유즈맵 '썬큰 라인 2 웨이 v5.5xp'는 6인용 디펜스 장르로, 원작자 Psychic-Stevie의 맵을 Taruto가 수정하여 엑스피(XP) 버전으로 완성한 작품이다. 황무지 타일셋을 기반으로 64x128 타일, 세로로 긴 2048x4096 크기의 전장은 두 갈래 길(2 Way)로 나뉘어 있으며, 플레이어는 각 진입로에서 밀려오는 적 유닛이 종점에 도달하지 못하도록 썬큰 콜로니와 스포어 콜로니, 진화장 업그레이드 등을 활용해 방어선을 구축해야 한다. 내부 설명에 'Dont let enemy get to end'라 명시된 것처럼 핵심 목표는 적의 종점 도착 저지이나, 'xp for expert players' 문구에서 알 수 있듯 후반부로 갈수록 체력과 공격력이 대폭 상승한 울트라리스크, 저글링, 히드라리스크, 뮤탈리스크, 가디언 등 지상·공중 혼합 웨이브가 쉴 새 없이 몰려와 자원 분배와 업그레이드 타이밍, 라인별 인원 배치가 생존을 가른다. 6인 전원이 음성 채팅이나 핑으로 협력해 두 라인의 밸런스를 실시간으로 맞추고, 누수 발생 시 즉각 지원 병력을 보내는 팀플레이가 필수적이다. 클래식한 컴까기·입구막기류 맵에 익숙한 유저라면 팀원 간 역할 분담과 라인 유지력 테스트용으로 적합하며, 난이도가 높아 초보자보다는 숙련된 디펜스 유저에게 권장된다. 버전 표기상 v5.5xp가 최종본으로 보이며, 고전 명작 디펜스의 변형판을 찾는 이들에게 좋은 선택지가 될 것이다. StarCraft Brood War UMS map 'Sunken Line 2 Way v5.5xp' is a 6-player defense genre map, modified by Taruto from the original by Psychic-Stevie and finalized as an XP version. Based on the Badlands tileset, the vertically long 2048x4096 battlefield (64x128 tiles) is split into two lanes (2 Way), where players must build Sunken Colonies, Spore Colonies, and utilize Evolution Chamber upgrades to prevent enemy units rushing from each entrance from reaching the end point. As the internal description states 'Don't let enemy get to end', the core objective is simple, but as noted by 'xp for expert players', the difficulty is high; in later stages, mixed ground and air waves of Ultralisks, Zerglings, Hydralisks, Mutalisks, and Guardians with significantly increased HP and attack power rush in relentlessly, making resource allocation, upgrade timing, and personnel distribution between lanes critical for survival. All 6 players must cooperate via voice chat or pings to balance the two lanes in real-time and send immediate reinforcements upon leaks, making teamplay essential. Recommended for users familiar with classic comp-stomp/entrance-blocking maps to test role division and line holding capability; due to high difficulty, it is suited for veteran defense players rather than beginners. Version v5.5xp appears to be the final build, offering a solid variant of a classic defense masterpiece.
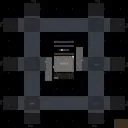
썬큰 디펜스 10웨이 13.8 임파서블 (SunkenD 10Way 13.8 Impossible)
썬큰 디펜스 10웨이 13.8 임파서블은 스타크래프트 브루드워 유즈맵 중에서도 오랜 기간 버전 업을 거치며 고난이도 디펜스 장르의 정점에 오른 맵이다. 우주 타일셋의 128x128 타일 전장에서 6명의 플레이어가 10개 방향에서 몰려오는 적 웨이브를 막아내는 구조로, 제목 그대로 '임파서블(Impossible)' 난이도를 표방한다. 내부 설명에 'levelsEven MidImpossible'이라 적힌 점으로 미뤄 볼 때, 웨이브 레벨 설계가 균일하게 배분되어 있으며 중간 단계의 임파서블 난이도에 맞춰 밸런스가 조정되었음을 짐작할 수 있다. 핵심 플레이는 저그의 대표적 방어 건물인 썬큰 콜로니를 중심으로 유닛 생산과 업그레이드, 자원 관리를 병행하며 끝없이 쏟아지는 적을 소멸시키는 것이다. 10방향이라는 다중 진입로는 플레이어 간 역할 분담과 실시간 소통을 강제하며, 한 곳이라도 뚫리면 연쇄 붕괴로 이어지는 긴장감을 유지한다. 버전 13.8에 이르기까지 12.6, 12.7, 13.1, 13.5 등 지속적인 패치가 있었던 만큼, 초반 빌드 오더 최적화와 중반 이후 특수 웨이브 대처법이 공략의 핵심이 된다. 난이도가 극도로 높기 때문에 무작정 유닛을 뽑기보다는 업그레이드 타이밍과 가스 효율, 테크 트리 선택이 생존을 가른다. 추천 대상은 고난이도 협동 디펜스를 즐기는 숙련자 그룹이며, 입문자는 하위 버전으로 감각을 익힌 뒤 도전하는 것이 좋다. 플레이 전에는 트리거 랙 발생 여부, 버전별 웨이브 구성 차이, 동맹 간 자원 공유 설정 등을 확인해야 한다. Sunken Defense 10Way 13.8 Impossible stands at the pinnacle of high-difficulty defense maps in StarCraft Brood War UMS, having undergone continuous version updates over a long period. On a 128x128 tile space tileset battlefield, six players must stop enemy waves rushing from ten directions, living up to the "Impossible" difficulty in its title. The internal description "levelsEven MidImpossible" suggests that wave levels are evenly distributed and balanced around a mid-tier Impossible difficulty. Core gameplay revolves around the Zerg's iconic Sunken Colony, requiring players to manage unit production, upgrades, and economy simultaneously to annihilate endless hordes. The ten entry points enforce role division and real-time communication among players; a single breach often leads to a chain collapse, maintaining constant tension. With persistent patches up to version 13.8 following 12.6, 12.7, 13.1, and 13.5, optimizing early build orders and preparing for special mid-to-late game waves become the crux of strategy. Because the difficulty is extreme, survival depends less on massing units and more on upgrade timing, gas efficiency, and tech tree choices. It is recommended for veteran groups who enjoy hardcore cooperative defense; beginners should practice on lower versions first. Before playing, check for trigger lag, wave composition differences between versions, and allied resource sharing settings.
Recently registered maps
Check newly added files and versions.
썬큰 디펜스 10웨이 17.9 임파서블 (SunkenD 10Way 17.9 Impossible)
스타크래프트 브루드워의 유즈맵 ‘썬큰 디펜스 10웨이 17.9 임파서블(SunkenD 10Way 17.9 Impossible)’은 디펜스 장르의 대표적인 ‘컴퓨터 상대 유즈맵’으로, 총 25단계에 이르는 난이도별 웨이브를 뚫고 최종 승리를 차지하는 것이 목표다. 맵의 중앙에 위치한 플레이어 기지 주변으로 10방향의 웨이브가 지속적으로 밀려오며, 각 웨이브마다 스캐럽, 뮤탈리스크, 울트라리스크, 가디언 등 다양한 저그 유닛들이 조합되어 공격을 펼쳐온다. 특히 17.9 버전부터는 저글러와 럴커의 조합이 강화되어 맵의 난이도가 한층 높아졌으며, 후속 버전인 12.9나 13.5와 비교했을 때도 피하기와 생존 전략이 더욱 중요해진다. 맵의 구조는 센터 기지에서 멀어질수록 방어가 약화되는 특징이 있어, 초반에는 기지에서 버티면서 자원을 확보하고, 중반부터는 멀티 테란, 멀티 저그 등 추가 기지를 확보하는 전략이 필수적이다. 또한, 맵 상단과 하단에 위치한 추가 멀티 지역은 자원 확보와 방어선을 넓히는 데 핵심적인 역할을 한다. 울트라리스크와 가디언의 조합이 강력한 15단계 이후로는 ‘백워시’ 지역에서도 공격을 방어해야 하며, 이 지역을 소홀히 하면 기지가 순식간에 무너질 수 있다. 초보자라면 10단계까지는 무리 없이 클리어할 수 있지만, 15단계 이후부터는 난이도가 급격히 상승하므로, 방어 건물의 배치와 유닛 조합을 신중히 계획해야 한다. 이 맵은 ‘컴퓨터 상대 디펜스’ 장르에 익숙한 플레이어에게는 훌륭한 도전 과제가 되며, 특히 10웨이의 균형 잡힌 공격 패턴과 단계별 난이도 상승이 흥미로운 플레이 경험을 제공한다. 하지만, 초보자의 경우 난이도 조절이 필요할 수 있으며, 방어塔의 업그레이드와 유닛의 효율적인 관리 전략을 익히는 것이 중요하다. 플레이 전에는 맵의 멀티 지역과 주요 공격 경로, 그리고 후속 웨이브의 유닛 조합을 미리 숙지하고 준비하는 것이 좋다. StarCraft: Brood War's custom map *Sunken Defense 10-Way 17.9 Impossible* is a standout among defense genre custom maps, where the objective is to survive 25 increasingly difficult waves and achieve final victory. Waves continuously assault the player's base from 10 directions around the central starting location, with each wave featuring diverse Zerg unit compositions such as Scourges, Mutalisks, Ultralisks, and Guardians. Starting with version 17.9, the inclusion of Zealots and Lurkers has significantly increased the map's difficulty, making evasion and survival strategies even more crucial compared to earlier versions like 12.9 or 13.5. The map's design weakens defenses the farther they are from the center, so early survival depends on holding the main base while securing resources. As the game progresses, expanding with additional Terran or Zerg bases becomes essential. The upper and lower sections of the map offer critical multi-resource areas that play a key role in resource gathering and expanding defensive lines. After wave 15, where Ultralisks and Guardians dominate, players must also defend the 'Backwash' area—neglecting it can lead to a swift base collapse. While beginners can typically clear up to wave 10 without much trouble, difficulty spikes sharply after wave 15, requiring careful planning of defensive structures and unit compositions. For players familiar with the *computer opponent defense* genre, this map offers an excellent challenge, especially with its balanced 10-way attack patterns and progressively escalating difficulty. However, newcomers may need to adjust the difficulty settings and focus on mastering turret upgrades and efficient unit management strategies. Before playing, it's advisable to familiarize yourself with the map's multi-resource areas, main attack paths, and upcoming wave compositions to prepare effectively.
썬큰 디펜스 10웨이 15.4 임파서블 (SunkenD 10Way 15.4 Impossible)
'썬큰 디펜스 10웨이 15.4 임파서블(SunkenD 10Way 15.4 Impossible)'은 스타크래프트 브루드워 유즈맵 중에서도 손꼽히는 고난도 협동 디펜스 맵으로, 최대 10인의 플레이어가 우주 타일셋 위에서 25단계 저그 웨이브를 상대로 생존을 겨루는 구조다. '10웨이(10Way)' 명칭대로 열 개의 독립 진입로가 'Even Mid' 대칭 배치로 구성되어 공평한 자원 분배와 난이도를 제공하며, '임파서블' 표기답게 일반 디펜스와는 차원이 다른 생존 압박이 지속된다. 플레이어는 감염된 커맨드 센터 또는 해처리를 거점으로 자원을 확보해 썬큰 콜로니 위주의 방진을 구축, 저글링부터 울트라리스크까지 진화하는 적 병력을 막아내야 한다. 'Backwash wont kill you' 설명은 후방 우회 병력(백워시)으로 인한 즉사 패널티를 완화해 전방 라인 유지와 업그레이드 타이밍에 집중하도록 유도한 트리거 설계로 보인다. 128x128 타일 기반 4096x4096 해상도는 10인 동시 플레이에 적절한 공간감을 주며, 버전 15.4까지 이어진 업데이트 이력과 'sc-maps.com' 출처는 지속적인 밸런스 검증이 있었음을 시사한다. 이 맵은 단순 타워 배치를 넘어 유닛 상성, 자원 관리, 10명 전원의 역할 분담과 웨이브 클리어 속도 조율이 유기적으로 맞물려야 하는 고차원적 협동을 요구한다. 입문자에게는 진입 장벽이 높으나, 정석 '입구 막기' 메커니즘을 익힌 숙련자 파티에게는 최적의 도전 과제다. 플레이 전 버전 호환성(리마스터/1.16.1), 팀원 간 의사소통 수단, 웨이브별 출현 유닛 공략 숙지 여부를 점검하고 진입하는 것이 생존의 열쇠가 된다. SunkenD 10Way 15.4 Impossible stands out as one of the highest-difficulty cooperative defense maps in the StarCraft Brood War UMS scene. Up to ten players face 25 stages of evolving Zerg waves on a space tileset. The "10Way" designation indicates ten independent lanes arranged in an "Even Mid" symmetrical layout, ensuring fair resource distribution and balanced difficulty. True to its "Impossible" label, the survival pressure far exceeds standard defense maps. Players establish bases around Infested Command Centers or Hatcheries, building Sunken Colony-centric defenses to stop enemies ranging from Zerglings to Ultralisks. The note "Backwash wont kill you" suggests triggers prevent instant loss from rear leaks, letting players focus on front-line upgrades and timing. The 4096x4096 resolution on 128x128 tiles provides ample room for ten players, while the v15.4 history and sc-maps.com origin imply long-term balance refinement. This map demands more than tower placement; it requires deep unit-counter knowledge, economy management, role assignment, and synchronized wave-clearing across all ten slots. The barrier is high for newcomers, but veteran parties mastering classic choke-point defense will find a rewarding challenge. Before starting, verify version compatibility (Remastered/1.16.1), ensure voice communication, and study wave compositions to maximize survival chances.
썬큰 디펜스 10웨이 13.8 임파서블 (SunkenD 10Way 13.8 Impossible)
썬큰 디펜스 10웨이 13.8 임파서블은 스타크래프트 브루드워 유즈맵 중에서도 오랜 기간 버전 업을 거치며 고난이도 디펜스 장르의 정점에 오른 맵이다. 우주 타일셋의 128x128 타일 전장에서 6명의 플레이어가 10개 방향에서 몰려오는 적 웨이브를 막아내는 구조로, 제목 그대로 '임파서블(Impossible)' 난이도를 표방한다. 내부 설명에 'levelsEven MidImpossible'이라 적힌 점으로 미뤄 볼 때, 웨이브 레벨 설계가 균일하게 배분되어 있으며 중간 단계의 임파서블 난이도에 맞춰 밸런스가 조정되었음을 짐작할 수 있다. 핵심 플레이는 저그의 대표적 방어 건물인 썬큰 콜로니를 중심으로 유닛 생산과 업그레이드, 자원 관리를 병행하며 끝없이 쏟아지는 적을 소멸시키는 것이다. 10방향이라는 다중 진입로는 플레이어 간 역할 분담과 실시간 소통을 강제하며, 한 곳이라도 뚫리면 연쇄 붕괴로 이어지는 긴장감을 유지한다. 버전 13.8에 이르기까지 12.6, 12.7, 13.1, 13.5 등 지속적인 패치가 있었던 만큼, 초반 빌드 오더 최적화와 중반 이후 특수 웨이브 대처법이 공략의 핵심이 된다. 난이도가 극도로 높기 때문에 무작정 유닛을 뽑기보다는 업그레이드 타이밍과 가스 효율, 테크 트리 선택이 생존을 가른다. 추천 대상은 고난이도 협동 디펜스를 즐기는 숙련자 그룹이며, 입문자는 하위 버전으로 감각을 익힌 뒤 도전하는 것이 좋다. 플레이 전에는 트리거 랙 발생 여부, 버전별 웨이브 구성 차이, 동맹 간 자원 공유 설정 등을 확인해야 한다. Sunken Defense 10Way 13.8 Impossible stands at the pinnacle of high-difficulty defense maps in StarCraft Brood War UMS, having undergone continuous version updates over a long period. On a 128x128 tile space tileset battlefield, six players must stop enemy waves rushing from ten directions, living up to the "Impossible" difficulty in its title. The internal description "levelsEven MidImpossible" suggests that wave levels are evenly distributed and balanced around a mid-tier Impossible difficulty. Core gameplay revolves around the Zerg's iconic Sunken Colony, requiring players to manage unit production, upgrades, and economy simultaneously to annihilate endless hordes. The ten entry points enforce role division and real-time communication among players; a single breach often leads to a chain collapse, maintaining constant tension. With persistent patches up to version 13.8 following 12.6, 12.7, 13.1, and 13.5, optimizing early build orders and preparing for special mid-to-late game waves become the crux of strategy. Because the difficulty is extreme, survival depends less on massing units and more on upgrade timing, gas efficiency, and tech tree choices. It is recommended for veteran groups who enjoy hardcore cooperative defense; beginners should practice on lower versions first. Before playing, check for trigger lag, wave composition differences between versions, and allied resource sharing settings.
썬큰 디펜스 10웨이 12.9 임파서블 (SunkenD 10Way 12.9 Impossible)
스타크래프트 브루드워 유즈맵 '썬큰 디펜스 10웨이 12.9 임파서블'은 이름 그대로 열 개 진입로를 막아내는 고난이도 타워 디펜스 맵이다. 우주 타일셋 위에 128x128 타일, 4096x4096 해상도로 펼쳐진 전장은 6인 협동 플레이를 기준으로 설계되었으며, 제작자 rion40025의 원작을 breathdeep가 수정해 밸런스를 다듬은 12.9 버전이다. 플레이어는 각자 혹은 공동으로 자원을 모아 저그의 대표적인 고정 포탑인 썬큰 콜로니를 건설하고 업그레이드하며 끝없이 몰려오는 적 웨이브를 버텨내야 한다. 10웨이 구조상 진입로가 많아 초반부터 병력 분산과 자원 배분 판단이 까다롭고, '임파서블' 난이도 표기답게 웨이브 후반부는 압도적인 물량과 특수 유닛 조합으로 밀고 들어와 단 한 번의 실수도 용납하지 않는다. 트리거로 구현된 웨이브 시스템과 업그레이드 트리, 보스전 연출 등은 클래식한 썬큰 디펜스 문법을 충실히 따르면서도 최신 버전에서 난이도 곡선을 세밀하게 조정한 흔적이 보인다. 6명이 모두 생존하려면 음성 채팅이나 빠른 핑으로 타워 집중 구간을 실시간 조율하는 팀워크가 필수적이며, 혼자서 여러 진입로를 맡아야 할 때는 멀티태스킹 한계와 맞닥뜨리게 된다. 입문용으로는 부담스럽지만, 고전 디펜스 감성을 극한까지 끌어올린 맵을 찾는 숙련자에게는 도전욕을 자극하는 좋은 소재다. 플레이 전에는 버전별 웨이브 구성 차이와 랙 유발 트리거 여부, 그리고 팀원 간 역할 분담 규칙을 미리 합의하면 훨씬 수월하게 공략할 수 있다. StarCraft Brood War UMS map 'Sunken Defense 10Way 12.9 Impossible' is, as the name suggests, a high-difficulty tower defense map where players must block ten entry routes. The battlefield, spread across a 128x128 tile grid at 4096x4096 resolution on the space tileset, is designed for six-player cooperative play. This version 12.9 refines the balance of the original work by rion40025, edited by breathdeep. Players must gather resources individually or jointly to build and upgrade the Zerg's iconic static defense, the Sunken Colony, to withstand endless enemy waves. The 10-way structure creates many lanes, making early force distribution and resource allocation decisions difficult. True to its 'Impossible' difficulty rating, later waves push with overwhelming numbers and special unit combinations that tolerate not a single mistake. The trigger-based wave system, upgrade trees, and boss encounters faithfully follow classic Sunken Defense conventions while showing signs of fine-tuned difficulty curves in this latest version. For all six to survive, teamwork coordinating turret focus points in real-time via voice chat or quick pings is essential, and solo players covering multiple lanes will hit multitasking limits. While daunting for beginners, it serves as excellent material for veterans seeking a classic defense experience pushed to its extreme. Before playing, agreeing on role assignments among teammates and checking for version-specific wave differences or lag-inducing triggers will make the strategy much smoother.
썬큰 라인 2 웨이 v5.5xp (Sunken Line 2 Way v5.5xp)
스타크래프트 브루드워 유즈맵 '썬큰 라인 2 웨이 v5.5xp'는 6인용 디펜스 장르로, 원작자 Psychic-Stevie의 맵을 Taruto가 수정하여 엑스피(XP) 버전으로 완성한 작품이다. 황무지 타일셋을 기반으로 64x128 타일, 세로로 긴 2048x4096 크기의 전장은 두 갈래 길(2 Way)로 나뉘어 있으며, 플레이어는 각 진입로에서 밀려오는 적 유닛이 종점에 도달하지 못하도록 썬큰 콜로니와 스포어 콜로니, 진화장 업그레이드 등을 활용해 방어선을 구축해야 한다. 내부 설명에 'Dont let enemy get to end'라 명시된 것처럼 핵심 목표는 적의 종점 도착 저지이나, 'xp for expert players' 문구에서 알 수 있듯 후반부로 갈수록 체력과 공격력이 대폭 상승한 울트라리스크, 저글링, 히드라리스크, 뮤탈리스크, 가디언 등 지상·공중 혼합 웨이브가 쉴 새 없이 몰려와 자원 분배와 업그레이드 타이밍, 라인별 인원 배치가 생존을 가른다. 6인 전원이 음성 채팅이나 핑으로 협력해 두 라인의 밸런스를 실시간으로 맞추고, 누수 발생 시 즉각 지원 병력을 보내는 팀플레이가 필수적이다. 클래식한 컴까기·입구막기류 맵에 익숙한 유저라면 팀원 간 역할 분담과 라인 유지력 테스트용으로 적합하며, 난이도가 높아 초보자보다는 숙련된 디펜스 유저에게 권장된다. 버전 표기상 v5.5xp가 최종본으로 보이며, 고전 명작 디펜스의 변형판을 찾는 이들에게 좋은 선택지가 될 것이다. StarCraft Brood War UMS map 'Sunken Line 2 Way v5.5xp' is a 6-player defense genre map, modified by Taruto from the original by Psychic-Stevie and finalized as an XP version. Based on the Badlands tileset, the vertically long 2048x4096 battlefield (64x128 tiles) is split into two lanes (2 Way), where players must build Sunken Colonies, Spore Colonies, and utilize Evolution Chamber upgrades to prevent enemy units rushing from each entrance from reaching the end point. As the internal description states 'Don't let enemy get to end', the core objective is simple, but as noted by 'xp for expert players', the difficulty is high; in later stages, mixed ground and air waves of Ultralisks, Zerglings, Hydralisks, Mutalisks, and Guardians with significantly increased HP and attack power rush in relentlessly, making resource allocation, upgrade timing, and personnel distribution between lanes critical for survival. All 6 players must cooperate via voice chat or pings to balance the two lanes in real-time and send immediate reinforcements upon leaks, making teamplay essential. Recommended for users familiar with classic comp-stomp/entrance-blocking maps to test role division and line holding capability; due to high difficulty, it is suited for veteran defense players rather than beginners. Version v5.5xp appears to be the final build, offering a solid variant of a classic defense masterpiece.
Map selection guide
태그는 맵의 핵심 특징을 빠르게 설명하지만 제작 버전마다 규칙이 다를 수 있습니다. 상세 설명에서 권장 인원, 난이도, 플레이 시간과 버전을 함께 확인한 뒤 다운로드하세요.