
리커 디펜스 StarCraft Map Collection
We've gathered maps registered with the '리커 디펜스' tag. Compare popular and latest maps focusing on play styles, difficulties, and features that are hard to find through genre alone.
- Registered Maps
- 5items
- Total Downloads
- 0
- Total Views
- 301
Popular Maps
This map has high download and view engagement.
리커 디펜스 솔로 하드 3.2b (Lurker Defense Solo HARD 3.2b)
스타크래프트: 브루드워의 숨은 명작 디펜스 유즈맵인 <리커 디펜스 솔로 하드 3.2b>는 이름 그대로 리커(Lurker)라는 지상형 유닛을 중심으로 한 고전적인 디펜스 장르의 정수를 보여준다. 이 맵은 플레이어가 맵 하단에 배치된 방어 건물과 유닛을 활용해 끊임없이 몰려오는 적군 웨이브를 막아내야 하는 구조로, 30단계에 걸쳐 점점 강해지는 적군을 상대해야 한다. 각 웨이브는 다양한 조합의 저글링, 히드라리스크, 뮤탈리스크 등으로 구성되어 있으며, 리커의 특성상 지상 공격만 가능한 특수 능력을 적극 활용해야 효율적인 방어가 가능하다. 맵의 특징은 하드 난이도로, 초보자에게는 상당히 어려운 난이도를 자랑하지만 숙련된 플레이어라면 전략적으로 리커를 배치하고 자원을 효율적으로 관리하는 재미를 느낄 수 있다. 특히 리커의 땅굴 발사 능력은 하단에서 공격해오는 적군을 미리 차단할 수 있어 전략의 핵심으로 작용한다. 맵의 진행 방식은 웨이브가 시작될 때마다 맵 상단에서 적군이 하단으로 진격하는 방식이며, 플레이어는 각 웨이브를 통과할 때마다 일정량의 미네랄과 가스를 획득할 수 있어 자원 관리가 중요하다. 또한, 맵의 배경은 황혼 테마의 황량한 분위기로 구성되어 있어 플레이어에게 긴장감을 더해준다. 이 맵은 혼자서 플레이하는 솔로 디펜스라는 점에서 concentration과 patience가 요구되며, 실수를 допу할 경우 다음 웨이브에서 치명적인 타격을 입을 수 있어 신중한 플레이가 필요하다. 추천 대상은 디펜스 장르를 좋아하는 플레이어, 리커 유닛의 전략적 활용을 즐기는 유저, 그리고 혼자서 긴장감 넘치는 플레이를 원하는 게이머들에게 적합하다. 플레이 전에는 리커의 특성과 각 웨이브 별 적군 조합을 숙지하고, 방어 건물의 위치와 리소스 관리 계획을 미리 세워두는 것이 중요하다. 또한, 하드 난이도 특성상 실수 허용도가 낮기 때문에 충분한 연습을 거친 후에 도전하는 것이 바람직하다. Lurker Defense Solo HARD 3.2b is a classic defense-style custom map in StarCraft: Brood War that focuses on the Lurker unit, offering a challenging experience for solo players. The gameplay revolves around defending the bottom of the map against relentless enemy waves that escalate in difficulty over 30 levels. Each wave consists of ground-based units like Zerglings, Hydralisks, and Mutalisks, requiring players to strategically place Lurkers to maximize their ground attack capabilities. The "Hard" difficulty ensures a tough challenge, where even a single mistake can lead to devastating consequences. Players earn minerals and vespene gas with each cleared wave, enabling resource management for upgrades and unit production. The map's eerie Twilight-themed atmosphere enhances the tension, making every wave feel like a high-stakes battle. Solo play demands concentration and patience, as the absence of team support means all defensive strategies must be executed flawlessly. This map is ideal for players who enjoy defense genres, appreciate the strategic depth of Lurkers, and seek a solo experience filled with excitement. Before playing, it's crucial to understand Lurker mechanics, study enemy wave compositions, and plan resource distribution carefully. Given the Hard difficulty, ample practice is recommended to avoid costly mistakes during the later stages.
Lurker Defence In Space EZ (리커 디펜스 인 스페이스 EZ)
Lurker Defence In Space EZ는 우주 배경의 디펜스 장르 유즈맵으로, 저글러 플레이어들이 적의 공격을 방어하고 리커를 강화하며 역공을 펼치는 재미가 있는 맵이다. 맵의 주요 메커니즘은 저글러 유닛을 중심으로 전개되며, 플레이어는 맵 중앙에 위치한 기지에서 시작해 리커를 배치하고 업그레이드하여 방어선을 구축해야 한다. 맵은 세로로 긴 구조로, 좌우로 나뉜 두 개의 주요 방어 구역과 중앙 기지가 있으며, 적의 공격이 끊임없이 밀어붙이기 때문에 방어 전략과 리소스 관리가 핵심이다. 저글러는 리커로 변이할 수 있는 특수 유닛으로, 적의 공격을 막아내면서도 역습을 가할 수 있어 전투의 재미를 더한다. 맵의 난이도는 비교적 쉬운 편으로, 초보자도 쉽게 접근할 수 있지만 방어선을 유지하면서 리커를 끊임없이 업그레이드하고 확장해야 하기 때문에 전략적 깊이가 있다. 특히, 맵의 좌우 대칭 구조는 플레이어 간 경쟁이나 협력을 유도할 수 있어 팀플레이에서도 흥미로운 요소가 된다. 플레이어는 맵의 지형을 활용해 방어 포인트를 설정하고, 리커의 배치와 업그레이드 타이밍을 신중히 판단해야 한다. 맵의 배경은 우주 테마로, 어두운 우주 공간과 빛나는 행성들이 어우러져 atmospheric한 분위기를 연출하며, 이는 디펜스 장르의 몰입감을 한층 높인다. 맵의 제목에 EZ가 포함된 것처럼 난이도가 낮게 설정되어 있지만, 방어선을 유지하며 리커를 지속적으로 관리하는 과정이 반복되면서 플레이어에게 지속적인 긴장감을 제공한다. 추천 대상은 스타크래프트 브루드워의 기본 유닛과 맵 구조에 익숙한 플레이어부터 초보까지 폭넓게, 특히 디펜스 장르를 좋아하는 유저들에게 적합하다. 플레이 전에는 리커의 배치 위치와 업그레이드 순서를 미리 계획하고, 맵의 좌우 방어 구역을 균형 있게 관리하는 전략을 세우는 것이 중요하다. 또한, 리커의 체력이 낮기 때문에 방어선을 구축할 때는 적의 공격 패턴을 분석하고, 리소스를 효율적으로 분배하는 연습이 필요하다. 맵의 재미 요소는 저글러의 변이 가능성과 리커의 강력함에 있으며, 이를 어떻게 활용하느냐에 따라 게임의 승패가 갈린다. 마지막으로, 맵의 버그가 보고된 바가 있어 최신 버전으로 플레이하는 것이 좋다. Lurker Defence In Space EZ는 단순히 방어하는 재미뿐 아니라, 리커를 강화하고 확장을 꾀하는 재미까지 더해져 스타크래프트 유즈맵의 매력을 잘 살린 작품이다. 플레이 시간은 약 20~30분 정도로 예상되며, 빠른 템포로 진행되면서도 전략적 깊이를 느낄 수 있어 반복 플레이의 재미가 크다. Lurker Defence In Space EZ is a defense genre custom map set in a space-themed environment, offering fun gameplay where Zerg players defend against enemy attacks, strengthen their Lurkers, and launch counterattacks. The map's core mechanics revolve around Zerg units, with players starting at a central base where they deploy and upgrade Lurkers to build defensive lines. The map has a vertically elongated structure with two main defensive zones divided left and right and a central base, requiring constant pressure from the enemy. Thus, defense strategy and resource management are key. Zergs can evolve into Lurkers, special units that block attacks while also launching counterattacks, adding excitement to battles. While the difficulty is relatively low, making it accessible to beginners, maintaining the defense line while continuously upgrading and expanding Lurkers adds strategic depth. The map's symmetrical left-right structure also encourages competition or cooperation between players, making team play engaging. Players must utilize the terrain to set defense points and carefully decide when to deploy and upgrade Lurkers. The space-themed background, with its dark void and glowing planets, creates an atmospheric mood that enhances the immersion of the defense genre. Despite the "EZ" in the title suggesting a low difficulty, the repetitive process of maintaining defenses and managing Lurkers provides sustained tension. Recommended for a wide range of players, from those familiar with Brood War's basic units and map structures to beginners—especially fans of the defense genre. Before playing, it's important to plan Lurker placements and upgrade priorities and adopt a strategy to balance defense between the left and right zones. Additionally, since Lurkers have low HP, analyzing enemy attack patterns and practicing efficient resource allocation are crucial when building defenses. The fun elements lie in the Zerg's mutability and the power of Lurkers, with victory hinging on how effectively these are utilized. Lastly, as some bugs have been reported, playing the latest version is recommended. Lurker Defence In Space EZ not only delivers the fun of defense but also the satisfaction of strengthening Lurkers and expanding, making it a well-crafted custom map that showcases the charm of StarCraft custom maps. With an expected playtime of about 20–30 minutes, the fast-paced yet strategically deep gameplay offers great replay value.
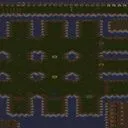
리커 디펜스: 아크로스틱스 v9.1 (Lurker Defense Accrostix v9.1)
스타크래프트 브루드워의 대표적인 디펜스 유즈맵인 <리커 디펜스: 아크로스틱스(Lurker Defense Accrostix)>의 최신 버전인 v9.1 리뷰입니다. 이 맵은 적의 진격을 저지하는 전통적인 디펜스 장르지만, 리커의 특수한 스킬과 지형의 조합으로 인해 단순하지 않은 전략적 깊이를 제공합니다. 맵은 사막 테마의 넓은 필드에 구축되어 있으며, 중앙을 가로지르는 narrow path를 중심으로 적의 유닛이 끊임없이 몰려오는 구조입니다. 플레이어는 리커의 특수한 공격 방식과 시야 차단 능력을 활용해 적을 차단해야 하며, 지형지물과 좁은 통로를 활용한 방어 라인을 구축하는 것이 핵심입니다. 특히 리커의 땅굴 파기 능력은 좁은 길목을 막는 데 최적화되어 있어, strategic tunnel placement가 승부를 가르는 요소로 작용합니다. 맵 곳곳의 언덕과 바위는 시야 확보와 은폐에 유용하며, 방어 포인트를 어떻게 배치하느냐에 따라 난이도가 크게 달라집니다. 초보자는 기본적인 리커 컨트롤과 좁은 길목 방어에 익숙해지는 데 시간을 투자해야 하며, 숙련자는 리커의 스킬 타이밍과 다중 방어 라인 구축을 통해 효율적인 플레이를 추구해야 합니다. 적의 유닛 종류가 다양하고 지속적으로 쏟아져 나오기 때문에, ресур스 관리와 동시에 방어 라인을 유지하는 멀티태스킹 능력이 요구됩니다. 맵의 디자인 자체가 리커의 장점을 극대화하도록 설계되어 있어, 리커를 주력으로 사용하는 플레이어에게는 매력적인 플레잉 경험을 제공합니다. 이 맵은 주로 1인 플레이를 상정하고 있지만, 팀 플레이로 변형하거나 협력 디펜스를 즐기는 유저들에게도 적합합니다. 긴 플레이 시간과 높은 난이도로 인해, 디펜스 장르를 любитель 수준에서 벗어나 실전적인 감각으로 즐기고자 하는 유저들에게 추천할 만합니다. 다만, 리커의 스킬과 맵의 지형에 대한 깊은 이해가 없으면 쉽게 무너질 수 있으니, 초반에는 낮은 난이도에서 연습하는 것이 좋습니다. 리커의 고유한 특성과 디펜스 장르의 핵심을 동시에 즐길 수 있는 이 맵은, 스타크래프트 유즈맵의 장인 정신이 느껴지는 작품으로, 디펜스 매니아라면 반드시 체험해볼 가치가 있습니다. Lurker Defense Accrostix v9.1 is a classic defense-style custom map from StarCraft: Brood War, offering a fresh take on the genre with the unique abilities of the Lurker unit. Set in a vast desert-themed battlefield, the map features a narrow central path where enemy waves relentlessly advance, challenging players to strategically block their progress. Players must utilize the Lurker's burrowing and ground attack capabilities to create effective choke points and defensive lines. The map's terrain, including hills and rocks, plays a crucial role in controlling vision and providing cover, making terrain awareness and placement a key factor in success. The ability to dig tunnels and block narrow passages is particularly vital, as it allows players to adapt their defense dynamically to the enemy's movements. For beginners, mastering basic Lurker control and understanding the map's narrow pathways are essential. More experienced players will focus on optimizing skill timing, multi-tasking resource management, and constructing layered defenses to handle the increasingly complex enemy waves. The map's design inherently favors the Lurker, making it a rewarding experience for players who specialize in this unit. While primarily designed for solo play, the map can also be adapted for team-based defense modes, adding a cooperative dimension to the challenge. Its extended playtime and high difficulty make it ideal for players seeking to hone their defense strategies beyond casual levels. However, without a solid grasp of Lurker mechanics and map terrain, players may struggle, so starting with lower difficulty settings is advisable. Lurker Defense Accrostix v9.1 stands out as a testament to the craftsmanship of StarCraft custom maps, offering a blend of classic defense gameplay and the strategic depth provided by the Lurker unit. It is a must-try for fans of the defense genre and those looking to test their tactical skills in a challenging yet rewarding environment.
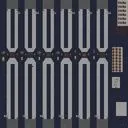
리커 디펜스 백 앤 포스 (Lurker Defense Back 'n' Forth)
스타크래프트 브루드워의 유즈맵 <리커 디펜스 백 앤 포스>는 리커( lurker )를 중심으로 한 독특한 디펜스 장르로, 플레이어의 전략적 판단력이 그대로 승패를 가르는 흥미로운 경험을 제공한다. 맵은 수직으로 나뉜 두 개의 구역( 상단과 하단 )으로 구성되어 있으며, 각각의 구역에 리커와 같은 유닛이 지속적으로 생산되어 반대편 구역으로 이동한다. 플레이어는 자신의 구역에 침입하는 리커를 저지하거나, 반대로 적 구역으로 리커를 보내 상대의 기지를 위협해야 한다. 즉, 단순히 방어만 하는 것이 아니라 공격과 방어가 병행되어야 하며, 이는 리커의 특성을 십분 활용한 전략적 균형감을 요구한다. 맵의 구조는 6인용으로 설계되어 있으며, 상단과 하단의 경계선에 위치한 좁은 통로와 장애물이 리커의 진로를 조절하는 핵심 요소로 작용한다. 리커의 이동 속도가 빠르고 지형에 민감하다는 점을 고려할 때, 통로 배치와 장애물의 활용이 승패의 주요 포인트가 된다. 또한, 리커가 중앙 통로로 몰리는 경우가 많으므로 이를 예측한 방어 라인 구축이 중요하다. 이 맵은 초보자와 숙련자 모두 즐길 수 있지만, 리커의 특성을 잘 이해하고 지형을 적극 활용할 줄 아는 플레이어에게 더 큰 재미를 제공할 것이다. 특히 디펜스 장르에 익숙하지 않거나, 새로운 전략적 접근을 시도해 보고 싶은 유저들에게 강력히 추천한다. 플레이 전에는 리커의 이동 경로와 맵의 상대적 배치, 통로의 넓이와 장애물의 위치를 반드시 숙지하고, 방어와 공격의 균형을 맞출 수 있는 전략을 미리 준비해야 한다. 맵의 난이도는 대체로 보통 수준으로 평가되지만, 리커의 생산 속도나 맵의 난이도 레벨이 내재되어 있어 한 번에 적응하기 어려울 수 있다. 따라서 여러 번 플레이를 통해 지형을 익히고, 상대방의 전략에 유연하게 대응할 수 있는 능력을 키우는 것이 중요하다. 리커 디펜스 백 앤 포스는 단순히 리커를 막는 것 이상의 전략적 깊이를 제공하는 만큼, 스타크래프트의 디펜스 유즈맵 중에서도 독보적인 입지를 차지하고 있다. 새로운 도전과 전략적 재미를 찾는 스타크래프트 팬들에게 강력히 권장하는 맵이다. 특히 리커를 활용한 디펜스 장르에 관심이 있는 플레이어라면, 그 재미에 푹 빠져들 수 있을 것이다. StarCraft: Brood War's custom map *Lurker Defense Back and Forth* offers a unique defense genre centered around the lurker, delivering an engaging experience where strategic decisions directly determine victory or defeat. The map is divided into two vertical zones (upper and lower), each continuously producing units like lurkers that move toward the opposing zone. Players must either block lurkers invading their own zone or send lurkers into enemy territory to threaten their base—meaning offense and defense must work in tandem. This demands a strategic balance that fully leverages the lurker’s traits. Designed for six players, the map’s narrow corridors and obstacles along the boundary between the upper and lower zones act as key elements in controlling lurker movement. Given the lurker’s speed and terrain sensitivity, the placement of pathways and obstacles becomes a major factor in determining outcomes. Lurkers often converge in central corridors, so building defensive lines with this in mind is crucial. While enjoyable for both beginners and experienced players, the map offers greater fun for those who understand lurker mechanics and can actively use the terrain to their advantage. It’s especially recommended for players unfamiliar with defense genres or eager to try new strategic approaches. Before playing, it’s essential to memorize lurker movement paths, the relative layout of the map, corridor widths, and obstacle positions, and to prepare a balanced strategy combining defense and offense. Though generally rated as moderate in difficulty, the map’s lurker spawn rates and inherent challenges can make initial adaptation difficult. Repeated play is key to mastering the terrain and developing the flexibility to counter opponents’ strategies. *Lurker Defense Back and Forth* stands out among Brood War’s defense custom maps by offering strategic depth beyond simply blocking lurkers. It’s highly recommended for StarCraft fans seeking new challenges and strategic fun—especially those interested in lurker-focused defense gameplay, who are likely to find it deeply engaging.
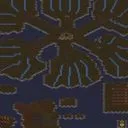
리커 디펜스 30웨이 v1.01 (Lurker Defence 30 Way v1.01)
스타크래프트 브루드워의 유즈맵 《리커 디펜스 30웨이 v1.01》은 리커를 중심으로 한 디펜스 장르의 맵으로, 플레이어는 리커를 배치하고 지속적인 웨이브를 방어하는 방식으로 진행된다. 맵은 황무지 타일셋으로 구성되어 있으며, 4096x4096의 넓은 공간에서 다수의 적 유닛이 끊임없이 몰려오는 구조로 되어 있다. 특히 30웨이라는 이름에서 알 수 있듯이 총 30회의 웨이브가 존재하며, 각 웨이브마다 다양한 종류의 적 유닛이 등장해 리커의 배치와 전략이 중요하다. 리커의 공격 범위와 시야를 고려한 효율적인 배치와, 자원 관리를 통한 리커의 지속적인 보충이 핵심 포인트다. 한정된 공간 내에서 리커의 시야와 공격 범위를 활용해 최대한 많은 적을 처치해야 하며, 마지막 웨이브까지 버티는 것이 목표다. 초보 플레이어는 리커의 기본 특징과 적의 움직임, 공격 패턴을 숙지하는 데 집중해야 하며, 숙련된 플레이어는 리커의 배치 최적화와 자원 효율화를 통해 높은 점수를 노릴 수 있다. 맵의 난이도는 웨이브가 진행될수록 점점 높아지므로, 초반 웨이브에서 리커를 충분히 확보하고 방어선을 구축하는 것이 중요하다. 또한, 리커의 특성상 시야가 제한적이므로, 맵 곳곳에 시야를 확보할 수 있는 위치나 구조물을 활용하는 전략도 고려해 볼 만하다. 이 맵은 리커의 특성을 활용한 디펜스 장르의 정석을 보여주며, 전략적 사고와 빠른 판단력이 요구되는 유즈맵으로 매력이 있다. 특히 리커의 공격 범위가 시야와 연동되어 있어, 시야 확보와 공격 범위를 동시에 고려해야 하는 점이 흥미로운 요소다. 리커 디펜스 30웨이 v1.01은 디펜스 유즈맵을 любителей и поклонников стратегических игр и требует от игрока не только тактического мышления, но и быстрого реагирования на изменяющиеся условия боя. Lurker Defence 30 Way v1.01 is a UMS-style defense map in StarCraft: Brood War where players control lurkers to fend off endless waves of enemy units. Set on a barren wasteland terrain, the 4096x4096 map challenges players with 30 distinct attack waves, each featuring progressively stronger and more varied enemy compositions. Success hinges on smart lurker positioning, resource management, and optimizing their sight and attack range coverage. Early waves are deceptively simple, but as difficulty escalates, players must adapt defenses on the fly—balancing lurker production with strategic sightline control. The map rewards foresight, spatial awareness, and economic discipline, making it ideal for players who enjoy tactical depth and escalating challenges. Experienced players can aim for high scores by maximizing lurker efficiency, while newcomers should focus on surviving the opening waves and learning lurker mechanics. One standout feature is how lurker sight mechanics force players to balance between defense coverage and resource investment, adding a layer of micro-management that sets this map apart in the defense genre.
Recently registered maps
Check newly added files and versions.
리커 디펜스 백 앤 포스 (Lurker Defense Back 'n' Forth)
스타크래프트 브루드워의 유즈맵 <리커 디펜스 백 앤 포스>는 리커( lurker )를 중심으로 한 독특한 디펜스 장르로, 플레이어의 전략적 판단력이 그대로 승패를 가르는 흥미로운 경험을 제공한다. 맵은 수직으로 나뉜 두 개의 구역( 상단과 하단 )으로 구성되어 있으며, 각각의 구역에 리커와 같은 유닛이 지속적으로 생산되어 반대편 구역으로 이동한다. 플레이어는 자신의 구역에 침입하는 리커를 저지하거나, 반대로 적 구역으로 리커를 보내 상대의 기지를 위협해야 한다. 즉, 단순히 방어만 하는 것이 아니라 공격과 방어가 병행되어야 하며, 이는 리커의 특성을 십분 활용한 전략적 균형감을 요구한다. 맵의 구조는 6인용으로 설계되어 있으며, 상단과 하단의 경계선에 위치한 좁은 통로와 장애물이 리커의 진로를 조절하는 핵심 요소로 작용한다. 리커의 이동 속도가 빠르고 지형에 민감하다는 점을 고려할 때, 통로 배치와 장애물의 활용이 승패의 주요 포인트가 된다. 또한, 리커가 중앙 통로로 몰리는 경우가 많으므로 이를 예측한 방어 라인 구축이 중요하다. 이 맵은 초보자와 숙련자 모두 즐길 수 있지만, 리커의 특성을 잘 이해하고 지형을 적극 활용할 줄 아는 플레이어에게 더 큰 재미를 제공할 것이다. 특히 디펜스 장르에 익숙하지 않거나, 새로운 전략적 접근을 시도해 보고 싶은 유저들에게 강력히 추천한다. 플레이 전에는 리커의 이동 경로와 맵의 상대적 배치, 통로의 넓이와 장애물의 위치를 반드시 숙지하고, 방어와 공격의 균형을 맞출 수 있는 전략을 미리 준비해야 한다. 맵의 난이도는 대체로 보통 수준으로 평가되지만, 리커의 생산 속도나 맵의 난이도 레벨이 내재되어 있어 한 번에 적응하기 어려울 수 있다. 따라서 여러 번 플레이를 통해 지형을 익히고, 상대방의 전략에 유연하게 대응할 수 있는 능력을 키우는 것이 중요하다. 리커 디펜스 백 앤 포스는 단순히 리커를 막는 것 이상의 전략적 깊이를 제공하는 만큼, 스타크래프트의 디펜스 유즈맵 중에서도 독보적인 입지를 차지하고 있다. 새로운 도전과 전략적 재미를 찾는 스타크래프트 팬들에게 강력히 권장하는 맵이다. 특히 리커를 활용한 디펜스 장르에 관심이 있는 플레이어라면, 그 재미에 푹 빠져들 수 있을 것이다. StarCraft: Brood War's custom map *Lurker Defense Back and Forth* offers a unique defense genre centered around the lurker, delivering an engaging experience where strategic decisions directly determine victory or defeat. The map is divided into two vertical zones (upper and lower), each continuously producing units like lurkers that move toward the opposing zone. Players must either block lurkers invading their own zone or send lurkers into enemy territory to threaten their base—meaning offense and defense must work in tandem. This demands a strategic balance that fully leverages the lurker’s traits. Designed for six players, the map’s narrow corridors and obstacles along the boundary between the upper and lower zones act as key elements in controlling lurker movement. Given the lurker’s speed and terrain sensitivity, the placement of pathways and obstacles becomes a major factor in determining outcomes. Lurkers often converge in central corridors, so building defensive lines with this in mind is crucial. While enjoyable for both beginners and experienced players, the map offers greater fun for those who understand lurker mechanics and can actively use the terrain to their advantage. It’s especially recommended for players unfamiliar with defense genres or eager to try new strategic approaches. Before playing, it’s essential to memorize lurker movement paths, the relative layout of the map, corridor widths, and obstacle positions, and to prepare a balanced strategy combining defense and offense. Though generally rated as moderate in difficulty, the map’s lurker spawn rates and inherent challenges can make initial adaptation difficult. Repeated play is key to mastering the terrain and developing the flexibility to counter opponents’ strategies. *Lurker Defense Back and Forth* stands out among Brood War’s defense custom maps by offering strategic depth beyond simply blocking lurkers. It’s highly recommended for StarCraft fans seeking new challenges and strategic fun—especially those interested in lurker-focused defense gameplay, who are likely to find it deeply engaging.
Lurker Defence In Space EZ (리커 디펜스 인 스페이스 EZ)
Lurker Defence In Space EZ는 우주 배경의 디펜스 장르 유즈맵으로, 저글러 플레이어들이 적의 공격을 방어하고 리커를 강화하며 역공을 펼치는 재미가 있는 맵이다. 맵의 주요 메커니즘은 저글러 유닛을 중심으로 전개되며, 플레이어는 맵 중앙에 위치한 기지에서 시작해 리커를 배치하고 업그레이드하여 방어선을 구축해야 한다. 맵은 세로로 긴 구조로, 좌우로 나뉜 두 개의 주요 방어 구역과 중앙 기지가 있으며, 적의 공격이 끊임없이 밀어붙이기 때문에 방어 전략과 리소스 관리가 핵심이다. 저글러는 리커로 변이할 수 있는 특수 유닛으로, 적의 공격을 막아내면서도 역습을 가할 수 있어 전투의 재미를 더한다. 맵의 난이도는 비교적 쉬운 편으로, 초보자도 쉽게 접근할 수 있지만 방어선을 유지하면서 리커를 끊임없이 업그레이드하고 확장해야 하기 때문에 전략적 깊이가 있다. 특히, 맵의 좌우 대칭 구조는 플레이어 간 경쟁이나 협력을 유도할 수 있어 팀플레이에서도 흥미로운 요소가 된다. 플레이어는 맵의 지형을 활용해 방어 포인트를 설정하고, 리커의 배치와 업그레이드 타이밍을 신중히 판단해야 한다. 맵의 배경은 우주 테마로, 어두운 우주 공간과 빛나는 행성들이 어우러져 atmospheric한 분위기를 연출하며, 이는 디펜스 장르의 몰입감을 한층 높인다. 맵의 제목에 EZ가 포함된 것처럼 난이도가 낮게 설정되어 있지만, 방어선을 유지하며 리커를 지속적으로 관리하는 과정이 반복되면서 플레이어에게 지속적인 긴장감을 제공한다. 추천 대상은 스타크래프트 브루드워의 기본 유닛과 맵 구조에 익숙한 플레이어부터 초보까지 폭넓게, 특히 디펜스 장르를 좋아하는 유저들에게 적합하다. 플레이 전에는 리커의 배치 위치와 업그레이드 순서를 미리 계획하고, 맵의 좌우 방어 구역을 균형 있게 관리하는 전략을 세우는 것이 중요하다. 또한, 리커의 체력이 낮기 때문에 방어선을 구축할 때는 적의 공격 패턴을 분석하고, 리소스를 효율적으로 분배하는 연습이 필요하다. 맵의 재미 요소는 저글러의 변이 가능성과 리커의 강력함에 있으며, 이를 어떻게 활용하느냐에 따라 게임의 승패가 갈린다. 마지막으로, 맵의 버그가 보고된 바가 있어 최신 버전으로 플레이하는 것이 좋다. Lurker Defence In Space EZ는 단순히 방어하는 재미뿐 아니라, 리커를 강화하고 확장을 꾀하는 재미까지 더해져 스타크래프트 유즈맵의 매력을 잘 살린 작품이다. 플레이 시간은 약 20~30분 정도로 예상되며, 빠른 템포로 진행되면서도 전략적 깊이를 느낄 수 있어 반복 플레이의 재미가 크다. Lurker Defence In Space EZ is a defense genre custom map set in a space-themed environment, offering fun gameplay where Zerg players defend against enemy attacks, strengthen their Lurkers, and launch counterattacks. The map's core mechanics revolve around Zerg units, with players starting at a central base where they deploy and upgrade Lurkers to build defensive lines. The map has a vertically elongated structure with two main defensive zones divided left and right and a central base, requiring constant pressure from the enemy. Thus, defense strategy and resource management are key. Zergs can evolve into Lurkers, special units that block attacks while also launching counterattacks, adding excitement to battles. While the difficulty is relatively low, making it accessible to beginners, maintaining the defense line while continuously upgrading and expanding Lurkers adds strategic depth. The map's symmetrical left-right structure also encourages competition or cooperation between players, making team play engaging. Players must utilize the terrain to set defense points and carefully decide when to deploy and upgrade Lurkers. The space-themed background, with its dark void and glowing planets, creates an atmospheric mood that enhances the immersion of the defense genre. Despite the "EZ" in the title suggesting a low difficulty, the repetitive process of maintaining defenses and managing Lurkers provides sustained tension. Recommended for a wide range of players, from those familiar with Brood War's basic units and map structures to beginners—especially fans of the defense genre. Before playing, it's important to plan Lurker placements and upgrade priorities and adopt a strategy to balance defense between the left and right zones. Additionally, since Lurkers have low HP, analyzing enemy attack patterns and practicing efficient resource allocation are crucial when building defenses. The fun elements lie in the Zerg's mutability and the power of Lurkers, with victory hinging on how effectively these are utilized. Lastly, as some bugs have been reported, playing the latest version is recommended. Lurker Defence In Space EZ not only delivers the fun of defense but also the satisfaction of strengthening Lurkers and expanding, making it a well-crafted custom map that showcases the charm of StarCraft custom maps. With an expected playtime of about 20–30 minutes, the fast-paced yet strategically deep gameplay offers great replay value.
리커 디펜스 30웨이 v1.01 (Lurker Defence 30 Way v1.01)
스타크래프트 브루드워의 유즈맵 《리커 디펜스 30웨이 v1.01》은 리커를 중심으로 한 디펜스 장르의 맵으로, 플레이어는 리커를 배치하고 지속적인 웨이브를 방어하는 방식으로 진행된다. 맵은 황무지 타일셋으로 구성되어 있으며, 4096x4096의 넓은 공간에서 다수의 적 유닛이 끊임없이 몰려오는 구조로 되어 있다. 특히 30웨이라는 이름에서 알 수 있듯이 총 30회의 웨이브가 존재하며, 각 웨이브마다 다양한 종류의 적 유닛이 등장해 리커의 배치와 전략이 중요하다. 리커의 공격 범위와 시야를 고려한 효율적인 배치와, 자원 관리를 통한 리커의 지속적인 보충이 핵심 포인트다. 한정된 공간 내에서 리커의 시야와 공격 범위를 활용해 최대한 많은 적을 처치해야 하며, 마지막 웨이브까지 버티는 것이 목표다. 초보 플레이어는 리커의 기본 특징과 적의 움직임, 공격 패턴을 숙지하는 데 집중해야 하며, 숙련된 플레이어는 리커의 배치 최적화와 자원 효율화를 통해 높은 점수를 노릴 수 있다. 맵의 난이도는 웨이브가 진행될수록 점점 높아지므로, 초반 웨이브에서 리커를 충분히 확보하고 방어선을 구축하는 것이 중요하다. 또한, 리커의 특성상 시야가 제한적이므로, 맵 곳곳에 시야를 확보할 수 있는 위치나 구조물을 활용하는 전략도 고려해 볼 만하다. 이 맵은 리커의 특성을 활용한 디펜스 장르의 정석을 보여주며, 전략적 사고와 빠른 판단력이 요구되는 유즈맵으로 매력이 있다. 특히 리커의 공격 범위가 시야와 연동되어 있어, 시야 확보와 공격 범위를 동시에 고려해야 하는 점이 흥미로운 요소다. 리커 디펜스 30웨이 v1.01은 디펜스 유즈맵을 любителей и поклонников стратегических игр и требует от игрока не только тактического мышления, но и быстрого реагирования на изменяющиеся условия боя. Lurker Defence 30 Way v1.01 is a UMS-style defense map in StarCraft: Brood War where players control lurkers to fend off endless waves of enemy units. Set on a barren wasteland terrain, the 4096x4096 map challenges players with 30 distinct attack waves, each featuring progressively stronger and more varied enemy compositions. Success hinges on smart lurker positioning, resource management, and optimizing their sight and attack range coverage. Early waves are deceptively simple, but as difficulty escalates, players must adapt defenses on the fly—balancing lurker production with strategic sightline control. The map rewards foresight, spatial awareness, and economic discipline, making it ideal for players who enjoy tactical depth and escalating challenges. Experienced players can aim for high scores by maximizing lurker efficiency, while newcomers should focus on surviving the opening waves and learning lurker mechanics. One standout feature is how lurker sight mechanics force players to balance between defense coverage and resource investment, adding a layer of micro-management that sets this map apart in the defense genre.
리커 디펜스: 아크로스틱스 v9.1 (Lurker Defense Accrostix v9.1)
스타크래프트 브루드워의 대표적인 디펜스 유즈맵인 <리커 디펜스: 아크로스틱스(Lurker Defense Accrostix)>의 최신 버전인 v9.1 리뷰입니다. 이 맵은 적의 진격을 저지하는 전통적인 디펜스 장르지만, 리커의 특수한 스킬과 지형의 조합으로 인해 단순하지 않은 전략적 깊이를 제공합니다. 맵은 사막 테마의 넓은 필드에 구축되어 있으며, 중앙을 가로지르는 narrow path를 중심으로 적의 유닛이 끊임없이 몰려오는 구조입니다. 플레이어는 리커의 특수한 공격 방식과 시야 차단 능력을 활용해 적을 차단해야 하며, 지형지물과 좁은 통로를 활용한 방어 라인을 구축하는 것이 핵심입니다. 특히 리커의 땅굴 파기 능력은 좁은 길목을 막는 데 최적화되어 있어, strategic tunnel placement가 승부를 가르는 요소로 작용합니다. 맵 곳곳의 언덕과 바위는 시야 확보와 은폐에 유용하며, 방어 포인트를 어떻게 배치하느냐에 따라 난이도가 크게 달라집니다. 초보자는 기본적인 리커 컨트롤과 좁은 길목 방어에 익숙해지는 데 시간을 투자해야 하며, 숙련자는 리커의 스킬 타이밍과 다중 방어 라인 구축을 통해 효율적인 플레이를 추구해야 합니다. 적의 유닛 종류가 다양하고 지속적으로 쏟아져 나오기 때문에, ресур스 관리와 동시에 방어 라인을 유지하는 멀티태스킹 능력이 요구됩니다. 맵의 디자인 자체가 리커의 장점을 극대화하도록 설계되어 있어, 리커를 주력으로 사용하는 플레이어에게는 매력적인 플레잉 경험을 제공합니다. 이 맵은 주로 1인 플레이를 상정하고 있지만, 팀 플레이로 변형하거나 협력 디펜스를 즐기는 유저들에게도 적합합니다. 긴 플레이 시간과 높은 난이도로 인해, 디펜스 장르를 любитель 수준에서 벗어나 실전적인 감각으로 즐기고자 하는 유저들에게 추천할 만합니다. 다만, 리커의 스킬과 맵의 지형에 대한 깊은 이해가 없으면 쉽게 무너질 수 있으니, 초반에는 낮은 난이도에서 연습하는 것이 좋습니다. 리커의 고유한 특성과 디펜스 장르의 핵심을 동시에 즐길 수 있는 이 맵은, 스타크래프트 유즈맵의 장인 정신이 느껴지는 작품으로, 디펜스 매니아라면 반드시 체험해볼 가치가 있습니다. Lurker Defense Accrostix v9.1 is a classic defense-style custom map from StarCraft: Brood War, offering a fresh take on the genre with the unique abilities of the Lurker unit. Set in a vast desert-themed battlefield, the map features a narrow central path where enemy waves relentlessly advance, challenging players to strategically block their progress. Players must utilize the Lurker's burrowing and ground attack capabilities to create effective choke points and defensive lines. The map's terrain, including hills and rocks, plays a crucial role in controlling vision and providing cover, making terrain awareness and placement a key factor in success. The ability to dig tunnels and block narrow passages is particularly vital, as it allows players to adapt their defense dynamically to the enemy's movements. For beginners, mastering basic Lurker control and understanding the map's narrow pathways are essential. More experienced players will focus on optimizing skill timing, multi-tasking resource management, and constructing layered defenses to handle the increasingly complex enemy waves. The map's design inherently favors the Lurker, making it a rewarding experience for players who specialize in this unit. While primarily designed for solo play, the map can also be adapted for team-based defense modes, adding a cooperative dimension to the challenge. Its extended playtime and high difficulty make it ideal for players seeking to hone their defense strategies beyond casual levels. However, without a solid grasp of Lurker mechanics and map terrain, players may struggle, so starting with lower difficulty settings is advisable. Lurker Defense Accrostix v9.1 stands out as a testament to the craftsmanship of StarCraft custom maps, offering a blend of classic defense gameplay and the strategic depth provided by the Lurker unit. It is a must-try for fans of the defense genre and those looking to test their tactical skills in a challenging yet rewarding environment.
리커 디펜스 솔로 하드 3.2b (Lurker Defense Solo HARD 3.2b)
스타크래프트: 브루드워의 숨은 명작 디펜스 유즈맵인 <리커 디펜스 솔로 하드 3.2b>는 이름 그대로 리커(Lurker)라는 지상형 유닛을 중심으로 한 고전적인 디펜스 장르의 정수를 보여준다. 이 맵은 플레이어가 맵 하단에 배치된 방어 건물과 유닛을 활용해 끊임없이 몰려오는 적군 웨이브를 막아내야 하는 구조로, 30단계에 걸쳐 점점 강해지는 적군을 상대해야 한다. 각 웨이브는 다양한 조합의 저글링, 히드라리스크, 뮤탈리스크 등으로 구성되어 있으며, 리커의 특성상 지상 공격만 가능한 특수 능력을 적극 활용해야 효율적인 방어가 가능하다. 맵의 특징은 하드 난이도로, 초보자에게는 상당히 어려운 난이도를 자랑하지만 숙련된 플레이어라면 전략적으로 리커를 배치하고 자원을 효율적으로 관리하는 재미를 느낄 수 있다. 특히 리커의 땅굴 발사 능력은 하단에서 공격해오는 적군을 미리 차단할 수 있어 전략의 핵심으로 작용한다. 맵의 진행 방식은 웨이브가 시작될 때마다 맵 상단에서 적군이 하단으로 진격하는 방식이며, 플레이어는 각 웨이브를 통과할 때마다 일정량의 미네랄과 가스를 획득할 수 있어 자원 관리가 중요하다. 또한, 맵의 배경은 황혼 테마의 황량한 분위기로 구성되어 있어 플레이어에게 긴장감을 더해준다. 이 맵은 혼자서 플레이하는 솔로 디펜스라는 점에서 concentration과 patience가 요구되며, 실수를 допу할 경우 다음 웨이브에서 치명적인 타격을 입을 수 있어 신중한 플레이가 필요하다. 추천 대상은 디펜스 장르를 좋아하는 플레이어, 리커 유닛의 전략적 활용을 즐기는 유저, 그리고 혼자서 긴장감 넘치는 플레이를 원하는 게이머들에게 적합하다. 플레이 전에는 리커의 특성과 각 웨이브 별 적군 조합을 숙지하고, 방어 건물의 위치와 리소스 관리 계획을 미리 세워두는 것이 중요하다. 또한, 하드 난이도 특성상 실수 허용도가 낮기 때문에 충분한 연습을 거친 후에 도전하는 것이 바람직하다. Lurker Defense Solo HARD 3.2b is a classic defense-style custom map in StarCraft: Brood War that focuses on the Lurker unit, offering a challenging experience for solo players. The gameplay revolves around defending the bottom of the map against relentless enemy waves that escalate in difficulty over 30 levels. Each wave consists of ground-based units like Zerglings, Hydralisks, and Mutalisks, requiring players to strategically place Lurkers to maximize their ground attack capabilities. The "Hard" difficulty ensures a tough challenge, where even a single mistake can lead to devastating consequences. Players earn minerals and vespene gas with each cleared wave, enabling resource management for upgrades and unit production. The map's eerie Twilight-themed atmosphere enhances the tension, making every wave feel like a high-stakes battle. Solo play demands concentration and patience, as the absence of team support means all defensive strategies must be executed flawlessly. This map is ideal for players who enjoy defense genres, appreciate the strategic depth of Lurkers, and seek a solo experience filled with excitement. Before playing, it's crucial to understand Lurker mechanics, study enemy wave compositions, and plan resource distribution carefully. Given the Hard difficulty, ample practice is recommended to avoid costly mistakes during the later stages.
Map selection guide
태그는 맵의 핵심 특징을 빠르게 설명하지만 제작 버전마다 규칙이 다를 수 있습니다. 상세 설명에서 권장 인원, 난이도, 플레이 시간과 버전을 함께 확인한 뒤 다운로드하세요.