
레벨형 StarCraft Map Collection
We've gathered maps registered with the '레벨형' tag. Compare popular and latest maps focusing on play styles, difficulties, and features that are hard to find through genre alone.
- Registered Maps
- 8items
- Total Downloads
- 22
- Total Views
- 303
Popular Maps
This map has high download and view engagement.
뉴 포커 디펜스 v4.20 (New Poker Defence v4.20)
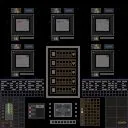
스타크래프트: 브루드워의 유즈맵 ‘뉴 포커 디펜스(New Poker Defence)’는 디펜스 장르의 대표적인 랜덤 디펜스 맵으로, 총 30개의 레벨과 14개의 목숨 시스템을 기반으로 제작된 작품이다. 맵의 구조는 중앙에 플레이어 기지(커맨드 센터)가 위치한 가운데, 외부에서 끊임없이 몰려오는 적 유닛들을 방어하는 방식으로 구성되어 있으며, 각 레벨마다 다양한 종류의 적과 배치 패턴을 제공한다. 플레이어는 제한된 자원과 목숨으로 레벨을 클리어해야 하며, 일정 조건을 만족하면 다음 레벨로 넘어갈 수 있다. 특히, 맵 곳곳에 배치된 포커 카드 아이콘은 레벨 클리어 시 보상이나 특수 효과를 제공하는 핵심 요소로, 카드에 따라 추가 자원 획득, 방어력 상승, 적 유닛 약화 등 다양한 혜택을 받을 수 있다. 이러한 시스템은 단순 디펜스를 넘어 전략적 선택과 운을 요구하는 흥미로운 요소로 작용한다. 또한, 맵의 그래픽은 우주 테마를 기반으로 깔끔하게 디자인되어 있으며, 적 유닛의 종류와 공격 패턴이 레벨별로 변화하여 긴장감을 유지할 수 있도록 설계되었다. 추천 대상은 디펜스 장르를 좋아하는 플레이어는 물론, 전략성과 운이 결합된 게임을 선호하는 유저들에게 적합하다. 플레이 전에는 레벨별 적 배치와 카드 시스템의 효과를 미리 숙지하는 것이 중요하며, 자원 관리와 목숨 관리에 신경을 써야 한다. 특히, 14개의 목숨은 제한적이므로 무리한 플레이보다는 차분한 전략이 필요하다. 맵의 난이도는 레벨이 진행될수록 점차 상승하므로, 초반 레벨을 안정적으로 클리어하는 것이 전체적인 성공의 관건이다. New Poker Defence v4.20 is one of the most distinctive defense-style custom maps in StarCraft: Brood War, blending random defense mechanics with a poker-themed progression system. The map features 30 distinct levels, each introducing new enemy units, attack patterns, and strategic challenges while maintaining a core survival loop. Players control a central base and must fend off waves of enemies using limited resources and exactly 14 lives across all levels. A standout feature is the poker card system scattered throughout the map: collecting specific cards grants bonuses such as extra minerals, temporary shields, or enemy slowdowns, adding a layer of risk-reward decision-making. The map’s visual design leans into a sleek space-themed aesthetic, with clean tilework and atmospheric lighting that enhances the tension of each defense scenario. Enemies escalate in complexity as levels progress, from basic Zerglings and Zealots to mixed air and ground assaults with special abilities. This map is ideal for players who enjoy tactical depth, adaptive enemy behavior, and the thrill of balancing strategy with a touch of luck. Before playing, it’s advisable to review the card effects and enemy spawn patterns per level, as efficient resource and life management is critical—especially since lives are non-renewable. The difficulty curve rises steadily, so mastering early levels is key to unlocking later, more challenging stages. Overall, New Poker Defence v4.20 offers a fresh take on the defense genre, appealing to both veterans of UMS maps and newcomers looking for a mix of skill and unpredictability.
검객 루로우니 켄신 바운드 1.2 (Rurouni Kenshin Bound 1.2)
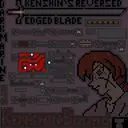
《유즈맵 '검객 루로우니 켄신 바운드 1.2'》는 무려 20단계의 레벨을 지닌 난이도 상승형 디펜스 맵입니다. 플레이어는 총 6명이 참여하며, 4번의 부활 기회를 가지고 각 레벨을 클리어해야 합니다. 맵 제목에서 느껴지듯 일본 만화 《바람의 검심》의 세계관을 모티브로 삼아, 검과 검객의 전투가 펼쳐지는 스타크래프트의 유즈맵으로 재탄생했습니다. 내부 설명에서 언급된 제작자 'l)ark(v)arine'와 클랜 'l)a12k', 그리고 운영 채널 'Op l)a12k'는 맵의 정체성과 제작 배경을 짐작하게 합니다. 정글 타일셋으로 구성된 맵의 배경은 숲과 산, 절벽 등으로 이루어져 있으며, 적의Wave가 밀려오는 디펜스 구조를 기본 틀로 하고 있습니다. 레벨은 20단계로 구성되어 있으며, 각 레벨마다 등장하는 적의 종류와 수가 점차 증가하는 방식으로 난이도가 조절됩니다. 플레이어는 레벨 클리어 시에만 다음 단계로 진행할 수 있으며, 도중에 부활 기회를 활용해 실수를 만회할 수 있습니다. 맵의 핵심은 적의 공격을 막아내는 동시에 자원을 효율적으로 관리하는 전략적 플레이에 있습니다. 특히, 맵의 중앙에서 펼쳐지는 전투는 치열한 혈투를 연상시키며, 맵의 지형적 특징을 활용한 방어 전략이 요구됩니다. 검객의 컨셉에 맞게, 플레이어는 검을 휘두르는 듯한 연출과 함께 다양한 스킬을 사용할 수 있는 시스템이 포함되어 있습니다. 이 맵은 6인까지 참여할 수 있으며, 팀전보다는 개별 플레이가 주가 되는 구조입니다. 그러나 맵의 특성상 플레이어 간의 협력이 필수적이며, 각 레벨의 보스를 클리어하기 위해선 상호간의 지원과 전략적 협력이 중요합니다. 맵의 난이도는 레벨이 올라갈수록 급격히 높아지며, 후반부로 갈수록 적의 공격 패턴이 복잡해지고 병력의 규모가 커집니다. 따라서 초보 플레이어는 레벨이 낮은 단계부터 천천히 적응해 나가야 하며, 숙련된 플레이어는 후반부 레벨을 공략하기 위해 끊임없는 연습과 전략 수정이 필요합니다. 맵의 분위기와 전투感은 《바람의 검심》의 특징을 잘 살려내어, 플레이어들에게 새로운 경험을 제공합니다. 이 맵을 플레이하기 위해서는 맵의 구조와 적의 패턴을 이해하는 것이 무엇보다 중요합니다. 맵의 지형을 활용한 방어선 구축, 자원의 효율적인 관리, 그리고 팀원 간의 원활한 의사소통이 성공의 열쇠가 됩니다. 또한, 맵의 각 레벨마다 숨겨진 보너스나 특별한 적의 등장 패턴이 있을 수 있으므로, 매 레벨을 클리어할 때마다 맵의 세부 요소를 재확인하는 것이 좋습니다. 마지막으로, 이 맵은 단순히 적을 물리치는 것이 아니라, 검객으로서의 성장과 전략적 excellence를 추구하는 경험을 제공합니다. 따라서 검객의 세계관을 любители로 즐기고 싶거나, 디펜스 장르에 익숙한 플레이어에게 강력히 추천하는 맵입니다. The custom map *"Kenjaku Rurouni Kenshin Bound 1.2"* is a defense-style game featuring a whopping 20 escalating difficulty levels. Up to six players can join, each with four revival chances to clear each stage. Inspired by the world of the Japanese manga *Rurouni Kenshin*, this StarCraft custom map reimagines sword and samurai battles within the game’s mechanics. The map’s creator, 'l)ark(v)arine,' their clan 'l)a12k,' and the managing channel 'Op l)a12k' hint at its identity and background. Set against a jungle tileset backdrop of forests, mountains, and cliffs, the map follows a defense structure where enemy waves progressively increase in number and variety. The 20 levels steadily ramp up difficulty, with enemies growing in both type and quantity as players advance. Progression is stage-locked—only clearing a level unlocks the next—but players can use their revival chances to recover from mistakes. The core challenge lies in balancing resource management with strategic defense, especially during intense central battles where terrain plays a crucial role. True to its samurai theme, the map incorporates dynamic sword-swinging visuals and a skill system that lets players unleash various combat abilities. While designed for up to six players, the focus leans toward individual play rather than strict teamwork. Still, cooperation is vital, particularly for defeating bosses, as shared support and coordinated strategies are often required. The difficulty spikes sharply in later levels, where enemy attack patterns grow more complex and forces become overwhelming. Beginners should start with lower levels to acclimate, while veterans must refine their tactics through repeated attempts to conquer the tougher stages. The map captures the essence of *Rurouni Kenshin*, delivering a fresh and immersive experience to players. To excel, understanding the map’s layout and enemy behaviors is key—building efficient defenses, managing resources wisely, and communicating clearly with teammates are all critical. Each level may also hide bonuses or unique enemy spawns, so reviewing details after each clear is wise. Ultimately, this isn’t just about defeating enemies; it’s about embracing the growth of a swordsman and striving for strategic mastery. A must-try for fans of the samurai world or defense genre enthusiasts seeking a fresh challenge.
버블 바운드 vFinal (Bubble Bound vFinal)
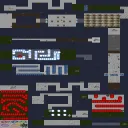
‘Bubble Bound vFinal’은 거품 속에 갇힌 플레이어가 장애물을 통과하며 살아남는 순수한 퍼즐형 디펜스 맵이다. 맵 중앙에 배치된 거대한 거품 안에서 플레이어는 좌우로 이동하며 녹색, 파란색, 빨간색 장애물을 피하거나 통과해야 한다. 각 레벨은 독립된 공간으로 나뉘어 있으며, 장애물의 배치와 패턴이 조금씩 변화하여 점진적으로 난이도가 상승하는 구조를 보인다. 특히 파란색 장애물은 통과할 수 있어 전략적인 회피가 가능하지만, 빨간색 장애물은 즉사 판정이므로 시야와 반응이 무엇보다 중요하다. 맵 우측 상단에는 레벨 표시기가 있어 현재 진행 상황을 한눈에 확인할 수 있으며, 좌측 하단에는 이동 공간이 제한적으로 배치되어 있어 플레이어의 조작력을 시험한다. 맵에서 확인되는 ‘10 Level’과 ‘22 Obstacle’이라는 설명은 총 10단계의 레벨이 있으며, 각 레벨마다 22개의 장애물이 배치되어 있음을 시사한다. 맵의 핵심은 ‘죽지 않고 모든 장애물을 통과하는 것’이므로, 플레이어는 끊임없는 집중력과 순간적인 반사 신경으로 생존을 도모해야 한다. 맵의 배경은 어두운 톤으로 통일되어 있어 장애물과 플레이어의 움직임이 더욱 뚜렷하게 부각되며, UI 요소는 간소하면서도 직관적이다. 이러한 구조는 초보자도 쉽게 접근할 수 있도록 돕지만, 후반부로 갈수록 패턴의 복잡성과 속도가 상승하여 숙련자도 긴장감을 유지하게 만든다. 추천 대상은 실시간 반응이 필요한 퍼즐과 디펜스를 좋아하는 유저이며, 특히 단기간 내에 여러 번 재도전하며 실력을 향상시키고자 하는 플레이어에게 적합하다. 플레이 전에는 키보드 또는 마우스 조작에 익숙해질 필요가 있으며, 장애물 패턴을 미리 숙지하는 훈련도 효과적이다. 맵의 난이도는 레벨에 따라 변동되지만, 전체적으로는 ‘보통’ 수준으로 평가된다. 맵의 제작자는 Dragoon-Protoss로 확인되며, 맵명은 ‘거품 경계’라는 뜻의 ‘Bubble Bound’를 사용하고 있다. 맵의 특성은 장애물 통과형 퍼즐과 생존 디펜스가 결합된 형태로, 타 맵과의 차별점은 레벨별로 독립된 공간을 제공한다는 점이다. 플레이 시간은 레벨당 약 2~3분이 소요될 것으로 추정되며, 총 10레벨을 고려하면 약 20~30분의 플레이 시간이 예상된다. 맵의 구조상 팀 플레이보다는 단독 플레이에 최적화되어 있으며, 경쟁보다는 도전과 극복에 중점을 두고 있다. ‘Bubble Bound vFinal’ is a pure puzzle defense map where players trapped inside bubbles must navigate through obstacles to survive. Players move left and right within a large bubble at the center of the map, dodging or passing through green, blue, and red obstacles. Each level is divided into separate spaces, with obstacle layouts and patterns gradually increasing in difficulty. While blue obstacles can be passed through, requiring strategic evasion, red obstacles are instant-death traps, making sharp vision and quick reactions essential. A level indicator in the top-right corner shows progress at a glance, while the limited movement space in the bottom-left tests player control. The map’s description of “10 Level” and “22 Obstacle” suggests there are 10 stages, each containing 22 obstacles. The core challenge is surviving without dying while passing all obstacles, demanding constant focus and reflexes. The dark-toned background sharpens the contrast between obstacles and player movement, while the UI remains simple and intuitive. This design makes the map accessible to beginners, though the increasing complexity and speed in later levels keep even experienced players on edge. It’s recommended for users who enjoy real-time puzzle and defense mechanics, especially those looking to improve through repeated short attempts. Familiarizing yourself with keyboard or mouse controls beforehand and memorizing obstacle patterns can be highly effective. While difficulty varies by level, the map is generally rated as "moderate." The creator, Dragoon-Protoss, named it ‘Bubble Bound,’ meaning ‘bubble boundary.’ Its unique feature is providing isolated spaces for each level, blending obstacle-passing puzzles with survival defense. Each level takes about 2–3 minutes, so completing all 10 levels would likely take around 20–30 minutes. The map is optimized for solo play rather than team play, emphasizing personal challenge and overcoming obstacles over competition.
침몰 디펜스 대회 (Sunken Defense Competition)
스타크래프트 브루드워의 유즈맵 장르 중 디펜스 장르에 속하는 ‘Sunken Defense Competition’은 침수된 전투 공간에서 펼쳐지는 흥미로운 방어형 게임으로, 최대 5명의 플레이어가 순차적으로 적의 공격을 막아내며 경쟁하는 구조로 구성되어 있다. 맵의 핵심 메커니즘은 ‘한 명만 통과시켜라’라는 간단한 규칙에 기반하며, 각 플레이어는 자신의 방어선을 구축하고 적 유닛을 섬멸해 다음 레벨로 넘어가야 한다. 맵 내부 설명에 따르면, 레벨을 완료할 때마다 8기의 추가 드론을 획득할 수 있으며, 10레벨을 먼저 클리어하거나 마지막까지 살아남은 플레이어가 승리하는 것으로 보인다. 해상도 4096x4096의 넓은 맵에서 펼쳐지는 전투는 전략적 배치와Micro 컨트롤이 요구되며, 특히 좁은 통로나 다리 지역에서의 전투가 승패를 좌우할 가능성이 높아 보인다. 맵의 분위기는 황무지 타일셋을 활용한 어두운 색감으로 침울한 바다 밑바닥을 연상시키며, 이는 디펜스 게임의 긴장감을 한층 더해준다. 초보자도 쉽게 진입할 수 있는 단순한 목표와 규칙이지만, 차근차근 레벨을 올라가며 전략을 다듬어야만 높은 레벨에서 승리할 수 있다. 특히 타워 배치와 자원 관리, 유닛 조합에 따라 난이도가 급변할 수 있어, 플레이어의 적응력이 중요하다. 추천 대상은 스타크래프트 유즈맵을 좋아하는 모든 유저로, 디펜스 장르에 익숙하지 않은 경우에도 규칙을 익히면 재미있게 플레이할 수 있다. 다만, 맵의 밸런스가 제작자의 의도대로 맞춰져 있는지는 확인되지 않았으므로, 플레이 전에는 레벨당 적의 구성과 배치에 대한 사전 조사나 시연 영상을 보는 것이 좋다. 플레이 전 확인 포인트는 자신의 방어선 구축 위치, 레벨 진행 시 드론 획득 타이밍, 그리고 적의 패턴 변화에 대응할 수 있는 유연성이다. 이 맵은 좁은 공간에서 벌어지는 치열한 전투를 선호하는 유저들에게 특히 어울릴 것으로 예상된다. This StarCraft: Brood War custom map, titled ‘Sunken Defense Competition’, falls under the defense genre, offering a unique underwater battlefield where up to five players compete to survive by eliminating enemies and advancing through levels. The core gameplay revolves around the simple yet strategic rule of allowing only one player to pass through while defending your position. Each player builds their own defense line, and upon completing a level, they receive eight additional drones, which can be crucial for progressing further. The map’s large 4096x4096 resolution provides ample space for tactical positioning, though tight corridors and bridges will likely become critical choke points during intense battles. The dark, murky aesthetic created by the wasteland tileset enhances the oppressive atmosphere of the sunken environment, making every encounter feel more immersive. While the rules are straightforward, mastering the game requires careful planning of tower placements, resource management, and unit combinations, especially as the difficulty ramps up in later levels. Beginners can easily start playing due to the simple objectives, but long-term success depends on adapting strategies to counter increasingly complex enemy patterns. This map is ideal for fans of StarCraft custom maps and defense games who enjoy high-stakes, close-quarters combat. Before diving in, players should check the enemy composition and layout per level or watch gameplay demonstrations to understand the balancing mechanics, as the difficulty curve may vary based on individual playstyles. Key points to verify before playing include optimal defense line positioning, drone acquisition timing, and adaptability to enemy strategies.
Impossible v6.0
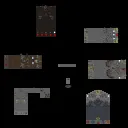
스타크래프트 브루드워의 유즈맵 ‘Impossible v6.0’는 5~6인용 디펜스 장르의 맵으로, 플레이어는 끊임없이 몰려드는 적군을 방어하면서 레벨을 progressing하는 구조를 가지고 있다. 이 맵의 핵심은 ‘불가능’이라는 제목답게 극한의 난이도를 자랑한다는 점으로, 방어선을 유지하는 동시에 끊임없이 변화하는 적의 공세를 버텨내야 한다. 내부 맵 제목과 설명에서 확인할 수 있듯이 ‘Levels to play by: Einherjer’라는 제작자도 존재하지만, 맵의 난이도나 진행 방식에 대한 구체적인 정보는 제공되지 않는다. 맵 이미지를 살펴보면 중앙에 위치한 본진 지역을 중심으로 적의 공세가 다양한 경로로 쏟아져 들어오며, 플레이어는 미네랄과 가스 자원을 확보해 방어 건물을 짓고 병력을 생산해 맞서 싸워야 한다. 이미지에서 확인되는 적의 기지 مانند 구조물과 병력 생산 시설은 맵의 난이도를 더욱 높이는 요소로 작용한다. 또한, 맵의 해상도가 4096x4096에 달하고 타일셋이 우주로 설정되어 있어 넓은 시야와 우주 테마의 분위기를 느낄 수 있다. 이 맵은 초보자보다는 중수 이상의 플레이어에게 적합하며, 방어선을 구축하는 전략과 자원 관리가 무엇보다 중요하다. 특히, 레벨이 올라갈수록 적의 공격 패턴이 복잡해지므로, 플레이어는 각 레벨마다 요구되는 전략을 신속히 адап해야 한다. 맵의 난이도가 높다는 점에서 플레이 전 충분한 연습과 전략 수립이 필수적이며, 팀 플레이보다는 개인 플레이에 더 초점을 맞추고 있는 구조로 보인다. 맵을 플레이하기 전에 미네랄과 가스 자원의 위치, 주요 방어 경로, 그리고 적의 공격 패턴을 숙지하는 것이 중요하다. 또한, 방어 건물의 배치와 병력의 조합을 신중히 결정해야만 높은 난이도를 극복할 수 있을 것이다. 이 맵은 ‘Impossible’이라는 제목답게 정말 불가능에 가까운 난이도를 자랑하며, 이를 극복하는 재미가 주요 포인트라고 할 수 있다. StarCraft: Brood War's custom map *Impossible v6.0* is a 5–6 player defense genre map where players must defend against relentless waves of enemies while progressing through levels. True to its name, the map boasts extreme difficulty, requiring players to maintain their defenses while enduring ever-changing enemy assaults. Though the map credits its creator as "Einherjer" in the internal title and description, no specific details about its difficulty or progression mechanics are provided. Examining the map image reveals that enemy attacks surge toward the main base area from multiple directions, forcing players to secure minerals and gas to construct defenses and produce forces. The presence of enemy structures resembling bases and production facilities further escalates the challenge. With a resolution of 4096x4096 and a space-themed tileset, the map offers expansive visibility and an immersive cosmic atmosphere. This map is better suited for intermediate to advanced players, as constructing defensive lines and managing resources are critical. As levels progress, enemy attack patterns grow increasingly complex, demanding quick adaptation to each stage’s requirements. Given its high difficulty, thorough practice and strategy planning are essential before playing. The design leans more toward solo play rather than team coordination. Before attempting the map, players should familiarize themselves with mineral and gas locations, key defensive routes, and enemy attack patterns. Careful placement of defensive structures and strategic unit compositions are vital to overcoming its punishing difficulty. *Impossible* lives up to its name, offering a near-unbeatable challenge where the thrill of overcoming its obstacles is the main draw.
Bound And Defend 5 (구속과 방어 5)
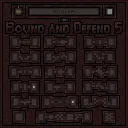
《Bound And Defend 5》는 스타크래프트: 브루드워의 컴까기 계열 유즈맵으로, 총 6명의 플레이어가 하나의 팀을 이루어 적의 공격을 방어하는 구조로 구성되어 있다. 맵의 이름은 'Bound(구속) And Defend(방어)'라는 제목에서 알 수 있듯, 플레이어는 제한된 공간 내에 갇힌 상태에서 끊임없이 밀려드는 적의 공격으로부터 본진과 주요 건물을 지켜내야 한다. 내부 설명에 'Akuma-30 Levels16 Obstacles'라는 문구가 포함되어 있는데, 이는 총 30단계의 레벨이 있으며 각 레벨마다 16개의 장애물이 배치되어 있음을 의미하는 것으로 추정된다. 이러한 장애물은 플레이어가 방어선을 구축하거나 기지를 보호하는 데 전략적인 영향을 미치며, 맵의 진행 방식이 레벨별로 변화함을 시사한다. 맵의 핵심은 방어에 집중되어 있지만, 단순히 막아내는 것만으로는 부족하다. 플레이어는 제한된 공간 안에서 자원과 유닛을 효율적으로 관리해야 하며, 각 레벨마다 변화하는 장애물과 적의 공격 패턴에 대응하기 위한 전략이 요구된다. 특히, 맵의 중앙이나 주요據點 주변은 적의 공격 루트가 집중되는 곳인지라 방어선 구축 시 추가적인 주의가 필요하다. 초반에는 기본 유닛으로 방어에 집중하더라도, 후반부로 갈수록 더 강력한 유닛과 방어 시설이 필요해지며, 레벨 디자인에 따라서는 특정 구간에서 새로운 전술이 필요할 수도 있다. 이 맵은 초보자보다는 적어도 스타크래프트의 기본적인 유닛 컨트롤과 맵 리딩 능력이 있는 플레이어에게 더 어울린다. 또한, 팀 플레이가 필수적이므로 팀원 간의 협력이 원활하지 않다면 방어에 실패할 가능성이 크다. 만약 혼자서 플레이를 시도한다면, AI의 공격 패턴과 맵의 장애물을 미리 파악한 후 방어 전략을 짜는 것이 중요하다. 맵의 레벨이 총 30단계에 달한다는 점에서 플레이 시간이 길어질 수 있으며, 특히 후반부로 갈수록 난이도가 급격히 상승할 수 있으므로 꾸준한 도전과 실력이 요구된다. 추천 플레이 대상으로는 컴까기 장르를 좋아하는 플레이어, 팀 플레이를 즐기는 유저, 그리고 전략적 사고와 긴장감을 동시에 느끼고 싶은 유저들에게 적합하다. 또한, 레벨 디자인과 장애물이 다양한 만큼, 같은 맵이라도 매번 다른 전략으로 접근할 수 있어 반복 플레이의 재미가 있는 맵이기도 하다. 마지막으로, 맵의 이름과 내부 설명에서 유추해 볼 때, 'Akuma'라는 단어가 포함되어 있는데, 이는 일본어로 '악마'를 의미하는 것으로 보이며, 맵의 분위기나 테마가 어두운 느낌을 주는 것으로 추정된다. 이 점을 고려한다면, 분위기 있는 배경 음악이나 시각적 요소와 함께 플레이한다면 더욱 몰입감 있는 경험을 느낄 수 있을 것이다. 《Bound And Defend 5》 is a "compilation" (compilation-style) custom map in *StarCraft: Brood War* where six players team up to defend against enemy attacks. As the name "Bound (restraint) And Defend" suggests, players are trapped in a confined space and must continuously fend off waves of enemies to protect their base and key structures. The internal description mentions "Akuma-30 Levels16 Obstacles," which likely indicates that the map features 30 levels, each with 16 obstacles. These obstacles play a strategic role in base defense and suggest that the gameplay evolves with each level. While the map centers on defense, simply holding the line isn’t enough. Players must efficiently manage resources and units within the limited space, adapting their strategies to the shifting obstacles and enemy attack patterns. Areas like the center or key strongholds are hotspots for enemy assaults, requiring careful positioning of defenses. Early levels may rely on basic units, but as the game progresses, stronger units and defensive structures become essential. Some sections might even demand entirely new tactics depending on the level design. This map is better suited for players with at least a basic grasp of unit control and map reading rather than complete beginners. Teamwork is crucial, and poor coordination among teammates can easily lead to failure. Attempting it solo requires preemptive study of AI attack patterns and obstacle placements to devise a solid defense strategy. With 30 levels in total, the playtime can be lengthy, and the difficulty spikes sharply in later stages, demanding consistent effort and skill. Ideal players for this map include fans of compilation-style games, those who enjoy team-based play, and anyone looking to test their strategic thinking and reflexes simultaneously. The varied level design and obstacle layouts allow for fresh strategies with each playthrough, making repetition enjoyable. Lastly, the name "Akuma" (likely derived from the Japanese word for "demon") hints at a dark, intense atmosphere—pairing it with fitting background music or visuals could enhance immersion.
뉴 포커 디펜스 WMe (New Poker Defence WMe)
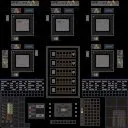
스타크래프트 브루드워의 유즈맵 중 하나로, ‘뉴 포커 디펜스 WMe’는 디펜스 장르의 랜덤 디펜스 유형에 속하는 맵입니다. 총 30개의 레벨이 있으며, 각 레벨당 14개의 생명력을 제공받습니다. 플레이어는 필요에 따라 건물을 구매하고, 프로브나 영웅 유닛을 선택적으로 활용할 수 있습니다. 또한, 상대방이 선택한 유닛을 ‘밴’할 수 있는 시스템이 포함되어 있어 전략적 선택의 폭이 넓습니다. 건물 구매는 선택 사항이지만, 방어력을 강화하거나 추가 유닛을 확보하는 데 필수적입니다. 업그레이드 시스템은 255단계까지 가능하며, 비용 계수도 조절할 수 있어 세밀한 플레이가 가능합니다. 맵의 분위기는 우주 테마로 구성되어 있으며, 타일셋과 배경 디자인에서 우주 feel을 느낄 수 있습니다. 이 맵의 핵심은 방어와 자원 관리입니다. 레벨이 진행될수록 적의 공격 패턴이 변하고 강해지므로, 건물을 효율적으로 배치하고 업그레이드를 신중히 진행해야 합니다. 프로브나 영웅을 활용하면 방어력을 보강할 수 있지만, 비용과 opportunity cost를 고려해야 합니다. ‘밴’ 시스템은 상대방의 전략을 방해할 수 있는 강력한 도구로, 초중반부터 후반까지 유용하게 활용할 수 있습니다. 맵의 난이도는 레벨이 올라갈수록 높아지므로, 초보자보다는 중간 이상의 실력을 가진 플레이어에게 더 적합합니다. 특히, 여러 번의 시도를 통해 레벨별 최적의 전략을 찾는 재미가 있는 맵입니다. 추천 대상으로는 디펜스 장르를 좋아하는 유저, 전략적 선택과Resource Management에 관심이 있는 플레이어, 그리고 다양한 전략을 실험해 보고 싶은 유즈맵 마니아들이 있습니다. 맵을 플레이하기 전에는 건물을 구매할 때 소모되는 자원과 업그레이드에 필요한 비용을 미리 확인하는 것이 중요합니다. 또한, ‘밴’ 시스템을 활용해 상대방의 전략을 미리 차단하는 것도 승률을 높이는 데 도움이 됩니다. "New Fork Defense WMe" is a custom map in *StarCraft: Brood War* that falls under the defense genre, specifically a random defense type. The map features 30 levels, each providing 14 health points. Players can purchase buildings as needed and selectively use Probe or hero units. A unique "ban" system allows players to counter the opponent’s chosen units, expanding strategic options. While building purchases are optional, they are essential for reinforcing defense or securing additional units. The upgrade system supports up to 255 levels, with adjustable cost coefficients for fine-tuned gameplay. The map adopts a space-themed atmosphere, reflected in its tileset and background design. The core focus of this map is defense and resource management. As levels progress, enemy attack patterns evolve and intensify, requiring efficient building placement and careful upgrade decisions. While Probes or heroes can strengthen defenses, players must weigh their costs and opportunity costs. The "ban" system serves as a powerful tool to disrupt the opponent’s strategy, remaining useful from early to late stages. The difficulty escalates with each level, making it more suitable for intermediate to advanced players rather than beginners. The enjoyment comes from experimenting to find the optimal strategy for each level through repeated attempts. Recommended for fans of defense games, players interested in strategic choices and resource management, and custom map enthusiasts looking to experiment with diverse strategies. Before playing, it’s crucial to check the resources required for building purchases and upgrade costs. Leveraging the "ban" system to preemptively counter the opponent’s strategy also boosts win rates.
글래디에이터! 10 레벨즈! (Gladiator! 10 LEVELS!)
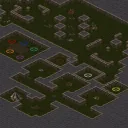
스타크래프트 브루드워의 유즈맵 〈Gladiator! 10 LEVELS!〉는 고대 로마의 콜로세움에서 영감을 받은 아레나형 전투 맵으로, 플레이어는 각각의 레벨에서 마주치는 적군과 사투를 벌이며 생존을 도모해야 한다. 맵은 사막 테마의 넓은 콜로세움 구조로 설계되어 있으며, 중앙에 위치한 투기장과 주위를 둘러싼 관중석, 그리고 여러 개의 입구와 통로가 특징적이다. 각 레벨은 고유한 적의 조합과 배치로 구성되어 있으며, 플레이어는 시야를 가리는 관중석과 좁은 통로를 활용해 전략적으로 전투를 펼쳐야 한다. 맵의 특징 중 하나는 레벨별로 난이도가 상승하는 구조로, 초반에는 기본적인 유닛으로 구성된 적이 등장하지만 후반부로 갈수록 조합이 다양해지고 적의 숫자도 증가한다. 또한, 맵 곳곳에 배치된 자원과 아이템 박스를 획득하면 일시적인 버프나 유닛 강화를 얻을 수 있어, 전투뿐만 아니라 자원 관리와 아이템 활용도 중요한 요소로 작용한다. 이 맵은 혼자서 모든 레벨을 클리어하는 싱글 플레이를 중점으로 삼고 있지만, 멀티플레이어 모드로 전환해 친구들과 협동하거나 경쟁할 수도 있어 다양한 플레이 스타일을 즐길 수 있다. 특히, 전략적인 위치 선정이 중요하며, 좁은 통로나 관중석을 활용한Ambush(매복) 전술이 효과적이다. 초보 플레이어는 기본적인 유닛 컨트롤과 맵 이해를 먼저 익힌 뒤 점차 난이도를 높이는 것이 좋으며, 숙련자는 아이템 획득 타이밍과 조합을 최적화해 클리어 시간을 단축시킬 수 있다. 맵의 분위기와는 달리 전투는 치열하며, 각 레벨의 보스급 적을 상대할 때는 신중한micro컨트롤이 요구된다. 콜로세움의 웅장한 배경과 박진감 넘치는 전투가 어우러져 몰입감을 높이는 이 맵은, 스타크래프트의 유즈맵 중에서도 아레나와 서바이벌 장르를 좋아하는 플레이어에게 강력히 추천할 만하다. 특히, 레벨별로 변화하는 적의 패턴과 맵 구조를 활용한 전략적 플레이를 즐기는 유저라면 이보다 더 흥미로운 경험을 제공할 수 없을 것이다. 맵 플레이 전에는 관중석과 통로의 위치를 숙지하고, 각 레벨의 보스 유닛의 특성을 미리 파악해 두는 것이 클리어의 열쇠가 될 것이다. 또한, 아이템 박스의 위치를 기억하고 필요할 때 빠르게 확보할 수 있도록 연습하는 것도 중요하다. 이 맵은 한 번 클리어하면 곧바로 재도전 욕구가 생길 정도로 중독성이 강하며, 레벨 디자인과 밸런스가 잘 갖춰져 있어 반복 플레이를 하더라도 질리지 않는 장점이 있다. 특히, 친구들과 함께 각 레벨을 도전하며 경쟁하는 재미도 쏠쏠하다. 이렇듯 〈Gladiator! 10 LEVELS!〉는 스타크래프트 유즈맵의 진수를 느낄 수 있는 작품으로, 아레나와 서바이벌 장르를 любителей에게 반드시 추천하고 싶다. StarCraft: Brood War's custom map *Gladiator! 10 LEVELS!* is an arena-style combat map inspired by ancient Rome's Colosseum, where players must survive by battling waves of enemies across ten challenging levels. The map features a vast desert-themed Colosseum structure with a central arena, surrounding spectator stands, and multiple entrances and pathways. Each level presents unique enemy compositions and layouts, forcing players to use the obscured vision of the stands and tight corridors to their advantage in strategic combat. One of the map's defining features is its progressive difficulty, where early levels feature basic enemy units but later levels introduce more complex unit combinations and larger enemy waves. Scattered throughout the map are resources and item boxes that grant temporary buffs or unit enhancements, making resource management and item utilization just as crucial as combat itself. While *Gladiator! 10 LEVELS!* is primarily designed for solo play, it also supports multiplayer modes, allowing players to team up with friends or compete against each other for added replayability. Strategic positioning is key, and ambush tactics using narrow corridors or the spectator stands can turn the tide of battle. Beginners should focus on mastering basic unit control and map awareness before tackling higher difficulties, while experienced players can optimize item timing and unit compositions to clear levels faster. Despite its grand Colosseum setting, the battles are intense, and defeating boss-level enemies requires careful micro-management. The map's immersive blend of epic atmosphere and high-stakes combat makes it a standout among StarCraft custom maps, especially for fans of arena and survival genres. Players who enjoy adapting strategies to shifting enemy patterns and map layouts will find *Gladiator! 10 LEVELS!* endlessly engaging. Before diving in, it's essential to memorize the locations of the spectator stands and pathways, study the unique traits of each level's boss units, and practice quickly securing item boxes when needed. The map's addictive nature ensures that once cleared, players will immediately want to replay it, thanks to its well-balanced level design and engaging mechanics. Competing with friends to tackle each level adds an extra layer of fun, making *Gladiator! 10 LEVELS!* a must-play for anyone seeking the essence of StarCraft custom maps.
Recently registered maps
Check newly added files and versions.
침몰 디펜스 대회 (Sunken Defense Competition)
스타크래프트 브루드워의 유즈맵 장르 중 디펜스 장르에 속하는 ‘Sunken Defense Competition’은 침수된 전투 공간에서 펼쳐지는 흥미로운 방어형 게임으로, 최대 5명의 플레이어가 순차적으로 적의 공격을 막아내며 경쟁하는 구조로 구성되어 있다. 맵의 핵심 메커니즘은 ‘한 명만 통과시켜라’라는 간단한 규칙에 기반하며, 각 플레이어는 자신의 방어선을 구축하고 적 유닛을 섬멸해 다음 레벨로 넘어가야 한다. 맵 내부 설명에 따르면, 레벨을 완료할 때마다 8기의 추가 드론을 획득할 수 있으며, 10레벨을 먼저 클리어하거나 마지막까지 살아남은 플레이어가 승리하는 것으로 보인다. 해상도 4096x4096의 넓은 맵에서 펼쳐지는 전투는 전략적 배치와Micro 컨트롤이 요구되며, 특히 좁은 통로나 다리 지역에서의 전투가 승패를 좌우할 가능성이 높아 보인다. 맵의 분위기는 황무지 타일셋을 활용한 어두운 색감으로 침울한 바다 밑바닥을 연상시키며, 이는 디펜스 게임의 긴장감을 한층 더해준다. 초보자도 쉽게 진입할 수 있는 단순한 목표와 규칙이지만, 차근차근 레벨을 올라가며 전략을 다듬어야만 높은 레벨에서 승리할 수 있다. 특히 타워 배치와 자원 관리, 유닛 조합에 따라 난이도가 급변할 수 있어, 플레이어의 적응력이 중요하다. 추천 대상은 스타크래프트 유즈맵을 좋아하는 모든 유저로, 디펜스 장르에 익숙하지 않은 경우에도 규칙을 익히면 재미있게 플레이할 수 있다. 다만, 맵의 밸런스가 제작자의 의도대로 맞춰져 있는지는 확인되지 않았으므로, 플레이 전에는 레벨당 적의 구성과 배치에 대한 사전 조사나 시연 영상을 보는 것이 좋다. 플레이 전 확인 포인트는 자신의 방어선 구축 위치, 레벨 진행 시 드론 획득 타이밍, 그리고 적의 패턴 변화에 대응할 수 있는 유연성이다. 이 맵은 좁은 공간에서 벌어지는 치열한 전투를 선호하는 유저들에게 특히 어울릴 것으로 예상된다. This StarCraft: Brood War custom map, titled ‘Sunken Defense Competition’, falls under the defense genre, offering a unique underwater battlefield where up to five players compete to survive by eliminating enemies and advancing through levels. The core gameplay revolves around the simple yet strategic rule of allowing only one player to pass through while defending your position. Each player builds their own defense line, and upon completing a level, they receive eight additional drones, which can be crucial for progressing further. The map’s large 4096x4096 resolution provides ample space for tactical positioning, though tight corridors and bridges will likely become critical choke points during intense battles. The dark, murky aesthetic created by the wasteland tileset enhances the oppressive atmosphere of the sunken environment, making every encounter feel more immersive. While the rules are straightforward, mastering the game requires careful planning of tower placements, resource management, and unit combinations, especially as the difficulty ramps up in later levels. Beginners can easily start playing due to the simple objectives, but long-term success depends on adapting strategies to counter increasingly complex enemy patterns. This map is ideal for fans of StarCraft custom maps and defense games who enjoy high-stakes, close-quarters combat. Before diving in, players should check the enemy composition and layout per level or watch gameplay demonstrations to understand the balancing mechanics, as the difficulty curve may vary based on individual playstyles. Key points to verify before playing include optimal defense line positioning, drone acquisition timing, and adaptability to enemy strategies.
검객 루로우니 켄신 바운드 1.2 (Rurouni Kenshin Bound 1.2)
《유즈맵 '검객 루로우니 켄신 바운드 1.2'》는 무려 20단계의 레벨을 지닌 난이도 상승형 디펜스 맵입니다. 플레이어는 총 6명이 참여하며, 4번의 부활 기회를 가지고 각 레벨을 클리어해야 합니다. 맵 제목에서 느껴지듯 일본 만화 《바람의 검심》의 세계관을 모티브로 삼아, 검과 검객의 전투가 펼쳐지는 스타크래프트의 유즈맵으로 재탄생했습니다. 내부 설명에서 언급된 제작자 'l)ark(v)arine'와 클랜 'l)a12k', 그리고 운영 채널 'Op l)a12k'는 맵의 정체성과 제작 배경을 짐작하게 합니다. 정글 타일셋으로 구성된 맵의 배경은 숲과 산, 절벽 등으로 이루어져 있으며, 적의Wave가 밀려오는 디펜스 구조를 기본 틀로 하고 있습니다. 레벨은 20단계로 구성되어 있으며, 각 레벨마다 등장하는 적의 종류와 수가 점차 증가하는 방식으로 난이도가 조절됩니다. 플레이어는 레벨 클리어 시에만 다음 단계로 진행할 수 있으며, 도중에 부활 기회를 활용해 실수를 만회할 수 있습니다. 맵의 핵심은 적의 공격을 막아내는 동시에 자원을 효율적으로 관리하는 전략적 플레이에 있습니다. 특히, 맵의 중앙에서 펼쳐지는 전투는 치열한 혈투를 연상시키며, 맵의 지형적 특징을 활용한 방어 전략이 요구됩니다. 검객의 컨셉에 맞게, 플레이어는 검을 휘두르는 듯한 연출과 함께 다양한 스킬을 사용할 수 있는 시스템이 포함되어 있습니다. 이 맵은 6인까지 참여할 수 있으며, 팀전보다는 개별 플레이가 주가 되는 구조입니다. 그러나 맵의 특성상 플레이어 간의 협력이 필수적이며, 각 레벨의 보스를 클리어하기 위해선 상호간의 지원과 전략적 협력이 중요합니다. 맵의 난이도는 레벨이 올라갈수록 급격히 높아지며, 후반부로 갈수록 적의 공격 패턴이 복잡해지고 병력의 규모가 커집니다. 따라서 초보 플레이어는 레벨이 낮은 단계부터 천천히 적응해 나가야 하며, 숙련된 플레이어는 후반부 레벨을 공략하기 위해 끊임없는 연습과 전략 수정이 필요합니다. 맵의 분위기와 전투感은 《바람의 검심》의 특징을 잘 살려내어, 플레이어들에게 새로운 경험을 제공합니다. 이 맵을 플레이하기 위해서는 맵의 구조와 적의 패턴을 이해하는 것이 무엇보다 중요합니다. 맵의 지형을 활용한 방어선 구축, 자원의 효율적인 관리, 그리고 팀원 간의 원활한 의사소통이 성공의 열쇠가 됩니다. 또한, 맵의 각 레벨마다 숨겨진 보너스나 특별한 적의 등장 패턴이 있을 수 있으므로, 매 레벨을 클리어할 때마다 맵의 세부 요소를 재확인하는 것이 좋습니다. 마지막으로, 이 맵은 단순히 적을 물리치는 것이 아니라, 검객으로서의 성장과 전략적 excellence를 추구하는 경험을 제공합니다. 따라서 검객의 세계관을 любители로 즐기고 싶거나, 디펜스 장르에 익숙한 플레이어에게 강력히 추천하는 맵입니다. The custom map *"Kenjaku Rurouni Kenshin Bound 1.2"* is a defense-style game featuring a whopping 20 escalating difficulty levels. Up to six players can join, each with four revival chances to clear each stage. Inspired by the world of the Japanese manga *Rurouni Kenshin*, this StarCraft custom map reimagines sword and samurai battles within the game’s mechanics. The map’s creator, 'l)ark(v)arine,' their clan 'l)a12k,' and the managing channel 'Op l)a12k' hint at its identity and background. Set against a jungle tileset backdrop of forests, mountains, and cliffs, the map follows a defense structure where enemy waves progressively increase in number and variety. The 20 levels steadily ramp up difficulty, with enemies growing in both type and quantity as players advance. Progression is stage-locked—only clearing a level unlocks the next—but players can use their revival chances to recover from mistakes. The core challenge lies in balancing resource management with strategic defense, especially during intense central battles where terrain plays a crucial role. True to its samurai theme, the map incorporates dynamic sword-swinging visuals and a skill system that lets players unleash various combat abilities. While designed for up to six players, the focus leans toward individual play rather than strict teamwork. Still, cooperation is vital, particularly for defeating bosses, as shared support and coordinated strategies are often required. The difficulty spikes sharply in later levels, where enemy attack patterns grow more complex and forces become overwhelming. Beginners should start with lower levels to acclimate, while veterans must refine their tactics through repeated attempts to conquer the tougher stages. The map captures the essence of *Rurouni Kenshin*, delivering a fresh and immersive experience to players. To excel, understanding the map’s layout and enemy behaviors is key—building efficient defenses, managing resources wisely, and communicating clearly with teammates are all critical. Each level may also hide bonuses or unique enemy spawns, so reviewing details after each clear is wise. Ultimately, this isn’t just about defeating enemies; it’s about embracing the growth of a swordsman and striving for strategic mastery. A must-try for fans of the samurai world or defense genre enthusiasts seeking a fresh challenge.
뉴 포커 디펜스 v4.20 (New Poker Defence v4.20)
스타크래프트: 브루드워의 유즈맵 ‘뉴 포커 디펜스(New Poker Defence)’는 디펜스 장르의 대표적인 랜덤 디펜스 맵으로, 총 30개의 레벨과 14개의 목숨 시스템을 기반으로 제작된 작품이다. 맵의 구조는 중앙에 플레이어 기지(커맨드 센터)가 위치한 가운데, 외부에서 끊임없이 몰려오는 적 유닛들을 방어하는 방식으로 구성되어 있으며, 각 레벨마다 다양한 종류의 적과 배치 패턴을 제공한다. 플레이어는 제한된 자원과 목숨으로 레벨을 클리어해야 하며, 일정 조건을 만족하면 다음 레벨로 넘어갈 수 있다. 특히, 맵 곳곳에 배치된 포커 카드 아이콘은 레벨 클리어 시 보상이나 특수 효과를 제공하는 핵심 요소로, 카드에 따라 추가 자원 획득, 방어력 상승, 적 유닛 약화 등 다양한 혜택을 받을 수 있다. 이러한 시스템은 단순 디펜스를 넘어 전략적 선택과 운을 요구하는 흥미로운 요소로 작용한다. 또한, 맵의 그래픽은 우주 테마를 기반으로 깔끔하게 디자인되어 있으며, 적 유닛의 종류와 공격 패턴이 레벨별로 변화하여 긴장감을 유지할 수 있도록 설계되었다. 추천 대상은 디펜스 장르를 좋아하는 플레이어는 물론, 전략성과 운이 결합된 게임을 선호하는 유저들에게 적합하다. 플레이 전에는 레벨별 적 배치와 카드 시스템의 효과를 미리 숙지하는 것이 중요하며, 자원 관리와 목숨 관리에 신경을 써야 한다. 특히, 14개의 목숨은 제한적이므로 무리한 플레이보다는 차분한 전략이 필요하다. 맵의 난이도는 레벨이 진행될수록 점차 상승하므로, 초반 레벨을 안정적으로 클리어하는 것이 전체적인 성공의 관건이다. New Poker Defence v4.20 is one of the most distinctive defense-style custom maps in StarCraft: Brood War, blending random defense mechanics with a poker-themed progression system. The map features 30 distinct levels, each introducing new enemy units, attack patterns, and strategic challenges while maintaining a core survival loop. Players control a central base and must fend off waves of enemies using limited resources and exactly 14 lives across all levels. A standout feature is the poker card system scattered throughout the map: collecting specific cards grants bonuses such as extra minerals, temporary shields, or enemy slowdowns, adding a layer of risk-reward decision-making. The map’s visual design leans into a sleek space-themed aesthetic, with clean tilework and atmospheric lighting that enhances the tension of each defense scenario. Enemies escalate in complexity as levels progress, from basic Zerglings and Zealots to mixed air and ground assaults with special abilities. This map is ideal for players who enjoy tactical depth, adaptive enemy behavior, and the thrill of balancing strategy with a touch of luck. Before playing, it’s advisable to review the card effects and enemy spawn patterns per level, as efficient resource and life management is critical—especially since lives are non-renewable. The difficulty curve rises steadily, so mastering early levels is key to unlocking later, more challenging stages. Overall, New Poker Defence v4.20 offers a fresh take on the defense genre, appealing to both veterans of UMS maps and newcomers looking for a mix of skill and unpredictability.
뉴 포커 디펜스 WMe (New Poker Defence WMe)
스타크래프트 브루드워의 유즈맵 중 하나로, ‘뉴 포커 디펜스 WMe’는 디펜스 장르의 랜덤 디펜스 유형에 속하는 맵입니다. 총 30개의 레벨이 있으며, 각 레벨당 14개의 생명력을 제공받습니다. 플레이어는 필요에 따라 건물을 구매하고, 프로브나 영웅 유닛을 선택적으로 활용할 수 있습니다. 또한, 상대방이 선택한 유닛을 ‘밴’할 수 있는 시스템이 포함되어 있어 전략적 선택의 폭이 넓습니다. 건물 구매는 선택 사항이지만, 방어력을 강화하거나 추가 유닛을 확보하는 데 필수적입니다. 업그레이드 시스템은 255단계까지 가능하며, 비용 계수도 조절할 수 있어 세밀한 플레이가 가능합니다. 맵의 분위기는 우주 테마로 구성되어 있으며, 타일셋과 배경 디자인에서 우주 feel을 느낄 수 있습니다. 이 맵의 핵심은 방어와 자원 관리입니다. 레벨이 진행될수록 적의 공격 패턴이 변하고 강해지므로, 건물을 효율적으로 배치하고 업그레이드를 신중히 진행해야 합니다. 프로브나 영웅을 활용하면 방어력을 보강할 수 있지만, 비용과 opportunity cost를 고려해야 합니다. ‘밴’ 시스템은 상대방의 전략을 방해할 수 있는 강력한 도구로, 초중반부터 후반까지 유용하게 활용할 수 있습니다. 맵의 난이도는 레벨이 올라갈수록 높아지므로, 초보자보다는 중간 이상의 실력을 가진 플레이어에게 더 적합합니다. 특히, 여러 번의 시도를 통해 레벨별 최적의 전략을 찾는 재미가 있는 맵입니다. 추천 대상으로는 디펜스 장르를 좋아하는 유저, 전략적 선택과Resource Management에 관심이 있는 플레이어, 그리고 다양한 전략을 실험해 보고 싶은 유즈맵 마니아들이 있습니다. 맵을 플레이하기 전에는 건물을 구매할 때 소모되는 자원과 업그레이드에 필요한 비용을 미리 확인하는 것이 중요합니다. 또한, ‘밴’ 시스템을 활용해 상대방의 전략을 미리 차단하는 것도 승률을 높이는 데 도움이 됩니다. "New Fork Defense WMe" is a custom map in *StarCraft: Brood War* that falls under the defense genre, specifically a random defense type. The map features 30 levels, each providing 14 health points. Players can purchase buildings as needed and selectively use Probe or hero units. A unique "ban" system allows players to counter the opponent’s chosen units, expanding strategic options. While building purchases are optional, they are essential for reinforcing defense or securing additional units. The upgrade system supports up to 255 levels, with adjustable cost coefficients for fine-tuned gameplay. The map adopts a space-themed atmosphere, reflected in its tileset and background design. The core focus of this map is defense and resource management. As levels progress, enemy attack patterns evolve and intensify, requiring efficient building placement and careful upgrade decisions. While Probes or heroes can strengthen defenses, players must weigh their costs and opportunity costs. The "ban" system serves as a powerful tool to disrupt the opponent’s strategy, remaining useful from early to late stages. The difficulty escalates with each level, making it more suitable for intermediate to advanced players rather than beginners. The enjoyment comes from experimenting to find the optimal strategy for each level through repeated attempts. Recommended for fans of defense games, players interested in strategic choices and resource management, and custom map enthusiasts looking to experiment with diverse strategies. Before playing, it’s crucial to check the resources required for building purchases and upgrade costs. Leveraging the "ban" system to preemptively counter the opponent’s strategy also boosts win rates.
Impossible v6.0
스타크래프트 브루드워의 유즈맵 ‘Impossible v6.0’는 5~6인용 디펜스 장르의 맵으로, 플레이어는 끊임없이 몰려드는 적군을 방어하면서 레벨을 progressing하는 구조를 가지고 있다. 이 맵의 핵심은 ‘불가능’이라는 제목답게 극한의 난이도를 자랑한다는 점으로, 방어선을 유지하는 동시에 끊임없이 변화하는 적의 공세를 버텨내야 한다. 내부 맵 제목과 설명에서 확인할 수 있듯이 ‘Levels to play by: Einherjer’라는 제작자도 존재하지만, 맵의 난이도나 진행 방식에 대한 구체적인 정보는 제공되지 않는다. 맵 이미지를 살펴보면 중앙에 위치한 본진 지역을 중심으로 적의 공세가 다양한 경로로 쏟아져 들어오며, 플레이어는 미네랄과 가스 자원을 확보해 방어 건물을 짓고 병력을 생산해 맞서 싸워야 한다. 이미지에서 확인되는 적의 기지 مانند 구조물과 병력 생산 시설은 맵의 난이도를 더욱 높이는 요소로 작용한다. 또한, 맵의 해상도가 4096x4096에 달하고 타일셋이 우주로 설정되어 있어 넓은 시야와 우주 테마의 분위기를 느낄 수 있다. 이 맵은 초보자보다는 중수 이상의 플레이어에게 적합하며, 방어선을 구축하는 전략과 자원 관리가 무엇보다 중요하다. 특히, 레벨이 올라갈수록 적의 공격 패턴이 복잡해지므로, 플레이어는 각 레벨마다 요구되는 전략을 신속히 адап해야 한다. 맵의 난이도가 높다는 점에서 플레이 전 충분한 연습과 전략 수립이 필수적이며, 팀 플레이보다는 개인 플레이에 더 초점을 맞추고 있는 구조로 보인다. 맵을 플레이하기 전에 미네랄과 가스 자원의 위치, 주요 방어 경로, 그리고 적의 공격 패턴을 숙지하는 것이 중요하다. 또한, 방어 건물의 배치와 병력의 조합을 신중히 결정해야만 높은 난이도를 극복할 수 있을 것이다. 이 맵은 ‘Impossible’이라는 제목답게 정말 불가능에 가까운 난이도를 자랑하며, 이를 극복하는 재미가 주요 포인트라고 할 수 있다. StarCraft: Brood War's custom map *Impossible v6.0* is a 5–6 player defense genre map where players must defend against relentless waves of enemies while progressing through levels. True to its name, the map boasts extreme difficulty, requiring players to maintain their defenses while enduring ever-changing enemy assaults. Though the map credits its creator as "Einherjer" in the internal title and description, no specific details about its difficulty or progression mechanics are provided. Examining the map image reveals that enemy attacks surge toward the main base area from multiple directions, forcing players to secure minerals and gas to construct defenses and produce forces. The presence of enemy structures resembling bases and production facilities further escalates the challenge. With a resolution of 4096x4096 and a space-themed tileset, the map offers expansive visibility and an immersive cosmic atmosphere. This map is better suited for intermediate to advanced players, as constructing defensive lines and managing resources are critical. As levels progress, enemy attack patterns grow increasingly complex, demanding quick adaptation to each stage’s requirements. Given its high difficulty, thorough practice and strategy planning are essential before playing. The design leans more toward solo play rather than team coordination. Before attempting the map, players should familiarize themselves with mineral and gas locations, key defensive routes, and enemy attack patterns. Careful placement of defensive structures and strategic unit compositions are vital to overcoming its punishing difficulty. *Impossible* lives up to its name, offering a near-unbeatable challenge where the thrill of overcoming its obstacles is the main draw.
글래디에이터! 10 레벨즈! (Gladiator! 10 LEVELS!)
스타크래프트 브루드워의 유즈맵 〈Gladiator! 10 LEVELS!〉는 고대 로마의 콜로세움에서 영감을 받은 아레나형 전투 맵으로, 플레이어는 각각의 레벨에서 마주치는 적군과 사투를 벌이며 생존을 도모해야 한다. 맵은 사막 테마의 넓은 콜로세움 구조로 설계되어 있으며, 중앙에 위치한 투기장과 주위를 둘러싼 관중석, 그리고 여러 개의 입구와 통로가 특징적이다. 각 레벨은 고유한 적의 조합과 배치로 구성되어 있으며, 플레이어는 시야를 가리는 관중석과 좁은 통로를 활용해 전략적으로 전투를 펼쳐야 한다. 맵의 특징 중 하나는 레벨별로 난이도가 상승하는 구조로, 초반에는 기본적인 유닛으로 구성된 적이 등장하지만 후반부로 갈수록 조합이 다양해지고 적의 숫자도 증가한다. 또한, 맵 곳곳에 배치된 자원과 아이템 박스를 획득하면 일시적인 버프나 유닛 강화를 얻을 수 있어, 전투뿐만 아니라 자원 관리와 아이템 활용도 중요한 요소로 작용한다. 이 맵은 혼자서 모든 레벨을 클리어하는 싱글 플레이를 중점으로 삼고 있지만, 멀티플레이어 모드로 전환해 친구들과 협동하거나 경쟁할 수도 있어 다양한 플레이 스타일을 즐길 수 있다. 특히, 전략적인 위치 선정이 중요하며, 좁은 통로나 관중석을 활용한Ambush(매복) 전술이 효과적이다. 초보 플레이어는 기본적인 유닛 컨트롤과 맵 이해를 먼저 익힌 뒤 점차 난이도를 높이는 것이 좋으며, 숙련자는 아이템 획득 타이밍과 조합을 최적화해 클리어 시간을 단축시킬 수 있다. 맵의 분위기와는 달리 전투는 치열하며, 각 레벨의 보스급 적을 상대할 때는 신중한micro컨트롤이 요구된다. 콜로세움의 웅장한 배경과 박진감 넘치는 전투가 어우러져 몰입감을 높이는 이 맵은, 스타크래프트의 유즈맵 중에서도 아레나와 서바이벌 장르를 좋아하는 플레이어에게 강력히 추천할 만하다. 특히, 레벨별로 변화하는 적의 패턴과 맵 구조를 활용한 전략적 플레이를 즐기는 유저라면 이보다 더 흥미로운 경험을 제공할 수 없을 것이다. 맵 플레이 전에는 관중석과 통로의 위치를 숙지하고, 각 레벨의 보스 유닛의 특성을 미리 파악해 두는 것이 클리어의 열쇠가 될 것이다. 또한, 아이템 박스의 위치를 기억하고 필요할 때 빠르게 확보할 수 있도록 연습하는 것도 중요하다. 이 맵은 한 번 클리어하면 곧바로 재도전 욕구가 생길 정도로 중독성이 강하며, 레벨 디자인과 밸런스가 잘 갖춰져 있어 반복 플레이를 하더라도 질리지 않는 장점이 있다. 특히, 친구들과 함께 각 레벨을 도전하며 경쟁하는 재미도 쏠쏠하다. 이렇듯 〈Gladiator! 10 LEVELS!〉는 스타크래프트 유즈맵의 진수를 느낄 수 있는 작품으로, 아레나와 서바이벌 장르를 любителей에게 반드시 추천하고 싶다. StarCraft: Brood War's custom map *Gladiator! 10 LEVELS!* is an arena-style combat map inspired by ancient Rome's Colosseum, where players must survive by battling waves of enemies across ten challenging levels. The map features a vast desert-themed Colosseum structure with a central arena, surrounding spectator stands, and multiple entrances and pathways. Each level presents unique enemy compositions and layouts, forcing players to use the obscured vision of the stands and tight corridors to their advantage in strategic combat. One of the map's defining features is its progressive difficulty, where early levels feature basic enemy units but later levels introduce more complex unit combinations and larger enemy waves. Scattered throughout the map are resources and item boxes that grant temporary buffs or unit enhancements, making resource management and item utilization just as crucial as combat itself. While *Gladiator! 10 LEVELS!* is primarily designed for solo play, it also supports multiplayer modes, allowing players to team up with friends or compete against each other for added replayability. Strategic positioning is key, and ambush tactics using narrow corridors or the spectator stands can turn the tide of battle. Beginners should focus on mastering basic unit control and map awareness before tackling higher difficulties, while experienced players can optimize item timing and unit compositions to clear levels faster. Despite its grand Colosseum setting, the battles are intense, and defeating boss-level enemies requires careful micro-management. The map's immersive blend of epic atmosphere and high-stakes combat makes it a standout among StarCraft custom maps, especially for fans of arena and survival genres. Players who enjoy adapting strategies to shifting enemy patterns and map layouts will find *Gladiator! 10 LEVELS!* endlessly engaging. Before diving in, it's essential to memorize the locations of the spectator stands and pathways, study the unique traits of each level's boss units, and practice quickly securing item boxes when needed. The map's addictive nature ensures that once cleared, players will immediately want to replay it, thanks to its well-balanced level design and engaging mechanics. Competing with friends to tackle each level adds an extra layer of fun, making *Gladiator! 10 LEVELS!* a must-play for anyone seeking the essence of StarCraft custom maps.
버블 바운드 vFinal (Bubble Bound vFinal)
‘Bubble Bound vFinal’은 거품 속에 갇힌 플레이어가 장애물을 통과하며 살아남는 순수한 퍼즐형 디펜스 맵이다. 맵 중앙에 배치된 거대한 거품 안에서 플레이어는 좌우로 이동하며 녹색, 파란색, 빨간색 장애물을 피하거나 통과해야 한다. 각 레벨은 독립된 공간으로 나뉘어 있으며, 장애물의 배치와 패턴이 조금씩 변화하여 점진적으로 난이도가 상승하는 구조를 보인다. 특히 파란색 장애물은 통과할 수 있어 전략적인 회피가 가능하지만, 빨간색 장애물은 즉사 판정이므로 시야와 반응이 무엇보다 중요하다. 맵 우측 상단에는 레벨 표시기가 있어 현재 진행 상황을 한눈에 확인할 수 있으며, 좌측 하단에는 이동 공간이 제한적으로 배치되어 있어 플레이어의 조작력을 시험한다. 맵에서 확인되는 ‘10 Level’과 ‘22 Obstacle’이라는 설명은 총 10단계의 레벨이 있으며, 각 레벨마다 22개의 장애물이 배치되어 있음을 시사한다. 맵의 핵심은 ‘죽지 않고 모든 장애물을 통과하는 것’이므로, 플레이어는 끊임없는 집중력과 순간적인 반사 신경으로 생존을 도모해야 한다. 맵의 배경은 어두운 톤으로 통일되어 있어 장애물과 플레이어의 움직임이 더욱 뚜렷하게 부각되며, UI 요소는 간소하면서도 직관적이다. 이러한 구조는 초보자도 쉽게 접근할 수 있도록 돕지만, 후반부로 갈수록 패턴의 복잡성과 속도가 상승하여 숙련자도 긴장감을 유지하게 만든다. 추천 대상은 실시간 반응이 필요한 퍼즐과 디펜스를 좋아하는 유저이며, 특히 단기간 내에 여러 번 재도전하며 실력을 향상시키고자 하는 플레이어에게 적합하다. 플레이 전에는 키보드 또는 마우스 조작에 익숙해질 필요가 있으며, 장애물 패턴을 미리 숙지하는 훈련도 효과적이다. 맵의 난이도는 레벨에 따라 변동되지만, 전체적으로는 ‘보통’ 수준으로 평가된다. 맵의 제작자는 Dragoon-Protoss로 확인되며, 맵명은 ‘거품 경계’라는 뜻의 ‘Bubble Bound’를 사용하고 있다. 맵의 특성은 장애물 통과형 퍼즐과 생존 디펜스가 결합된 형태로, 타 맵과의 차별점은 레벨별로 독립된 공간을 제공한다는 점이다. 플레이 시간은 레벨당 약 2~3분이 소요될 것으로 추정되며, 총 10레벨을 고려하면 약 20~30분의 플레이 시간이 예상된다. 맵의 구조상 팀 플레이보다는 단독 플레이에 최적화되어 있으며, 경쟁보다는 도전과 극복에 중점을 두고 있다. ‘Bubble Bound vFinal’ is a pure puzzle defense map where players trapped inside bubbles must navigate through obstacles to survive. Players move left and right within a large bubble at the center of the map, dodging or passing through green, blue, and red obstacles. Each level is divided into separate spaces, with obstacle layouts and patterns gradually increasing in difficulty. While blue obstacles can be passed through, requiring strategic evasion, red obstacles are instant-death traps, making sharp vision and quick reactions essential. A level indicator in the top-right corner shows progress at a glance, while the limited movement space in the bottom-left tests player control. The map’s description of “10 Level” and “22 Obstacle” suggests there are 10 stages, each containing 22 obstacles. The core challenge is surviving without dying while passing all obstacles, demanding constant focus and reflexes. The dark-toned background sharpens the contrast between obstacles and player movement, while the UI remains simple and intuitive. This design makes the map accessible to beginners, though the increasing complexity and speed in later levels keep even experienced players on edge. It’s recommended for users who enjoy real-time puzzle and defense mechanics, especially those looking to improve through repeated short attempts. Familiarizing yourself with keyboard or mouse controls beforehand and memorizing obstacle patterns can be highly effective. While difficulty varies by level, the map is generally rated as "moderate." The creator, Dragoon-Protoss, named it ‘Bubble Bound,’ meaning ‘bubble boundary.’ Its unique feature is providing isolated spaces for each level, blending obstacle-passing puzzles with survival defense. Each level takes about 2–3 minutes, so completing all 10 levels would likely take around 20–30 minutes. The map is optimized for solo play rather than team play, emphasizing personal challenge and overcoming obstacles over competition.
Bound And Defend 5 (구속과 방어 5)
《Bound And Defend 5》는 스타크래프트: 브루드워의 컴까기 계열 유즈맵으로, 총 6명의 플레이어가 하나의 팀을 이루어 적의 공격을 방어하는 구조로 구성되어 있다. 맵의 이름은 'Bound(구속) And Defend(방어)'라는 제목에서 알 수 있듯, 플레이어는 제한된 공간 내에 갇힌 상태에서 끊임없이 밀려드는 적의 공격으로부터 본진과 주요 건물을 지켜내야 한다. 내부 설명에 'Akuma-30 Levels16 Obstacles'라는 문구가 포함되어 있는데, 이는 총 30단계의 레벨이 있으며 각 레벨마다 16개의 장애물이 배치되어 있음을 의미하는 것으로 추정된다. 이러한 장애물은 플레이어가 방어선을 구축하거나 기지를 보호하는 데 전략적인 영향을 미치며, 맵의 진행 방식이 레벨별로 변화함을 시사한다. 맵의 핵심은 방어에 집중되어 있지만, 단순히 막아내는 것만으로는 부족하다. 플레이어는 제한된 공간 안에서 자원과 유닛을 효율적으로 관리해야 하며, 각 레벨마다 변화하는 장애물과 적의 공격 패턴에 대응하기 위한 전략이 요구된다. 특히, 맵의 중앙이나 주요據點 주변은 적의 공격 루트가 집중되는 곳인지라 방어선 구축 시 추가적인 주의가 필요하다. 초반에는 기본 유닛으로 방어에 집중하더라도, 후반부로 갈수록 더 강력한 유닛과 방어 시설이 필요해지며, 레벨 디자인에 따라서는 특정 구간에서 새로운 전술이 필요할 수도 있다. 이 맵은 초보자보다는 적어도 스타크래프트의 기본적인 유닛 컨트롤과 맵 리딩 능력이 있는 플레이어에게 더 어울린다. 또한, 팀 플레이가 필수적이므로 팀원 간의 협력이 원활하지 않다면 방어에 실패할 가능성이 크다. 만약 혼자서 플레이를 시도한다면, AI의 공격 패턴과 맵의 장애물을 미리 파악한 후 방어 전략을 짜는 것이 중요하다. 맵의 레벨이 총 30단계에 달한다는 점에서 플레이 시간이 길어질 수 있으며, 특히 후반부로 갈수록 난이도가 급격히 상승할 수 있으므로 꾸준한 도전과 실력이 요구된다. 추천 플레이 대상으로는 컴까기 장르를 좋아하는 플레이어, 팀 플레이를 즐기는 유저, 그리고 전략적 사고와 긴장감을 동시에 느끼고 싶은 유저들에게 적합하다. 또한, 레벨 디자인과 장애물이 다양한 만큼, 같은 맵이라도 매번 다른 전략으로 접근할 수 있어 반복 플레이의 재미가 있는 맵이기도 하다. 마지막으로, 맵의 이름과 내부 설명에서 유추해 볼 때, 'Akuma'라는 단어가 포함되어 있는데, 이는 일본어로 '악마'를 의미하는 것으로 보이며, 맵의 분위기나 테마가 어두운 느낌을 주는 것으로 추정된다. 이 점을 고려한다면, 분위기 있는 배경 음악이나 시각적 요소와 함께 플레이한다면 더욱 몰입감 있는 경험을 느낄 수 있을 것이다. 《Bound And Defend 5》 is a "compilation" (compilation-style) custom map in *StarCraft: Brood War* where six players team up to defend against enemy attacks. As the name "Bound (restraint) And Defend" suggests, players are trapped in a confined space and must continuously fend off waves of enemies to protect their base and key structures. The internal description mentions "Akuma-30 Levels16 Obstacles," which likely indicates that the map features 30 levels, each with 16 obstacles. These obstacles play a strategic role in base defense and suggest that the gameplay evolves with each level. While the map centers on defense, simply holding the line isn’t enough. Players must efficiently manage resources and units within the limited space, adapting their strategies to the shifting obstacles and enemy attack patterns. Areas like the center or key strongholds are hotspots for enemy assaults, requiring careful positioning of defenses. Early levels may rely on basic units, but as the game progresses, stronger units and defensive structures become essential. Some sections might even demand entirely new tactics depending on the level design. This map is better suited for players with at least a basic grasp of unit control and map reading rather than complete beginners. Teamwork is crucial, and poor coordination among teammates can easily lead to failure. Attempting it solo requires preemptive study of AI attack patterns and obstacle placements to devise a solid defense strategy. With 30 levels in total, the playtime can be lengthy, and the difficulty spikes sharply in later stages, demanding consistent effort and skill. Ideal players for this map include fans of compilation-style games, those who enjoy team-based play, and anyone looking to test their strategic thinking and reflexes simultaneously. The varied level design and obstacle layouts allow for fresh strategies with each playthrough, making repetition enjoyable. Lastly, the name "Akuma" (likely derived from the Japanese word for "demon") hints at a dark, intense atmosphere—pairing it with fitting background music or visuals could enhance immersion.
Map selection guide
태그는 맵의 핵심 특징을 빠르게 설명하지만 제작 버전마다 규칙이 다를 수 있습니다. 상세 설명에서 권장 인원, 난이도, 플레이 시간과 버전을 함께 확인한 뒤 다운로드하세요.