
랜덤벙커디펜스 StarCraft Map Collection
We've gathered maps registered with the '랜덤벙커디펜스' tag. Compare popular and latest maps focusing on play styles, difficulties, and features that are hard to find through genre alone.
- Registered Maps
- 2items
- Total Downloads
- 4
- Total Views
- 113
Popular Maps
This map has high download and view engagement.
랜덤 벙커 디펜스 (Random Bunker Defense)
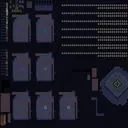
스타크래프트 브루드워 맵을 즐기는 유저들에게 벙커와 디펜스 장르의 조합은 언제나 흥미로운 선택지입니다. 이번에 살펴볼 맵은 파일명과 내부 정보에서 드러나듯 무작위 요소가 가미된 방어 구조를 핵심으로 삼고 있는 작품입니다. 전체적인 맵 구조를 살펴보면 플레이어들이 각자 독립적으로 방어선을 구축할 수 있는 공간이 다수 배치되어 있으며, 유닛 배치와 자원 관리 능력이 중요한 변수로 작용합니다. 화산 타일셋을 바탕으로 구성된 전장은 어둡고 거친 분위기를 자아내며, 중앙과 측면의 다양한 유닛 배치 공간과 길목들은 치밀한 수싸움을 유도합니다. 특히 무작위로 주어지는 요소를 어떻게 활용하느냐에 따라 매판 다른 양상이 펼쳐지기 때문에 반복 플레이에서 오는 재미가 쏠쏠한 편입니다. 다인용 플레이 환경에 맞춰 설계되어 있어 여럿이 함께 모여 협력하거나 각자의 방어 구역을 책임지는 방식을 선호하는 유저들에게 적합합니다. 게임이 시작되면 주어지는 위치를 확인하고, 몰려오는 적의 공세에 대비해 효율적인 방어 타워나 유닛 배치를 고민하는 것이 핵심 공략 포인트입니다. 운의 요소를 실력으로 극복하며 친구들과 함께 가볍게 즐길 만한 디펜스 유즈맵을 찾는 플레이어들에게 추천할 만한 맵입니다. 플레이하기 전 각 플레이어의 진입로와 자원 수급 방식을 미리 파악해 두면 더욱 원활한 방어 라인을 완성할 수 있을 것입니다. For users who enjoy StarCraft: Brood War maps, the combination of bunkers and the defense genre is always an intriguing choice. The map we are examining today, as revealed by its filename and internal information, is a work centered around a defensive structure infused with random elements. Looking at the overall map structure, multiple spaces are arranged where players can independently build their defense lines, and unit placement and resource management skills act as important variables. The battlefield, constructed based on a volcanic tileset, creates a dark and rough atmosphere, and the various unit placement spaces and pathways in the center and on the sides induce meticulous strategic battles. In particular, depending on how you utilize the randomly given elements, different aspects unfold in every match, making the fun of repeated play quite substantial. Designed to fit a multi-player environment, it is suitable for users who prefer to gather together and cooperate or take charge of their own defense zones. Once the game starts, the core strategy point is to check the given location and ponder efficient defense towers or unit placement in preparation for the approaching enemy offensive. It is a recommended map for players looking for a defense usemap that they can lightly enjoy with friends while overcoming elements of luck with skill. Before playing, understanding each player's approach routes and resource supply methods in advance will help complete a much smoother defense line.
랜덤 벙커 디펜스 v1.2.1 (Random Bunker D v1.2.1)
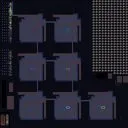
랜덤 벙커 디펜스 v1.2.1 (Random Bunker D v1.2.1)은 스타크래프트 브루드워 UMS 유즈맵 장르에서 독특한 운 요소와 디펜스 재미를 결합한 대표적인 맵 중 하나입니다. 화산 타일셋을 배경으로 펼쳐지는 이 맵은 다수의 플레이어가 동시에 참여하여 각자의 진지를 방어하는 구조를 가지고 있습니다. 맵 전체의 구조를 살펴보면, 각 플레이어는 독립된 구역에서 시작하며, 주변의 좁은 길목과 벙커 배치를 활용해 밀려오는 적의 공세를 막아내야 합니다. 내부 설명에 언급된 것처럼 행운이 따를 경우 자원을 더 많이 획득할 수 있는 메커니즘이 존재하여, 단순한 피지컬 싸움뿐만 아니라 무작위 요소가 게임의 판도를 뒤흔드는 핵심 변수로 작용합니다. 이전 버전들에 비해 난이도가 소폭 조정되어 접근성이 좋아졌으나, 여전히 방심할 수 없는 긴장감을 선사합니다. 이 맵의 진행 방식은 기본적으로 웨이브마다 몰려오는 적들로부터 거점을 사수하는 전형적인 디펜스 규칙을 따릅니다. 하지만 무작위로 주어지는 자원이나 유닛 배치 같은 변수들 때문에 매 판마다 전혀 다른 양상의 플레이 경험을 하게 됩니다. 플레이어들은 협력과 경쟁 속에서 자신의 진형을 튼튼하게 다져야 하며, 자원 관리를 어떻게 하느냐에 따라 생존 여부가 갈리게 됩니다. 특히 친구들과 함께 여러 명이 모여서 가볍게 즐기면서도 운 시험을 해보고 싶어 하는 유저들에게 안성맞춤입니다. 초보자들도 쉽게 이해할 수 있는 직관적인 규칙을 가졌으면서도, 반복 플레이를 유도하는 랜덤 요소가 매력적입니다. 플레이하기 전에 벙커의 위치와 지형적 이점을 미리 파악하고, 팀원 간의 자원 분배나 방어선 연계 전략을 가볍게 구상해 둔다면 훨씬 수월하게 게임을 풀어나갈 수 있을 것입니다. Random Bunker D v1.2.1 is one of the representative UMS custom maps in StarCraft: Brood War that combines unique luck elements with traditional defense gameplay. Set against a volcanic tileset, this map allows multiple players to participate simultaneously, each defending their own designated base area. Looking at the overall layout, each player starts in an independent zone and must utilize narrow pathways and strategic bunker placements to fend off incoming enemy waves. As noted in the internal map description, there is a mechanism where players can acquire more minerals when luck is on their side, making random factors a crucial turning point that can completely change the game's momentum alongside basic tactical skills. Compared to previous versions, the difficulty has been slightly adjusted to offer better accessibility, yet it still delivers a thrilling challenge where complacency leads to defeat. The progression of this map basically follows standard defense rules of protecting your stronghold against enemy waves that approach each round. However, due to variables such as randomly provided resources or unit distributions, players encounter completely different gameplay experiences with every match. Participants must carefully fortify their formations amid cooperation and competition, and their survival ultimately depends on how efficiently they manage their resources. This map is ideally suited for users who want to gather with friends for a fun session while testing their luck. While it features intuitive rules that beginners can easily grasp, the random elements encourage high replayability. Before jumping into the game, reviewing the bunker locations, terrain advantages, and coordinating basic defense strategies with teammates will help players progress much more smoothly.
Recently registered maps
Check newly added files and versions.
랜덤 벙커 디펜스 (Random Bunker Defense)
스타크래프트 브루드워 맵을 즐기는 유저들에게 벙커와 디펜스 장르의 조합은 언제나 흥미로운 선택지입니다. 이번에 살펴볼 맵은 파일명과 내부 정보에서 드러나듯 무작위 요소가 가미된 방어 구조를 핵심으로 삼고 있는 작품입니다. 전체적인 맵 구조를 살펴보면 플레이어들이 각자 독립적으로 방어선을 구축할 수 있는 공간이 다수 배치되어 있으며, 유닛 배치와 자원 관리 능력이 중요한 변수로 작용합니다. 화산 타일셋을 바탕으로 구성된 전장은 어둡고 거친 분위기를 자아내며, 중앙과 측면의 다양한 유닛 배치 공간과 길목들은 치밀한 수싸움을 유도합니다. 특히 무작위로 주어지는 요소를 어떻게 활용하느냐에 따라 매판 다른 양상이 펼쳐지기 때문에 반복 플레이에서 오는 재미가 쏠쏠한 편입니다. 다인용 플레이 환경에 맞춰 설계되어 있어 여럿이 함께 모여 협력하거나 각자의 방어 구역을 책임지는 방식을 선호하는 유저들에게 적합합니다. 게임이 시작되면 주어지는 위치를 확인하고, 몰려오는 적의 공세에 대비해 효율적인 방어 타워나 유닛 배치를 고민하는 것이 핵심 공략 포인트입니다. 운의 요소를 실력으로 극복하며 친구들과 함께 가볍게 즐길 만한 디펜스 유즈맵을 찾는 플레이어들에게 추천할 만한 맵입니다. 플레이하기 전 각 플레이어의 진입로와 자원 수급 방식을 미리 파악해 두면 더욱 원활한 방어 라인을 완성할 수 있을 것입니다. For users who enjoy StarCraft: Brood War maps, the combination of bunkers and the defense genre is always an intriguing choice. The map we are examining today, as revealed by its filename and internal information, is a work centered around a defensive structure infused with random elements. Looking at the overall map structure, multiple spaces are arranged where players can independently build their defense lines, and unit placement and resource management skills act as important variables. The battlefield, constructed based on a volcanic tileset, creates a dark and rough atmosphere, and the various unit placement spaces and pathways in the center and on the sides induce meticulous strategic battles. In particular, depending on how you utilize the randomly given elements, different aspects unfold in every match, making the fun of repeated play quite substantial. Designed to fit a multi-player environment, it is suitable for users who prefer to gather together and cooperate or take charge of their own defense zones. Once the game starts, the core strategy point is to check the given location and ponder efficient defense towers or unit placement in preparation for the approaching enemy offensive. It is a recommended map for players looking for a defense usemap that they can lightly enjoy with friends while overcoming elements of luck with skill. Before playing, understanding each player's approach routes and resource supply methods in advance will help complete a much smoother defense line.
랜덤 벙커 디펜스 v1.2.1 (Random Bunker D v1.2.1)
랜덤 벙커 디펜스 v1.2.1 (Random Bunker D v1.2.1)은 스타크래프트 브루드워 UMS 유즈맵 장르에서 독특한 운 요소와 디펜스 재미를 결합한 대표적인 맵 중 하나입니다. 화산 타일셋을 배경으로 펼쳐지는 이 맵은 다수의 플레이어가 동시에 참여하여 각자의 진지를 방어하는 구조를 가지고 있습니다. 맵 전체의 구조를 살펴보면, 각 플레이어는 독립된 구역에서 시작하며, 주변의 좁은 길목과 벙커 배치를 활용해 밀려오는 적의 공세를 막아내야 합니다. 내부 설명에 언급된 것처럼 행운이 따를 경우 자원을 더 많이 획득할 수 있는 메커니즘이 존재하여, 단순한 피지컬 싸움뿐만 아니라 무작위 요소가 게임의 판도를 뒤흔드는 핵심 변수로 작용합니다. 이전 버전들에 비해 난이도가 소폭 조정되어 접근성이 좋아졌으나, 여전히 방심할 수 없는 긴장감을 선사합니다. 이 맵의 진행 방식은 기본적으로 웨이브마다 몰려오는 적들로부터 거점을 사수하는 전형적인 디펜스 규칙을 따릅니다. 하지만 무작위로 주어지는 자원이나 유닛 배치 같은 변수들 때문에 매 판마다 전혀 다른 양상의 플레이 경험을 하게 됩니다. 플레이어들은 협력과 경쟁 속에서 자신의 진형을 튼튼하게 다져야 하며, 자원 관리를 어떻게 하느냐에 따라 생존 여부가 갈리게 됩니다. 특히 친구들과 함께 여러 명이 모여서 가볍게 즐기면서도 운 시험을 해보고 싶어 하는 유저들에게 안성맞춤입니다. 초보자들도 쉽게 이해할 수 있는 직관적인 규칙을 가졌으면서도, 반복 플레이를 유도하는 랜덤 요소가 매력적입니다. 플레이하기 전에 벙커의 위치와 지형적 이점을 미리 파악하고, 팀원 간의 자원 분배나 방어선 연계 전략을 가볍게 구상해 둔다면 훨씬 수월하게 게임을 풀어나갈 수 있을 것입니다. Random Bunker D v1.2.1 is one of the representative UMS custom maps in StarCraft: Brood War that combines unique luck elements with traditional defense gameplay. Set against a volcanic tileset, this map allows multiple players to participate simultaneously, each defending their own designated base area. Looking at the overall layout, each player starts in an independent zone and must utilize narrow pathways and strategic bunker placements to fend off incoming enemy waves. As noted in the internal map description, there is a mechanism where players can acquire more minerals when luck is on their side, making random factors a crucial turning point that can completely change the game's momentum alongside basic tactical skills. Compared to previous versions, the difficulty has been slightly adjusted to offer better accessibility, yet it still delivers a thrilling challenge where complacency leads to defeat. The progression of this map basically follows standard defense rules of protecting your stronghold against enemy waves that approach each round. However, due to variables such as randomly provided resources or unit distributions, players encounter completely different gameplay experiences with every match. Participants must carefully fortify their formations amid cooperation and competition, and their survival ultimately depends on how efficiently they manage their resources. This map is ideally suited for users who want to gather with friends for a fun session while testing their luck. While it features intuitive rules that beginners can easily grasp, the random elements encourage high replayability. Before jumping into the game, reviewing the bunker locations, terrain advantages, and coordinating basic defense strategies with teammates will help players progress much more smoothly.
Map selection guide
태그는 맵의 핵심 특징을 빠르게 설명하지만 제작 버전마다 규칙이 다를 수 있습니다. 상세 설명에서 권장 인원, 난이도, 플레이 시간과 버전을 함께 확인한 뒤 다운로드하세요.