StarCraft HUZY map downloads and community
English

라커 방어 StarCraft Map Collection

We've gathered maps registered with the '라커 방어' tag. Compare popular and latest maps focusing on play styles, difficulties, and features that are hard to find through genre alone.

Registered Maps
1items
Total Downloads
0
Total Views
13

Popular Maps

This map has high download and view engagement.

View All
라커 개체 방어 3 (Lurker Individual Defense3) Map Preview

라커 개체 방어 3 (Lurker Individual Defense3)

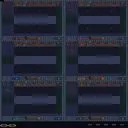
스타크래프트 브루드워의 유즈맵 ‘라커 개체 방어 3(Lurker Individual Defense3)’는 디펜스 장르의 유닛 중심형 맵으로, 특히 저그 종족의 라커(Lurker) 유닛을 활용한 입구막기 플레이에 초점을 맞춘 작품이다. 맵의 전체적인 구조는 중앙 광장과 그 주변을 감싸는 방어선으로 구성되어 있으며, 광장 입구에 위치한 저그의 방어 건물들(크립 콜로니, 센서리) 주변으로 라커가 배치되어 있다. 플레이어는 이 라커를 조종해 끊임없이 밀려드는 적의 유닛들을 저지해야 한다. 맵의 특징은 라커의 특수 능력인 지하 상태로의 전환과 원거리 공격 능력을 살린 전략적 플레이가 요구된다는 점이다. 방어선의 너비가 넓고 입구가 여러 개로 나뉘어 있어 유닛의 배치와 기습 공격을 신경 써야 한다. 또한, 맵의 하단과 상단에 위치한 확장 지역은 보조 방어선을 구축할 수 있는 공간으로, 자원과 방어 건물의 배치 여부가 승패를 좌우할 수 있다. 초보자의 경우 라커의 특성을 충분히 숙지하지 못해 방어선이 뚫리기 쉬우며, 숙련자는 라커의 위치를 능동적으로 변경해 다방면의 공격을 차단하는 플레이가 가능하다. 맵의 분위기는 화산 타일셋을 사용해 어둡고 긴장感 있는 분위기로 연출되어 있으며, 특히 라커의 붉은 색상이 맵의 어두운 색감과 어우러져 시야를 가리는 듯한 효과를 준다. 추천 대상은 저그 종족의 라커 유닛에 익숙한 플레이어나 디펜스 장르를 즐기는 유저이며, 플레이 전 라커의 특성을 숙지하고 방어 건물의 위치를 전략적으로 배치하는 연습이 필요하다. 또한, 팀 플레이가 가능한 맵이므로 팀원과의 호흡도 중요한 포인트다. 게임의 재미는 끊임없이 몰려오는 적의 공격을 막아내는 성취감과 함께, 라커의 특성을 살린 창의적인 방어 전략을 구상할 수 있다는 점에서 comes from the balance between simplicity and depth in mechanics. Lurker Individual Defense3 is a defense-style custom map in StarCraft: Brood War that focuses on utilizing the Zerg Lurker unit for entrance-blocking gameplay. The map features a central plaza surrounded by defensive structures, with Lurkers positioned around the entrance to fend off waves of enemy units. The core mechanics revolve around the Lurker's ability to burrow and attack from a distance, requiring strategic placement and repositioning to counter enemy advances. The map's layout includes multiple entry points and wider defensive fronts, making unit positioning and awareness of flanking attacks crucial. The lower and upper expansion areas offer additional space for building auxiliary defenses, where resource management and building placement can influence the outcome. Beginners may struggle with the Lurker's mechanics, leading to breached defenses, while experienced players can dynamically adjust Lurker positions to block attacks from multiple directions. The volcanic tileset creates a dark and tense atmosphere, enhanced by the Lurker's red color scheme, which may obscure vision slightly. This map is recommended for players familiar with Zerg units or those who enjoy defense-style games. Prior knowledge of the Lurker's abilities and strategic placement of defensive structures are essential for success. Team coordination is also beneficial, as the map allows for team play. The fun factor lies in the satisfaction of repelling endless waves of enemies and devising creative defensive strategies tailored to the Lurker's unique mechanics.

Download 0 · Views 13 · Comments 0

Recently registered maps

Check newly added files and versions.

라커 개체 방어 3 (Lurker Individual Defense3) Map Preview

라커 개체 방어 3 (Lurker Individual Defense3)

스타크래프트 브루드워의 유즈맵 ‘라커 개체 방어 3(Lurker Individual Defense3)’는 디펜스 장르의 유닛 중심형 맵으로, 특히 저그 종족의 라커(Lurker) 유닛을 활용한 입구막기 플레이에 초점을 맞춘 작품이다. 맵의 전체적인 구조는 중앙 광장과 그 주변을 감싸는 방어선으로 구성되어 있으며, 광장 입구에 위치한 저그의 방어 건물들(크립 콜로니, 센서리) 주변으로 라커가 배치되어 있다. 플레이어는 이 라커를 조종해 끊임없이 밀려드는 적의 유닛들을 저지해야 한다. 맵의 특징은 라커의 특수 능력인 지하 상태로의 전환과 원거리 공격 능력을 살린 전략적 플레이가 요구된다는 점이다. 방어선의 너비가 넓고 입구가 여러 개로 나뉘어 있어 유닛의 배치와 기습 공격을 신경 써야 한다. 또한, 맵의 하단과 상단에 위치한 확장 지역은 보조 방어선을 구축할 수 있는 공간으로, 자원과 방어 건물의 배치 여부가 승패를 좌우할 수 있다. 초보자의 경우 라커의 특성을 충분히 숙지하지 못해 방어선이 뚫리기 쉬우며, 숙련자는 라커의 위치를 능동적으로 변경해 다방면의 공격을 차단하는 플레이가 가능하다. 맵의 분위기는 화산 타일셋을 사용해 어둡고 긴장感 있는 분위기로 연출되어 있으며, 특히 라커의 붉은 색상이 맵의 어두운 색감과 어우러져 시야를 가리는 듯한 효과를 준다. 추천 대상은 저그 종족의 라커 유닛에 익숙한 플레이어나 디펜스 장르를 즐기는 유저이며, 플레이 전 라커의 특성을 숙지하고 방어 건물의 위치를 전략적으로 배치하는 연습이 필요하다. 또한, 팀 플레이가 가능한 맵이므로 팀원과의 호흡도 중요한 포인트다. 게임의 재미는 끊임없이 몰려오는 적의 공격을 막아내는 성취감과 함께, 라커의 특성을 살린 창의적인 방어 전략을 구상할 수 있다는 점에서 comes from the balance between simplicity and depth in mechanics. Lurker Individual Defense3 is a defense-style custom map in StarCraft: Brood War that focuses on utilizing the Zerg Lurker unit for entrance-blocking gameplay. The map features a central plaza surrounded by defensive structures, with Lurkers positioned around the entrance to fend off waves of enemy units. The core mechanics revolve around the Lurker's ability to burrow and attack from a distance, requiring strategic placement and repositioning to counter enemy advances. The map's layout includes multiple entry points and wider defensive fronts, making unit positioning and awareness of flanking attacks crucial. The lower and upper expansion areas offer additional space for building auxiliary defenses, where resource management and building placement can influence the outcome. Beginners may struggle with the Lurker's mechanics, leading to breached defenses, while experienced players can dynamically adjust Lurker positions to block attacks from multiple directions. The volcanic tileset creates a dark and tense atmosphere, enhanced by the Lurker's red color scheme, which may obscure vision slightly. This map is recommended for players familiar with Zerg units or those who enjoy defense-style games. Prior knowledge of the Lurker's abilities and strategic placement of defensive structures are essential for success. Team coordination is also beneficial, as the map allows for team play. The fun factor lies in the satisfaction of repelling endless waves of enemies and devising creative defensive strategies tailored to the Lurker's unique mechanics.

Download 0 · Views 13 · Comments 0
Map selection guide

태그는 맵의 핵심 특징을 빠르게 설명하지만 제작 버전마다 규칙이 다를 수 있습니다. 상세 설명에서 권장 인원, 난이도, 플레이 시간과 버전을 함께 확인한 뒤 다운로드하세요.

라커 방어 StarCraft Map Collection | StarCraft HUZY