
대규모 디펜스 StarCraft Map Collection
We've gathered maps registered with the '대규모 디펜스' tag. Compare popular and latest maps focusing on play styles, difficulties, and features that are hard to find through genre alone.
- Registered Maps
- 5items
- Total Downloads
- 0
- Total Views
- 208
Popular Maps
This map has high download and view engagement.
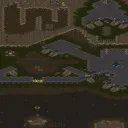
헬름즈 딥 대 아나타 13.3 (Helms Deep v. Annatar 13.3)
‘헬름즈 딥 대 아나타 13.3’은 스타크래프트: 브루드워의 유즈맵으로, 총 8명의 플레이어가 참여하는 대규모 디펜스 및 전략 게임이다. 맵의 전체적인 구조는 중앙에 위치한 거대한 요새와 주변을 에워싼 방어 시설, 그리고 적의 공격 루트를 차단하는 요충지들로 구성되어 있다. 맵의 배경은 사막 타일셋을 사용해 건조하고 메마른 분위기를 연출하며, 요새와 방어 시설은 마치Middle-earth의 ‘헬름즈 딥 전투’를 연상케 하는 중세 요새 디자인으로 구성되어 있다. 플레이어는 요새를 중심으로 한 방어선을 구축하고, 끊임없이 몰려오는 적의 웨이브를 상대해야 하며, 이 과정에서 자원 관리와 병력 배치, 전략적 판단이 요구된다. 특히 맵의 특징은 맵 곳곳에 배치된 방어 타워와 유닛 생산 건물들로, 플레이어는 초반 자원을 확보해 효율적으로 방어 체계를 구축해야 한다. 적의 공격은 요새 외곽에서부터 시작되며, 공격 루트는 맵의 지형을 따라 여러 갈래로 나뉘어 있어 플레이어는 한정된 병력으로도 다방면의 공격을 방어해야 한다. 또한 맵의 규모가 크고 지형이 복잡해, 전술적인 시야 확보와 통제가 중요한 포인트로 작용한다. 맵의 디자인상으로는 요새 내부와 외곽의 구조가 뚜렷이 구분되어 있어, 방어와 공격의 밸런스를 맞추는 것이 관건이다. 이 맵은 초보 플레이어보다는 중급 이상의 실력을 가진 플레이어에게 더 적합한데, 그 이유는 복잡한 지형과 다채로운 적의 웨이브 패턴 때문이다. 또한 팀 플레이가 강제되는 구조는 아니지만, 협력과 분업이 방어 성공의 열쇠가 되므로, 친구나 팀원과의 원활한 소통이 필요하다. 맵의 난이도는 적의 공격 패턴이 점점 강력해지면서 상승하므로, 초반 자원 확보와 방어 시설 구축을 얼마나 신속히 완료하는지가 승패를 좌우할 수 있다. 맵의 플레이 시간은 약 60분 내외로 예상되며, 이는 맵의 규모와 적의 웨이브 수가 많기 때문이다. 플레이 전 반드시 확인해야 할 요소는 맵의 주요 방어 지점과 적의 공격 루트, 그리고 자원 수집 지역의 위치다. 특히 요새 주변의 mineral field와 gas geyser의 분포는 초반 자원 확보에 큰 영향을 미치므로, 이를 미리 파악해두는 것이 중요하다. 또한 맵의 지형상 여러 길목이 존재해, 한 곳에만 방어 시설을 집중하면 쉽게 뚫릴 수 있으므로, 맵 전체를 아우르는 균형 잡힌 방어 계획을 세우는 것이 필수다. 마지막으로, 적의 웨이브는 일정 시간 간격으로 발생하므로, 이를 예측해 병력을 배치하고 보충하는 타이밍을 잘 조절해야 한다. ‘Helm’s Deep vs. Anath 13.3’ is a *StarCraft: Brood War* custom map designed for a large-scale defense and strategy game with up to eight players. The map features a massive central fortress surrounded by defensive structures and key choke points that block enemy attack routes. Set in a desert tile theme, the dry, barren atmosphere evokes the medieval fortress designs reminiscent of Middle-earth’s Battle of Helm’s Deep. Players must fortify defenses around the fortress while fending off relentless enemy waves, requiring careful resource management, troop positioning, and strategic decision-making. A defining feature of the map is the scattered defensive towers and unit production buildings. Players must secure early resources to efficiently build their defensive framework. Enemy attacks originate from the outer edges of the fortress, with multiple branching routes dictated by the terrain, forcing players to defend against multi-pronged assaults with limited forces. The large scale and complex geography of the map make tactical vision and control critical. The clear distinction between the fortress interior and exterior structures plays a key role in balancing defense and offense. This map is better suited for intermediate to advanced players due to its intricate terrain and varied enemy wave patterns. While not strictly team-based, successful defense hinges on cooperation and division of roles, making clear communication with teammates or friends essential. The difficulty escalates as enemy attacks grow stronger, with early resource collection and rapid defense setup often determining victory or defeat. Matches typically last around 60 minutes, given the map’s size and the number of enemy waves. Before playing, it’s crucial to identify key defensive points, enemy attack routes, and resource locations—especially the distribution of mineral fields and gas geysers around the fortress, which significantly impact early-game resource gathering. The terrain includes multiple pathways, and over-concentrating defenses in one area can lead to easy breaches, so a balanced, map-wide defense plan is vital. Additionally, since enemy waves spawn at regular intervals, predicting their timing and adjusting troop placements and reinforcements accordingly is essential for survival.
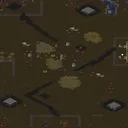
에픽 워 3011! (The Epic War 3011!)
《The Epic War 3011!》은 스타크래프트 브루드워의 대규모 유즈맵으로, 4096×4096 크기의 황무지 타일셋을 배경으로 펼쳐지는 전략 디펜스 장르의 정점이라 할 수 있다. 맵 중앙을 가로지르는 협곡과 주변의 잔해가 뒤섞인 지형은 전장의 위엄을 한층 끌어올리며, 플레이어는 이 넓은 공간에서 적의 공격과 끊임없이 몰려오는 웨이브를 막아내야 한다. 이미지 상으로는 중앙 협곡 양옆으로 넓게 배치된 고지대가 주요據點으로 보이며, 이 지형적 특징 덕분에 방어선을 구축할 수 있는 전략적 요충지가 다수 존재한다. 파괴된 건물 잔해와 흩어진 상자 등은 맵의 몰입감을 높이는 요소로 작용한다. 맵 제목에서 짐작할 수 있듯이 ‘3011’이라는 숫자는 일종의 스토리적 맥락이나 시대를 나타내는 것으로 추정되며, 파괴와 재건의 주제가 담긴 듯한 느낌을 준다. 이 맵의 핵심은 방어와Resource 관리다. 플레이어는 중앙 협곡을 따라 끊임없이 밀려오는 적 유닛들을 막아내며, 각據點을 방어하는 동시에 자원의 확보와 건물을 건설하는 균형을 맞춰야 한다. 이미지 상으로는 맵 가장자리에 위치한 넥서스나 커맨드 센터가 주요 기지 역할을 할 것으로 보이며, 이 기지들 주변의 좁은 통로를 통해서만 접근할 수 있는 구조는 방어의 난이도를 한층 높인다. 또한 맵 곳곳에 흩어진 미네랄과 베스핀 가스는 자원의 확보 여부를 좌우하는 중요한 요소로,Resource 관리와 타이밍을 어떻게 잡느냐가 승패를 가를 것이다. 맵이 제공하는 넓은 시야와 전략적 요충지는 플레이어 간의 협력과 경쟁을 동시에 유도하며, 특히 협동 디펜스가 강조된 맵으로 보인다. 이 맵의 추천 대상은 전략 디펜스와 대규모 유즈맵을 좋아하는 플레이어들이다. 특히 팀플레이가 가능한 구조로 보이며, 넓은 맵과 복잡한 지형은 팀원 간의 전략적 협의와 개개인의 실력을 동시에 요구한다. 또한 방어선을 구축하고Resource를 관리하는 동시에 끊임없이 몰아치는 적들을 상대해야 하는 만큼, 집중력과 전략적 사고가 요구된다. 초보자의 경우 맵의 규모와 복잡한 지형 때문에 어려움을 느낄 수 있지만, 경험이 쌓이면 그 넓은 공간을 활용한 다양한 전략을 구사할 수 있다는 장점이 있다. 플레이 전에는 맵의 주요據點과Resource 분포, 그리고 적의 웨이브 패턴을 미리 숙지하는 것이 중요할 것이다. The Epic War 3011! is a grand-scale user-made map (UMS) in StarCraft: Brood War, set against a desolate 4096×4096 tileset terrain. The map features a central canyon flanked by elevated ruins, creating a strategic battlefield where players must defend against relentless enemy waves. The terrain suggests multiple high-ground chokepoints ideal for establishing defensive positions. The map’s title, '3011', hints at a thematic or narrative context—perhaps a futuristic era of destruction and reconstruction—enhancing immersion with scattered debris and ruins. The core gameplay revolves around defense and resource management. Players must protect key locations along the central canyon while securing resources like minerals and vespene gas, which are scattered across the map. The edge structures, likely command centers or Nexus, act as primary bases with limited access points, raising the challenge of maintaining supply lines. The wide field of view and strategic terrain encourage both cooperation and competition, particularly in team-based modes. The map’s scale and complexity demand strong strategic planning, concentration, and teamwork. This map is best suited for players who enjoy large-scale strategy defense UMS maps, especially those who appreciate team-based gameplay. Beginners may find the vast terrain overwhelming, but experienced players will appreciate the depth and strategic flexibility the map offers. Before playing, it’s crucial to study key locations, resource distribution, and enemy wave patterns to optimize defensive strategies.
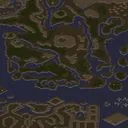
에오라의 재건 (The Rebuilding Of Eora)
스타크래프트 브루드워의 유즈맵 'The Rebuilding Of Eora'는 8192x8192의 거대한 사막 지형에서 펼쳐지는 대규모 디펜스와 전략적Rebuilding을 조합한 작품이다. 플레이어는 각기 다른 세력으로 나뉘어 파괴된 에오라(Eora)의 땅에서 새로운 터전인 에오라 II(Eora II)로 이주해 문명을 재건하는 과정을 겪는다. 맵은 사막 타일셋을 기반으로 넓은 평야와 절벽, 협곡이 복잡하게 배치되어 있으며, 중앙에는 대규모의 공동체가 자리하고 있다. 각 세력은 자원 채취와 방어 시설 건설을 통해 살아남아야 하며, 끊임없이 몰려오는 적대 세력의 공격을 방어해야 한다. 적의 공격 패턴은 랜덤 디펜스와 유사하게 구성되어 있지만,Rebuilding이라는 고유한 목표가 게임의 흐름을 이끈다. 플레이어는 자원을 확보해 건물을 짓고 병력을 양성하는 동시에, 맵 곳곳에 scattered되어 있는 고대 유물이나 보급 기지를 점령해 추가적인 이점을 얻을 수 있다. 게임의 난이도는 세력의 수와 적의 공격 빈도에 따라 크게 달라지며, 특히 넓은 맵을 활용한 전략적 후퇴와 기습 공격이 핵심이다. 6명의 플레이어가 참여할 수 있는 이 맵은 대규모 팀플레이와 개인 역량 모두를 요구하며,Rebuilding의 성공 여부는 자원 관리와 방어 계획에 달려 있다. 초보자는 맵의 규모에 압도당할 수 있지만, 좁은 길목이나 협곡을 활용한 방어 라인을 구축하면 안정적인 플레이가 가능하다. 반면 숙련된 플레이어는 넓은 시야와 빠른 자원 수급을 통해 적극적인 공격과Rebuilding을 동시에 진행할 수 있다. 이 맵은 단순히 적을 물리치는 것만이 아니라,Rebuilding이라는 스토리적 목표를 달성하는 재미가 있으며, 특히 대규모 디펜스와Rebuilding의 조합이 새로운 경험을 제공한다.Rebuilding에 성공하기 위해서는 초반 자원 확보와 방어 시설 배치에 신중을 기해야 하며, 중반 이후에는 동맹 세력과의 협력과 보급로 확보가 중요하다. 맵의 난이도는 보통으로 설정되어 있지만,Rebuilding의 목표를 얼마나 efficiently 달성하느냐에 따라 체감 난이도가 달라질 수 있다.Rebuilding의 성공 여부는Rebuilding의 진행 상황과 적의 공격 패턴을 얼마나 잘 읽느냐에 달려 있으며,Rebuilding의 재미는Rebuilding의 스토리와Rebuilding의 전략적 선택에 있다. 이 맵은Rebuilding이라는 고유한 목표와 대규모 디펜스,Rebuilding의 전략적Rebuilding을 동시에 제공하기 때문에Rebuilding을 любителейRebuilding과Rebuilding을 즐기는 플레이어 모두에게 추천할 만하다.Rebuilding의 재미는Rebuilding의Rebuilding과Rebuilding의Rebuilding에 있으며,Rebuilding의Rebuilding은Rebuilding의Rebuilding을 통해 더욱 깊어진다.Rebuilding의Rebuilding을 경험하고 싶다면,Rebuilding의Rebuilding을 시도해 보는 것을 추천한다.
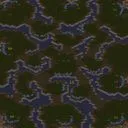
팬텀 모드 맥스800 (Phantom Mode Max800)
‘팬텀 모드 V4.0 맥스800(Phantom Mode V4.0 Max800)’은 스타크래프트 브루드워의 유즈맵으로, 최대 8인까지 참여 가능한 대규모 디펜스 장르의 맵이다. 맵의 전체적인 분위기는 사막 타일셋을 기반으로 하며, 중앙에 위치한 거대한 요새를 중심으로 방어형 전투가 펼쳐진다. 플레이어는 ‘팬텀’이라는 명칭의 유닛을 조종하며, 끊임없이 몰려오는 적군을 상대로 요새를 방어하는 것이 주된 목표로 보인다. 맵의 구조는 중앙 요새를 중심으로 동서남북으로 뻗어나가는 방어선이 있으며, 각 방향마다 일정 간격으로 배치된 방어 건물이 보인다. 맵의 가장자리에는 적의 기지가 위치하고 있으며, 이곳에서 끊임없이 적 병력이 생산되어 공격해 오는 구조로 추정된다. 방어선을 유지하는 동시에 요새 주변의 자원을 확보하거나 추가 방어 건물을 건설하는 전략적 요소가 포함될 가능성이 크다. 맵의 테두리에는 플레이어간 상호작용을 위한 공간이 배치되어 있으며, 맵의 크기가 4096x4096으로 상당히 넓은 만큼 긴 플레이 시간을 예상할 수 있다. 초보자는 지형과 방어 시설을 익히는 데 다소 어려움을 느낄 수 있으나, 익숙해지면 전략적인 판단과 팀워크가 요구되는 흥미로운 플레이가 가능할 것이다. 특히 대규모 디펜스 맵의 특성상 지속적인 적의 공격을 방어해야 하므로, 초반 자원 수급과 방어 시설의 배치, 그리고 후방 지원 체계를 신중히 계획해야 한다. 맵의 디자인 특성상 사막 지형의 넓은 시야가 제공되어 적의 움직임을 미리 예측할 수 있는 장점이 있지만, 반대로 사각지대가 존재할 가능성이 있어 세심한 관리가 필요하다. 이 맵은 디펜스 장르를 선호하는 플레이어들에게는 물론, 대규모 팀플레이와 전략적 사고를 즐기는 유저들에게도Strongly recommended된다. 다만, 맵의 크기가 크고 복잡한 만큼 플레이 전에 맵의 구조와 각 방어선의 특징을 숙지하는 것이 중요하다. 또한, 맵의_VERSION_4.0_이라는 버전 정보와 제작자 ‘hbline777’의 존재로 미루어 보아, 지속적인 업데이트와 밸런스 조정이 이루어진 것으로 추정된다. 이 맵을 플레이하기 전에는 맵 에디터에서 제공하는 내부 설명이나 간단한 튜토리얼을 참고하는 것이 좋다. ‘Phantom Mode V4.0 Max800’ is a custom map for *StarCraft: Brood War*, a large-scale defense genre map that can accommodate up to 8 players. The overall atmosphere of the map is based on a desert tileset, with large-scale defensive battles centered around a massive fortress in the middle. Players control units called ‘Phantoms’ and primarily aim to defend the fortress against waves of enemy forces. The map features defensive lines extending in all four directions from the central fortress, with defensive structures spaced at regular intervals. Enemy bases are located along the map’s edges, where enemy units are continuously produced and launched in waves. In addition to maintaining the defensive lines, players may need to secure resources around the fortress or construct additional defensive buildings, adding a strategic element to the gameplay. The map includes spaces for player interaction along its borders, and with a size of 4096x4096, it offers an extended playtime. Beginners may struggle at first with the terrain and defensive structures, but once familiar, the map offers engaging gameplay that requires strategic thinking and teamwork. Given its nature as a large-scale defense map, players must carefully plan early resource collection, defensive structure placement, and backline support to withstand constant enemy attacks. The desert terrain provides wide visibility, allowing players to predict enemy movements, though blind spots may exist, requiring careful management. This map is highly recommended for players who enjoy defense genres as well as those who prefer large-scale team play and strategic thinking. However, due to its size and complexity, it is important to study the map’s structure and the characteristics of each defensive line before playing. The map’s Version 4.0 and the presence of the creator ‘hbline777’ suggest ongoing updates and balance adjustments. Before playing, it is advisable to check the internal descriptions or simple tutorials provided in the map editor.
라커 D 18웨이 골드 (Lurker D 18 Way Gold)
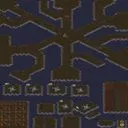
스타크래프트 브루드워의 유즈맵 《Lurker D 18 Way Gold》는 레이저 디펜스를 기반으로 한 대규모 컴까기 디펜스 맵이다. 맵의 전체 구조는 18개의 분리된 섬으로 나뉘어 있으며, 각 섬에는 미네랄과 베스핀 가스가 배치되어 있다. 플레이어는 이 섬들에서 자원을 채취하며, 중앙에 위치한 본진 기지에서 라커(Lurker)와 기타 유닛을 생산해 외부에서 끊임없이 몰려드는 적들을 방어해야 한다. 맵의 특징 중 하나는 기존 레이저 디펜스와 달리 'No more pylon building'이라는 설명에서 알 수 있듯, 플레이어는 프로브를 생산해 파일런을 짓는 대신, 본진 기지에서 직접 유닛을 생산하는 방식으로 진행된다는 점이다. 또한, 'upgrade time for lurks'라는 설명은 라커의 업그레이드 시간이 조정되었음을 시사한다. 맵의 디자인 측면에서 4096x4096의 거대한 크기와 황무지 타일셋을 활용한 황량한 분위기가 특징적이며, 18개의 분리된 섬 구조는 전략적 배치와 자원 관리 능력을 요구한다. 플레이어는 각 섬의 자원을 효율적으로 활용하면서도 방어선을 굳건히 유지해야 하며, 특히 라커의 사정거리와 업그레이드 효율성이 승패를 좌우할 핵심 요소로 보인다. 초보자의 경우 섬 간의 연결성과 라커의 위치 선정이 어렵게 느껴질 수 있지만, 익숙해지면 섬 간의 자원 분배와 방어 전략을 조율하는 재미가 있는 맵이다. 추천 대상은 대규모 디펜스 맵을 선호하는 플레이어이며, 특히 레이저 디펜스의 변형 버전을 경험해보고 싶은 유저들에게 적합하다. 플레이 전에는 섬 간의 연결 경로와 라커의 배치 가능 위치를 사전에 숙지하는 것이 중요하다. Lurker D 18 Way Gold is a large-scale UMS defense map based on the Laser Defense genre in StarCraft: Brood War. The map features 18 separate islands, each equipped with mineral patches and vespene gas, where players gather resources while defending their main base against relentless enemy waves. Unlike traditional Laser Defense maps, this version omits the need to construct Pylons—instead, players produce units directly from their main base. The description mentions adjusted upgrade times for Lurkers, suggesting strategic depth in unit progression. The map's expansive 4096x4096 terrain, set in a barren wasteland tile, creates an immersive challenge, while the island layout demands careful resource management and defensive planning. Players must balance resource distribution across islands while maintaining a strong defense line, with Lurker range and upgrade efficiency serving as key factors in success. Beginners may find the island connections and Lurker placement challenging, but mastering the map offers deep strategic gameplay. This map is ideal for fans of large-scale defense UMS maps, particularly those looking to experience a variation of Laser Defense. Before playing, it's crucial to study the island connections and potential Lurker deployment spots for optimal strategy.
Recently registered maps
Check newly added files and versions.
에오라의 재건 (The Rebuilding Of Eora)
스타크래프트 브루드워의 유즈맵 'The Rebuilding Of Eora'는 8192x8192의 거대한 사막 지형에서 펼쳐지는 대규모 디펜스와 전략적Rebuilding을 조합한 작품이다. 플레이어는 각기 다른 세력으로 나뉘어 파괴된 에오라(Eora)의 땅에서 새로운 터전인 에오라 II(Eora II)로 이주해 문명을 재건하는 과정을 겪는다. 맵은 사막 타일셋을 기반으로 넓은 평야와 절벽, 협곡이 복잡하게 배치되어 있으며, 중앙에는 대규모의 공동체가 자리하고 있다. 각 세력은 자원 채취와 방어 시설 건설을 통해 살아남아야 하며, 끊임없이 몰려오는 적대 세력의 공격을 방어해야 한다. 적의 공격 패턴은 랜덤 디펜스와 유사하게 구성되어 있지만,Rebuilding이라는 고유한 목표가 게임의 흐름을 이끈다. 플레이어는 자원을 확보해 건물을 짓고 병력을 양성하는 동시에, 맵 곳곳에 scattered되어 있는 고대 유물이나 보급 기지를 점령해 추가적인 이점을 얻을 수 있다. 게임의 난이도는 세력의 수와 적의 공격 빈도에 따라 크게 달라지며, 특히 넓은 맵을 활용한 전략적 후퇴와 기습 공격이 핵심이다. 6명의 플레이어가 참여할 수 있는 이 맵은 대규모 팀플레이와 개인 역량 모두를 요구하며,Rebuilding의 성공 여부는 자원 관리와 방어 계획에 달려 있다. 초보자는 맵의 규모에 압도당할 수 있지만, 좁은 길목이나 협곡을 활용한 방어 라인을 구축하면 안정적인 플레이가 가능하다. 반면 숙련된 플레이어는 넓은 시야와 빠른 자원 수급을 통해 적극적인 공격과Rebuilding을 동시에 진행할 수 있다. 이 맵은 단순히 적을 물리치는 것만이 아니라,Rebuilding이라는 스토리적 목표를 달성하는 재미가 있으며, 특히 대규모 디펜스와Rebuilding의 조합이 새로운 경험을 제공한다.Rebuilding에 성공하기 위해서는 초반 자원 확보와 방어 시설 배치에 신중을 기해야 하며, 중반 이후에는 동맹 세력과의 협력과 보급로 확보가 중요하다. 맵의 난이도는 보통으로 설정되어 있지만,Rebuilding의 목표를 얼마나 efficiently 달성하느냐에 따라 체감 난이도가 달라질 수 있다.Rebuilding의 성공 여부는Rebuilding의 진행 상황과 적의 공격 패턴을 얼마나 잘 읽느냐에 달려 있으며,Rebuilding의 재미는Rebuilding의 스토리와Rebuilding의 전략적 선택에 있다. 이 맵은Rebuilding이라는 고유한 목표와 대규모 디펜스,Rebuilding의 전략적Rebuilding을 동시에 제공하기 때문에Rebuilding을 любителейRebuilding과Rebuilding을 즐기는 플레이어 모두에게 추천할 만하다.Rebuilding의 재미는Rebuilding의Rebuilding과Rebuilding의Rebuilding에 있으며,Rebuilding의Rebuilding은Rebuilding의Rebuilding을 통해 더욱 깊어진다.Rebuilding의Rebuilding을 경험하고 싶다면,Rebuilding의Rebuilding을 시도해 보는 것을 추천한다.
에픽 워 3011! (The Epic War 3011!)
《The Epic War 3011!》은 스타크래프트 브루드워의 대규모 유즈맵으로, 4096×4096 크기의 황무지 타일셋을 배경으로 펼쳐지는 전략 디펜스 장르의 정점이라 할 수 있다. 맵 중앙을 가로지르는 협곡과 주변의 잔해가 뒤섞인 지형은 전장의 위엄을 한층 끌어올리며, 플레이어는 이 넓은 공간에서 적의 공격과 끊임없이 몰려오는 웨이브를 막아내야 한다. 이미지 상으로는 중앙 협곡 양옆으로 넓게 배치된 고지대가 주요據點으로 보이며, 이 지형적 특징 덕분에 방어선을 구축할 수 있는 전략적 요충지가 다수 존재한다. 파괴된 건물 잔해와 흩어진 상자 등은 맵의 몰입감을 높이는 요소로 작용한다. 맵 제목에서 짐작할 수 있듯이 ‘3011’이라는 숫자는 일종의 스토리적 맥락이나 시대를 나타내는 것으로 추정되며, 파괴와 재건의 주제가 담긴 듯한 느낌을 준다. 이 맵의 핵심은 방어와Resource 관리다. 플레이어는 중앙 협곡을 따라 끊임없이 밀려오는 적 유닛들을 막아내며, 각據點을 방어하는 동시에 자원의 확보와 건물을 건설하는 균형을 맞춰야 한다. 이미지 상으로는 맵 가장자리에 위치한 넥서스나 커맨드 센터가 주요 기지 역할을 할 것으로 보이며, 이 기지들 주변의 좁은 통로를 통해서만 접근할 수 있는 구조는 방어의 난이도를 한층 높인다. 또한 맵 곳곳에 흩어진 미네랄과 베스핀 가스는 자원의 확보 여부를 좌우하는 중요한 요소로,Resource 관리와 타이밍을 어떻게 잡느냐가 승패를 가를 것이다. 맵이 제공하는 넓은 시야와 전략적 요충지는 플레이어 간의 협력과 경쟁을 동시에 유도하며, 특히 협동 디펜스가 강조된 맵으로 보인다. 이 맵의 추천 대상은 전략 디펜스와 대규모 유즈맵을 좋아하는 플레이어들이다. 특히 팀플레이가 가능한 구조로 보이며, 넓은 맵과 복잡한 지형은 팀원 간의 전략적 협의와 개개인의 실력을 동시에 요구한다. 또한 방어선을 구축하고Resource를 관리하는 동시에 끊임없이 몰아치는 적들을 상대해야 하는 만큼, 집중력과 전략적 사고가 요구된다. 초보자의 경우 맵의 규모와 복잡한 지형 때문에 어려움을 느낄 수 있지만, 경험이 쌓이면 그 넓은 공간을 활용한 다양한 전략을 구사할 수 있다는 장점이 있다. 플레이 전에는 맵의 주요據點과Resource 분포, 그리고 적의 웨이브 패턴을 미리 숙지하는 것이 중요할 것이다. The Epic War 3011! is a grand-scale user-made map (UMS) in StarCraft: Brood War, set against a desolate 4096×4096 tileset terrain. The map features a central canyon flanked by elevated ruins, creating a strategic battlefield where players must defend against relentless enemy waves. The terrain suggests multiple high-ground chokepoints ideal for establishing defensive positions. The map’s title, '3011', hints at a thematic or narrative context—perhaps a futuristic era of destruction and reconstruction—enhancing immersion with scattered debris and ruins. The core gameplay revolves around defense and resource management. Players must protect key locations along the central canyon while securing resources like minerals and vespene gas, which are scattered across the map. The edge structures, likely command centers or Nexus, act as primary bases with limited access points, raising the challenge of maintaining supply lines. The wide field of view and strategic terrain encourage both cooperation and competition, particularly in team-based modes. The map’s scale and complexity demand strong strategic planning, concentration, and teamwork. This map is best suited for players who enjoy large-scale strategy defense UMS maps, especially those who appreciate team-based gameplay. Beginners may find the vast terrain overwhelming, but experienced players will appreciate the depth and strategic flexibility the map offers. Before playing, it’s crucial to study key locations, resource distribution, and enemy wave patterns to optimize defensive strategies.
팬텀 모드 맥스800 (Phantom Mode Max800)
‘팬텀 모드 V4.0 맥스800(Phantom Mode V4.0 Max800)’은 스타크래프트 브루드워의 유즈맵으로, 최대 8인까지 참여 가능한 대규모 디펜스 장르의 맵이다. 맵의 전체적인 분위기는 사막 타일셋을 기반으로 하며, 중앙에 위치한 거대한 요새를 중심으로 방어형 전투가 펼쳐진다. 플레이어는 ‘팬텀’이라는 명칭의 유닛을 조종하며, 끊임없이 몰려오는 적군을 상대로 요새를 방어하는 것이 주된 목표로 보인다. 맵의 구조는 중앙 요새를 중심으로 동서남북으로 뻗어나가는 방어선이 있으며, 각 방향마다 일정 간격으로 배치된 방어 건물이 보인다. 맵의 가장자리에는 적의 기지가 위치하고 있으며, 이곳에서 끊임없이 적 병력이 생산되어 공격해 오는 구조로 추정된다. 방어선을 유지하는 동시에 요새 주변의 자원을 확보하거나 추가 방어 건물을 건설하는 전략적 요소가 포함될 가능성이 크다. 맵의 테두리에는 플레이어간 상호작용을 위한 공간이 배치되어 있으며, 맵의 크기가 4096x4096으로 상당히 넓은 만큼 긴 플레이 시간을 예상할 수 있다. 초보자는 지형과 방어 시설을 익히는 데 다소 어려움을 느낄 수 있으나, 익숙해지면 전략적인 판단과 팀워크가 요구되는 흥미로운 플레이가 가능할 것이다. 특히 대규모 디펜스 맵의 특성상 지속적인 적의 공격을 방어해야 하므로, 초반 자원 수급과 방어 시설의 배치, 그리고 후방 지원 체계를 신중히 계획해야 한다. 맵의 디자인 특성상 사막 지형의 넓은 시야가 제공되어 적의 움직임을 미리 예측할 수 있는 장점이 있지만, 반대로 사각지대가 존재할 가능성이 있어 세심한 관리가 필요하다. 이 맵은 디펜스 장르를 선호하는 플레이어들에게는 물론, 대규모 팀플레이와 전략적 사고를 즐기는 유저들에게도Strongly recommended된다. 다만, 맵의 크기가 크고 복잡한 만큼 플레이 전에 맵의 구조와 각 방어선의 특징을 숙지하는 것이 중요하다. 또한, 맵의_VERSION_4.0_이라는 버전 정보와 제작자 ‘hbline777’의 존재로 미루어 보아, 지속적인 업데이트와 밸런스 조정이 이루어진 것으로 추정된다. 이 맵을 플레이하기 전에는 맵 에디터에서 제공하는 내부 설명이나 간단한 튜토리얼을 참고하는 것이 좋다. ‘Phantom Mode V4.0 Max800’ is a custom map for *StarCraft: Brood War*, a large-scale defense genre map that can accommodate up to 8 players. The overall atmosphere of the map is based on a desert tileset, with large-scale defensive battles centered around a massive fortress in the middle. Players control units called ‘Phantoms’ and primarily aim to defend the fortress against waves of enemy forces. The map features defensive lines extending in all four directions from the central fortress, with defensive structures spaced at regular intervals. Enemy bases are located along the map’s edges, where enemy units are continuously produced and launched in waves. In addition to maintaining the defensive lines, players may need to secure resources around the fortress or construct additional defensive buildings, adding a strategic element to the gameplay. The map includes spaces for player interaction along its borders, and with a size of 4096x4096, it offers an extended playtime. Beginners may struggle at first with the terrain and defensive structures, but once familiar, the map offers engaging gameplay that requires strategic thinking and teamwork. Given its nature as a large-scale defense map, players must carefully plan early resource collection, defensive structure placement, and backline support to withstand constant enemy attacks. The desert terrain provides wide visibility, allowing players to predict enemy movements, though blind spots may exist, requiring careful management. This map is highly recommended for players who enjoy defense genres as well as those who prefer large-scale team play and strategic thinking. However, due to its size and complexity, it is important to study the map’s structure and the characteristics of each defensive line before playing. The map’s Version 4.0 and the presence of the creator ‘hbline777’ suggest ongoing updates and balance adjustments. Before playing, it is advisable to check the internal descriptions or simple tutorials provided in the map editor.
라커 D 18웨이 골드 (Lurker D 18 Way Gold)
스타크래프트 브루드워의 유즈맵 《Lurker D 18 Way Gold》는 레이저 디펜스를 기반으로 한 대규모 컴까기 디펜스 맵이다. 맵의 전체 구조는 18개의 분리된 섬으로 나뉘어 있으며, 각 섬에는 미네랄과 베스핀 가스가 배치되어 있다. 플레이어는 이 섬들에서 자원을 채취하며, 중앙에 위치한 본진 기지에서 라커(Lurker)와 기타 유닛을 생산해 외부에서 끊임없이 몰려드는 적들을 방어해야 한다. 맵의 특징 중 하나는 기존 레이저 디펜스와 달리 'No more pylon building'이라는 설명에서 알 수 있듯, 플레이어는 프로브를 생산해 파일런을 짓는 대신, 본진 기지에서 직접 유닛을 생산하는 방식으로 진행된다는 점이다. 또한, 'upgrade time for lurks'라는 설명은 라커의 업그레이드 시간이 조정되었음을 시사한다. 맵의 디자인 측면에서 4096x4096의 거대한 크기와 황무지 타일셋을 활용한 황량한 분위기가 특징적이며, 18개의 분리된 섬 구조는 전략적 배치와 자원 관리 능력을 요구한다. 플레이어는 각 섬의 자원을 효율적으로 활용하면서도 방어선을 굳건히 유지해야 하며, 특히 라커의 사정거리와 업그레이드 효율성이 승패를 좌우할 핵심 요소로 보인다. 초보자의 경우 섬 간의 연결성과 라커의 위치 선정이 어렵게 느껴질 수 있지만, 익숙해지면 섬 간의 자원 분배와 방어 전략을 조율하는 재미가 있는 맵이다. 추천 대상은 대규모 디펜스 맵을 선호하는 플레이어이며, 특히 레이저 디펜스의 변형 버전을 경험해보고 싶은 유저들에게 적합하다. 플레이 전에는 섬 간의 연결 경로와 라커의 배치 가능 위치를 사전에 숙지하는 것이 중요하다. Lurker D 18 Way Gold is a large-scale UMS defense map based on the Laser Defense genre in StarCraft: Brood War. The map features 18 separate islands, each equipped with mineral patches and vespene gas, where players gather resources while defending their main base against relentless enemy waves. Unlike traditional Laser Defense maps, this version omits the need to construct Pylons—instead, players produce units directly from their main base. The description mentions adjusted upgrade times for Lurkers, suggesting strategic depth in unit progression. The map's expansive 4096x4096 terrain, set in a barren wasteland tile, creates an immersive challenge, while the island layout demands careful resource management and defensive planning. Players must balance resource distribution across islands while maintaining a strong defense line, with Lurker range and upgrade efficiency serving as key factors in success. Beginners may find the island connections and Lurker placement challenging, but mastering the map offers deep strategic gameplay. This map is ideal for fans of large-scale defense UMS maps, particularly those looking to experience a variation of Laser Defense. Before playing, it's crucial to study the island connections and potential Lurker deployment spots for optimal strategy.
헬름즈 딥 대 아나타 13.3 (Helms Deep v. Annatar 13.3)
‘헬름즈 딥 대 아나타 13.3’은 스타크래프트: 브루드워의 유즈맵으로, 총 8명의 플레이어가 참여하는 대규모 디펜스 및 전략 게임이다. 맵의 전체적인 구조는 중앙에 위치한 거대한 요새와 주변을 에워싼 방어 시설, 그리고 적의 공격 루트를 차단하는 요충지들로 구성되어 있다. 맵의 배경은 사막 타일셋을 사용해 건조하고 메마른 분위기를 연출하며, 요새와 방어 시설은 마치Middle-earth의 ‘헬름즈 딥 전투’를 연상케 하는 중세 요새 디자인으로 구성되어 있다. 플레이어는 요새를 중심으로 한 방어선을 구축하고, 끊임없이 몰려오는 적의 웨이브를 상대해야 하며, 이 과정에서 자원 관리와 병력 배치, 전략적 판단이 요구된다. 특히 맵의 특징은 맵 곳곳에 배치된 방어 타워와 유닛 생산 건물들로, 플레이어는 초반 자원을 확보해 효율적으로 방어 체계를 구축해야 한다. 적의 공격은 요새 외곽에서부터 시작되며, 공격 루트는 맵의 지형을 따라 여러 갈래로 나뉘어 있어 플레이어는 한정된 병력으로도 다방면의 공격을 방어해야 한다. 또한 맵의 규모가 크고 지형이 복잡해, 전술적인 시야 확보와 통제가 중요한 포인트로 작용한다. 맵의 디자인상으로는 요새 내부와 외곽의 구조가 뚜렷이 구분되어 있어, 방어와 공격의 밸런스를 맞추는 것이 관건이다. 이 맵은 초보 플레이어보다는 중급 이상의 실력을 가진 플레이어에게 더 적합한데, 그 이유는 복잡한 지형과 다채로운 적의 웨이브 패턴 때문이다. 또한 팀 플레이가 강제되는 구조는 아니지만, 협력과 분업이 방어 성공의 열쇠가 되므로, 친구나 팀원과의 원활한 소통이 필요하다. 맵의 난이도는 적의 공격 패턴이 점점 강력해지면서 상승하므로, 초반 자원 확보와 방어 시설 구축을 얼마나 신속히 완료하는지가 승패를 좌우할 수 있다. 맵의 플레이 시간은 약 60분 내외로 예상되며, 이는 맵의 규모와 적의 웨이브 수가 많기 때문이다. 플레이 전 반드시 확인해야 할 요소는 맵의 주요 방어 지점과 적의 공격 루트, 그리고 자원 수집 지역의 위치다. 특히 요새 주변의 mineral field와 gas geyser의 분포는 초반 자원 확보에 큰 영향을 미치므로, 이를 미리 파악해두는 것이 중요하다. 또한 맵의 지형상 여러 길목이 존재해, 한 곳에만 방어 시설을 집중하면 쉽게 뚫릴 수 있으므로, 맵 전체를 아우르는 균형 잡힌 방어 계획을 세우는 것이 필수다. 마지막으로, 적의 웨이브는 일정 시간 간격으로 발생하므로, 이를 예측해 병력을 배치하고 보충하는 타이밍을 잘 조절해야 한다. ‘Helm’s Deep vs. Anath 13.3’ is a *StarCraft: Brood War* custom map designed for a large-scale defense and strategy game with up to eight players. The map features a massive central fortress surrounded by defensive structures and key choke points that block enemy attack routes. Set in a desert tile theme, the dry, barren atmosphere evokes the medieval fortress designs reminiscent of Middle-earth’s Battle of Helm’s Deep. Players must fortify defenses around the fortress while fending off relentless enemy waves, requiring careful resource management, troop positioning, and strategic decision-making. A defining feature of the map is the scattered defensive towers and unit production buildings. Players must secure early resources to efficiently build their defensive framework. Enemy attacks originate from the outer edges of the fortress, with multiple branching routes dictated by the terrain, forcing players to defend against multi-pronged assaults with limited forces. The large scale and complex geography of the map make tactical vision and control critical. The clear distinction between the fortress interior and exterior structures plays a key role in balancing defense and offense. This map is better suited for intermediate to advanced players due to its intricate terrain and varied enemy wave patterns. While not strictly team-based, successful defense hinges on cooperation and division of roles, making clear communication with teammates or friends essential. The difficulty escalates as enemy attacks grow stronger, with early resource collection and rapid defense setup often determining victory or defeat. Matches typically last around 60 minutes, given the map’s size and the number of enemy waves. Before playing, it’s crucial to identify key defensive points, enemy attack routes, and resource locations—especially the distribution of mineral fields and gas geysers around the fortress, which significantly impact early-game resource gathering. The terrain includes multiple pathways, and over-concentrating defenses in one area can lead to easy breaches, so a balanced, map-wide defense plan is vital. Additionally, since enemy waves spawn at regular intervals, predicting their timing and adjusting troop placements and reinforcements accordingly is essential for survival.
Map selection guide
태그는 맵의 핵심 특징을 빠르게 설명하지만 제작 버전마다 규칙이 다를 수 있습니다. 상세 설명에서 권장 인원, 난이도, 플레이 시간과 버전을 함께 확인한 뒤 다운로드하세요.