
골렘 StarCraft Map Collection
We've gathered maps registered with the '골렘' tag. Compare popular and latest maps focusing on play styles, difficulties, and features that are hard to find through genre alone.
- Registered Maps
- 74items
- Total Downloads
- 1
- Total Views
- 2,270
Popular Maps
This map has high download and view engagement.
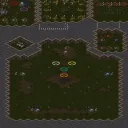
골렘 레벨레이션 (Golem Revelation v9.3)
를 통해 살펴볼 골렘 레벨레이션(Golem Revelation v9.3)은 독특한 유즈맵 장르의 재미를 선사하는 스타크래프트 맵이다. 이 맵은 내부 설명에 따르면 골렘을 파괴하고 건설하는 핵심 목표를 가지고 있으며, 골렘 팩토리를 파괴하는 임무가 중심이 된다. 사막 타일셋을 기반으로 넓은 맵 크기를 활용하여 다양한 전략적 공간을 제공하며, 플레이어들은 각자의 구역에서 유닛과 건물을 배치하고 치열한 공방전을 펼치게 된다. 전체적인 맵 구조를 보면 중앙의 넓은 전장과 사방에 배치된 독립된 기지 형태의 구역들이 눈에 띈다. 플레이어들은 이 공간을 활용해 자원을 확보하고, 골렘을 생산하거나 적의 거점을 파괴하는 전술적 선택을 내려야 한다. 게임이 시작되면 자신만의 기지를 방어하는 동시에 상대방 혹은 적의 골렘 팩토리를 무너뜨리기 위한 공격 경로를 탐색해야 한다. 일반적인 밀리 방식과 달리 정형화되지 않은 독특한 승리 조건과 유닛 운용 방식을 요구하므로, 기존 스타크래프트 유즈맵과는 다른 신선한 플레이 경험을 느낄 수 있다. 특히 팀원들과의 협력이나 개별적인 빌드 타이밍 조절이 중요하게 작용하며, 맵 지형의 특성을 파악하는 것이 승패를 가르는 핵심 요소가 된다. 이 맵은 평소와는 다른 독창적인 규칙의 스타크래프트 유즈맵을 즐기고 싶은 유저들이나, 색다른 전투 양상을 경험해보고 싶은 플레이어들에게 추천할 만하다. 플레이 전 내부 설명에 명시된 골렘 건설과 파괴라는 핵심 메커니즘을 미리 숙지하고 들어간다면 더욱 원활한 게임 진행이 가능할 것이다. Golem Revelation v9.3 is a StarCraft Brood War custom map that delivers a unique gameplay experience within the usemap genre. According to its internal description, the core objective revolves around destroying and building golems, with a primary mission focused on taking down golem factories. Set on a desert tileset, the map utilizes a spacious layout to provide various strategic areas where players can deploy units and engage in intense tactical combat. The map structure features a prominent central battlefield surrounded by distinct base-like areas, allowing players to secure resources, produce golems, and plan offensive routes to dismantle enemy strongholds. Unlike standard melee games, this map requires unconventional unit management and tactical decision-making, offering a fresh alternative to traditional custom maps. Cooperation and timing play vital roles in achieving victory, making an understanding of the terrain essential for success. This map is recommended for players who enjoy distinctive rule sets and want to experience a different kind of tactical warfare in StarCraft. Familiarizing yourself with the core mechanics of golem construction and destruction before diving in will help ensure a smoother gameplay experience.
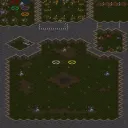
골렘 레벨레이션 v3.0 (Golem Revelation v3.0)
스타크래프트 브루드워 유즈맵 '골렘 레벨레이션 v3.0'은 5인용 사막 전장에서 골렘을 생산하고 적의 골렘 팩토리를 파괴하는 전투 중심 맵이다. 맵 설명에 따르면 플레이어는 골렘을 건설하고 파괴하며, 골렘 팩토리를 제거하는 것이 핵심 목표로 제시된다. 2048x2048 크기의 넓은 전장은 64x64 타일로 구성되어 있어 다수의 유닛이 동시에 충돌해도 여유로운 기동 공간을 제공한다. 사막 타일셋 특유의 밝은 지형은 시인성을 높여주며, 골렘이라는 중장갑 유닛 위주의 교전이 펼쳐질 때 시각적 구분이 용이하다. 진행 방식은 일반적인 밀리와 달리 기지 건설보다는 유닛 생산과 업그레이드, 전선 유지에 집중된다. 골렘 팩토리가 핵심 거점이므로 이를 방어하면서 상대 진영의 팩토리를 공략하는 '넥서스 부수기' 변형 규칙에 가깝다. 5인 자유 대결(FFA) 구도로 추정되며, 외교나 동맹 없이 순수한 전투력과 운영 능력으로 승부를 가른다. 골렘 유닛의 특성상 근접 화력과 체력이 강조되므로, 업그레이드 타이밍과 병력 조합, 지형 활용이 승패를 가르는 핵심 요소다. 플레이 경험은 초반 자원 확보와 골렘 양산, 중반 교전과 팩토리 압박, 후반 결정타로 이어지는 전형적인 아레나형 흐름을 보인다. 맵 크기가 넓어 기습 루트가 다양하고, 팩토리 파괴 조건 덕분에 수비적 플레이보다 적극적인 공세가 유리하다. 제작자 'DESTR0YINGANGEL'의 네이밍에서 엿보듯 공격적인 플레이를 유도하는 트리거가 다수 포함되었을 가능성이 높다. 추천 대상은 밀리 빌드 오더 암기보다 실시간 마이크로 컨트롤과 전장 판단력을 선호하는 유저, 5인 파티로 가볍게 즐길 수 있는 경쟁형 유즈맵을 찾는 팀이다. 플레이 전 확인할 점은 골렘의 스펙과 업그레이드 트리, 팩토리의 내구도와 재생성 여부, 자원 지분 분배 방식이다. 후속 버전(v9.0~v12.2)까지 존재하는 만큼 밸런스 패치가 지속되었을 것으로 보여, 최신 버전과의 차이점도 참고하면 좋다. StarCraft Brood War use map 'Golem Revelation v3.0' is a combat-focused map for five players on a desert battlefield where you produce golems and destroy enemy golem factories. According to the map description, the core objective is to build and destroy golems while eliminating golem factories. The spacious 2048x2048 map, composed of 64x64 tiles, provides ample maneuvering room even when large numbers of units clash simultaneously. The bright terrain of the desert tileset enhances visibility, making it easier to distinguish engagements centered on heavily armored golem units. Unlike standard melee, the gameplay focuses on unit production, upgrades, and frontline maintenance rather than base building. Since golem factories serve as key strongholds, the rules resemble a 'Nexus Destroy' variant where you defend your own factories while assaulting those of opponents. A five-player free-for-all (FFA) structure is presumed, where victory is decided purely by combat prowess and management skill without diplomacy or alliances. Given the golems' characteristics emphasizing melee firepower and durability, upgrade timing, army composition, and terrain utilization become decisive factors. The play experience follows a typical arena flow: early resource securing and golem massing, mid-game skirmishes and factory pressure, leading to a late-game finishing blow. The large map size allows diverse infiltration routes, and the factory destruction condition favors aggressive offense over passive defense. As suggested by the creator name 'DESTR0YINGANGEL', triggers encouraging offensive play are likely abundant. Recommended for users who prefer real-time micro control and battlefield judgment over memorizing melee build orders, and for teams seeking a competitive use map enjoyable in a five-player party. Points to verify before playing include golem stats and upgrade trees, factory durability and respawn mechanics, and resource distribution methods. With subsequent versions existing up to v12.2, balance patches have likely continued, so checking differences from the latest version is advisable.
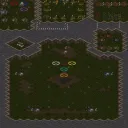
골렘 레벨레이션 v9.0 (Golem Revelation v9.0)
스타크래프트 브루드워 맵인 골렘 레벨레이션 v9.0(Golem Revelation v9.0)은 독특한 유즈맵 규칙을 바탕으로 제작된 UMS 장르의 작품이다. 내부 설명에 따르면 이 맵은 골렘을 파괴하고 건설하는 핵심 메커니즘과 함께 적의 골렘 팩토리를 무너뜨리는 플레이 방식을 제공하는 것으로 추정된다. 전체적인 지형 구조는 여러 구역으로 나뉘어 있으며, 유닛들이 배치될 수 있는 공간과 다양한 기지 형태의 지형이 조화롭게 어우러져 있다. 특히 중앙의 넓은 마당 형태의 공간과 주변의 격리된 구역들은 플레이어 간의 전략적인 동선과 교전 상황을 유도하는 데 적합해 보인다. 사막 타일셋을 기반으로 구현된 전장은 시각적으로 깔끔하면서도 특유의 분위기를 자아낸다. 플레이어는 주어진 자원과 구조물을 활용해 골렘을 생산하고, 상대의 공세를 막아내거나 적의 거점을 타격하는 전술적 판단을 내려야 한다. 5인의 플레이 인원을 지원하는 만큼 다수가 참여하여 각자의 역할을 분담하거나 협력하는 재미를 느낄 수 있다. 일반적인 밀리 방식에서 벗어나 독자적인 규칙과 오브젝트 파괴 중심의 진행을 선호하는 유저들에게 적합하며, 색다른 방어 및 파괴 임무를 즐기는 이들에게 추천할 만하다. 플레이를 시작하기 전에는 맵 설명에 언급된 골렘 건설 및 파괴 요소와 관련된 승리 조건이나 세부 진행 규칙을 미리 파악해 두는 것이 원활한 게임 진행에 도움이 된다. Golem Revelation v9.0 is a StarCraft: Brood War use map created within the UMS genre based on unique custom rules. According to the internal map description, this custom map is designed around core mechanics that involve destroying and building golems, as well as taking down enemy golem factories. The overall terrain layout is divided into multiple sections, harmoniously combining space for unit deployment with various base-style configurations. In particular, the wide central courtyard area and the surrounding isolated zones seem well-suited for encouraging strategic movement and engagement between players. Built upon a desert tileset, the battlefield presents a visually clean yet distinctive atmosphere. Players must utilize the given resources and structures to produce golems, fend off enemy offensives, and make tactical decisions to strike enemy strongholds. Supporting five players, it allows multiple participants to share roles or cooperate for greater enjoyment. This map is ideal for users who prefer unique rules and objective-destruction gameplay rather than standard melee matches, and it is recommended for those who enjoy distinctive defense and destruction missions. Before starting the game, it is helpful to understand the victory conditions and detailed progression rules related to golem construction and destruction mentioned in the map description to ensure a smooth gameplay experience.
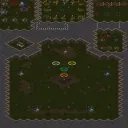
골렘 레벨레이션 v9.1 (Golem Revelation v9.1)
스타크래프트 브루드워의 유즈맵 <골렘 레벨레이션>은 골렘을 파괴하고 공장을 점령하는 전략적 디펜스 장르의 맵으로, 플레이어는 다섯 명의 팀으로 나뉘어 적의 골렘과 골렘 공장을 제거하는 동시에 자신의 골렘을 성장시켜야 한다. 맵은 중앙에 넓은 평지가 펼쳐져 있으며, 네 개의 구석과 중앙에 골렘 공장이 배치되어 있어 공격과 방어의 균형을 맞춰야 한다. 골렘은 일정 시간마다 생성되며, 이를 파괴하지 않으면 적의 골렘이 점점 강해지므로 신속한 대응이 필수다. 플레이어는 골렘을 조종할 수 있으며, 골렘의 체력과 공격력을 업그레이드할 수 있는 시스템이 보인다. 또한, 골렘 공장을 점령하면 추가적인 골렘을 생산할 수 있어 전략의 깊이를 더한다. 맵의 지형은 사막 테마로 디자인되어 있으며, 넓은 개활지뿐만 아니라 곳곳에 바위와 오아시스가 배치되어 골렘의 이동을 방해할 수 있다. 초보자와 숙련자 모두 즐길 수 있는 균형 잡힌 난이도를 제공하며, 팀워크와 빠른 판단력이 승리의 열쇠가 된다. 특히 골렘의 체력 관리와 공장 점령 타이밍을 잘못 잡으면 순식간에 밀릴 수 있어 신중한 플레이가 요구된다. 추천 대상은 디펜스와 전략적 플레이를 좋아하는 유저이며, 특히 팀플레이에 익숙한 플레이어에게 적합하다. 게임을 시작하기 전, 골렘의 업그레이드 경로와 공장 점령의 우선순위를 미리 숙지하는 것이 중요하다. 또한, 골렘의 이동 경로를 미리 파악하여 방어선을 구축하는 것이 승리의 핵심이다. 맵의 균형 잡힌 디자인과 명확한 목표 설정은 플레이어에게 몰입감을 선사하며, 여러 번 플레이해 볼수록 전략적 깊이를 느낄 수 있는佳作이다. 이 맵은 유즈맵 커뮤니티에서도 오랜 인기를 구가한 작품으로, 꾸준한 업데이트와 밸런스 조정을 통해 완성도를 높여왔다는 특징이 있다. The *Golem Revelation* custom map in *StarCraft: Brood War* is a strategic defense game where players, divided into five teams, must destroy enemy golems and their factories while growing their own golems. The map features a central open area with golems spawning every set interval; failing to destroy them allows the enemy’s golems to grow stronger, making quick responses essential. Players can control golems and upgrade their health and attack power, while capturing golems’ factories enables the production of additional units, adding depth to strategy. The desert-themed terrain includes wide open spaces, scattered rocks, and oases that disrupt movement, requiring careful positioning. The balanced difficulty suits both beginners and veterans, rewarding teamwork and swift decision-making. Mismanaging golems’ health or misjudging factory capture timing can lead to sudden losses, demanding cautious play. The map is ideal for those who enjoy defense and strategy, especially players comfortable with team play. Before starting, it’s crucial to understand upgrade paths and factory priorities, as preemptively securing movement routes and establishing defenses are key to victory. Its well-balanced design and clear objectives immerse players, revealing deeper strategies with repeated plays. A long-standing favorite in the custom map community, *Golem Revelation* has maintained popularity through consistent updates and balance adjustments to refine its quality.
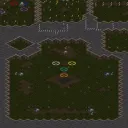
골렘 리벨리션 v12.0 (Golem Revelation v12.0)
‘골렘 리벨리션 v12.0’은 사막 테마의 유즈맵으로, 거대한 골렘을 조종하며 진행하는 디펜스와 서바이벌 요소가 혼합된 맵이다. 맵 중앙에 위치한 넓은 평야와 그 주변을 에워싼 험준한 산맥, 그리고 곳곳에 흩어져 있는 골렘의 잔해가 인상적인 배경은 플레이어에게 신비로운 분위기를 전달한다. 특히 맵의 가장자리를 따라 배치된 오브젝트와 건물이 방어선을 형성하고 있어, 골렘이 침공해오는 적들을 막아내는 gameplay로 유도된다. 골렘을 제어하는 방식은 마치 RTS의 핵심 유닛을 다루듯 전략적인 움직임을 요구하며, 골렘의 체력과 공격력을 관리하는 것이 주요 포인트다. 또한, 맵 여기저기에 숨겨진 자원 포인트와 보너스 지역을 확보하는 것이 승리의 열쇠로 작용할 가능성이 높아 보인다. 이 맵의 가장 큰 특징은 골렘을 조종하는 플레이 방식에 있다. 골렘은 맵 중앙에 배치된 거대한 구조물을 중심으로 이동하며, 적의 침공을 방어하는 동시에 골렘을 강화하거나 업그레이드하는 시스템이 포함되어 있을 것으로 추정된다. 맵의 지형은 비교적 평탄한 가운데 몇몇 지점을 제어하는 것이 중요하며, 특히 고지대나 좁은 통로가 골렘의 기동성을 제한할 수 있어 전략적 위치 선정이 필수적이다. 또한, 골렘의 움직임과 공격 패턴은 맵의 지형에 큰 영향을 받으므로, 맵을 완벽히 숙지하고 있어야 원활한 플레이가 가능하다. 이 맵은 초보 플레이어보다는 골렘의 조작과 전략적 판단력이 필요한 중급 이상의 플레이어에게 적합할 것으로 보인다. 골렘을 조종하는 재미와 더불어 방어선을 구축하고 자원을 확보하는 재미도 쏠쏠할 것으로 예상되며, 특히 팀플레이가 가능한 맵이라면 협동 플레이의 묘미를 느낄 수 있을 것이다. 플레이 전에는 골렘의 조작법과 맵의 주요 포인트를 미리 숙지하고, 골렘의 체력과 마나 관리, 방어선을 구축하는 법을 숙지하는 것이 중요하다. 또한, 골렘의 공격 패턴과 적의 침공 루트를 미리 예측하여 대비를 하는 것이 승률을 높이는 데 도움이 될 것이다. Golem Revelation v12.0 is a unique UMS custom map set in a desert theme, blending defense and survival elements where players control a massive golem. The map features a vast central plain surrounded by rugged mountains and scattered golem remnants, creating an atmospheric backdrop. The edges of the map are lined with objects and buildings that form defensive lines, guiding players to repel invading enemies with their golem. Controlling the golem feels akin to managing a core RTS unit, requiring strategic movement and focus on health and attack power management. Additionally, hidden resource points and bonus areas scattered throughout the map likely play a crucial role in securing victory. The defining feature of this map is the golem control mechanic. The golem moves around the central structure, defending against enemy invasions while offering opportunities for upgrades and enhancements. The terrain is mostly flat, but controlling key positions, such as high ground or narrow passages, is vital as they can restrict the golem's mobility. The golem's movement and attack patterns are heavily influenced by the map's terrain, so mastering the layout is essential for smooth gameplay. This map is best suited for intermediate to advanced players who enjoy tactical golem control and strategic decision-making. The fun lies in both the golem's control mechanics and the process of building defenses and securing resources. If team play is supported, the cooperative aspect adds an extra layer of enjoyment. Before playing, it's important to familiarize yourself with the golem's control scheme, key map points, health and mana management, and defensive line construction. Predicting enemy invasion routes and preparing accordingly will significantly improve your chances of winning.
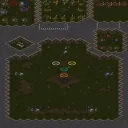
골렘 레벨레이션 v9.0 (Golem Revelation v9.0)
골렘 레벨레이션 v9.0은 사막 타일셋을 배경으로 한 5인용 유즈맵으로, 맵 설명에 따르면 골렘을 파괴하고 건설하며 골렘 팩토리를 제거하는 것이 주요 목표다. 맵 크기는 2048×2048로 넓은 전장을 제공하며, 64×64 타일 단위로 세밀한 지형 배치가 가능하다. 플레이어는 각자 기지를 운영하면서 골렘 유닛을 생산해 적진을 압박하거나, 팩토리를 방어하며 자원을 확보하는 전략적 선택을 하게 된다. 골렘이라는 특수 유닛이 핵심 자원이자 공격 수단이므로, 일반적인 밀리 전투와는 다른 자원 관리와 유닛 컨트롤이 요구된다. 맵 내부에는 별도의 트리거나 스토리 텍스트가 확인되지 않아, 자유로운 샌드박스식 진행이 예상된다. 난이도는 공식 정보가 없으나, 골렘 생산과 팩토리 파괴의 밸런스에 따라 초보자도 접근 가능한 보통 수준으로 보인다. 협동보다는 개인별 목표 달성이 강조되므로, 팀플레이보다는 솔로 또는 프리포올 형태의 플레이에 적합하다. 골렘 테마의 독특한 메커닉을 경험하고 싶은 유즈맵 애호가에게 추천한다. 맵 파일명은 Golem Revelation v.9.1.scx로 버전 표기가 약간 다르지만 내부 제목은 v9.0으로 통일되어 있다. 인코딩은 cp949로 한글 환경에서 정상적으로 로드된다. 사막 타일셋 특유의 밝은 색감과 넓은 시야는 골렘 유닛의 이동 경로를 한눈에 파악하기 좋게 만든다. 골렘 팩토리는 맵 곳곳에 분포해 있어, 초반 정찰과 팩토리 선점 여부가 승부를 가른다. 자원 채취는 일반적인 미네랄과 가스 외에 골렘 생산을 위한 별도 자원이 필요할 것으로 보이며, 이는 맵 제작자 DoomWarrior가 의도한 독자적 경제 시스템을 암시한다. 트리거가 공개되지 않아 정확한 승리 조건은 알 수 없으나, 모든 팩토리 파괴 또는 일정 수의 골렘 보유 시 승리하는 방식이 유력하다. 플레이 타임은 30분 내외로 예상되며, 맵 크기와 유닛 생산 속도를 고려할 때 지루하지 않은 템포를 유지한다. 골렘 레벨레이션 시리즈의 최신 버전인 만큼, 기존 버전 플레이어에게도 새로운 밸런스 조정을 체감할 수 있는 기회가 될 것이다. Golem Revelation v9.0 is a 5‑player UMS map set on a desert tileset where the main objective, according to the map description, is to destroy and build Golems and eliminate Golem Factories. The map spans 2048×2048 with a 64×64 tile grid, offering a spacious battlefield for detailed terrain placement. Each player manages a base, producing Golem units to pressure opponents or defending factories to secure resources. Because Golems serve as both a key resource and offensive tool, the map demands resource management and unit control distinct from standard melee games. No explicit triggers or story text are visible, suggesting a sandbox‑style progression. While no official difficulty rating exists, the balance between Golem production and factory destruction appears accessible to newcomers, placing it at a moderate level. The design emphasizes individual goal completion over cooperation, making it better suited for solo or free‑for‑all play rather than team matches. Fans of unique UMS mechanics centered on Golems will find this map appealing. The file name Golem Revelation v.9.1.scx shows a slight version discrepancy, yet the internal title settles on v9.0. The map uses cp949 encoding, loading correctly in Korean environments. The bright desert palette and wide sightlines help track Golem movement paths. Factories are scattered across the map, so early scouting and factory control often decide the outcome. Beyond standard minerals and gas, a separate resource for Golem production is likely required, hinting at a custom economy devised by creator DoomWarrior. With triggers undisclosed, victory likely comes from destroying all factories or amassing a set number of Golems. Expected playtime is around 30 minutes, and the map size combined with unit production speed keeps the pace engaging. As the latest iteration in the Golem Revelation series, it offers returning players a chance to experience revised balance.
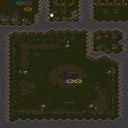
AirGolem *SilverStyle*
에어 골렘 실버스타일(AirGolem *SilverStyle*)은 제작자 CYTRYN이 만든 5인용 유즈맵으로, 사막 타일셋의 2048x2048 대형 맵에서 골렘을 파괴하고 건설하는 독특한 게임플레이를 제공한다. 내부 설명인 'Destroy and build Golems'에서 알 수 있듯, 핵심 메커니즘은 골렘 유닛을 활용한 전투와 생산에 집중되어 있다. 5명의 플레이어가 참여하는 구조상 프리포올(FFA) 또는 팀 대전 형태가 추정되며, 넓은 맵 크기와 사막 지형이 자원 확보와 기지 확장, 다방향 전투를 유도할 것으로 보인다. 골렘이라는 특정 유닛을 중심으로 한 빌드 앤 파이트(Build & Fight) 방식은 일반적인 밀리나 디펜스와 차별화된 재미를 줄 가능성이 높다. 다만 트리거 상세, 승리 조건, 유닛 밸런스, 자원 시스템 등 세부 규칙은 플레이 전 직접 확인해야 한다. 커스텀 유닛 메커니즘과 자유도 높은 빌드 전략을 즐기는 유저, 색다른 5인 대전 맵을 찾는 파티에게 추천한다. 플레이 전 맵 설명창의 규칙과 단축키, 특수 커맨드 숙지가 필수적이다. AirGolem SilverStyle is a 5-player UMS map created by CYTRYN, offering unique gameplay centered on destroying and building Golems on a large 2048x2048 desert tileset map. As the internal description 'Destroy and build Golems' indicates, the core mechanic focuses on combat and production utilizing Golem units. With five players participating, a free-for-all (FFA) or team battle format is presumed, and the vast map size combined with desert terrain likely encourages resource acquisition, base expansion, and multi-directional combat. The build-and-fight style centered on the specific Golem unit has high potential to deliver differentiated fun compared to standard melee or defense maps. However, detailed triggers, victory conditions, unit balance, and resource systems must be verified directly before play. Recommended for users who enjoy custom unit mechanics and flexible build strategies, as well as parties seeking a fresh 5-player versus map. Checking the map description window for rules, hotkeys, and special commands before starting is essential.
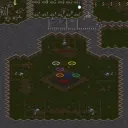
골렘 레벨레이션 v13.2 (Golem Revelation v13.2)
스타크래프트 브루드워 맵 가운데 독특한 테마와 개성 있는 유닛 활용으로 오랫동안 사랑받아 온 장르가 바로 골렘 시리즈입니다. 이번에 살펴볼 맵은 이러한 계보를 잇는 대표적인 유즈맵으로, 파일명과 내부 설정에서 확인할 수 있듯이 정교하게 다듬어진 버전입니다. 플레이어는 사막 타일셋을 배경으로 펼쳐지는 넓은 전장에서 다양한 유닛과 특수한 구조물을 다루며 게임을 진행하게 됩니다. 맵 전반의 구조는 플레이어들이 각자의 구역에서 자원을 확보하고 전력을 강화한 뒤, 몰려오는 적의 공세나 특정 목표에 대응하는 협동 중심의 진행 방식을 보여줍니다. 이미지에서 엿볼 수 있듯 플레이어들이 배치되는 독립된 기지 구역과 유닛들이 대기하는 공간이 체계적으로 나뉘어 있어, 다인 플레이 시 각자의 역할을 나누어 맡기 좋도록 설계되어 있습니다. 특히 골렘이라는 독특한 소재를 중심으로 유닛의 성장과 조합, 그리고 제한된 공간에서의 방어와 진격이 어우러져 색다른 재미를 선사합니다. 이 맵은 평소 반복되는 밀리 게임에서 벗어나 색다른 규칙과 협동 플레이를 즐기는 유저들에게 알맞은 선택이 됩니다. 다수의 플레이어가 함께 호흡을 맞추며 각자의 진지를 구축하고 적의 공세를 막아내는 과정에서 깊은 몰입감을 느낄 수 있습니다. 플레이를 시작하기 전에는 기지 배치와 자원 관리 동선을 미리 파악하고, 아군과의 유기적인 소통 방식을 염두에 두는 것이 유리합니다. 오랜 기간 버전업을 거치며 완성도를 높여온 만큼, 전략적인 유즈맵을 선호하는 이들이라면 한 번쯤 도전해 볼 만한 가치가 있는 흥미로운 전장입니다. Starcraft Brood War features various custom maps with unique themes and units, among which the Golem series has maintained a steady following. This map continues that tradition as a refined version of the classic Golem custom map genre, offering a distinct gameplay experience set against a desert tileset. Players operate within designated base areas on a spacious battlefield, managing units and specialized structures to achieve their objectives. The overall structure emphasizes cooperative progression, where participants must secure resources, strengthen their forces, and coordinate to fend off enemy waves or tackle specific challenges. Based on the visual layout, the separate starting zones and staging areas allow multiple players to easily divide roles and responsibilities during a session. The core theme revolves around utilizing unique golem-themed units, combining growth mechanics with tactical defense and advancement in structured environments. It serves as a suitable choice for users looking to step away from standard melee matches in favor of alternative rules and cooperative strategies. Players can expect deep immersion as they build up their positions and synchronize their defenses with teammates. Before jumping into the session, it is helpful to review the base layout and resource routes to ensure smooth coordination with allies. As a map that has undergone continuous version updates to refine its balance and structure, it provides an engaging battlefield for fans of strategic custom scenarios.
골렘 매드니스 매스 어택 (Golem Madness /w Mass-Attack)
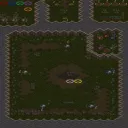
골렘 매드니스 매스 어택(Golem Madness /w Mass-Attack)은 스타크래프트 브루드워 UMS 유즈맵으로, 골렘을 주제로 독특한 유닛 활용과 전투를 즐길 수 있도록 제작된 독창적인 작품입니다. 내부 맵 설명에 따르면 골렘을 파괴하고 건설하는 요소가 핵심으로 포함되어 있으며, 제작자 블레이즈드듀드(Blazeddude)에 의해 수정 및 보완을 거쳐 완성되었습니다. 이 맵은 기본 밀리 전투와는 완전히 다른 결을 지니고 있으며, 사막 타일셋을 배경으로 한 넓은 공간에서 다양한 기지와 유닛 배치 구조를 통해 색다른 플레이 경험을 선사합니다. 게임이 시작되면 플레이어는 주어진 자원과 공간을 활용해 골렘 유닛들을 전략적으로 건설하고, 적대적인 세력이나 오브젝트를 파괴하는 임무를 마주하게 됩니다. 대규모 공격 요소가 가미되어 있어 순간적으로 몰려드는 유닛들을 상대하거나 전선을 유지하는 집중력이 요구되며, 일반적인 방어전이나 단순한 파괴 미션과는 차별화된 운영의 재미를 느낄 수 있습니다. 정해진 공간 안에서 유닛의 생산 타이밍과 조합을 고민해야 하므로, 평소 스타크래프트 유즈맵에서 색다른 전투 방식을 선호하는 유저들에게 흥미로운 도전 과제가 됩니다. 이 맵은 특히 독특한 유닛 조작과 건설 요소를 결합한 커스텀 게임을 좋아하는 플레이어들에게 알맞습니다. 친구들과 함께 멀티플레이로 즐기거나, 색다른 규칙 속에서 몰입도 높은 전투를 경험하고자 하는 이들에게 추천할 만한 스타크래프트 브루드워 맵입니다. 플레이를 시작하기 전에는 내부 설명에 명시된 골렘의 건설 및 파괴 메커니즘을 숙지하고, 대규모 공격에 대비한 방어선과 자원 수급 동선을 미리 파악해 두는 것이 원활한 진행에 도움이 됩니다. Golem Madness /w Mass-Attack is a StarCraft: Brood War UMS custom map designed to offer a unique combat experience centered around golems. According to the internal map description, the core mechanics involve destroying and building golems, and the map was modified and refined by Blazeddude. Set in a desert tileset with wide-open areas and distinct base layouts, this map deviates significantly from traditional melee matches, delivering a fresh and engaging gameplay experience. Upon starting the game, players must utilize the given resources and space to strategically construct golem units and complete objectives involving hostile entities. With mass-attack elements integrated into the gameplay, players need to maintain sharp focus to manage incoming waves and hold strategic lines, offering tactical depth that goes beyond standard defense or simple destruction missions. Careful timing in unit production and composition within designated areas makes this map an intriguing challenge for users who enjoy unconventional combat styles in StarCraft custom maps. This map is especially well-suited for players who appreciate custom games combining unique unit controls and building mechanics. It is a recommended StarCraft: Brood War map for those looking to enjoy multiplayer sessions with friends or seeking immersive combat under alternative rulesets. Before diving into the match, it is helpful to familiarize yourself with the golem construction and destruction mechanics mentioned in the map description, and to plan your defense lines and resource gathering paths in preparation for large-scale attacks.
골렘 매드니스 에어 (Golem Madness Air)
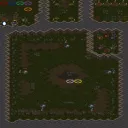
스타크래프트 브루드워 유즈맵 '골렘 매드니스 에어'는 5인용 사막 타일셋에서 펼쳐지는 골렘 중심의 전투 맵이다. 내부 설명에 'Destroy n Build Golems 2 protected n fight'라고 적혀 있어, 플레이어가 골렘을 생산하고 파괴하며 보호 대상이나 거점을 두고 싸우는 진행 방식이 예상된다. 맵 크기는 2048x2048로 64x64 타일 구성이며, 넓은 전장에서 다수의 유닛이 충돌하는 난전 양상이 그려진다. 제작자 qwertaspolk가 제작과 편집을 모두 맡아 일관된 설계 의도가 엿보인다. 플레이어는 각자 기지를 운영하며 골렘을 조합해 상대를 압박하거나, 중앙 지역을 차지하기 위한 힘싸움을 벌일 것으로 보인다. 'Air'라는 부제가 붙어 공중 유닛이나 공중전이 강조되었을 가능성도 있다. 5인 자유 대결(FFA) 또는 팀전 여부는 명확하지 않으나, 인원 수를 고려하면 개인전 위주의 빠른 템포가 예상된다. 골렘이라는 특정 유닛을 핵심으로 삼아 업그레이드, 생산 속도 조절, 배치 타이밍 등이 승부를 가를 핵심 요소로 작용할 것이다. 이 맵은 밀리 밸런스에서 벗어나 유즈맵 특유의 기발한 규칙과 유닛 조합을 즐기는 유저에게 적합하다. 골렘 대량 생산과 난전 상황을 선호하는 플레이어, 짧은 시간 안에 승부가 나는 아레나 스타일을 찾는 이에게 추천한다. 플레이 전에는 골렘의 스펙과 생산 비용, 보호 대상의 승리 조건 여부를 확인하고 전략을 짜는 것이 좋다. StarCraft Brood War use map 'Golem Madness Air' is a 5-player golem-centric battle map set on the desert tileset. The internal description reads 'Destroy n Build Golems 2 protected n fight,' suggesting gameplay where players produce and destroy golems while contesting protected objectives or bases. The map dimensions are 2048x2048 with 64x64 tiles, providing a spacious battlefield for large-scale unit clashes. The creator qwertaspolk handled both creation and editing, indicating a consistent design intent. Each player likely manages a base to assemble golem forces, pressuring opponents or fighting for control of central areas. The 'Air' subtitle may hint at an emphasis on air units or aerial combat. Whether it is a free-for-all or team match is unclear, but the five-player count points to a fast-paced individual battle format. Key strategic elements will revolve around golem stats, production costs, upgrade timing, and deployment decisions. This map suits players who enjoy the inventive rules and unit combinations unique to use map settings, departing from standard melee balance. It is recommended for those who favor mass golem production, chaotic skirmishes, and arena-style matches that conclude quickly. Before playing, it is advisable to check golem specifications, resource costs, and whether protected objectives define victory conditions.
골렘 매드니스 SE (Golem Madness SE)
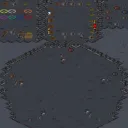
‘골렘 매드니스 SE(Golem Madness SE)’는 스타크래프트: 브루드워의 UMS 유즈맵으로, 5명의 플레이어가 각각의 요새를 지키며 적의 거점을 파괴하는 디펜스 장르의 맵이다. 맵은 우주 타일셋을 기반으로 2048x2048 크기의 넓은 필드에서 펼쳐지며, 중앙을 가로지르는 거대한 강과 그 주변의 좁은 통로가 주요 전투 공간으로 보인다. 플레이어는 각자의 시작 지점에서 자원을 확보하고, 강력한 골렘 유닛을 중심으로 방어선을 구축해야 한다. 적의 공격을 방어하면서 동시에 상대방의 요새를 공격하는 교전 양상이 인상적이다. 맵의 특징은 강을 건너는 교량 역할을 하는 좁은 길목으로, 이곳에서 전투가 집중되며 전략적 위치로 활용된다. 또한 맵 상단과 하단에 위치한 두 번째 길목도 교전 포인트로 작용할 수 있어, 후방 침투를 통한 기습이 가능한 구조다. 맵의 내구도 시스템을 고려한 배치와 더불어, 골렘 유닛의 특성상 체력 관리가 중요해진다. 플레이어는 자원 수급과 유닛 생산을 조율하면서도, 상대방의 움직임을 끊임없이 주시해야 한다. 맵의 난이도는 중간 수준으로, 골렘의 생산과 방어 전략을 얼마나 잘 구사하느냐에 따라 승부가 갈린다. 초보자는 골렘의 특성과 맵의 교전 포인트를 숙지하는 데 집중해야 하며, 숙련자는 자원 관리와 기습 타이밍을 노려야 한다. 맵을 플레이하기 전, 골렘의 스킬과 맵의 주요 교량 위치를 미리 확인해두는 것이 좋다. 전체적으로는 긴장감 넘치는 디펜스 경험을 제공하는 맵으로, 전략과 타이밍을 요구하는 고품질의 유즈맵이다. 5인까지 참여 가능한 구조로, 팀플레이보다는 개인전 성향이 강하지만, 협동이 필요한 순간도 존재한다. 맵의 재출시 버전으로 ‘SE’가 붙어 있어, 원작의 버그 수정과 밸런스 개선이 반영된 것으로 추정된다. 마스터 버전답게 난이도와 몰입도가 뛰어난 맵으로, 디펜스 장르를 любите하는 플레이어들에게 강력히 추천한다. Golem Madness SE is a UMS custom map for StarCraft: Brood War, where five players defend their fortresses while attempting to destroy the enemy strongholds, offering a defensive gameplay experience. The map utilizes a space-themed tileset and spans a large 2048x2048 battlefield, with a prominent river bisecting the field and narrow pathways serving as critical combat zones. Players must gather resources from their starting points and build defense lines centered around powerful golem units. The map’s key feature is the narrow bridge crossing the river, where most battles occur, along with secondary pathways at the top and bottom that allow for potential flank attacks. The durable structure of the map and the unique properties of the golem units make resource management and health control essential. Players must balance resource collection with unit production while constantly monitoring enemy movements. The difficulty is moderate, with victory often hinging on the player’s ability to effectively deploy golem units and defend strategic positions. Beginners should focus on understanding golem mechanics and key battle points, while advanced players can exploit resource management and ambush timing. Before playing, it’s advisable to familiarize yourself with golem skills and the map’s bridge locations. Overall, this map delivers an intense defensive experience requiring strategic planning and precise timing. Designed for up to five players, it leans toward individual play but includes moments where teamwork is necessary. The SE re-release suggests bug fixes and balance improvements, making it a high-quality choice for fans of defense-themed maps.
골렘 블러드 (Golem Blood)
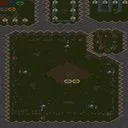
골렘블러드는 스타크래프트 브루드워 유즈맵 중 블러드 장르에 속하는 맵으로, 제목 그대로 골렘을 주력 유닛으로 활용해 대규모 전투를 벌이는 구조다. 사막 타일셋 위에 2048x2048 크기의 넓은 전장이 펼쳐져 있으며, 5인 플레이를 기준으로 설계되어 있다. 일반적인 블러드 맵과 마찬가지로 유닛을 지속적으로 생산해 적을 섬멸하고 자원이나 업그레이드를 확보하는 성장 루프가 핵심이다. 골렘이라는 느리지만 튼튼한 유닛 특성상 초반 난전보다는 중후반 대규모 병력 충돌이 주를 이루며, 입구 막기나 지형 활용 여부가 승패를 가른다. 제작자인 nerd.pride의 의도대로 골렘의 높은 체력과 공격력을 극대화하는 업그레이드 트리가 존재할 것으로 보이며, 5인 난전 특성상 외교나 임시 동맹 변수도 열려 있다. 맵 크기가 넓어 멀티태스킹과 병력 이동 컨트롤이 요구되며, 초보자보다는 블러드 장르 기본기를 갖춘 유저에게 적합하다. 파일명 인코딩 깨짐 외에는 내부 제목과 설명이 일치해 정식 배포본으로 추정된다. 혼자 즐기기보다 5인이 모인 맞수전이나 클랜전용으로 권장된다. 블러드 특유의 무한 생산과 업그레이드 경쟁을 골렘이라는 독특한 유닛으로 풀어내 색다른 긴장감을 준다. 사막 지형의 모래 색감이 전투 이펙트와 어우러져 가시성도 나쁘지 않아 보인다. 승리 조건은 최후의 1인이 남을 때까지 생존하는 FFA 방식일 가능성이 높다. Golem Blood is a StarCraft Brood War UMS map belonging to the Blood genre, where the Golem serves as the main unit for large-scale battles as the title suggests. A vast 2048x2048 battlefield unfolds on the Desert tileset, designed for 5 players. Like typical Blood maps, the core loop involves continuously producing units to annihilate enemies and secure resources or upgrades. Due to the Golem's slow but durable nature, mid-to-late game massive army clashes dominate over early skirmishes, and choke point control or terrain utilization often decides the outcome. An upgrade tree maximizing the Golem's high HP and attack power likely exists per the creator nerd.pride's intent, and the 5-player free-for-all opens variables like diplomacy or temporary alliances. The large map size demands multitasking and army movement control, making it more suitable for users with Blood genre fundamentals than beginners. Aside from the filename encoding corruption, the internal title and description match, suggesting an official release. It is recommended for 5-player competitive matches or clan wars rather than solo play. It offers unique tension by interpreting the Blood genre's infinite production and upgrade competition through the distinct Golem unit. The desert terrain's sand tones blend well with combat effects, so visibility appears decent. Victory conditions likely follow an FFA format where the last player standing wins.
Recently registered maps
Check newly added files and versions.
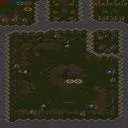
골렘 매드니스 매스 어택 v10.0 (Golem Madness Mass Attack v10.0)
Golem Madness Mass Attack v10.0은 스타크래프트 브루드워 유즈맵 중에서도 골렘을 중심으로 한 전투와 생성을 핵심 메커니즘으로 삼은 독특한 맵입니다. 사막 타일셋의 넓은 2048x2048 크기 맵은 5인 플레이에 최적화된 구조를 보이며, 플레이어는 골렘을 파괴하고 다시 조합하는 과정을 반복하며 성장해 나갑니다. 내부 맵 설명에 따르면 모든 골렘 파츠 조합은 Golem.Master에 의해 제작되었으며, 이는 다양한 골렘 유닛의 조합과 전략적 깊이를 암시합니다. 맵의 진행 방식은 단순한 정면 대결을 넘어, 골렘 파츠라는 자원을 관리하고 효율적인 조합을 찾아내는 전략적 요소를 강조합니다. 플레이어는 지속적으로 적의 골렘을 공격하여 파괴하고, 얻은 파츠로 자신만의 더 강력한 골렘 군단을 구축해야 하는 사이클을 경험하게 됩니다. 이러한 구조는 맵을 단순한 '컴까기'나 '아레나'보다는 자원 관리와 부대 구성에 중점을 둔 '강화' 및 '조합' 중심의 유즈맵으로 분류하게 합니다. 플레이 경험은 빠른 템포의 전투와 신중한 자원 할당 사이에서 균형을 잡는 것이 핵심이며, 초보자보다는 유즈맵에 익숙한 중급 이상의 플레이어에게 더 적합해 보입니다. 맵의 제목인 'Mass Attack'은 대규모 군단 전투를 암시하지만, 실제 플레이는 소수의 고급 유닛(골렘)을 중심으로 이루어질 가능성이 높습니다. 플레이 전 확인 포인트로는 골렘 파츠의 조합 규칙과 각 조합별 능력치 차이, 그리고 맵 내 자원 분포와 초반 생존을 위한 위치 선정이 중요합니다. 넓은 맵 크기와 5인 설정은 개인전 또는 제한된 팀 플레이 모두 가능한 환경을 조성하며, 장기전보다는 중간 길이의 플레이 시간을 예상하게 합니다. Golem Madness Mass Attack v10.0 is a unique StarCraft: Brood War Use Map Settings (UMS) map that centers its core mechanics around the combat and creation of Golems. The vast 2048x2048 map using a desert tileset is structured optimally for 5-player gameplay, where players repeatedly destroy and recombine Golems to grow stronger. According to the internal map description, all Golem part combinations were created by Golem.Master, hinting at a variety of Golem unit combinations and strategic depth. The map's progression goes beyond simple frontal clashes, emphasizing strategic elements of managing the resource that is Golem parts and discovering efficient combinations. Players experience a cycle of constantly attacking and destroying enemy Golems, then using the acquired parts to build their own more powerful Golem army. This structure classifies the map not as a simple 'computer destruction' or 'arena' map, but rather as a reinforcement and combination-focused UMS map that emphasizes resource management and army composition. The core of the gameplay experience lies in balancing between fast-paced combat and careful resource allocation, making it more suitable for intermediate or advanced UMS players rather than beginners. While the map's title 'Mass Attack' suggests large-scale legion warfare, the actual gameplay is likely centered around a small number of high-tier units (Golems). Key points to check before playing include the rules for combining Golem parts, the stat differences between each combination, as well as resource distribution on the map and positioning for early-game survival. The large map size and 5-player setup create an environment suitable for both free-for-all or limited team play, suggesting a medium-length play session rather than a long drawn-out game.
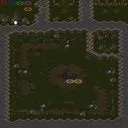
골렘 광기 대량 공격 v10 (Golem Madness Mass Attack v10)
Golem Madness Mass Attack v10은 사막 타일셋을 배경으로 한 5인용 유즈맵으로, 플레이어는 골렘을 생산하고 동시에 적의 골렘을 파괴하며 자원을 관리하는 방식으로 진행됩니다. 맵 내부는 광활한 사막 지역에 scattered된 광물과 가스 지점이 있으며, 이를 채취하여 골렘 유닛을 훈련시킬 수 있습니다. 골렘은 기본 공격력이 높고 내구성이 뛰어난 유닛으로, 대량 생산 시 적 진형을 압도할 수 있는 힘이 있습니다. 그러나 골렘 생산에는 상당한 자원이 소모되므로, 자원 채취 효율과 타이밍 조정이 승패를 좌우합니다. 또한 맵 중앙에는 골렘을 강화할 수 있는 특수 구조물이 놓여 있어, 이를 점령하면 일시적으로 공격력이나 방어력이 상승하는 버프를 얻을 수 있습니다. 이 구조물은 양측이 경쟁하게 설계되어 전투의 흐름에 변수를 더합니다. 승리 조건은 적의 모든 골렘을 파괴하거나, 일정 시간 내에 더 많은 골렘을 남겨 두는 점수 기반 방식으로, 이는 단순히 전투 위주가 아니라 자원 관리와 전략적 배치가 중요한 요소가 됨을 의미합니다. 플레이어는 초반에 광물 채취에 집중해 골렘 생산 기지를 마련하고, 중반에는 중앙 버프 구조물을 놓고 전투를 펼치며, 후기에는 대량 골렘을 동원해 결정적인 한 방을 노리는 전형을 따릅니다. 이런 흐름은 밀리 장르의 특징을 잘 살리며, 유즈맵으로서의 자유도와 전략 깊이를 동시에 제공합니다. 추천 대상은 전략적 사고와 빠른 결정을 즐기는 중급 이상의 플레이어이며, 초보자도 골렘의 직관적인 조작 덕분에 입문하기 쉬울 것입니다. 플레이 전 확인해야 할 점은 사막 지형에서의 시야 확보와 자원 분포 파악, 그리고 중앙 버프 구조물의 위치를 미리 기억해 두는 것이다. Golem Madness Mass Attack v10 is a 5-player UMS map set on a desert tileset where players produce golems while destroying enemy golems and managing resources. The map features scattered mineral and gas vents across a vast desert area that can be harvested to train golem units. Golems are high-damage, high‑durability units; mass-producing them can overwhelm enemy formations. However, golems consume considerable resources, so efficient gathering and timing are key to victory. A special structure in the map’s center can be captured to grant a temporary buff to attack or defense, adding a contested focal point that shifts the flow of battle. Victory is achieved by destroying all enemy golems or by having more golems remaining after a set time, emphasizing resource management and strategic placement over pure combat. Early game focuses on mineral gathering to establish a golem production base; mid game centers on fighting for the central buff structure; late game involves massing golems for a decisive strike. This progression captures the essence of the 밀리 (mass battle) genre while offering the freedom and strategic depth typical of UMS maps. The map is recommended for intermediate‑to‑advanced players who enjoy strategic thinking and quick decisions; beginners can also pick it up easily thanks to the intuitive control of golems. Before playing, check visibility on the desert terrain, understand resource distribution, and memorize the location of the central buff structure.
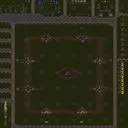
골렘 매드니스 2008 (Golem Madness 2008)
‘골렘 매드니스 2008(Golem Madness 2008)’은 스타크래프트 브루드워의 유즈맵으로, 8명의 플레이어가 각각 골렘을 생산해 상대방의 성을 파괴하는 전쟁을 펼치는 전략형 디펜스 장르의 맵이다. 맵의 전체적인 분위기는 사막 테마의 타일셋으로 구성되어 있으며, 넓은 평야와 중앙의 주요 전장 구조가 눈에 띈다. 플레이어는 시작 지점에서 빠르게 골렘을 생산할 수 있는 구조를 갖추고 있으며, 상대방의 성을 향해 진격하거나 방어선을 구축하는 두 가지 전략을 고민해야 한다. 골렘의 생산 및 업그레이드는 자원 수집과 생산 건물을 통해 진행되며, 유닛의 종류가 제한적이지만 전술적 선택지가 풍부한 편이다. 맵의 특성은 대칭형이 아닌 비대칭 구조를 띄고 있어, 각 플레이어의 시작 위치에 따라 전략적 접근 방식이 달라진다. 특히 중앙 교두보를 두고 벌어지는 싸움은 승패를 가르는 핵심 요소가 된다. 맵의 난이도는 초반 자원 수집과 골렘 생산 타이밍에 따라 크게 좌우되며, 후기에는 방어 건물과 유닛의 조합을 통해 상대의 공격을 방어해야 한다. 초보자도 쉽게 접근할 수 있는 구조이지만, 골렘의 효율적인 운용과 자원 관리, 상대방의 전략을 읽는 능력이 요구된다. 추천 대상은 스타크래프트 유즈맵을 즐기는 모든 플레이어로, 특히 전략적 디펜스 플레이를 선호하는 유저들에게 적합하다. 플레이 전에는 맵의 주요 길목과 자원 분포, 골렘 생산 건물의 위치를 숙지하는 것이 중요하다. 또한, 상대방의 골렘 생산 속도를 항상 체크하며 방어선을 구축하는 것이 승리의 관건이다. 맵의 분위기는 중세 판타지풍으로, 골렘이라는 유닛이 주는 묵직한 공격력은 전장의 분위기를 한층 더 흥미롭게 만든다. 다양한 전략을 시도해 볼 수 있는 만큼, 매 게임마다 새로운 전술을 발견할 수 있어 반복 플레이의 재미도 있다. 골렘의 생산 비용과 업그레이드 비용, 그리고 상대방의 자원 수집 속도를 계산하는 것이 핵심이다. 초반에는 방어에 치중하되, 중반부터는 적극적인 공격으로 상대방을 압박하는 전략이 유효하다. 맵의 밸런스는 제작자의 의도대로 골렘의 전투력이 균형 있게 조절되어 있어, 초보자와 숙련자 모두 즐길 수 있는 구조로 보인다. “Golem Madness 2008” is a custom StarCraft: Brood War map where eight players each produce golems to destroy their opponents’ bases in a strategic defense-style battle. The map features a desert-themed tileset, with open plains and a central battlefield that stands out. Players start with structures that let them quickly produce golems, forcing them to weigh whether to push toward the enemy base or fortify their defenses. Golem production and upgrades rely on resource collection and production buildings, and while unit variety is limited, tactical options remain rich. The map’s asymmetrical layout means each player’s starting position shapes their strategic approach, with control of the central foothold often deciding victory. Early-game success hinges on efficient resource gathering and timing golem production, while later stages require combining defensive structures and units to fend off attacks. Though the design is welcoming to newcomers, effective golem management, resource control, and reading opponents are essential. It’s ideal for anyone who enjoys custom StarCraft maps, especially those who prefer strategic defense play. Before jumping in, familiarize yourself with key paths, resource spots, and golem production buildings. Consistently monitoring the enemy’s golem output and shoring up defenses are vital to winning. The medieval-fantasy atmosphere, amplified by the golems’ heavy-hitting attacks, makes the battlefield feel even more immersive. With so many strategic possibilities, every match can reveal fresh tactics, ensuring replay value. Balancing golem costs, upgrade expenses, and the opponent’s resource rate is crucial. Early on, focus on defense, then shift to aggressive pressure mid-game. The map’s balance keeps golem combat power fair, making it enjoyable for both beginners and experts.
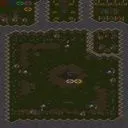
골렘 매드니스 매스 어택 v10.0 (Golem Madness Mass Attack v10.0)
‘골렘 매드니스 매스 어택(Golem Madness Mass Attack v10.0)’은 스타크래프트 브루드워의 유즈맵으로, 플레이어들이 직접 골렘을 조합하고 파괴하는 독특한 디펜스 및 빌드 전략을 즐길 수 있는 맵이다. 사막 테마의 배경 위에서 펼쳐지는 이 맵은 골렘의 각 파츠(머리, 몸통, 팔, 다리)를 조합해 강력한 유닛으로 변신시키는 재미와 함께, 끊임없이 몰려드는 적을 방어하거나 직접 공격을 펼쳐야 하는 전략적 깊이를 제공한다. 맵의 핵심 메커니즘은 골렘의 조합 시스템으로, 플레이어는 맵 곳곳에 흩어져 있는 골렘 파츠를 수집해 자신만의 골렘을 완성할 수 있으며, 완성된 골렘은 전투에서 큰 힘을 발휘한다. 또한, 맵은 다수의 플레이어가 동시에 활동할 수 있도록 설계되어 있으며, 각 플레이어의 골렘 조합과 전략에 따라 전투의 양상이 크게 달라진다. 특히, 골렘의 조합을 완료한 플레이어는 강력한 공격을 펼칠 수 있어, 팀원 간의 협력과 경쟁이 자연스럽게 유도된다. 맵의 진행은 파괴와 건설의 반복으로, 상대방의 골렘을 파괴하거나 자신의 골렘을 강화하는 과정에서 긴장감이 지속된다. 초보 플레이어의 경우 골렘의 조합과 전투 전략을 익히는 데 다소 시간이 걸릴 수 있지만, 맵의 규칙이 비교적 명확하고 조작이 직관적이기 때문에 빠르게 적응할 수 있다. 반면, 숙련된 플레이어는 보다 복잡한 전략을 구사하며 상대방을 압박할 수 있어, 다양한 수준의 플레이어에게 모두 매력적인 경험을 제공한다. 골렘 매드니스 매스 어택은 단순히 적을 파괴하는 것뿐만 아니라, 골렘을 조합하고 강화하는 재미가 있는 맵으로, 디펜스와 빌드 전략을 좋아하는 유저들에게 강력히 추천할 만하다. 플레이 전에는 골렘의 조합 방법과 각 파츠의 위치를 숙지하는 것이 중요하며, 팀원과의 원활한 소통을 통해 전략을 조정하는 것이 승리의 관건이다. "Golem Madness Mass Attack (v10.0)" is a custom StarCraft: Brood War map where players can enjoy a unique defense and build strategy by directly combining and destroying golems. Set against a desert-themed backdrop, the map offers the fun of transforming collected golem parts (head, torso, arms, legs) into powerful units, along with the strategic depth of defending against endless enemy waves or launching direct attacks. The core mechanic revolves around the golem combination system—players gather scattered parts across the map to assemble their own golem, which becomes a formidable force in battle. Designed for multiple players, the outcome of fights shifts dramatically based on each player's golem composition and strategy. Notably, players who complete their golems can unleash devastating attacks, naturally encouraging teamwork and competition. The gameplay alternates between destruction and construction, maintaining tension as you either dismantle opponents' golems or reinforce your own. While newcomers may need time to master golem assembly and combat tactics, the map’s clear rules and intuitive controls make it easy to adapt. Meanwhile, experienced players can deploy advanced strategies to overwhelm opponents, ensuring an engaging experience for all skill levels. Beyond mere destruction, "Golem Madness Mass Attack" stands out for its satisfying golem-building and upgrading mechanics, making it a must-try for fans of defense and build strategies. Before playing, familiarize yourself with golem combinations and part locations, and coordinate with teammates to adjust strategies for victory.
매킨토시 골렘! (Macintosh Golems!)
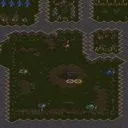
Macintosh Golems!는 사막 타일셋을 기반으로 한 5인용 유즈맵으로, 각 플레이어가 독립된 골렘 유닛을 조종하며 자원을 채취하고 기지를 개발하는 맞춤 시나리오입니다. 시작 시 기본 골렘 하나와 소량의 광물·가스를 지급받으며, 이를 사용해 골렘의 체력·공격력을 강화하거나 지원 유닛을 생산할 수 있습니다. 맵 중앙에 위치한 유적지에서 speciale 이벤트가 발생해 보스 골렘 소환이나 고급 기술을 습득할 수 있으며, 이는 전투의 흐름을 크게 바꿉니다. 자원이 제한적이므로 효율적인 수집 시점과 업그레이드 타이밍이 승부를 가리며, 전투는 골렘 간 근접전과 가끔씩 나오는 원거리 지원이 섞인 형태로 진행됩니다. 승리 조건은 상대 골렘 전멸 또는 시간 내 최고 점수 달성 중 하나로, 스코어 기반 경쟁 요소가 뚜렷합니다. 이런 구조는 빠른 판단과 미세 조작을 요구하므로, 스타크래프트 브루드워 기본기를 갖춘 중급 이상의 플레이어에게 적합합니다. 플레이 전에는 골렘 업그레이드 트리와 유적지 spawn 타이밍을 확인하고, 개인전 형태임을 기억하는 것이 좋습니다. Macintosh Golems! is a 5-player UMS map based on the desert tileset, where each player controls an independent golem unit to gather resources and develop a base in a custom scenario. At the start, each player receives one basic golem and a small amount of minerals and gas, which can be used to strengthen the golem's health and attack or produce support units. A special event occurs at the central ruin, allowing the summoning of a boss golem or acquisition of advanced technologies, which can greatly shift the flow of battle. Since resources are limited, efficient collection timing and upgrade timing determine victory, and combat consists of golem melee clashes mixed with occasional ranged support. Victory conditions are either annihilating all enemy golems or achieving the highest score within the time limit, emphasizing a score-based competitive element. This structure demands quick judgment and fine micro-management, making it suitable for players who have mastered the basic mechanics of StarCraft: Brood War and are seeking a fresh unit-control experience at an intermediate level or higher. Before playing, check the golem upgrade tree and the spawn timing of the central ruin, and remember that the map is set up as an individual match rather than a team game.
골렘 플래티넘 v1.9 (Golems Platinum v1.9)
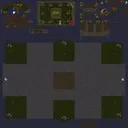
골렘 플래티넘 v1.9는 사막 타일셋을 기반으로 한 6인용 유즈맵으로, 넓이 1024×1024 타일의 맵에서 플레이어는 강력한 골렘 유닛을 중심으로 전략을 펼친다. 지형은 개활지역과 협곡이 섞여 있어 초반에는 자원 확보와 함께 골렘 생산을 위한 건물을 배치하고, 중반에는 골렘 업그레이드와 지원 유닛을 조합해 전투력을 높인다. 맵 중앙에는 고대 유적지가 위치해 이를 점령하면 추가 자원과 특수 능력을 얻을 수 있어, 점령 싸움이 승부의 키가 된다. 플레이 방식은 표준 RTS 방식과 유사하지만, 골렘 유닛의 높은 체력과 공격력으로 인해 전투가 다소 느리게 진행되며, 타이밍과 위치 선정이 중요하다. 따라서 멀티태스킹 능력과 장기적인 자원 관리 능력이 필요한 플레이어에게 적합하며, 초보자보다는 중급 이상의 유저가 맵의 깊이를 즐길 수 있다. 플레이 전에는 골렘 업그레이드 트리와 지원 유닛의 시너지를 확인하고, 사막 특유의 시야 제한을 고려해 스카웃과 감시塔 배치를 계획하는 것이 좋다. Golems Platinum v1.9 is a 6-player UMS map based on the desert tileset, featuring a 1024×1024 tile arena where players build strategies around powerful golem units. The terrain mixes open fields and narrow canyons, so early game focuses on resource gathering and constructing buildings for golem production, while mid‑game emphasizes golem upgrades and combining support units to boost combat power. An ancient ruin sits at the map’s center; capturing it grants extra resources and special abilities, making control of the ruin a decisive factor. The gameplay follows standard RTS mechanics, but the golem units’ high health and damage make battles proceed relatively slowly, so timing and positioning are crucial. Consequently, the map suits players with strong multitasking and long‑term resource‑management skills; it is more rewarding for intermediate‑to‑advanced users than beginners. Before playing, review the golem upgrade tree and the synergies of support units, and keep in mind the desert’s limited visibility when planning scouting and watchtower placement.
골렘 광기 v. stupid_person (Golem Madness v. stupid_person)
골렘 매드니스 v. stupid_person은 황무지 타일셋을 사용한 1024×1024 크기의 유즈맵으로, 플레이어는 맵 곳곳에 scattered한 골렘 유닛을 획득하여 적의 골렘 본부(Golem H.Q.)를 파괴하면서 자신의 본부를 방어해야 하는 목표를 가진 맵이다. 시작 시 각 플레이어는 기본 기지와 약간의 자원을 받으며, 맵 중앙에 배치된 골렘 생산 구조물을 통해 골렘을 소환하거나 중립 골렘을 점령할 수 있다. 골렘은 비교적 높은 체력과 공격력을 지니고 있어 소수로도 큰 피해를 줄 수 있으며, 적의 골렘을 파괴하면 점진적으로 자원이 늘어나는 구조라서 지속적인 공세가 가능해진다. 동시에 자신의 골렘 본부를 적의 공격으로부터 지키기 위해서는 방어선 구축과 timely한 골렘 소환이 필수적이며, 이는 자원 관리와 타이밍 감각을 동시에 요구한다. 게임 방식은 크게 자원 채취 → 골렘 생산 → 공격·방어 사이클로 흐르며, 6인 자유전 혹은 팀전 형태로도 즐길 수 있다. 맵 내에는 다양한 지형 장애물이 있어 골렘의 이동 경로를 조절할 수 있고, 이를 활용한 협곡Blocking이나 측면 공략이 승패를 좌우한다. 초보자도 기본적인 골렘 생산과 싸움을 이해하면 금방 적응할 수 있지만, 고레벨 플레이에서는 골렘의 타이밍, 위치 선점, 그리고 적의 골렘 흐름을 읽는 전략적 깊이가 요구된다. 따라서 전략적 사고와 미크로 컨트롤을 좋아하는 유저에게 추천하며, 맵을 플레이하기 전에는 골렘의 생산 비용과 쿨타임, 그리고 각 지점의 골렘 spawn 위치를 미리 확인하는 것이 좋다. 맵의 전체적인 분위기는 황무지의 건조한 느낌과 골렘의 돌덩이 같은 외형이 조화를 이루어 독특한 시각적 즐거움을 제공한다. Golem Madness v. stupid_person is a UMS map set on a wasteland tileset with a size of 1024×1024, where players must gather scattered golems across the map to destroy the enemy's Golem Headquarters while defending their own base. At the start, each player receives a basic base and a small amount of resources, and can summon golems or capture neutral ones through the central golem production structures. Golems possess relatively high health and damage, allowing even small numbers to inflict significant damage; destroying enemy golems gradually increases resources, enabling sustained offensives. Simultaneously, protecting one's own Golem Headquarters from enemy attacks requires establishing defensive lines and timely golem summoning, demanding both resource management and timing sense. The gameplay follows a cycle of resource gathering → golem production → attack/defense, and can be enjoyed as a six‑player free‑for‑all or in team formats. The map features various terrain obstacles that can alter golem movement paths, allowing choke‑point blocks or flanking maneuvers that often decide the outcome. Beginners can quickly grasp the basics of golem production and combat, but high‑level play demands precise timing, positioning, and the ability to read the enemy's golem flow, adding strategic depth. Therefore, the map is recommended for users who enjoy strategic thinking and micro‑control; before playing, it is advisable to check the golem production cost, cooldown, and spawn locations of each point. The overall atmosphere combines the arid feel of the wasteland with the stone‑like appearance of golems, delivering a unique visual experience.
골렘 광기 어드밴스드 (Golem Madness ADVANCED)
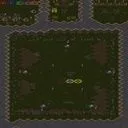
Golem Madness ADVANCED는 사막 타일셋을 기반으로 한 유즈맵으로, 플레이어는 골렘을 파괴하고 새로 조합하여 자신의 군대를 확장하는 독특한 메커니즘을 중심으로 진행된다. 기본적인 자원 채집은 없으며, 맵 곳곳에散布된 골렘 유닛을 공격해 부수면 해당 골렘의 조각을 획득하고, 이를 특정 건물이나 조합 창에 넣어 더 강력한 골렘을 소환할 수 있다. 이와 함께 일정 주기로 등장하는 중립 골렘은 추가 자원이나 특수 능력을 제공하여 전략적인 타이밍 잡이가 중요하다. 맵은 5인 자유전 구성을 지원하며, 팀 구분이 없어 각자 생존과 골렘 우위를 놓고 경쟁한다. 플레이 방식은 실시간 전략과 퍼즐 요소가 결합되어, 골렘의 조합 레시피를 미리 익히고 자원 흐름을 관리하는 능력이 승부를 가른다. 초보자에게는 골렘의 기본 속성과 조합법을 숙지하는 데 시간이 필요할 수 있으나, 반복 플레이를 통해 패턴을 익히면 빠르게 적응할 수 있다. 추천 대상은 골렘 유닛에 관심 있는 전략 애호가와, 기존 메플레이에 지친 유즈맵 애호가들이다. 플레이 전에는 골렘 조합 표를 확인하고, 사막 지형의 시야 제한에 대비해 스카우트 유닛을 미리 배치하는 것이 좋다. Golem Madness ADVANCED is a UMS map set on a desert tileset where players focus on destroying and recombining golems to expand their armies through a unique mechanic. There is no traditional resource gathering; instead, scattered golem units across the map can be attacked and shattered to collect their fragments, which are then placed in specific buildings or a combination interface to summon stronger golems. Periodically appearing neutral golems provide extra resources or special abilities, making timing crucial. The map supports five‑player free‑for‑all play with no fixed teams, so each participant competes for survival and golem supremacy. Gameplay blends real‑time strategy with puzzle elements, requiring players to learn golem recipes in advance and manage resource flow to secure victory. Beginners may need time to memorize golem stats and recipes, but repeated play helps them internalize patterns and adapt quickly. It is recommended for strategy enthusiasts interested in golems and for UMS players tired of standard melee. Before playing, check the golem combination chart and place scout units early to offset the limited vision inherent to desert terrain.
Map selection guide
태그는 맵의 핵심 특징을 빠르게 설명하지만 제작 버전마다 규칙이 다를 수 있습니다. 상세 설명에서 권장 인원, 난이도, 플레이 시간과 버전을 함께 확인한 뒤 다운로드하세요.