StarCraft HUZY map downloads and community
English

개별 라인 StarCraft Map Collection

We've gathered maps registered with the '개별 라인' tag. Compare popular and latest maps focusing on play styles, difficulties, and features that are hard to find through genre alone.

Registered Maps
1items
Total Downloads
0
Total Views
14

Popular Maps

This map has high download and view engagement.

View All
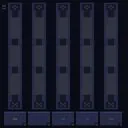
러커 디펜스 ABC 4 (Lurker Defense ABC 4) Map Preview

러커 디펜스 ABC 4 (Lurker Defense ABC 4)

스타크래프트의 유즈맵 장르 중에서도 독보적인 개성을 지닌 ‘러커 디펜스 ABC 4’는 개별 플레이어의 실력을 극한까지 시험하는 디펜스형 맵이다. 6명의 플레이어가 각자 독립된 라인으로 구성된 맵에서 적의 공격을 막아내야 하며, 맵 중앙의 좁은 통로를 통과하는 적들을 러커로 제압하는 것이 핵심 전략이다. 맵은 화산 타일셋으로 이루어져 있으며, 지형이 복잡하고 시야가 제한적인 부분이 많아 플레이어는 항상 예측 불가능한 상황에 대비해야 한다. 각 라인은 서로 연결되어 있지 않지만, 중앙 통로의 길목에서 일어나는 교전이 전체 승패를 좌우하는 경우가 많다. 러커의 특성상 스플래시 데미지가 강력하고, 적의 진형이 밀집되어 있을수록 그 위력이 배가되기 때문에 플레이어는 끊임없이 라인을 관리하고 러커의 위치를 최적화해야 한다. 또한, 맵 곳곳에 배치된 자원이나 업그레이드 포인트는 선택적으로 활용할 수 있어, 개인의 플레이 스타일에 따라 전략이 달라질 수 있다. 초보자는 러커의 스플래시 범위를 제대로 이해하지 못해 쉽게 무너질 수 있으며, 숙련자일수록 중앙 통로의 흐름을 읽고 적절한 타이밍에 러커를 배치하는 플레이가 요구된다. 맵의 난이도는 전체적으로 높은 편으로, 개인의 실력뿐만 아니라 팀원 간의 호흡도 승리를 좌우할 수 있다. 개별 라인에서 혼자 싸워야 한다는 점에서 스트레스가 크지만, 그만큼 성취감을 느낄 수 있는 맵이다. 플레이 전에는 러커의 스킬 사용 방법과 맵의 주요 길목을 숙지하는 것이 필수적이며, 특히 중앙 통로의 넓이와 러커의 사정거리를 정확히 파악하고 있어야 한다. 맵의 구조상 한 라인이 무너지면 전체적인 방어선이 흔들릴 수 있으므로, 각 플레이어는 자신의 라인에만 집중하는 것이 아니라 전장의 흐름을 읽는 안목도 필요하다. 이 맵은 디펜스 매니아뿐만 아니라 개인의 실력을 테스트하고 싶은 유저들에게 강력히 추천할 만하다. 각 라인의 독립성과 중앙 통로의 중요성 때문에, 단순한 디펜스 맵이 아니라 전략과 집중력을 동시에 요구하는 고난이도 맵으로 자리매김하고 있다. 특히 러커의 스플래시 데미지를 효과적으로 활용하는 플레이어는 승리의 열쇠를 쥘 수 있을 것이다. StarCraft's custom map genre boasts a unique identity with *Lurker Defense ABC 4*, a defense-focused map that pushes individual player skill to its limits. Six players must defend separate lanes while suppressing enemies passing through the narrow central corridor with lurkers—a core strategic element. The map features a volcanic tileset with intricate terrain and limited visibility, forcing players to prepare for unpredictable situations. Though the lanes are isolated, battles at the central corridor often determine the outcome of the entire match. Given lurkers' powerful splash damage—especially effective against clustered enemies—players must constantly manage their lanes and optimize lurker positioning. Scattered resources and upgrade points can be selectively used, allowing strategies to vary based on personal playstyle. Beginners may struggle without a proper grasp of lurker splash range, while advanced players must read the central corridor's flow and deploy lurkers at the right moments. The map's overall difficulty demands not just individual skill but also strong team coordination. The stress of solo combat in each lane is high, but the sense of achievement is equally rewarding. Before playing, mastering lurker mechanics and key pathways is essential, particularly understanding the central corridor's width and lurker range. Since one lane's collapse can destabilize the entire defense, players must balance focus on their own lane with awareness of the broader battlefield. This map isn't just for defense enthusiasts—it's a high-level challenge for anyone looking to test their skills. Its blend of lane independence and central corridor importance elevates it beyond a simple defense map, requiring both strategy and concentration. Players who leverage lurker splash damage effectively will hold the key to victory.

Download 0 · Views 14 · Comments 0

Recently registered maps

Check newly added files and versions.

러커 디펜스 ABC 4 (Lurker Defense ABC 4) Map Preview

러커 디펜스 ABC 4 (Lurker Defense ABC 4)

스타크래프트의 유즈맵 장르 중에서도 독보적인 개성을 지닌 ‘러커 디펜스 ABC 4’는 개별 플레이어의 실력을 극한까지 시험하는 디펜스형 맵이다. 6명의 플레이어가 각자 독립된 라인으로 구성된 맵에서 적의 공격을 막아내야 하며, 맵 중앙의 좁은 통로를 통과하는 적들을 러커로 제압하는 것이 핵심 전략이다. 맵은 화산 타일셋으로 이루어져 있으며, 지형이 복잡하고 시야가 제한적인 부분이 많아 플레이어는 항상 예측 불가능한 상황에 대비해야 한다. 각 라인은 서로 연결되어 있지 않지만, 중앙 통로의 길목에서 일어나는 교전이 전체 승패를 좌우하는 경우가 많다. 러커의 특성상 스플래시 데미지가 강력하고, 적의 진형이 밀집되어 있을수록 그 위력이 배가되기 때문에 플레이어는 끊임없이 라인을 관리하고 러커의 위치를 최적화해야 한다. 또한, 맵 곳곳에 배치된 자원이나 업그레이드 포인트는 선택적으로 활용할 수 있어, 개인의 플레이 스타일에 따라 전략이 달라질 수 있다. 초보자는 러커의 스플래시 범위를 제대로 이해하지 못해 쉽게 무너질 수 있으며, 숙련자일수록 중앙 통로의 흐름을 읽고 적절한 타이밍에 러커를 배치하는 플레이가 요구된다. 맵의 난이도는 전체적으로 높은 편으로, 개인의 실력뿐만 아니라 팀원 간의 호흡도 승리를 좌우할 수 있다. 개별 라인에서 혼자 싸워야 한다는 점에서 스트레스가 크지만, 그만큼 성취감을 느낄 수 있는 맵이다. 플레이 전에는 러커의 스킬 사용 방법과 맵의 주요 길목을 숙지하는 것이 필수적이며, 특히 중앙 통로의 넓이와 러커의 사정거리를 정확히 파악하고 있어야 한다. 맵의 구조상 한 라인이 무너지면 전체적인 방어선이 흔들릴 수 있으므로, 각 플레이어는 자신의 라인에만 집중하는 것이 아니라 전장의 흐름을 읽는 안목도 필요하다. 이 맵은 디펜스 매니아뿐만 아니라 개인의 실력을 테스트하고 싶은 유저들에게 강력히 추천할 만하다. 각 라인의 독립성과 중앙 통로의 중요성 때문에, 단순한 디펜스 맵이 아니라 전략과 집중력을 동시에 요구하는 고난이도 맵으로 자리매김하고 있다. 특히 러커의 스플래시 데미지를 효과적으로 활용하는 플레이어는 승리의 열쇠를 쥘 수 있을 것이다. StarCraft's custom map genre boasts a unique identity with *Lurker Defense ABC 4*, a defense-focused map that pushes individual player skill to its limits. Six players must defend separate lanes while suppressing enemies passing through the narrow central corridor with lurkers—a core strategic element. The map features a volcanic tileset with intricate terrain and limited visibility, forcing players to prepare for unpredictable situations. Though the lanes are isolated, battles at the central corridor often determine the outcome of the entire match. Given lurkers' powerful splash damage—especially effective against clustered enemies—players must constantly manage their lanes and optimize lurker positioning. Scattered resources and upgrade points can be selectively used, allowing strategies to vary based on personal playstyle. Beginners may struggle without a proper grasp of lurker splash range, while advanced players must read the central corridor's flow and deploy lurkers at the right moments. The map's overall difficulty demands not just individual skill but also strong team coordination. The stress of solo combat in each lane is high, but the sense of achievement is equally rewarding. Before playing, mastering lurker mechanics and key pathways is essential, particularly understanding the central corridor's width and lurker range. Since one lane's collapse can destabilize the entire defense, players must balance focus on their own lane with awareness of the broader battlefield. This map isn't just for defense enthusiasts—it's a high-level challenge for anyone looking to test their skills. Its blend of lane independence and central corridor importance elevates it beyond a simple defense map, requiring both strategy and concentration. Players who leverage lurker splash damage effectively will hold the key to victory.

Download 0 · Views 14 · Comments 0
Map selection guide

태그는 맵의 핵심 특징을 빠르게 설명하지만 제작 버전마다 규칙이 다를 수 있습니다. 상세 설명에서 권장 인원, 난이도, 플레이 시간과 버전을 함께 확인한 뒤 다운로드하세요.